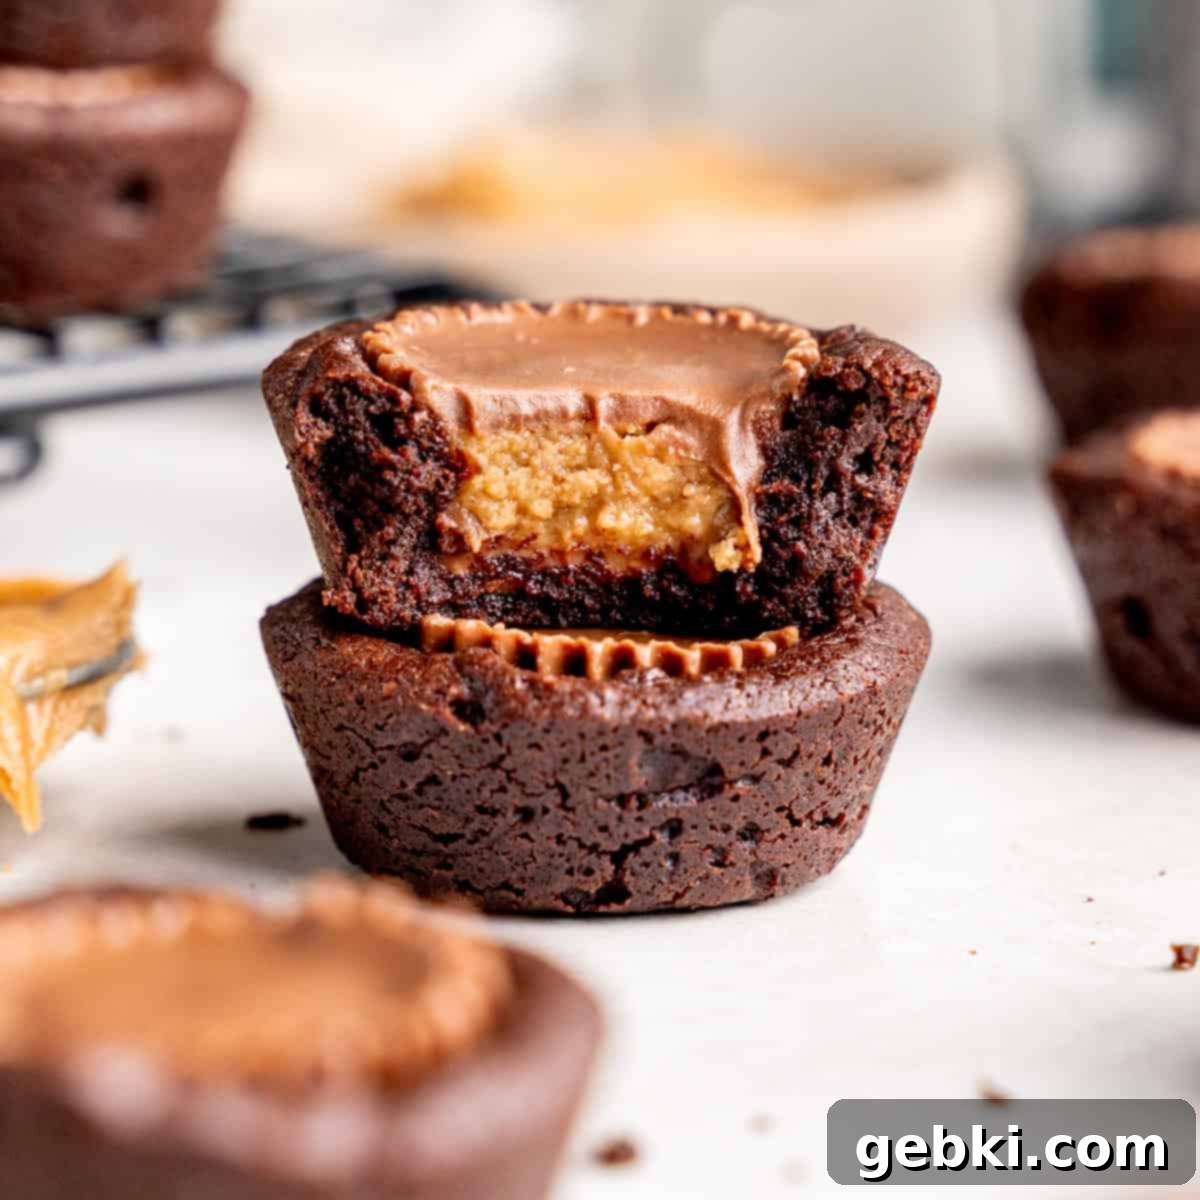
Easy & Fudgy Mini Peanut Butter Cup Brownies: The Ultimate Reese’s Lover’s Dream
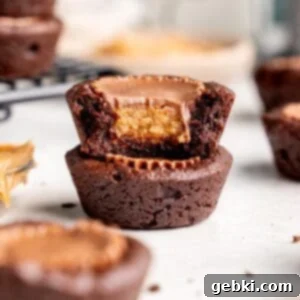
These decadent Mini Peanut Butter Cup Brownies are truly a Reese’s lover’s dream come true! Imagine individual, rich, and fudgy brownie bites, each perfectly crowned with a miniature peanut butter cup. This delightful combination ensures that with every single bite of these irresistible brownie cups, you get that iconic, harmonious blend of creamy peanut butter and intense chocolate. They’re not just brownies; they’re a bite-sized celebration of one of the world’s most beloved flavor pairings.
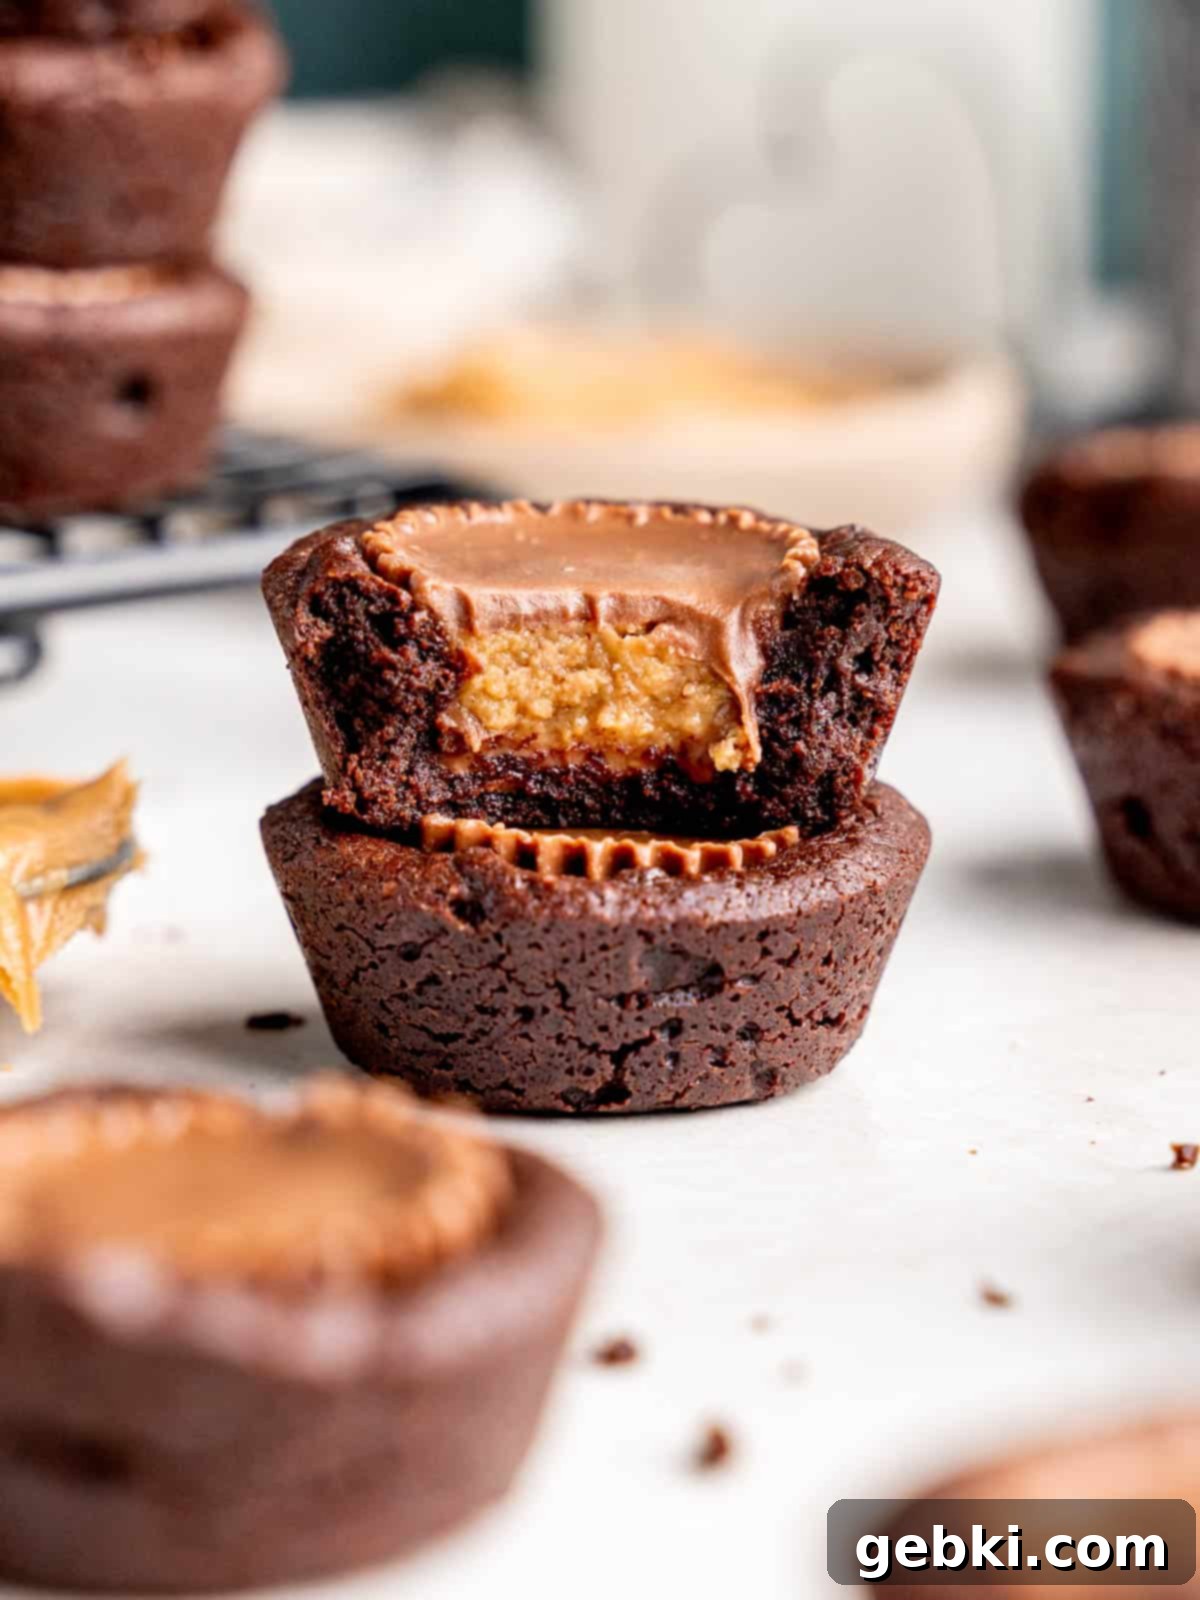
Whenever that undeniable craving for Reese’s peanut butter cups strikes, it’s almost impossible to stop at just one. That’s precisely why these mini peanut butter brownies were created – to offer a delightful double dose of chocolate and peanut butter in a convenient, bite-sized form. This way, you can easily enjoy multiple fudgy brownie treats in one sitting without any guilt, savoring that perfect balance of sweet and salty with every pop.
These adorable, bite-size brownies are not only incredibly simple to make but also bursting with deep chocolate flavor, complemented by the creamy surprise of a peanut butter cup in each. They’re perfectly portioned, making them an ideal dessert for sharing with friends and family at parties, potlucks, or just a casual get-together – assuming, of course, you don’t devour them all yourself first! For those who prefer a more traditional, larger brownie experience, be sure to try my Chocolate Peanut Butter Brownies, which offers the same incredible flavor in a classic bar form.
[feast_advanced_jump_to]
Why You’ll Adore These Mini Peanut Butter Cup Brownies
These mini peanut butter cup brownies are more than just a dessert; they’re a delightful experience that brings joy with minimal effort. Here’s why this recipe will quickly become a favorite in your kitchen:
- Effortlessly Quick & Easy: These fudgy peanut butter brownie bites come together in just 4 simple steps, meaning you can whip up a batch of homemade brownies in approximately 30 minutes from start to finish. If you’re looking for an even quicker chocolate fix, consider my brownie in a mug recipe – you could even add a mini peanut butter cup inside for an extra special treat!
- A Fun Twist on a Classic: This recipe offers an exciting and delicious variation on my popular brownie bites recipe. The addition of a peanut butter cup elevates the classic fudgy brownie to new heights, adding a delightful surprise and a burst of flavor in every mini serving.
- Perfectly Portioned & Guilt-Free Indulgence: Since they are perfectly sized mini brownie bites, you have a fantastic excuse to enjoy more than one! Their small stature makes them ideal for satisfying your sweet tooth without feeling overly indulgent, perfect for parties, lunchboxes, or a quick snack.
- Minimal Ingredients, Maximum Flavor: You’ll be amazed at the depth of flavor achieved with fewer than 10 pantry-staple ingredients. This easy recipe simplifies baking, proving that you don’t need a long shopping list to create something truly delicious and impressive.
- Infinitely Adaptable: While we adore these brownies with Reese’s peanut butter cups, the base recipe is incredibly versatile. It’s simple to turn them into other versions using different chocolate candies or fillings, allowing you to get creative and experiment with your favorite sweet treats for an easy variation every time.
Essential Ingredients for Perfect Peanut Butter Brownie Bites
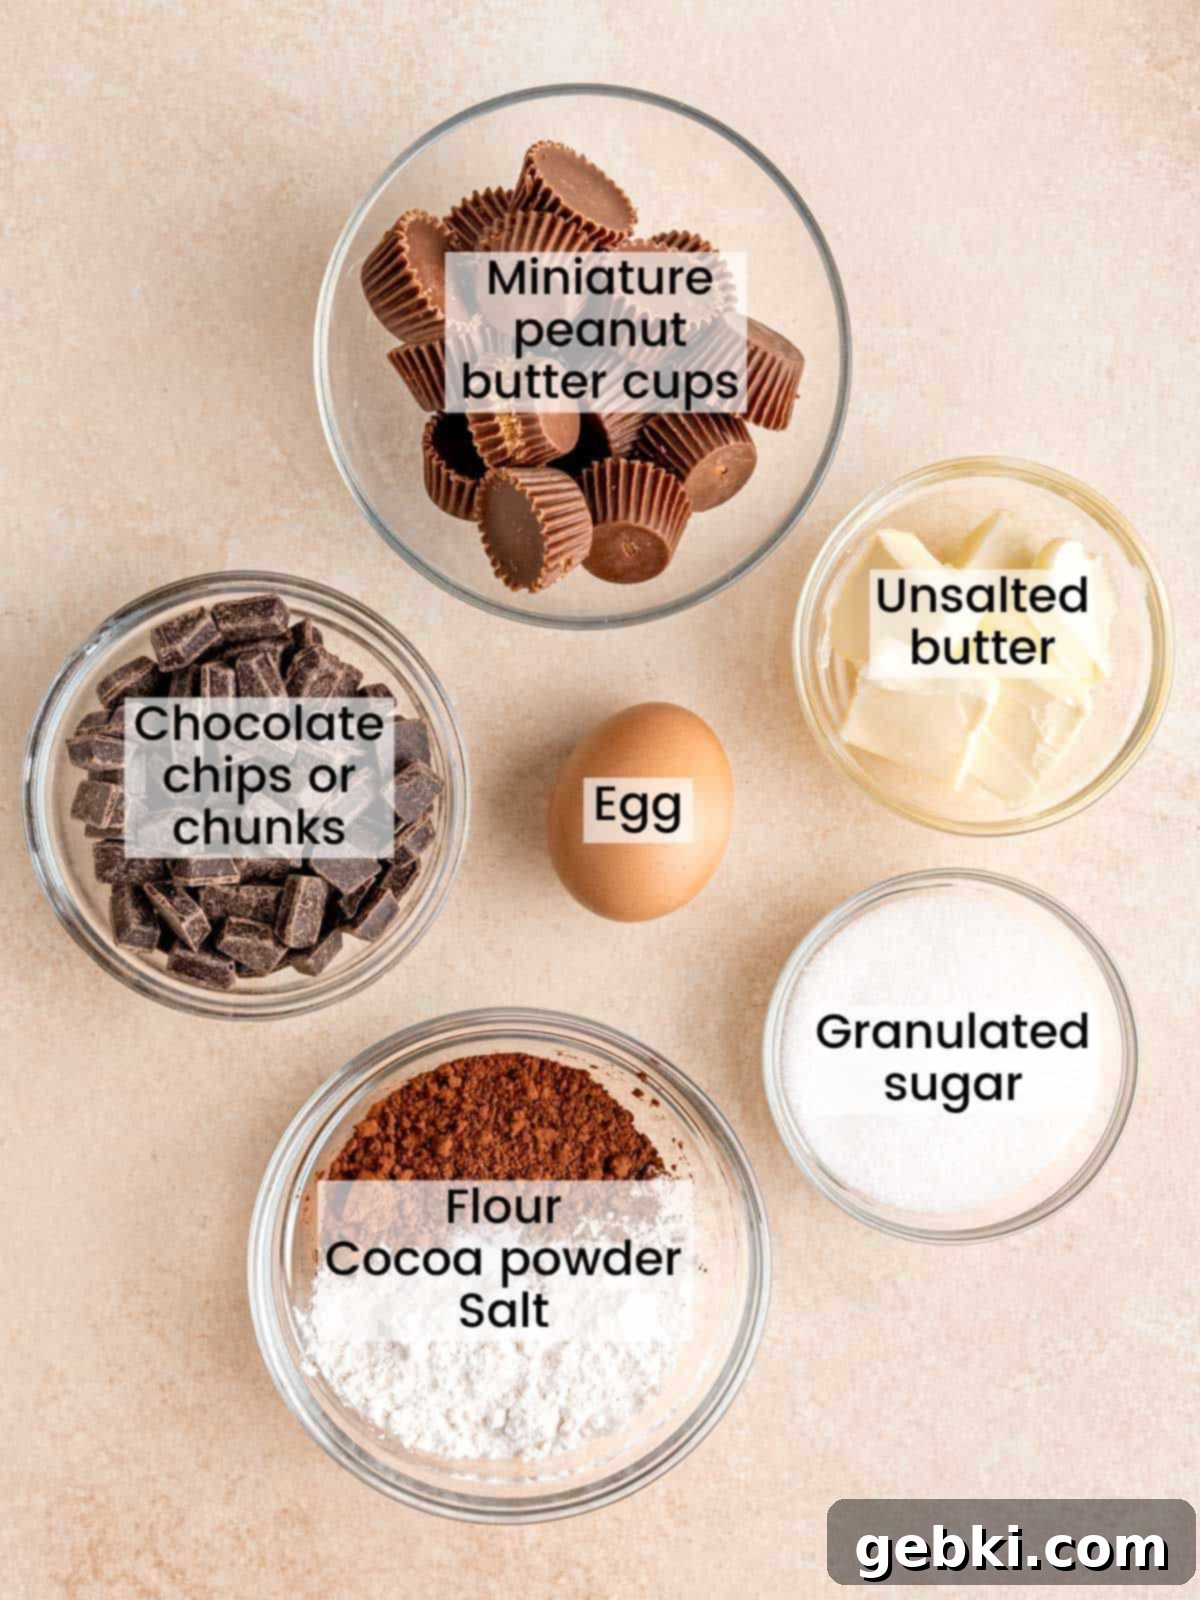
Gathering your ingredients is the first step to creating these delightful treats. Here’s a breakdown of what you’ll need and why each component is crucial:
- Mini Peanut Butter Cups: These delightful candies are the star of the show and what truly set these brownies apart, delivering that signature chocolate-peanut butter experience in every bite. Whether you opt for classic Reese’s Mini Peanut Butter Cups or your preferred brand, make sure they are unwrapped and ready to be pressed into the warm brownie batter. Their small size is perfect for mini brownie bites.
- Unsweetened Cocoa Powder: This provides the deep, rich chocolate flavor that forms the foundation of our fudgy brownies. You have the flexibility to use either natural cocoa powder (which is most common in the US, think Hershey’s or Ghirardelli’s) or Dutch process cocoa powder. They are interchangeable in this particular recipe because there is no leavening agent (like baking soda or baking powder) that would react differently with their acidity levels. Simply grab whatever high-quality cocoa powder you’ve got in the pantry and get baking!
- Unsalted Butter: The unsalted butter contributes to the incredibly fudgy texture and rich flavor of these brownies. Melting it with the chocolate creates a smooth, luscious base. Using unsalted butter allows you to control the overall salt content of the recipe.
- Semi-Sweet Chocolate Chips or Chocolate Chunks: These are melted down with the butter to form the backbone of the brownie’s intense chocolate flavor and provide that desirable gooey, fudgy consistency. High-quality chocolate will yield the best results.
- Granulated Sugar: Beyond sweetness, sugar plays a vital role in the texture of brownies, helping to create that glossy, crackly top and contributing to the moist, chewy interior.
- Large Eggs: Eggs act as a binder, holding the brownie batter together and adding to its rich, fudgy texture. Ensure your eggs are at room temperature for better emulsion and a smoother batter.
- All-Purpose Flour: Just a small amount of all-purpose flour provides the necessary structure without making the brownies cakey. We want fudgy, not fluffy!
- Salt: A pinch of salt is essential for enhancing all the other flavors, especially the chocolate and peanut butter. It balances the sweetness and makes the brownies taste even more decadent.
See recipe card below for exact ingredient measurements.
Creative Substitutions & Delicious Variations
While these mini peanut butter cup brownies are fantastic as is, they also serve as a versatile base for culinary creativity. Feel free to experiment with these suggestions to customize your batch:
- Swap Your Favorite Chocolate Candy: Don’t limit yourself to peanut butter cups! Take these delicious brownies and turn them into something entirely new by swapping in other beloved chocolate candies. Imagine them with chopped Snickers bars for a caramel, nougat, and peanut twist, or maybe Milky Way for a chewy caramel and nougat experience. For coconut and almond lovers, try adding pieces of Almond Joy or Mounds bars. The possibilities are endless, allowing you to tailor these treats to any craving.
- Double the Peanut Butter Love: For the ultimate peanut butter enthusiasts, elevate these treats into double peanut butter filled brownies. After distributing the brownie batter into the muffin wells, add a small teaspoon of creamy peanut butter on top of each brownie bite. Then, using a toothpick or a small knife, create a beautiful peanut butter swirl before pressing in the mini peanut butter cup. This adds an extra layer of gooey peanut butter goodness that’s truly irresistible.
- Go Regular-Sized: If you don’t have a mini muffin pan on hand, no problem! You can easily adapt this recipe to a regular-sized cupcake pan. Just remember to use parchment liners for easy removal. In this case, feel free to use regular-sized Reese’s peanut butter cups, or even chop up larger ones. Note that baking times will need to be adjusted, likely increasing by a few minutes, and your yield will be fewer but larger brownies.
- Add a Sprinkle of Salt: For an extra gourmet touch and to truly highlight the chocolate and peanut butter flavors, sprinkle a tiny pinch of flaky sea salt (like Maldon) over the warm brownies right after they come out of the oven. The salt crystals provide a delightful textural contrast and enhance the overall taste.
- Mix-Ins to the Batter: Consider folding in a handful of mini chocolate chips, chopped nuts (like pecans or walnuts), or even more chopped peanut butter cups into the brownie batter before scooping for added texture and flavor throughout.
This recipe has been thoroughly tested with the original ingredients. If you replace or add any ingredients, please let us know how it turned out in the comments below! Your feedback helps us and other bakers!
Essential Equipment for Baking Success
Making these bite-size Reese’s peanut butter cup brownies is straightforward and doesn’t require a lot of specialized tools. Here’s what you’ll need to ensure a smooth baking process and perfectly portioned treats:
- Mini Muffin Pan: The star equipment for achieving those adorable, perfectly sized brownie bites! You will need a mini muffin pan with 24 wells. Be sure to generously grease it with butter or cooking spray, or line it with mini paper liners, to prevent sticking and ensure easy removal.
- Mixing Bowls: You’ll need a couple of sturdy mixing bowls – one medium-sized for melting the chocolate and butter and combining the wet ingredients, and a smaller one for whisking together the dry ingredients.
- Measuring Cups and Spoons: Accurate measurements are key in baking! Have a set of dry measuring cups, liquid measuring cups, and measuring spoons ready. For best results, consider using a kitchen scale to measure your dry ingredients by weight.
- Whisk: Essential for thoroughly combining the wet ingredients and ensuring a smooth, homogenous mixture after melting the chocolate and butter.
- Rubber Spatula: A flexible rubber spatula is perfect for folding the dry ingredients into the wet ingredients gently, ensuring you don’t overmix the batter (which can lead to tough brownies). It’s also great for scraping down the sides of the bowl to ensure everything is well incorporated.
- Small/Medium Cookie Scoop (Optional but Recommended): While you can use a spoon, a small or medium-sized cookie scoop makes distributing the brownie batter evenly into the mini muffin wells incredibly easy and mess-free, ensuring consistent brownie sizes.
Easy Step-by-Step Baking Guide
Follow these straightforward steps to create your perfect batch of mini peanut butter cup brownies:
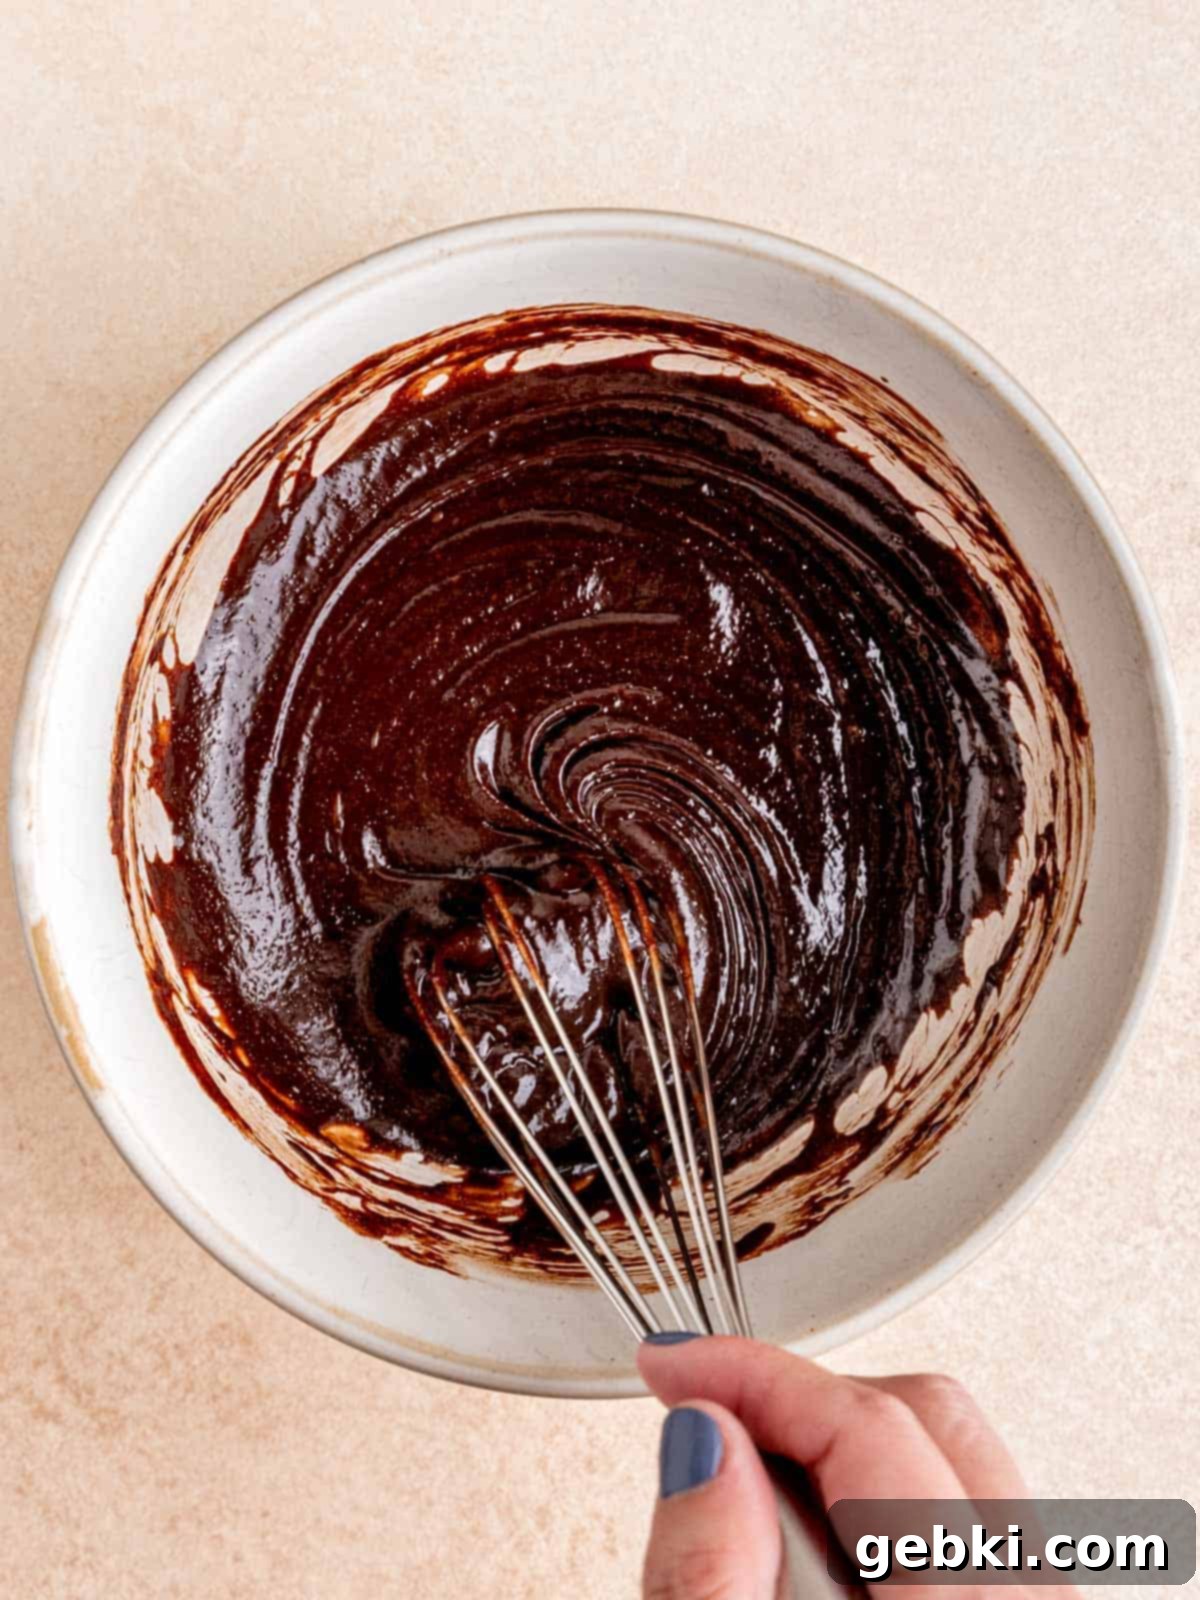
Step 1: Melt Chocolate and Butter. Begin by gently melting your chocolate chips (or chunks) and unsalted butter together. You can do this either in a microwave-safe medium bowl, heating in 30-second bursts and stirring between each until smooth, or by placing the bowl over a double boiler on low heat. Once fully melted and smooth, remove the mixture from the heat. Next, stir in the granulated sugar for a few minutes; this not only helps the sugar dissolve for a smoother texture but also slightly cools the mixture. Finally, beat in the eggs one at a time until well combined and the mixture is glossy.
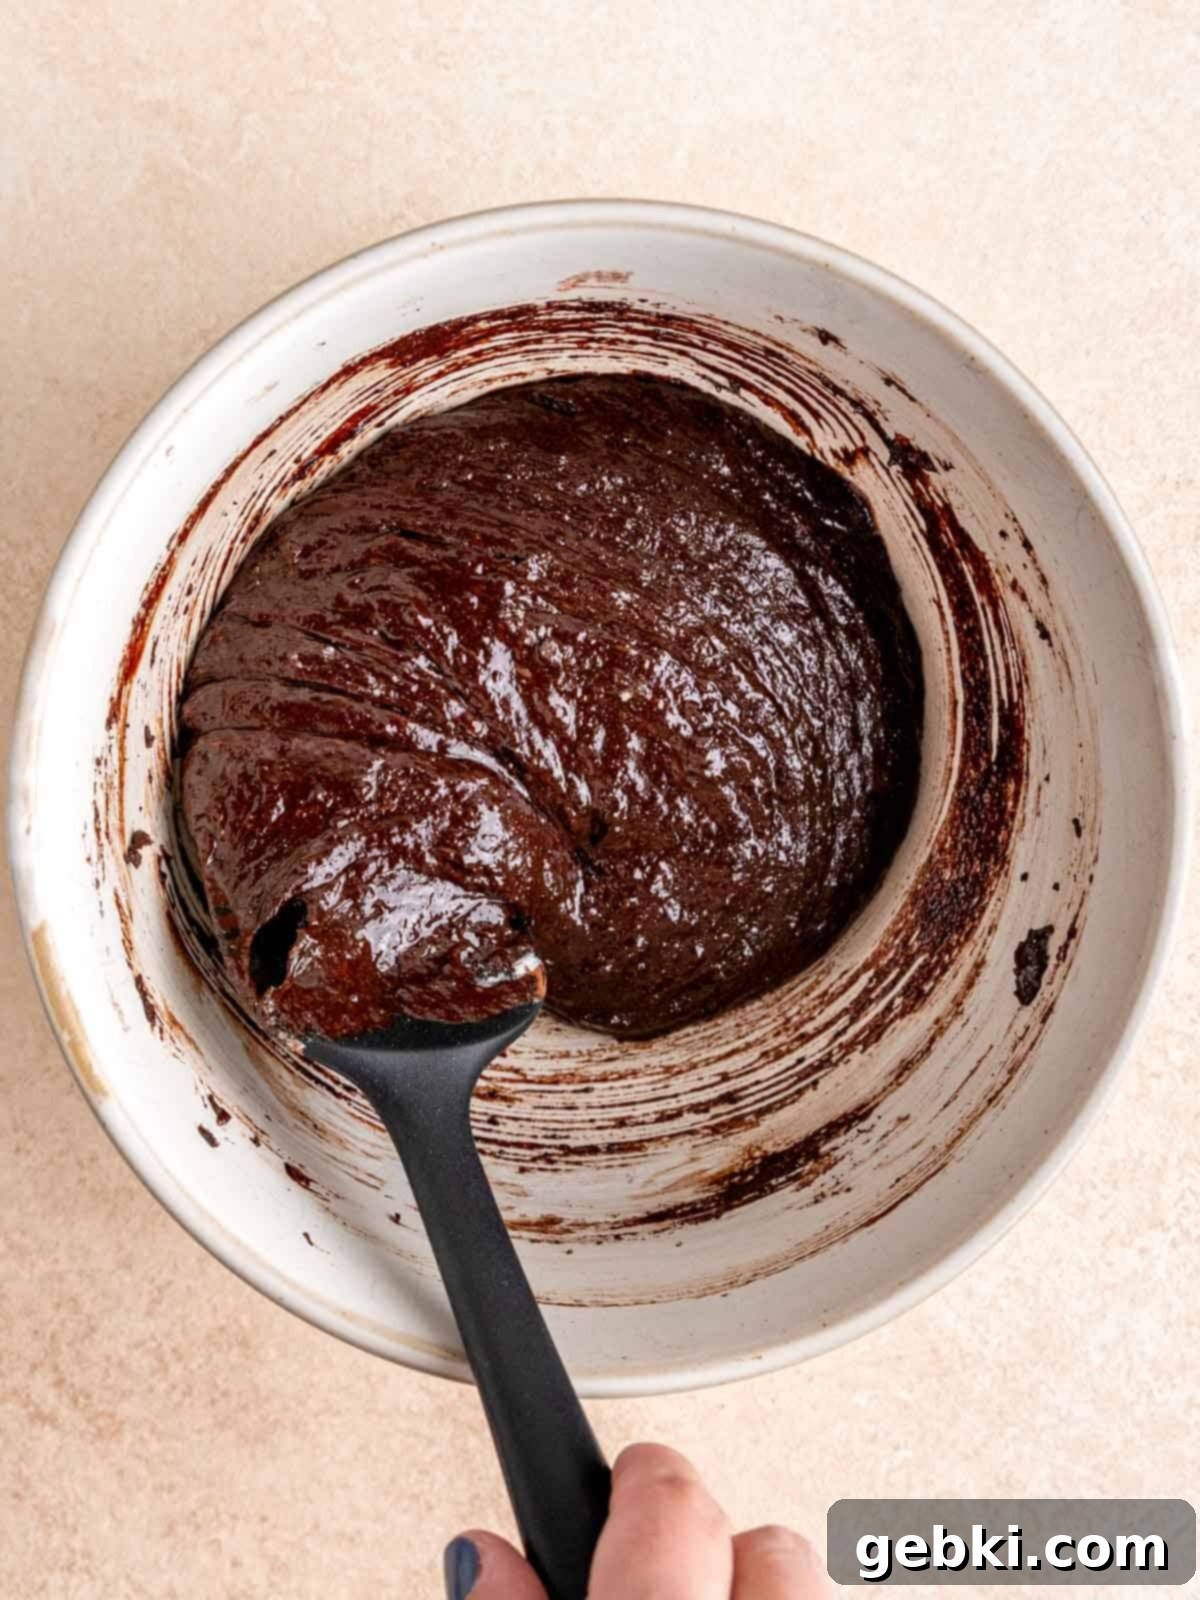
Step 2: Combine Dry and Wet Ingredients. In a separate small bowl, whisk together the all-purpose flour, unsweetened cocoa powder, and salt. This ensures these dry ingredients are well distributed. Once combined, gently fold the dry ingredients into the wet chocolate mixture using a rubber spatula. Mix just until no dry flour streaks are visible. Be careful not to overmix, as this can lead to tougher brownies.
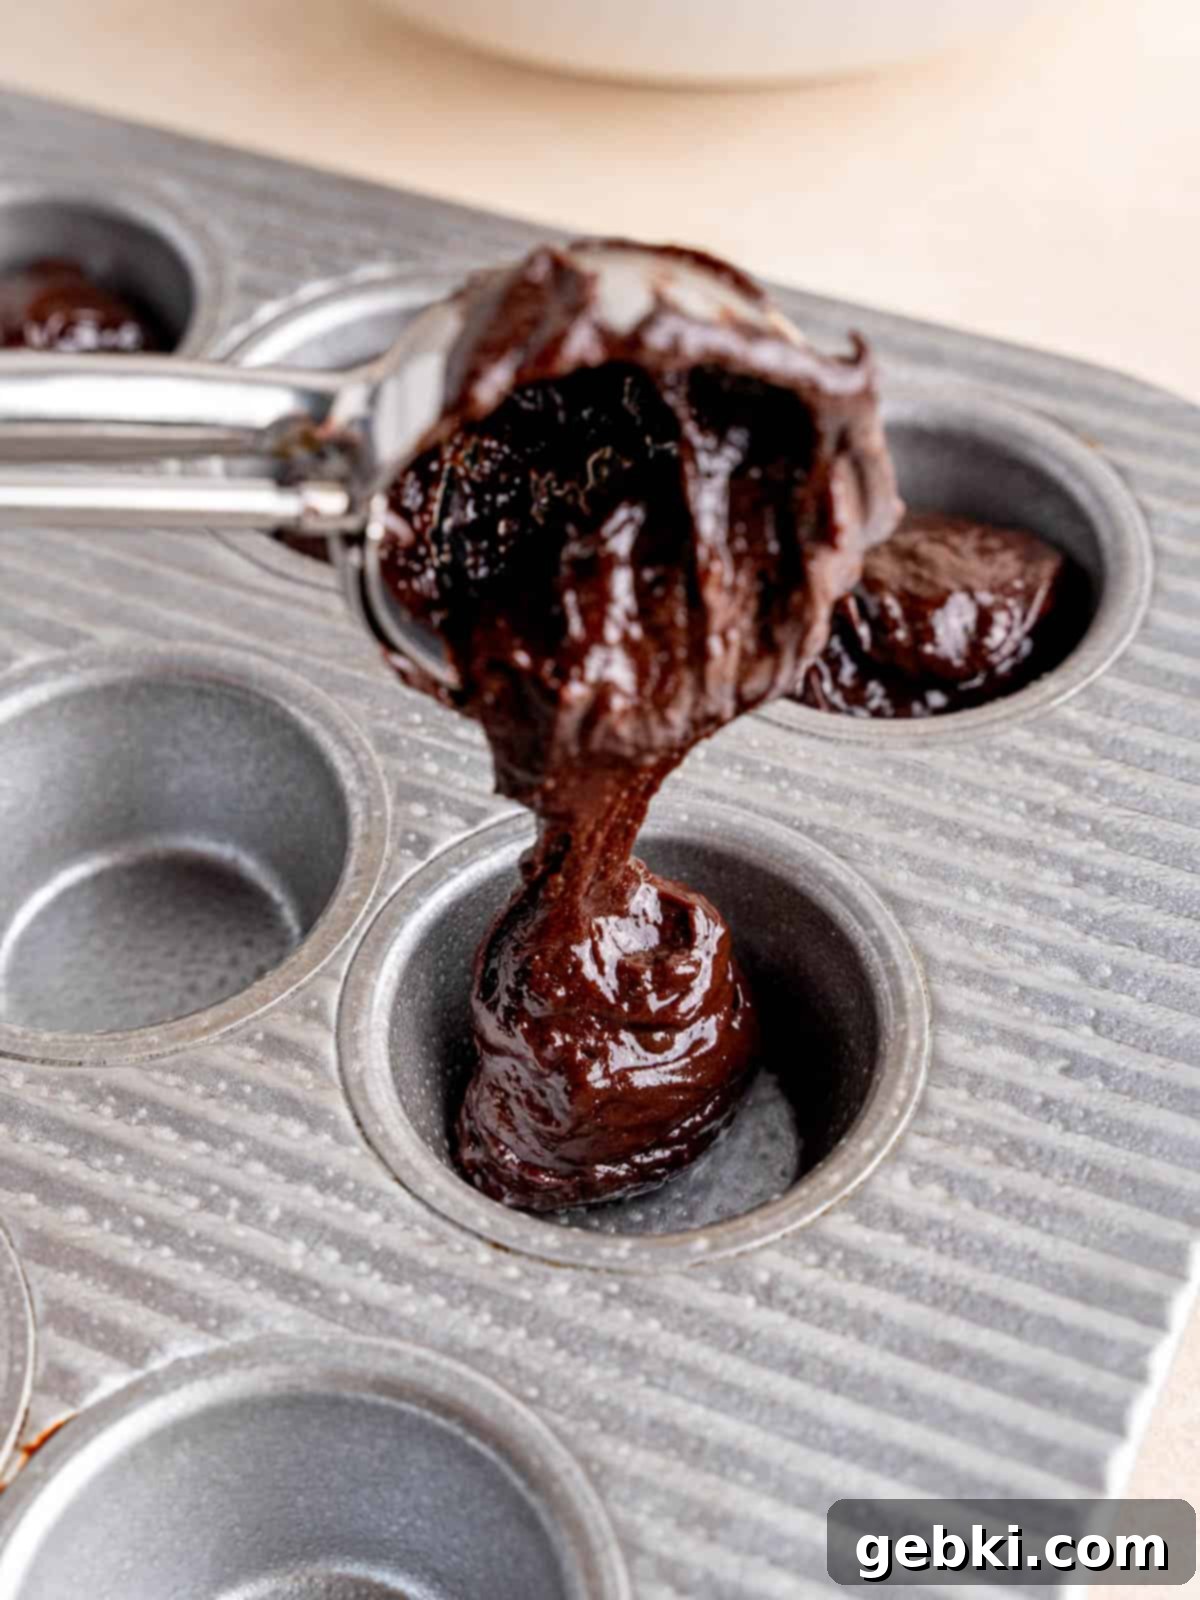
Step 3: Fill Muffin Wells. Preheat your oven to 325°F (160°C). Prepare your 24-well mini muffin pan by greasing it thoroughly with butter or non-stick cooking spray, or by lining it with mini paper liners. Then, using a small cookie scoop or two spoons, evenly distribute the rich brownie batter across all 24 greased muffin wells. Aim for each well to be about halfway full. This ensures uniform baking and the perfect base for your peanut butter cups.
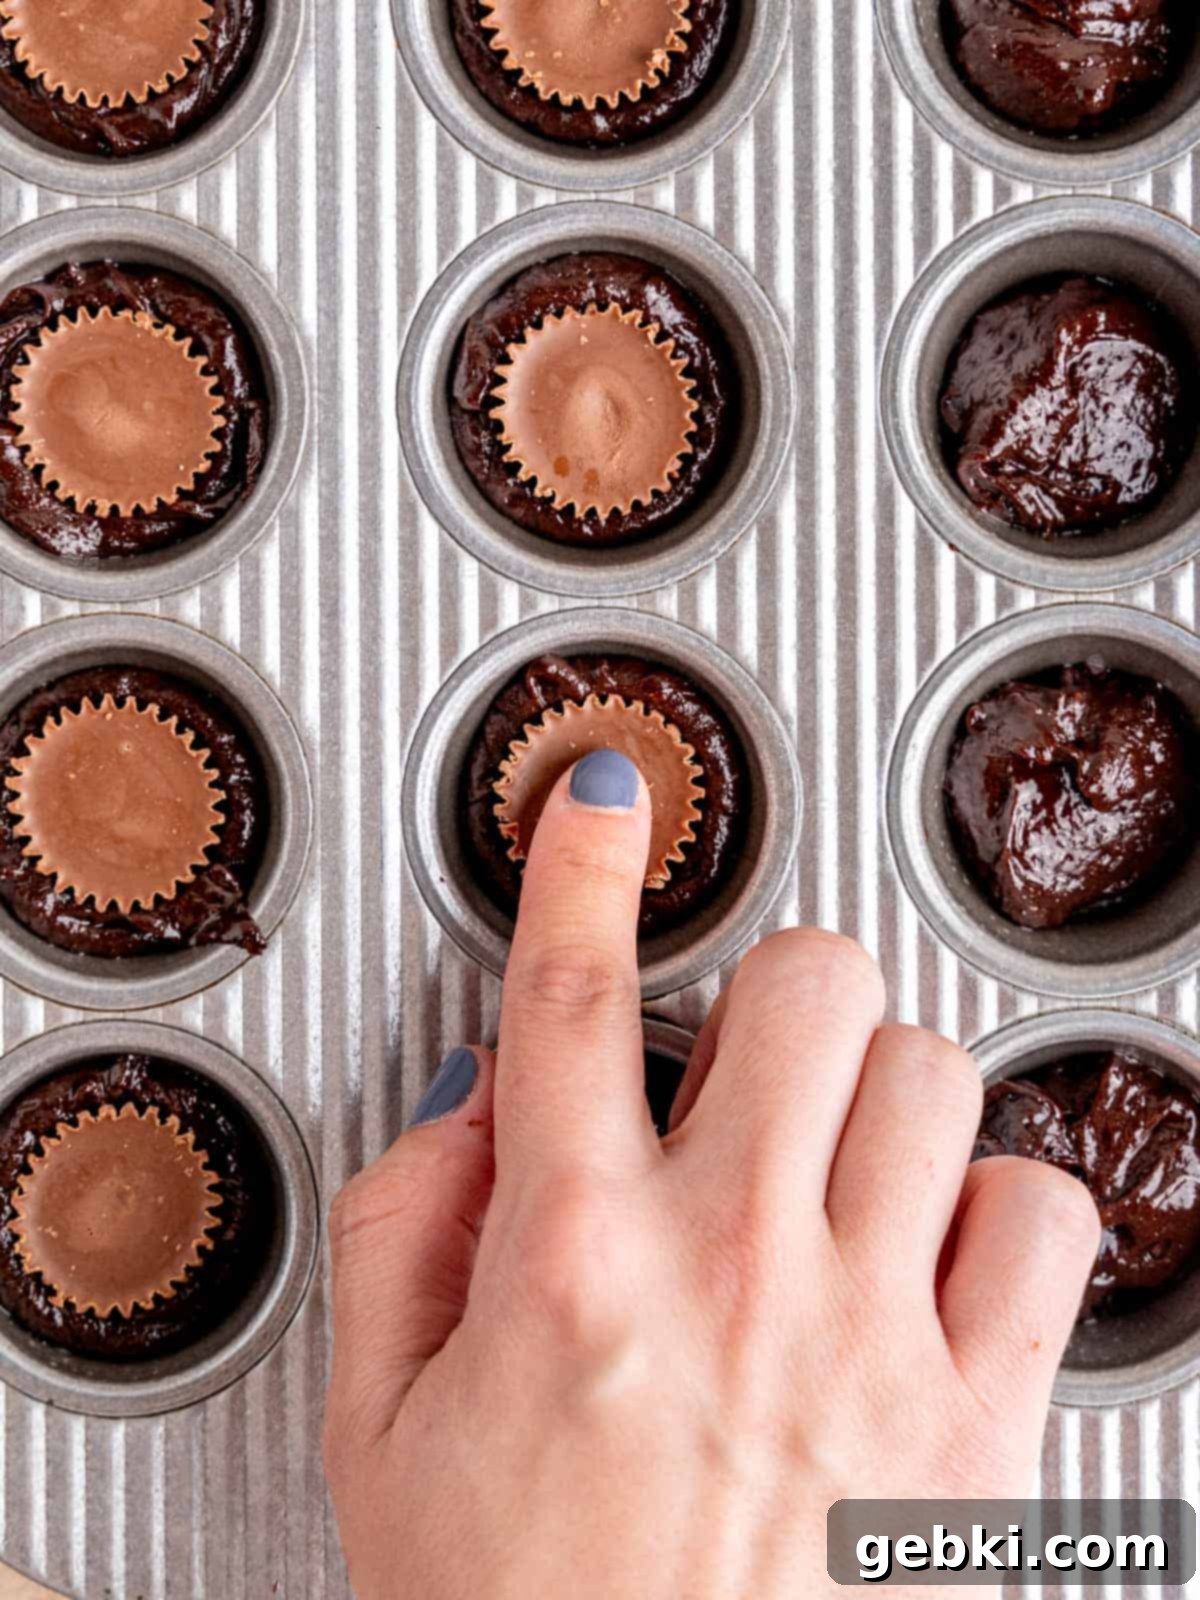
Step 4: Add Peanut Butter Cups & Bake. Carefully press one miniature peanut butter cup into the center of the brownie batter in each well. The batter should slightly rise around the cup as it bakes. Place the pan in the preheated oven and bake for 9-12 minutes, or until the edges of the brownies are set and look slightly dry, but the centers still appear fudgy (a toothpick inserted into the brownie part, not the peanut butter cup, should come out with moist crumbs). Allow the brownies to cool in the mini muffin tin for 10-20 minutes before gently transferring them to a wire rack to cool completely. Enjoy these delectable mini treats!
Pro Tips for Perfect Mini Peanut Butter Cup Brownies
Achieving bakery-quality mini peanut butter cup brownies is easier than you think with these expert tips:
Tip #1 – Gentle Melting is Key: When melting your butter and chocolate in the microwave, it’s crucial to do it in short bursts. Heat for 30 seconds at a time, then remove and stir vigorously, even if it doesn’t look fully melted. Repeat this process, stirring between each burst, until the mixture is completely smooth and glossy. This usually takes only about 1 minute in total and prevents the chocolate from scorching or seizing, ensuring a smooth brownie base.
Tip #2 – Dissolve the Sugar Properly: After melting the chocolate and butter, stir the granulated sugar into the mixture while it’s still warm. Continuously stir for at least a couple of minutes. This vital step helps the sugar crystals dissolve thoroughly, which contributes to that signature shiny, crackly top on your brownies. Additionally, stirring the sugar helps to slightly cool down the chocolate mixture, preventing the eggs from cooking when you add them in the next step.
Tip #3 – Even Distribution for Even Baking: To ensure all your mini brownie bites are uniform in size and bake consistently, use a small cookie scoop (approximately 1.5 tablespoons) to cleanly transfer the batter to each well of the mini cupcake tin. If you don’t have a scoop, two spoons can work, but a scoop makes the process much tidier and more efficient.
Tip #4 – The Perfect Cool-Down and Removal: Timing is everything when removing these delicate brownies. Be sure to remove them from the pan after they’ve had a chance to cool down for about 10-20 minutes, but while they are still slightly warm. If they’re too hot, they will be very fragile and likely fall apart when you try to lift them. Conversely, if they’ve cooled for too long and become completely cold in the pan, the fudgy brownie can stick firmly, making them difficult to extract without damage. A gentle twist and lift should do the trick if the pan was well-greased and they’re at the ideal temperature.
Tip #5 – Don’t Overmix the Batter: Once you add the flour and cocoa powder to the wet ingredients, fold them in gently with a spatula. Mix just until the dry streaks disappear. Overmixing develops the gluten in the flour, which can lead to tough, cakey brownies instead of the desired fudgy texture. Less is more when it comes to mixing brownie batter!
Frequently Asked Questions
Got questions about making these mini peanut butter cup brownies? We’ve got answers!
Yes, absolutely! You can certainly make these delicious brownies in a regular square baking pan if a mini muffin tin isn’t available. Follow steps 1 & 2 as written to prepare the batter. Then, generously grease an 8×8 or 9×9 inch square baking pan and smooth the brownie batter evenly into it. Once the batter is in the pan, space your miniature peanut butter cups evenly throughout the top, pressing them down gently. Bake at 325°F (160°C) for approximately 25-30 minutes, or until the edges are set and a toothpick inserted into the center (away from a peanut butter cup) comes out with moist crumbs. Allow the brownies to cool completely in the pan before removing and cutting them into your desired size. The flavor will be just as amazing!
Yes, these mini peanut butter cup brownies freeze beautifully, making them an excellent make-ahead dessert! To freeze, ensure they are completely cooled. Place them in a single layer on a baking sheet and freeze for about 30 minutes, or until firm. Then, transfer the frozen brownie bites to a freezer-safe airtight container or a heavy-duty freezer bag. They can be stored in the freezer for up to 1 month. You can enjoy them straight out of the freezer for a chewy, cold treat, or allow them to come back to room temperature on the counter for about 20-30 minutes before serving. They maintain their fudgy texture wonderfully.
Brownies often turn out cakey when the batter has been overmixed after adding the flour. When you overmix, you develop the gluten in the flour, which creates a more structured, cake-like texture. For fudgy brownies, mix the dry ingredients into the wet ingredients only until no dry streaks of flour remain. Another common culprit is using too much flour; always measure accurately, preferably by weight using a kitchen scale.
Absolutely! While semi-sweet chocolate chips are recommended for their balanced flavor, you can experiment with other types. Dark chocolate chunks or chips will give a more intense, less sweet brownie, while milk chocolate will result in a sweeter, milder flavor. You can also use a combination of different chocolates to create a unique profile. Just ensure the total weight of the chocolate remains consistent with the recipe.
Storage Tips for Freshness
To keep your mini peanut butter cup brownies fresh and delicious, proper storage is key:
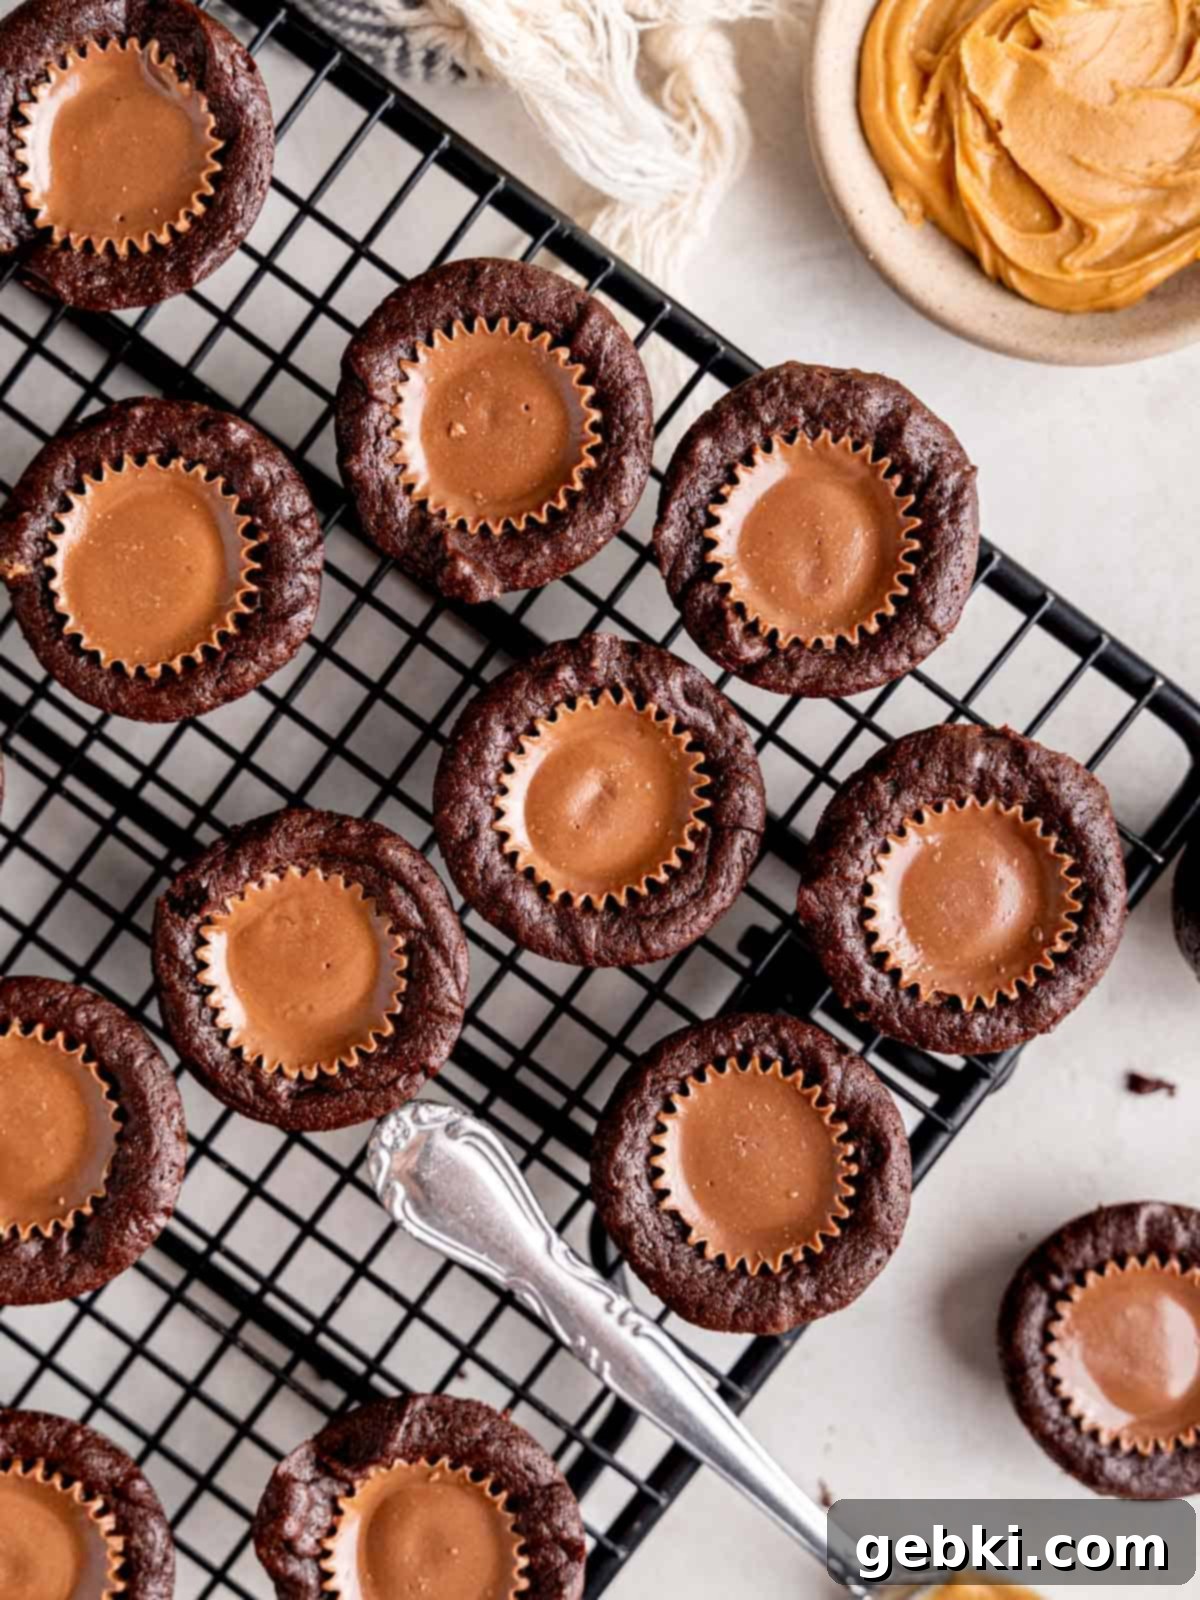
Room Temperature: Once completely cooled, place your mini peanut butter cup brownies in an airtight container. Store them at room temperature for up to 1 week. Keeping them sealed will prevent them from drying out and help maintain their delightful fudgy texture.
Freezing Instructions: These brownie bites are excellent for freezing, allowing you to enjoy them whenever a craving strikes. After they have cooled completely, transfer them to a freezer-safe bag or an airtight container. For best results and to prevent them from sticking together, you can flash-freeze them first by placing them on a baking sheet in the freezer for about 30 minutes until firm, then transfer them to your container or bag. They will keep well in the freezer for up to 1 month. Thaw them at room temperature for 20-30 minutes before serving, or enjoy them directly from the freezer for a chewier treat.
More Delicious Recipes You’ll Love
If you’ve enjoyed these Mini Peanut Butter Cup Brownies, then you’re in for a treat with these other irresistible dessert recipes:
-
Easy Homemade Chocolate Peanut Butter Brownies
-
Mini Brownie Bites
-
Mini Brownie Bites
-
Fudgy Mug Brownie
-
Samoa Brownies
Did you try this recipe? I’d love to see it! Tag @brokenovenbaking on Instagram & Facebook and leave a ⭐️ review below!
📖 Recipe
Mini Peanut Butter Cup Brownies
Kayla Burton
Pin Recipe
Equipment
-
Mixing bowl
-
Measuring Cups or Scale
-
Measuring spoons
-
Whisk
-
Spatula
-
Small/medium cookie scoop
-
24-well Mini Muffin Pan
Ingredients
- ½ cup (1 stick) (113.5 g) unsalted butter
- 1 cup (170 g) semi-sweet chocolate chips or chocolate chunks
- ⅔ cup (133 g) granulated sugar
- 2 large (2 large) eggs room temperature
- ⅔ cup (83 g) all-purpose flour
- ¼ cup (25 g) cocoa powder
- ¼ teaspoon (¼ teaspoon) salt
- 24 miniature peanut butter cups
Instructions
-
Preheat oven to 325°F (160°C) and generously grease a mini muffin pan with non-stick spray or fill each well with mini parchment liners.
-
In a microwave-safe bowl (or over a double boiler), heat and stir the chocolate chips and butter in 30-second intervals until completely smooth.
-
Whisk the granulated sugar into the warm chocolate mixture for about 2 minutes until it’s cool to the touch and homogenous. Then, stir in the eggs until well combined.
-
In a separate small bowl, combine the flour, cocoa powder, and salt. Gently fold these dry ingredients into the wet ingredients using a spatula, mixing just until all flour streaks have disappeared. Be careful not to overmix.
-
Using a small cookie scoop or two spoons, fill each well of the prepared mini muffin pan approximately halfway with brownie batter. Then, gently press one unwrapped mini peanut butter cup into the center of the batter in each well.
-
Bake for 9-12 minutes, or until the edges of the brownies look slightly firm and dry, but the centers still appear fudgy. A toothpick inserted into the brownie (avoiding the peanut butter cup) should come out with moist crumbs.
-
Let the brownies cool in the pan for about 10-20 minutes. At this point, they should still be slightly warm but firm enough to handle. If your pan was greased well, you should be able to give each brownie a little twist and gently pull them right out. If not, carefully scoop them out with a small knife or offset spatula. Transfer them to a wire rack to cool completely.
Save This Recipe! 💌
We’ll email this post to you, so you can come back to it later!
Notes
Measuring Dry Ingredients: For the most accurate and consistently best results in baking, it is highly recommended to use a digital kitchen scale to weigh dry ingredients like flour and cocoa powder in grams (g). If you don’t have a scale, make sure to use the “scoop and level” method with your measuring cups: gently spoon flour into the measuring cup until overflowing, then use a straight edge (like the back of a knife) to level off the excess. Do not pack the flour into the cup.
Storage: To maintain their optimal freshness and fudginess, store these brownie bites in an airtight container at room temperature for up to 1 week. For longer storage, they can be kept in a freezer-safe bag or container in the freezer for up to 1 month.
Nutrition: The provided nutrition information is an estimate per serving and is generated by an online calculator. The calorie accuracy is not guaranteed and may vary based on specific ingredients and brands used.
The provided nutritional information is an estimate per serving. Accuracy is not guaranteed.
