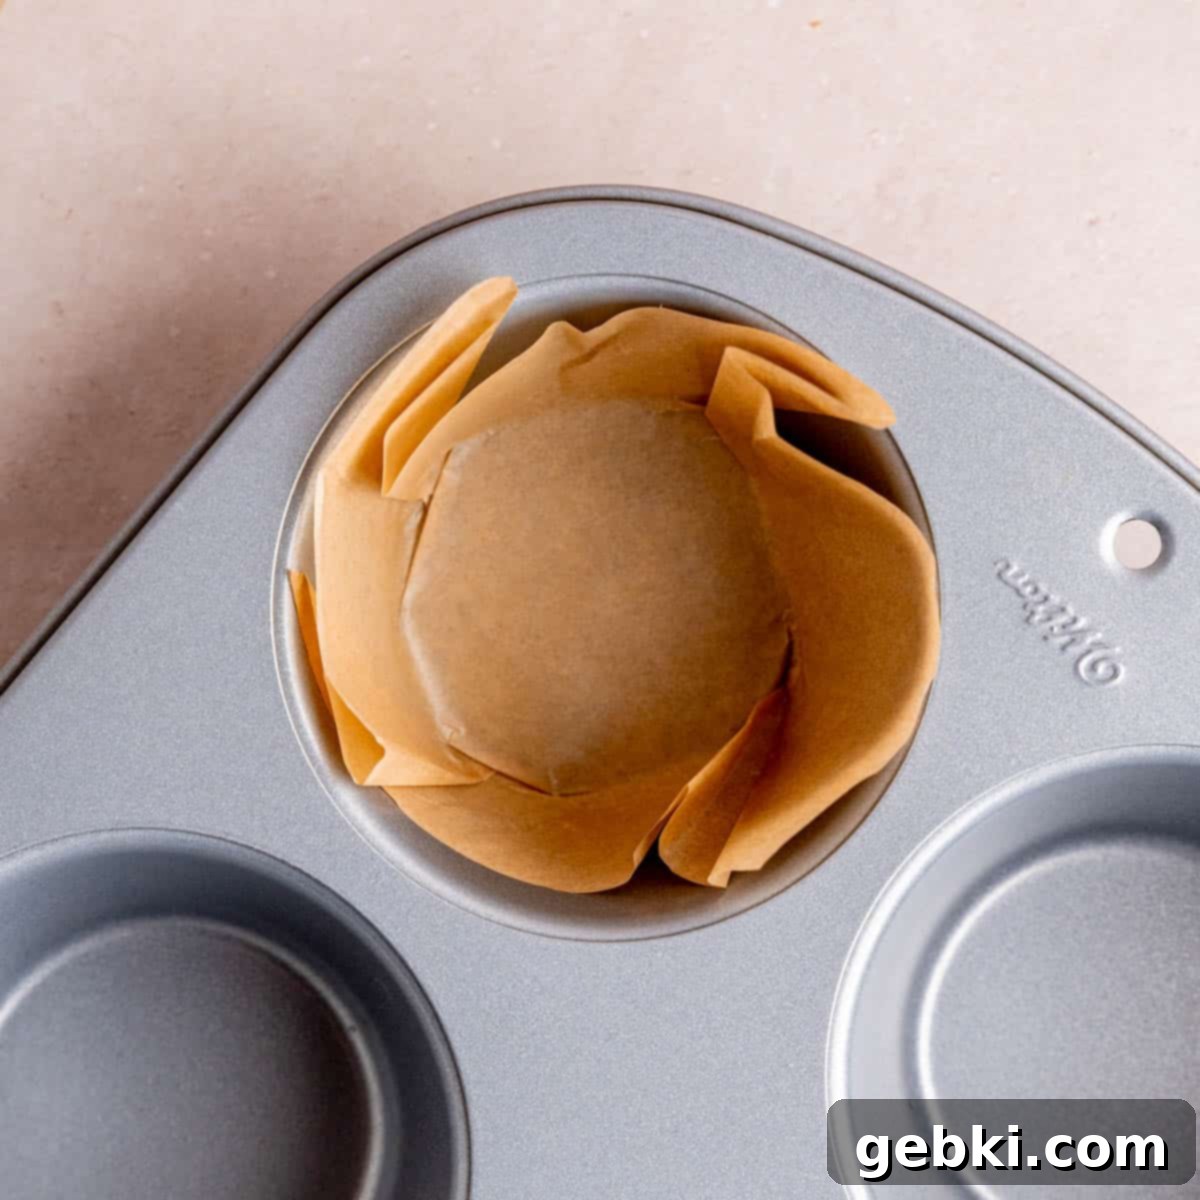
Effortless DIY Muffin Liners: Make Your Own Parchment Paper Muffin Cups in Minutes
Have you ever eagerly prepared your delicious muffin batter, only to realize with a sinking heart that you’re completely out of muffin liners? It’s a common baking dilemma that can quickly turn excitement into frustration. But don’t fret! You don’t need a last-minute trip to the store. All you need is a roll of humble parchment paper, a few everyday household items, and a mere 10 minutes (or even less) to craft your very own, perfectly functional, and charming muffin liners!
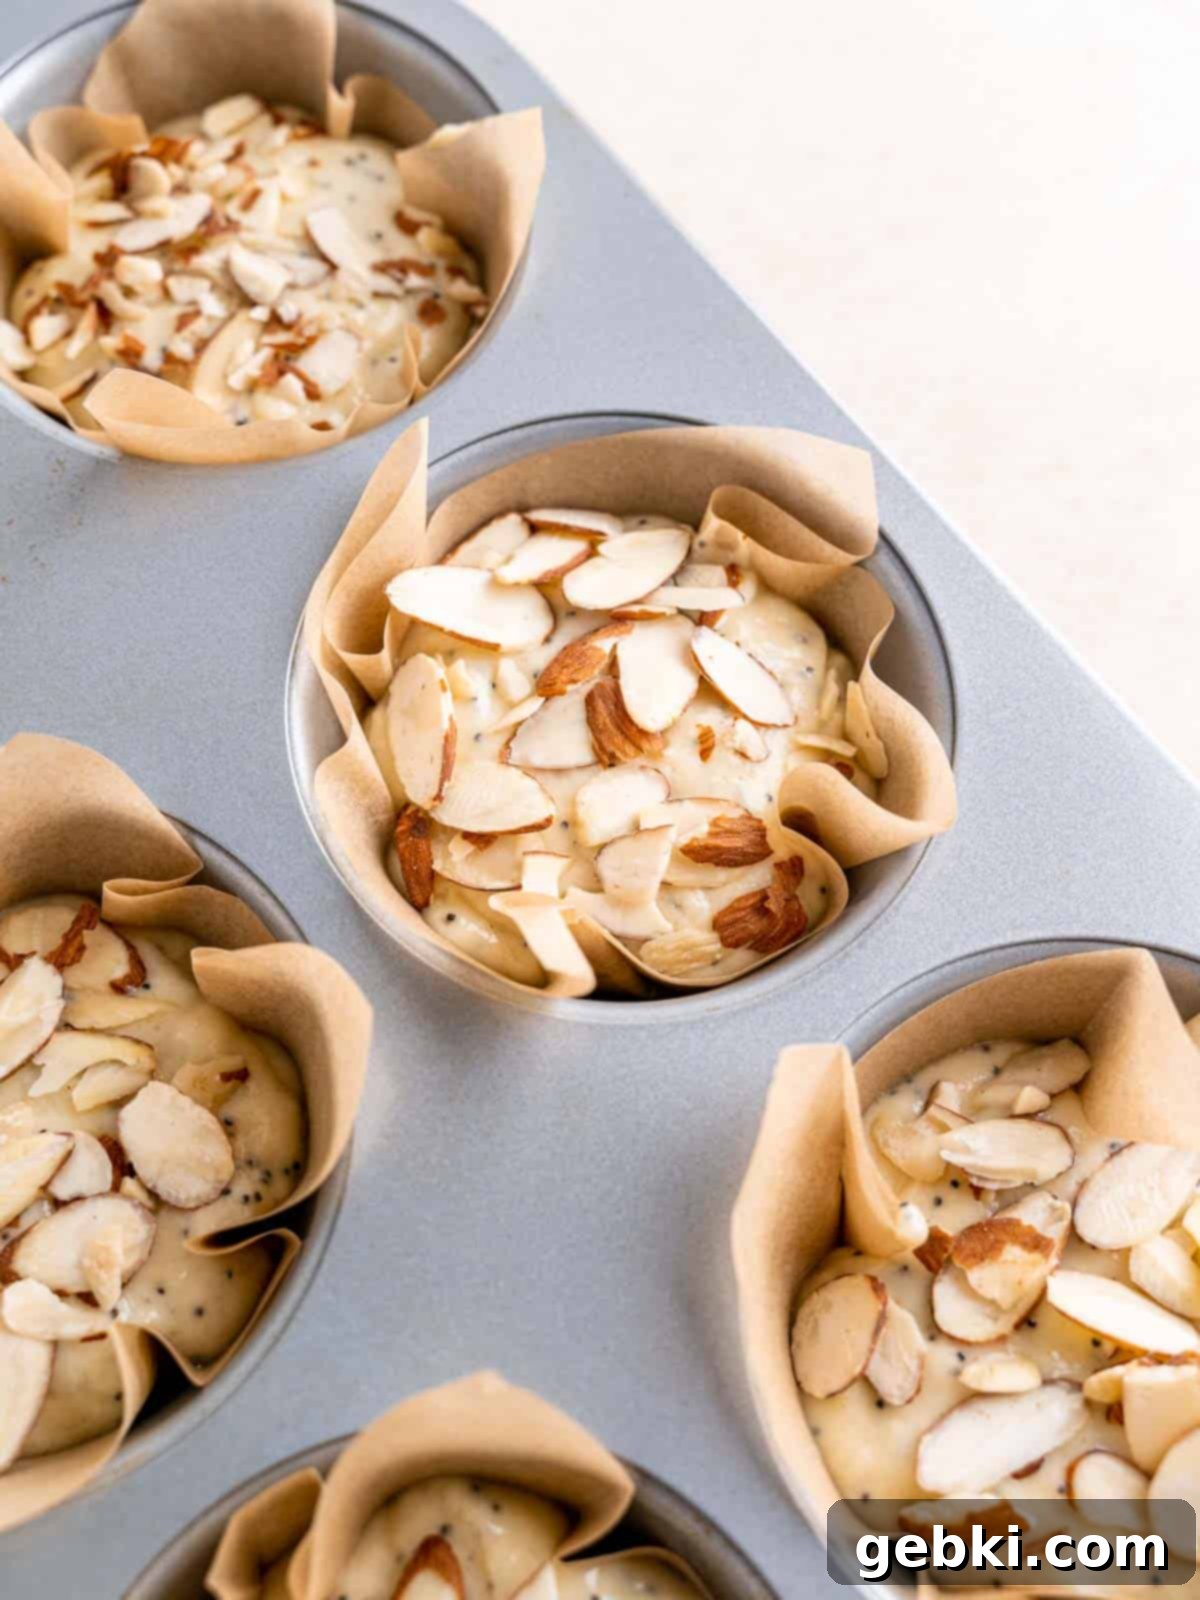
This exact scenario played out for me not long ago when I was getting ready to bake a batch of my beloved almond poppy seed muffins. I was practically doing an archaeological dig in my kitchen cabinets, convinced I had a hidden stash of muffin liners somewhere, like it was a Black Friday sale for baking supplies!
After a fruitless search, I eventually had to admit defeat. But a true baker always finds a solution! I grabbed my trusty roll of parchment paper and began experimenting with making my own liners. Within a quick 20 minutes (including a bit of online research for inspiration), I was back on track, and thankfully, my easy muffin recipes are forgiving enough to wait a little while without issue. This experience taught me a valuable lesson and gave me a fantastic baking hack to share!
Learning how to make DIY parchment paper muffin liners is an essential trick for any home baker’s repertoire. It’s a versatile skill that comes in handy whether you’re whipping up fluffy muffins for breakfast, preparing elegant cupcakes for dessert, or simply facing an unexpected shortage of store-bought liners. They add a rustic, homemade touch that store-bought liners often lack, elevating the presentation of your baked goods.
In this comprehensive guide, I’ll walk you through my simple, step-by-step process for crafting beautiful tulip-shaped muffin liners from scratch. The best part? You won’t even need a ruler – we’ll use a clever folding technique. While store-bought liners certainly have their convenience, we’ll also explore the unique benefits and charming appeal of these homemade alternatives, helping you decide which option is best for your baking needs.
What You’ll Need to Make Parchment Paper Muffin Liners
Ready to get crafty in the kitchen? Making your own muffin liners is surprisingly simple and requires just a handful of basic materials you likely already have on hand. Let’s gather our tools:
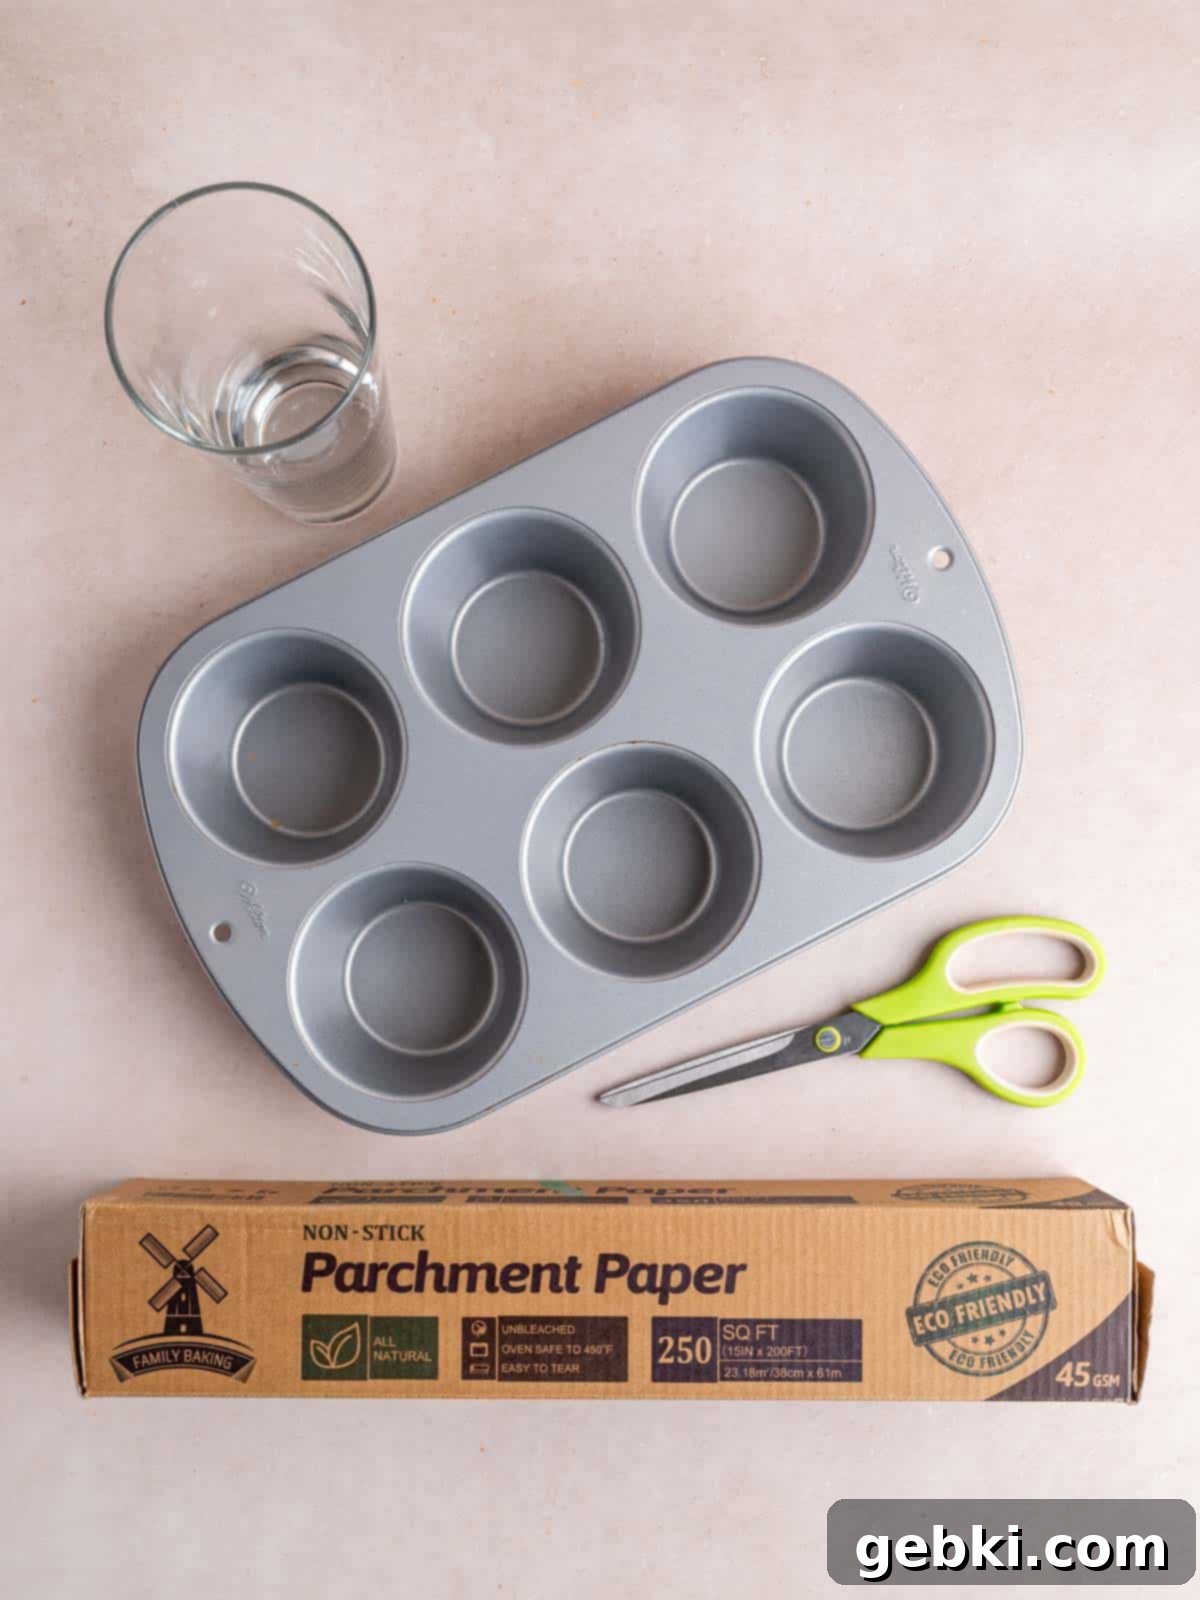
- Parchment paper – This is the star of our show! Look for non-stick, oven-safe baking paper. While any color works, I personally prefer natural, unbleached parchment paper for an authentic, rustic look and often because it’s a more environmentally conscious choice. It’s crucial that it’s oven-safe to withstand baking temperatures.
- Scissors – A good pair of sharp scissors, ideally designated for paper, will make clean cuts and ensure your liners look neat. Dull scissors can tear the parchment paper, making the shaping process more challenging.
- Muffin pan – You’ll need your actual muffin pan to size and shape the liners correctly. For this particular demonstration, I’ll be using a 6-cup jumbo muffin pan, but the technique is easily adaptable for standard or mini muffin pans.
- A clean glass or food can – This will act as your shaping tool. The key is to find one where the base fits comfortably inside your muffin pan’s wells. A standard drinking glass or a cleaned food can (like a tomato paste can for mini muffins, or a wider can for larger ones) works perfectly. Its stable base will help you create crisp folds.
Since these homemade muffin liners will be in direct contact with your delicious bakes, please ensure all your equipment – especially the glass and muffin pan – is meticulously clean and sanitary before you begin. While a ruler and pencil can be used for precise measurements, they are completely optional for this method, as we’ll rely on a more intuitive folding technique.
One of the beauties of this DIY approach is its flexibility. There are no strict numbers or exact measurements you *must* follow, which makes it incredibly forgiving. This is because muffin pans come in a variety of sizes, and you might also want to customize the height of your liners or the overall size of your muffins. My main recommendation is simply to grab a glass or can that fits snugly within your muffin pan’s wells – this will be your primary guide.
That being said, if you prefer to have a general idea of dimensions, I will provide suggested square sizes for different muffin pan types within the instructions below. For this tutorial, I will be demonstrating with a 6-well jumbo muffin pan, which stands about 1.5 inches tall.
Step-by-Step Video and Photo Instructions: Crafting Your Own Muffin Liners
For a visual walkthrough, check out the video below. Otherwise, continue scrolling for detailed photo instructions!
Step 1: Fold and Position Your Parchment Paper
Begin by taking your roll of parchment paper and folding its short end inwards, creating a flap. This flap will determine the height of your muffin liners. Next, place the base of your chosen glass (or can) onto this folded paper. Make sure there’s approximately 1 to 2 inches of paper extending around the bottom of the glass. This extra paper will form the walls and the charming “tulip” shape of your finished muffin liners. Once you’ve positioned it, lightly crease the paper around the base of the glass.
In this example, for my jumbo muffin pan, my initial fold measured about 6 inches. This ensures ample paper to create tall, rustic liners.
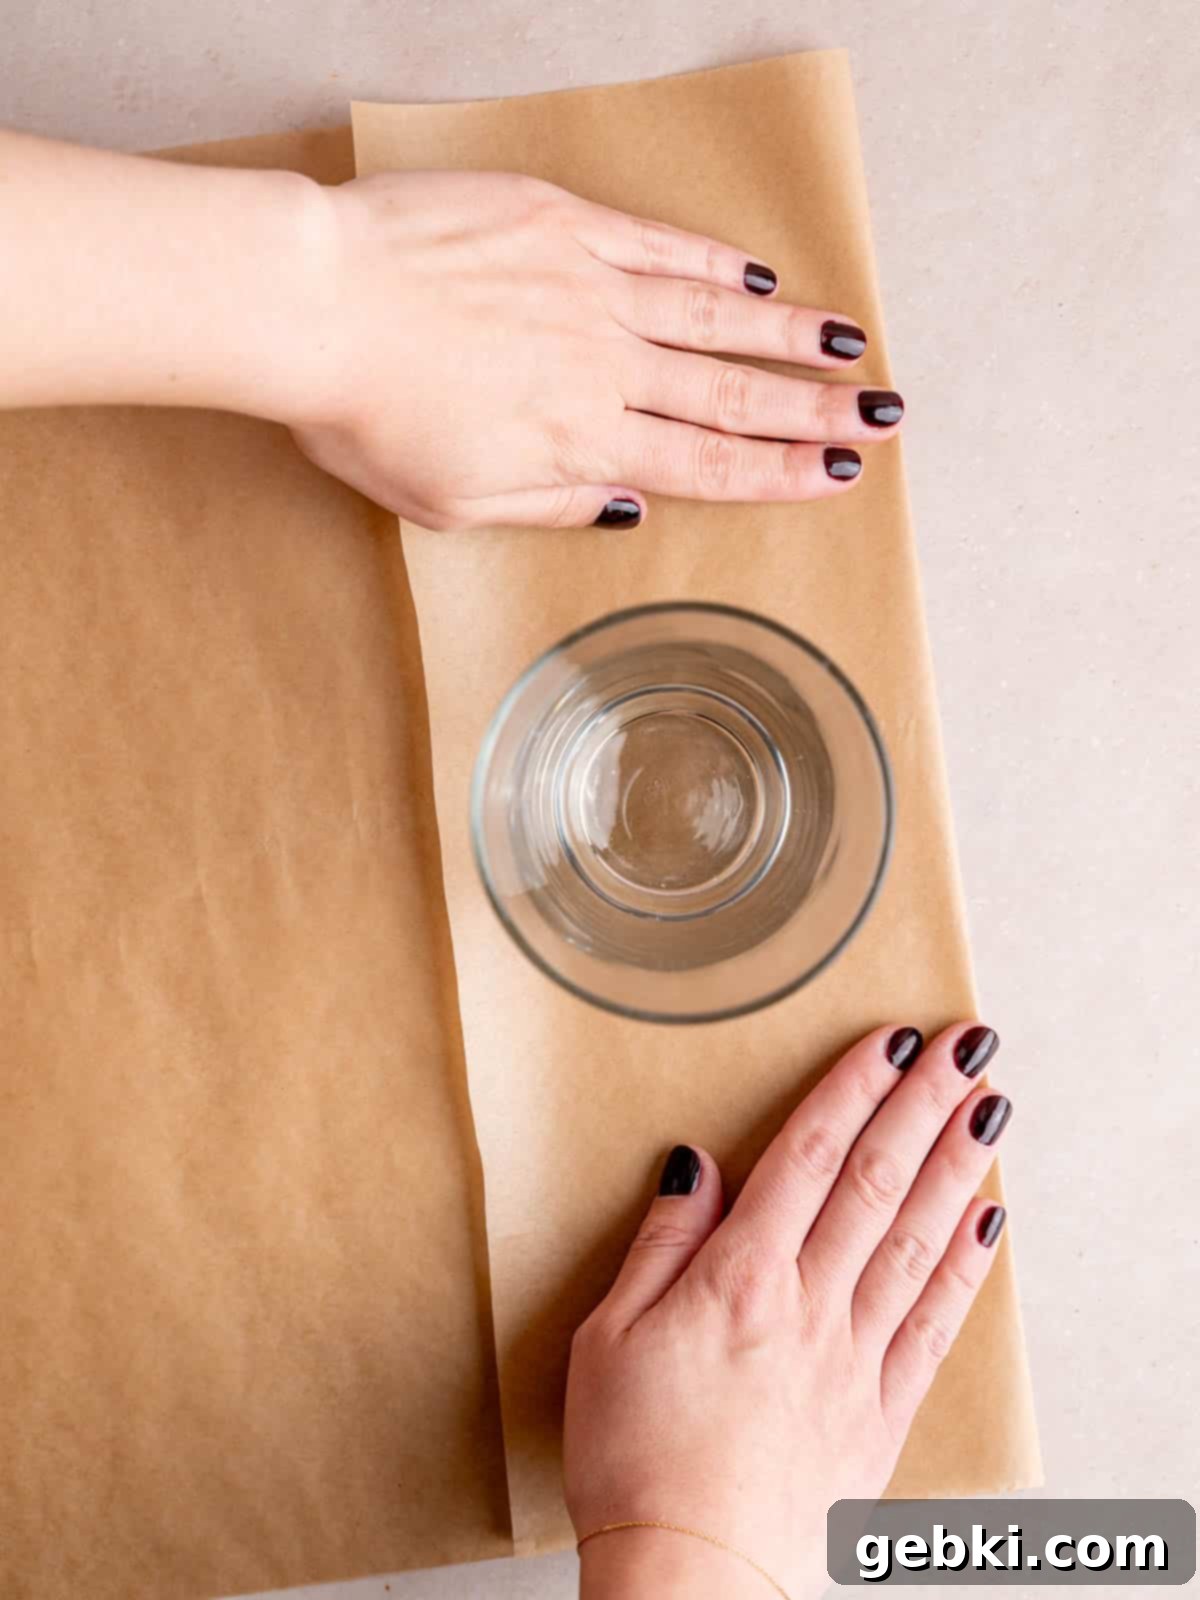
Remember, the goal is not perfection, but functionality and a homemade aesthetic. It’s perfectly fine if your homemade muffin liners look a little imperfect – that’s part of their charm! However, for those who prefer more specific guidance, here are general square sizes to aim for, depending on your muffin pan type:
- Jumbo muffin pan: Cut 6-inch squares. This gives you enough material to create those lovely tall tulip edges.
- Regular muffin pan: Cut 5-inch squares. This size is ideal for standard muffins and cupcakes.
- Mini muffin pan: Cut 3-4 inch squares. Smaller squares will ensure your mini muffins aren’t swallowed by too much paper.
Step 2: Trim the Excess Paper
With the paper still folded and the glass in place, carefully cut the bottom layer of the parchment paper, following the crease you just made. This will leave you with a long, folded strip of parchment paper, often referred to as a “hot dog fold.” Ensure your cut is as straight as possible, as this will impact the uniformity of your squares later on.
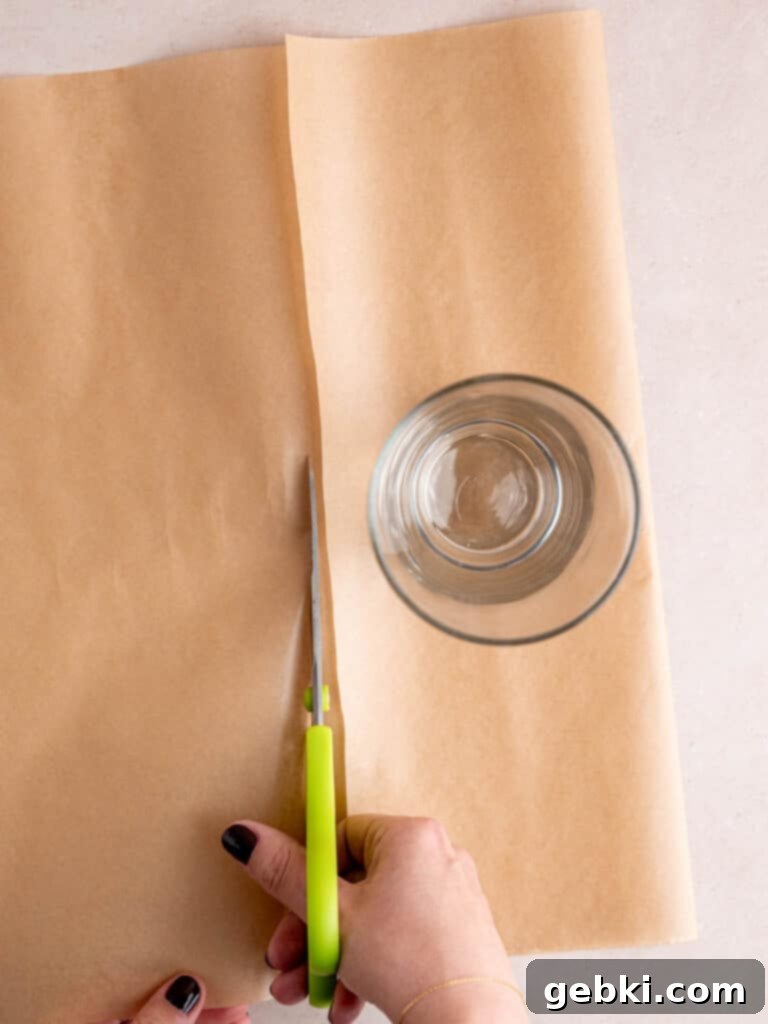
Pro Tip for Clean Cuts: To achieve a smooth and even cut, position the parchment paper between the inner edges of your scissors. Use your free hand to hold the paper taut. Then, in one continuous motion, run the scissors along the entire length of your intended cut. This technique minimizes jagged lines and prevents the parchment paper from tearing, resulting in cleaner squares.
Step 3: Create Equal Squares with a Trifold
Now, take your long, folded strip of parchment paper and divide it horizontally into three equal parts. This creates a trifold, much like how you would fold a brochure. Press down firmly to create crisp creases. The goal here is to create multiple equal-sized squares from your single strip of paper.
The exact number of folds might vary slightly depending on the initial size of your parchment paper roll and the dimensions of your muffin wells. The most important thing is to ensure that, once unfolded, the paper yields individual squares that are roughly equal in size.
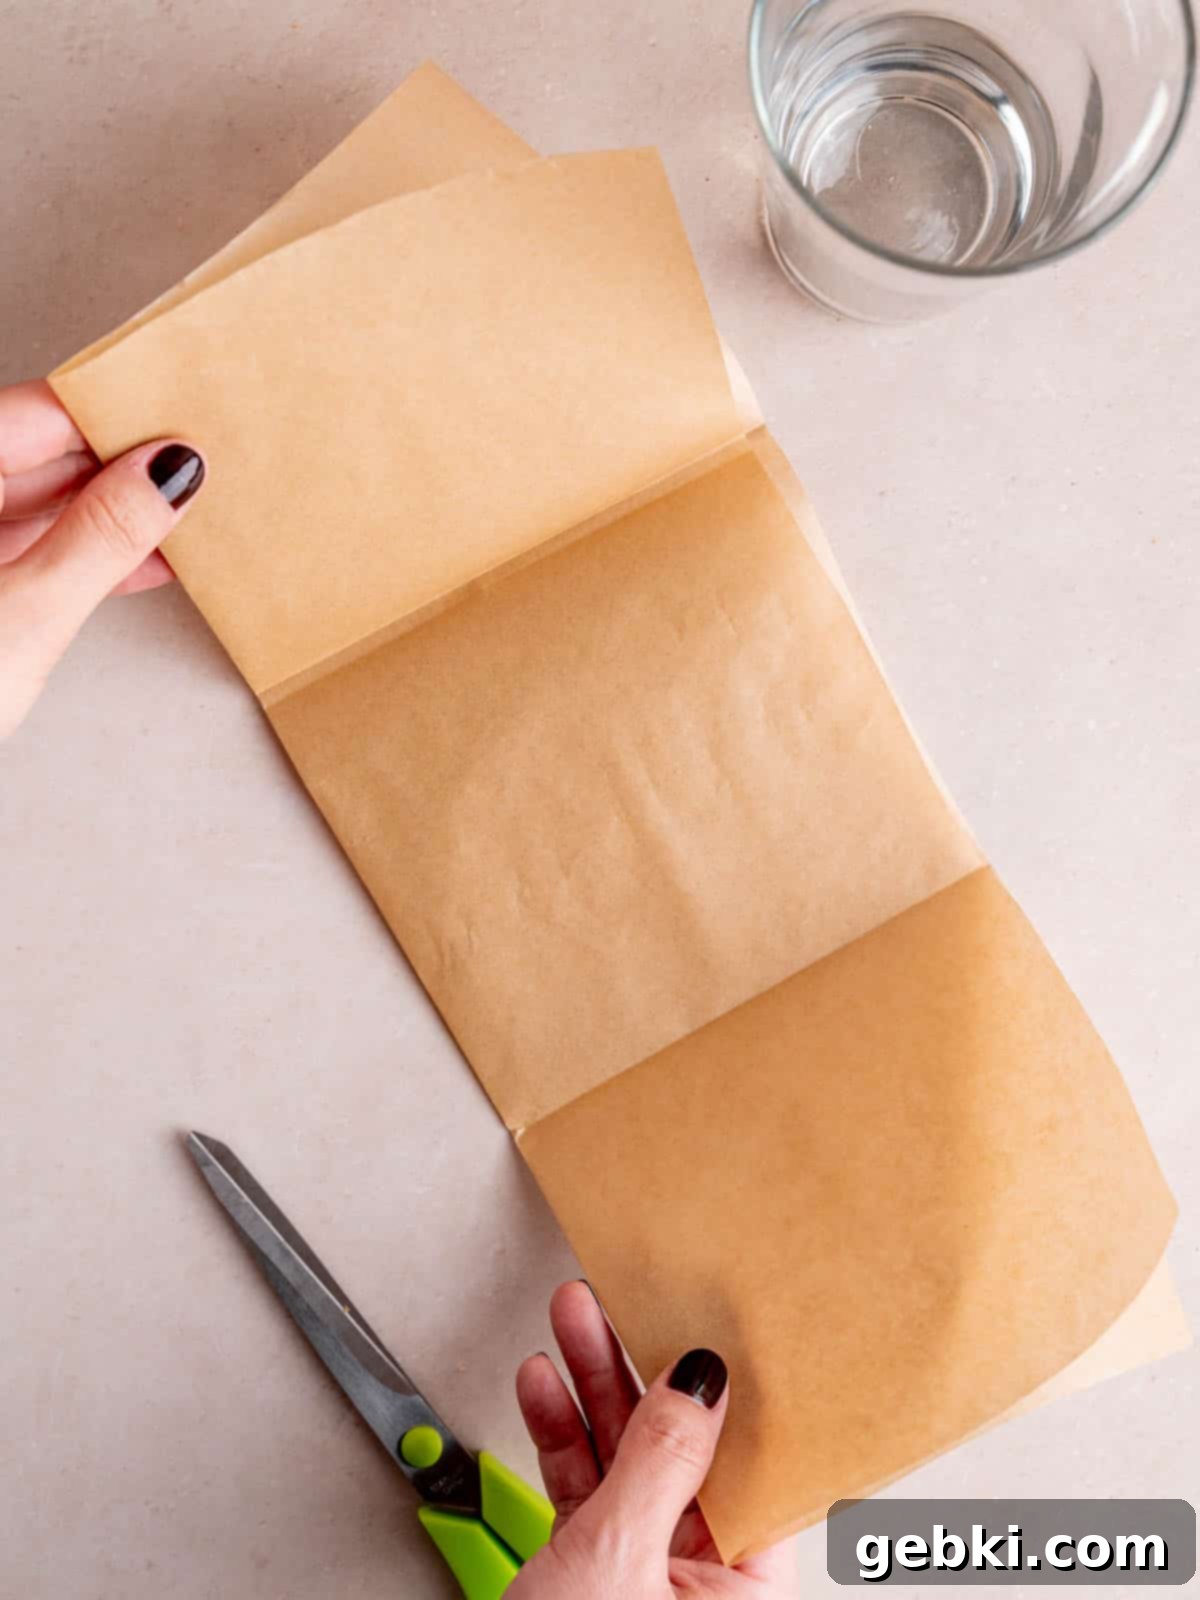
Step 4: Cut Along Creases to Yield Individual Squares
Once you’ve created your trifold, carefully cut along all the creases you’ve just made. This includes the two shorter horizontal creases and the long one that runs along the middle of the paper. If you’ve followed the measurements and folds as I have, you should now have 6 perfectly equal squares of parchment paper. These are the raw materials for your DIY muffin liners!
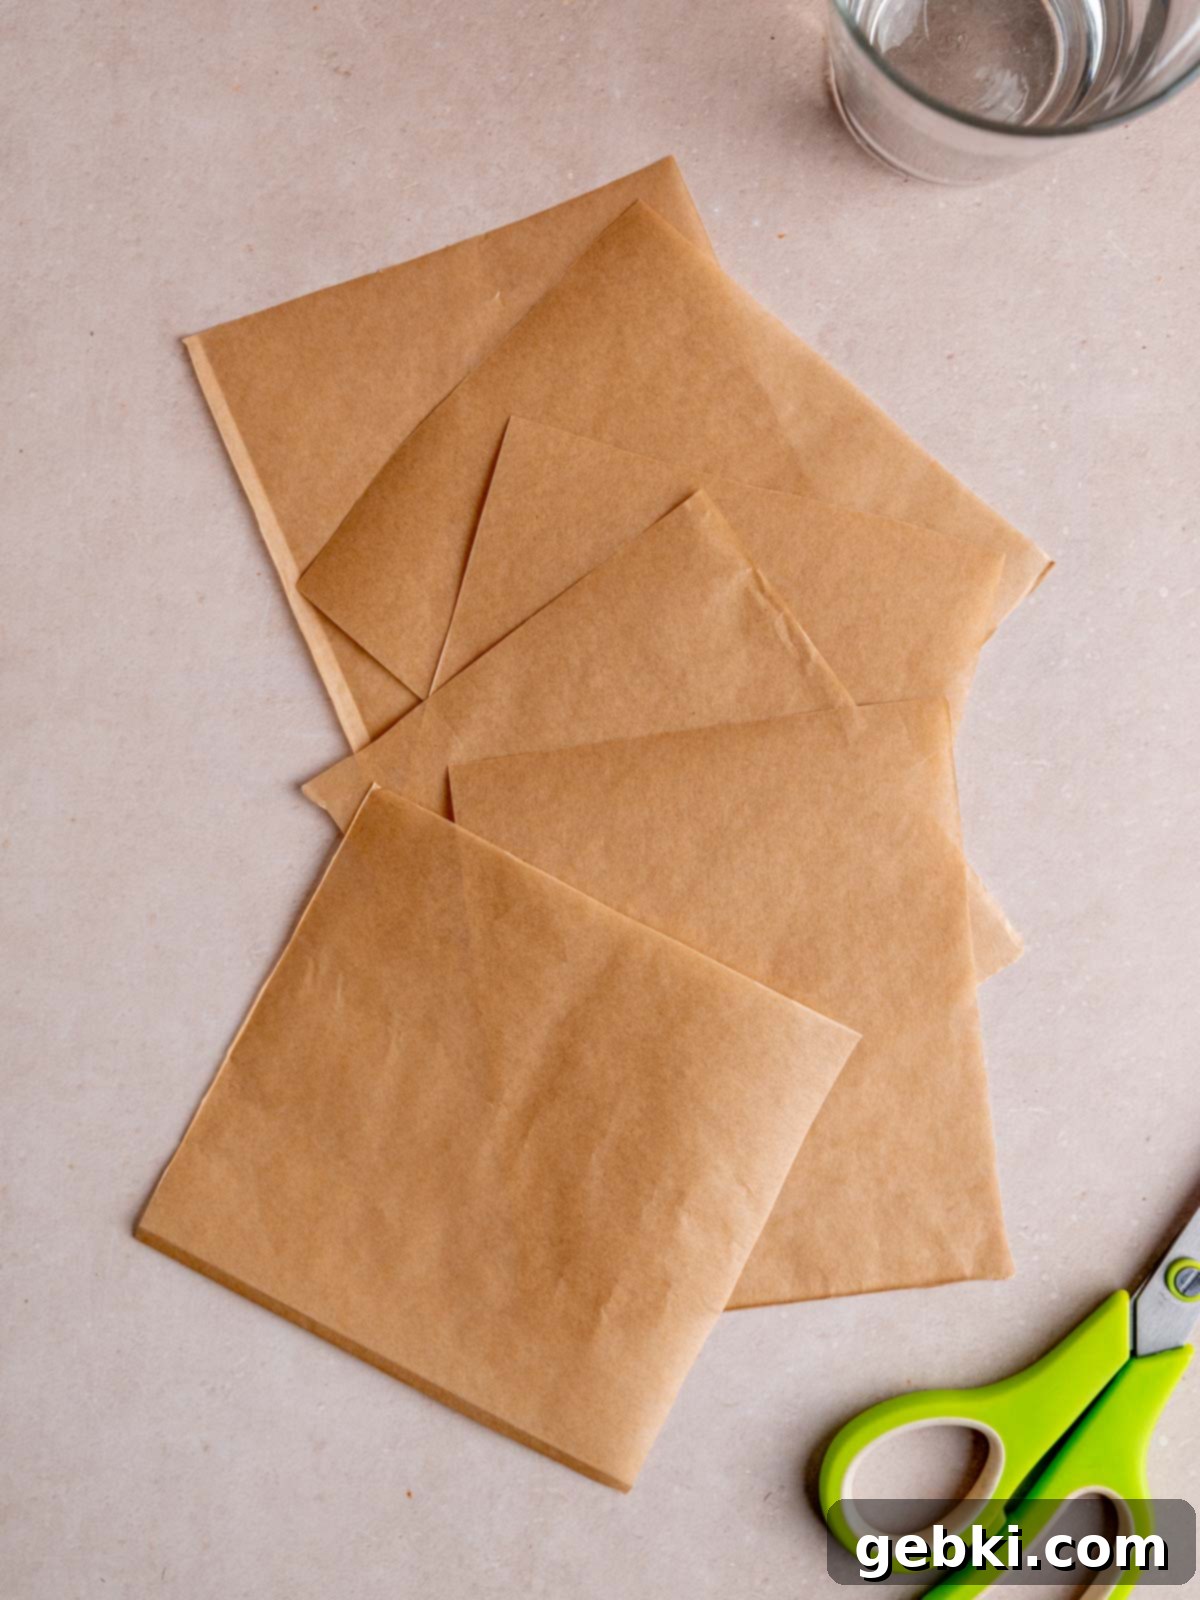
Pro Tip for Efficiency: I often cut a few extra squares beyond what I immediately need and store them flat in a drawer. This way, the next time a muffin craving strikes or I unexpectedly run out of liners, I can skip the initial cutting steps and go straight to shaping. It’s a small habit that significantly boosts baking efficiency!
Step 5: Shape Each Square into a Muffin Liner
Now comes the fun part: shaping your individual parchment squares into beautiful tulip muffin liners. Take one square and place it over the bottom of your upturned glass. Carefully bring the edges of the paper down and around the base of the glass, creasing it firmly to form a cup shape. The key here is to really press the paper against the glass to help it hold its form. The more defined the creases, the better your liner will hold its shape once removed from the glass.
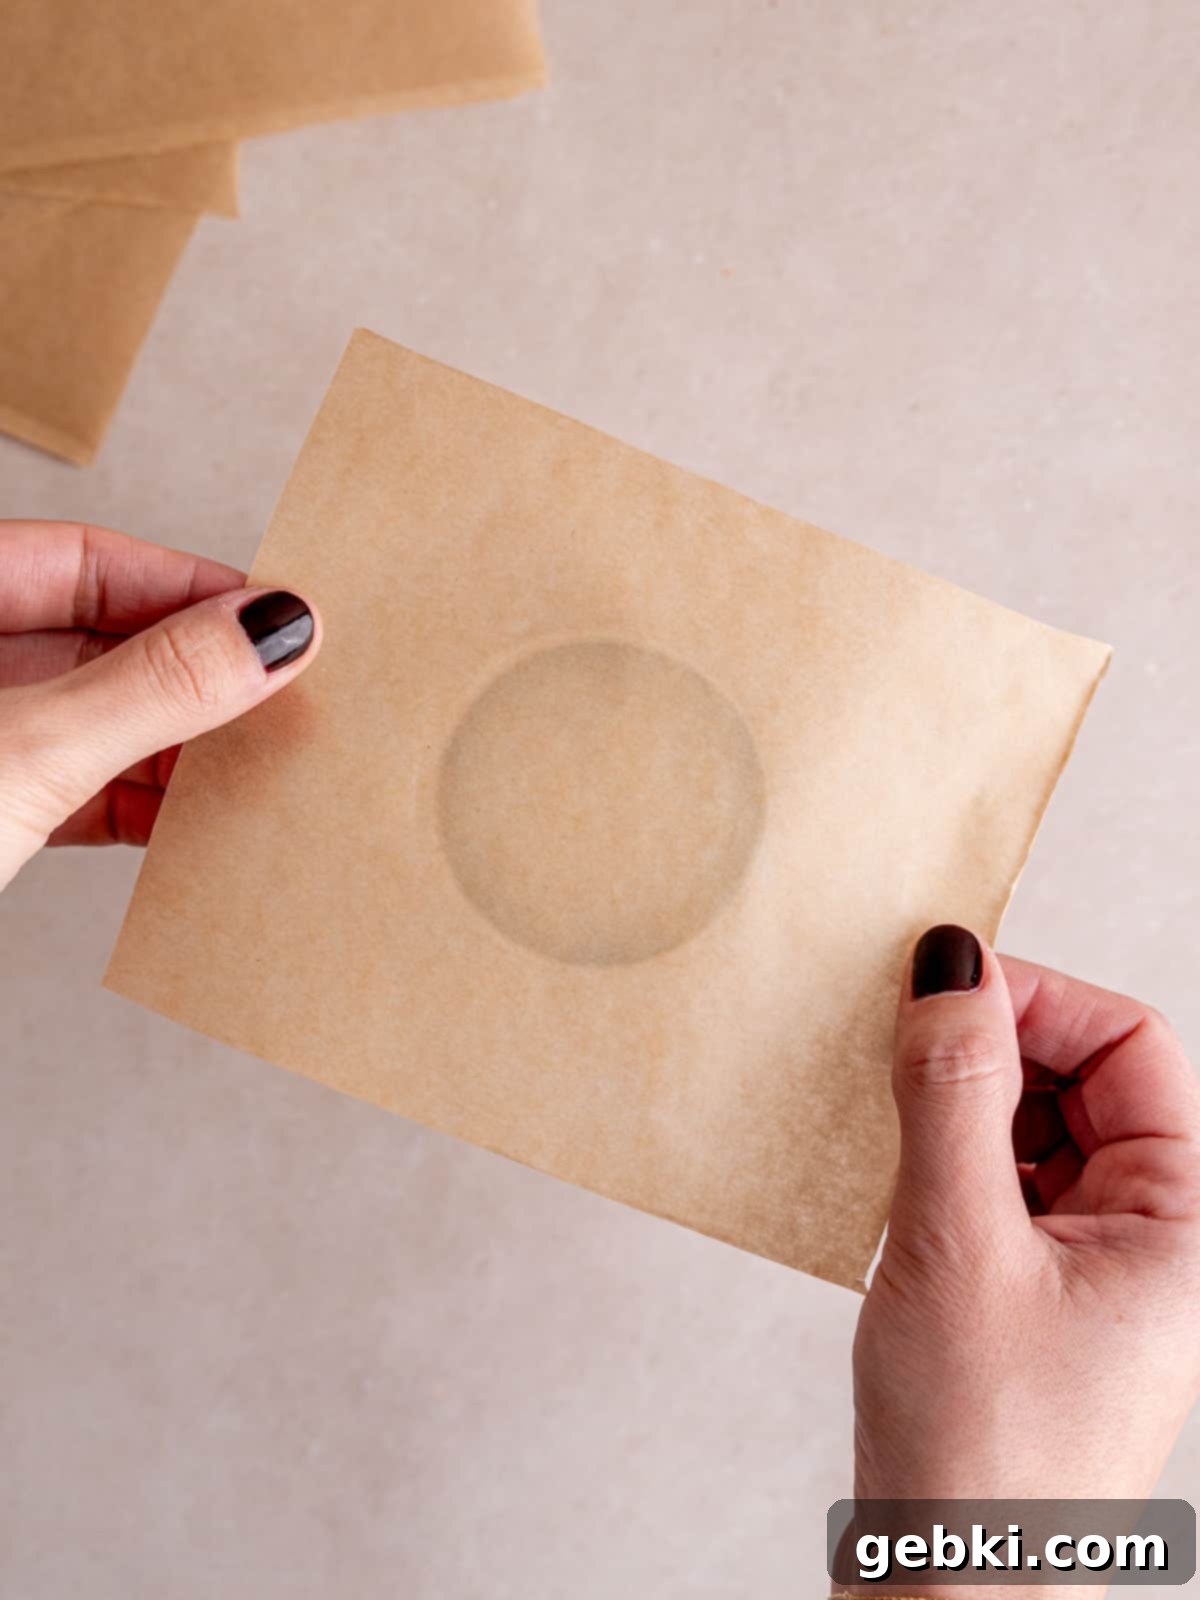
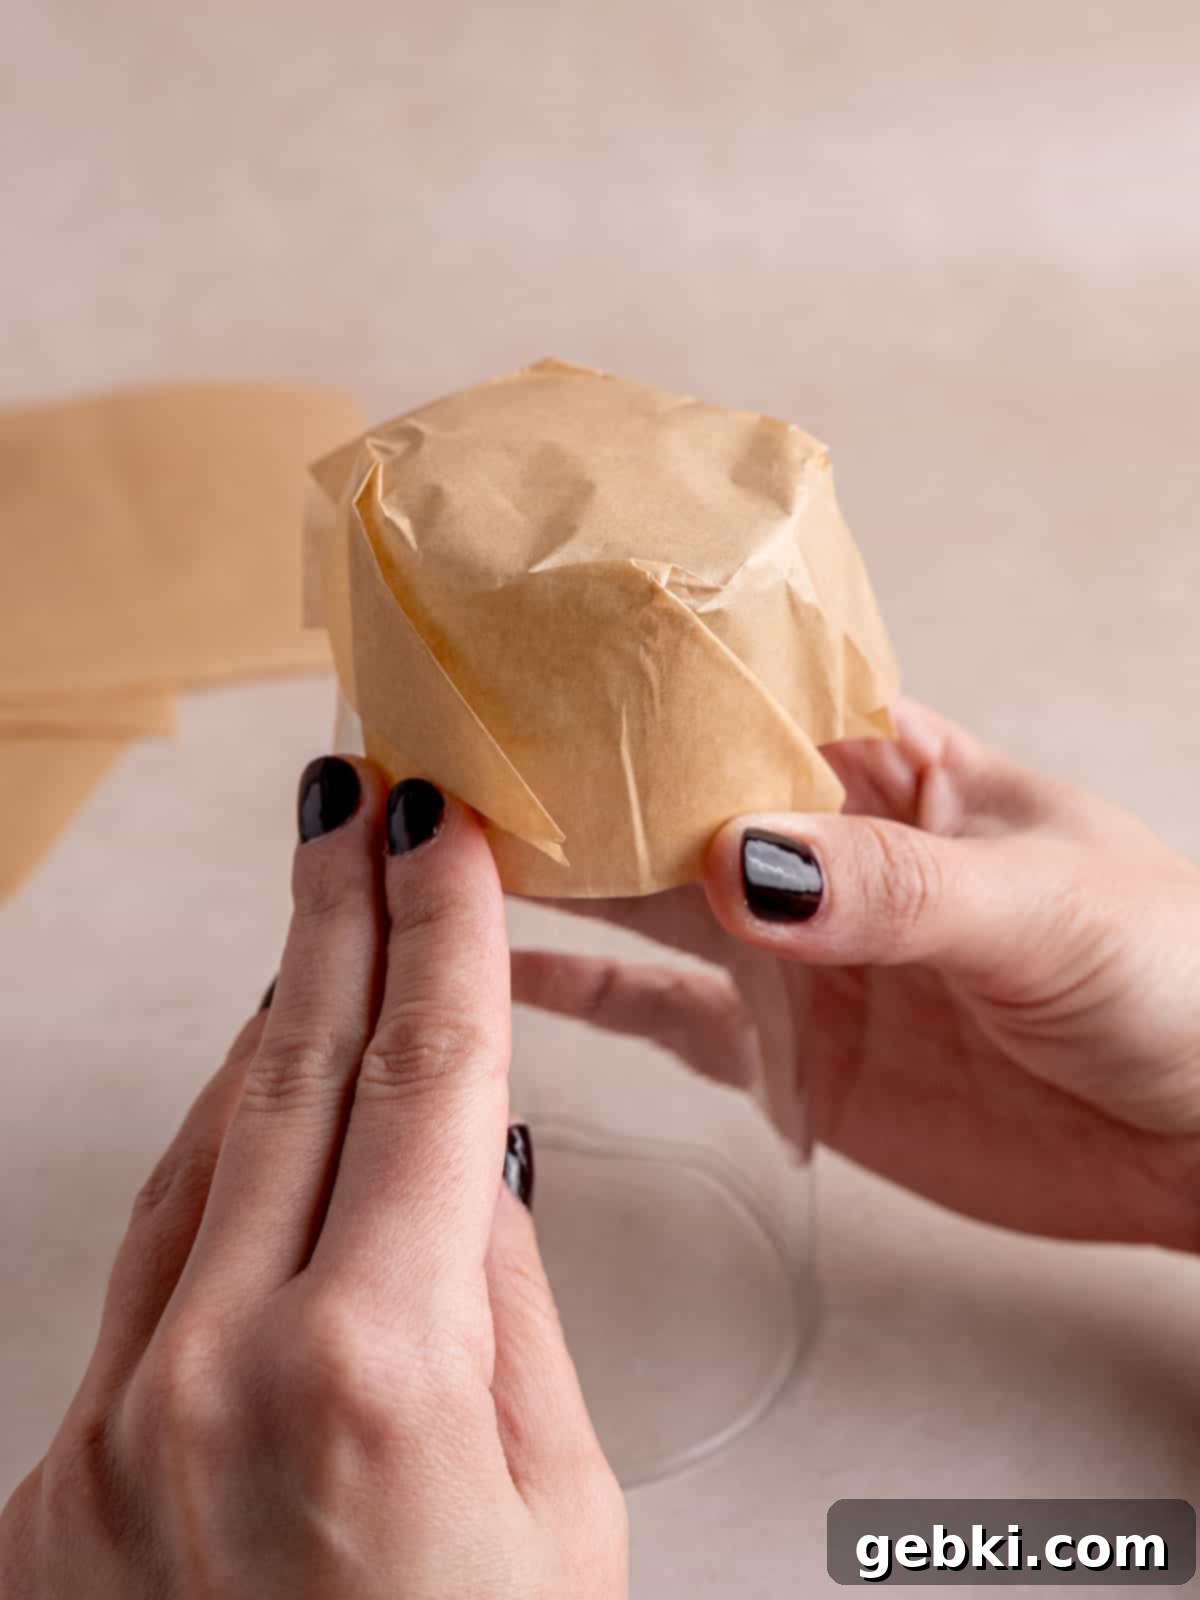
Step 6: Press and Twist into the Muffin Pan
With the parchment paper still snugly wrapped around the glass, carefully invert the glass and paper, then press and twist it down into one of the wells of your muffin pan. This action will further define the shape of your liner, ensuring it perfectly conforms to the contours of the muffin cup. The twisting motion helps to set the folds and gives the liner its distinct “tulip” appearance. Once satisfied, gently remove the glass, leaving behind your beautifully shaped, homemade muffin liner!
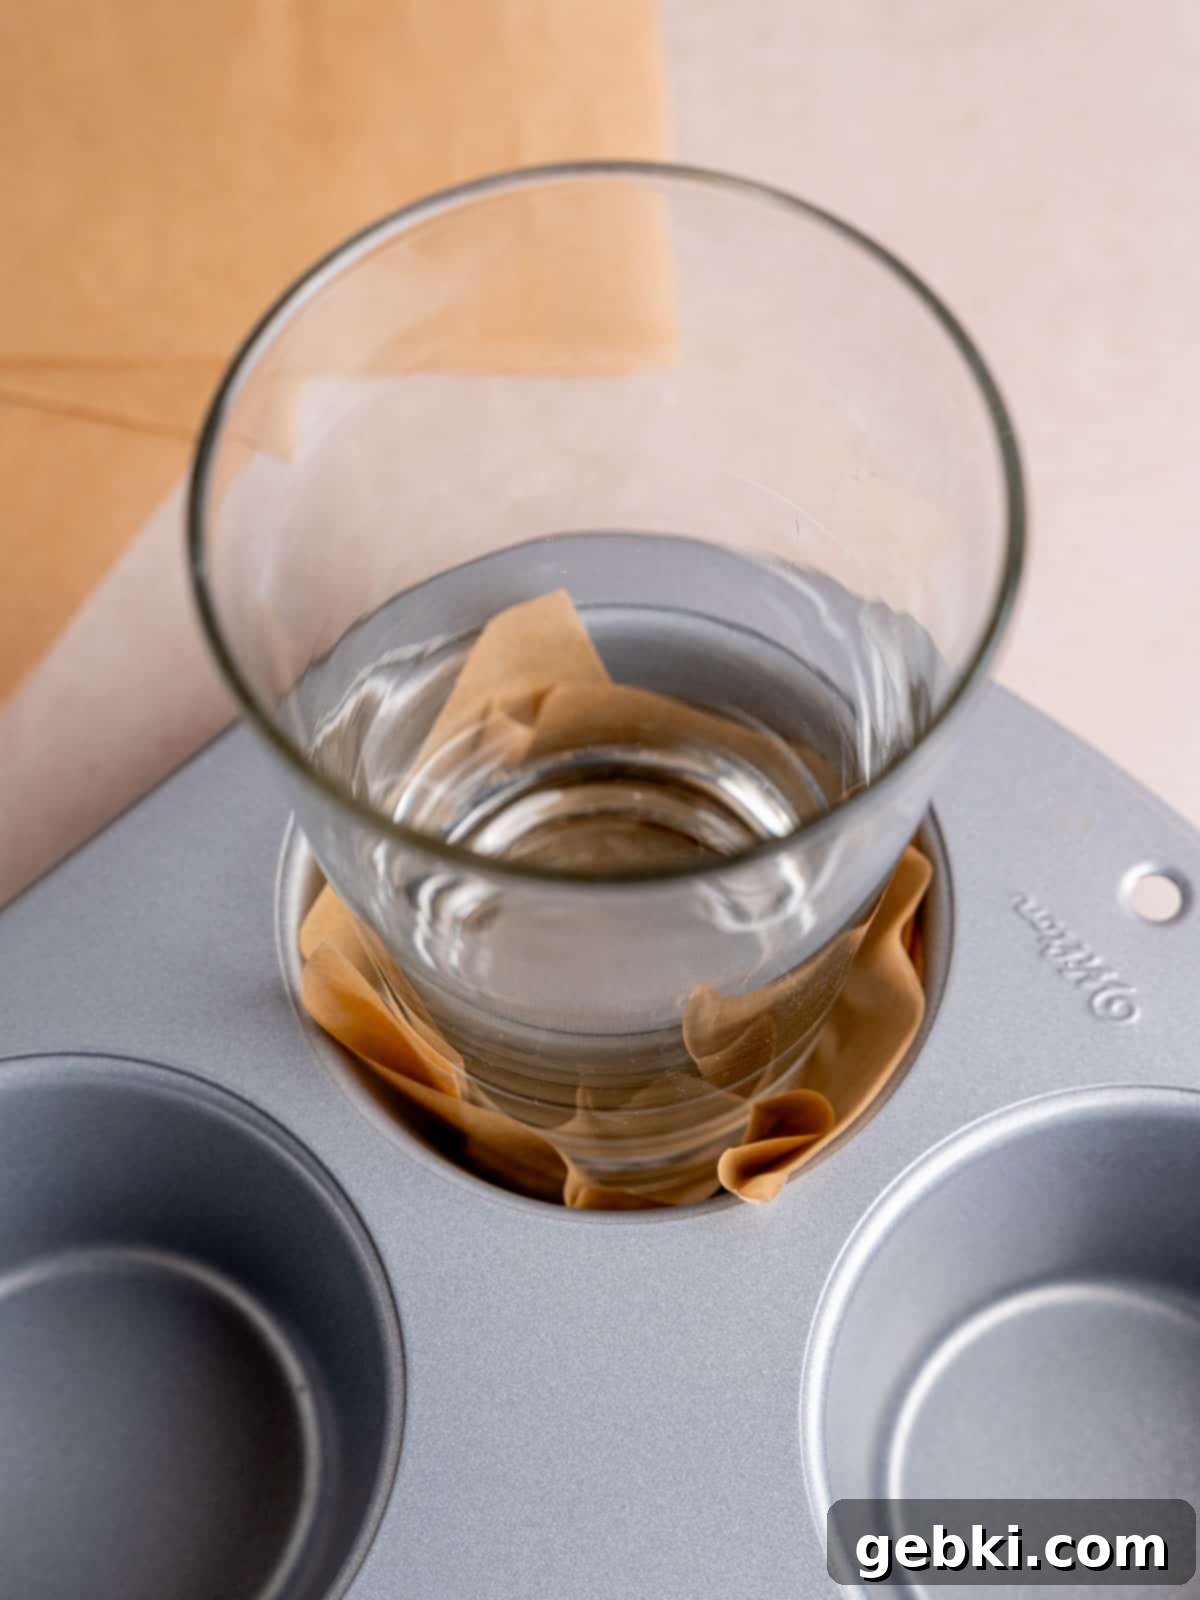
Repeat this process for all your parchment squares, and voilà – you’ll have a full pan of charming, tulip-shaped muffin liners ready for your batter!
DIY vs. Store-Bought Muffin Liners: A Baker’s Dilemma
You might be pondering, “Kayla, this is a clever hack, but why spend time making these when I can just grab a packet of baking cups from the store?” I completely understand that sentiment – time is a precious commodity, especially with all the mixing, baking, and cleaning involved in home baking! However, there are distinct advantages and disadvantages to both DIY parchment paper muffin liners and their store-bought counterparts. Let’s weigh them out to help you make an informed choice for your next baking adventure.
Pros of DIY Parchment Paper Muffin Liners
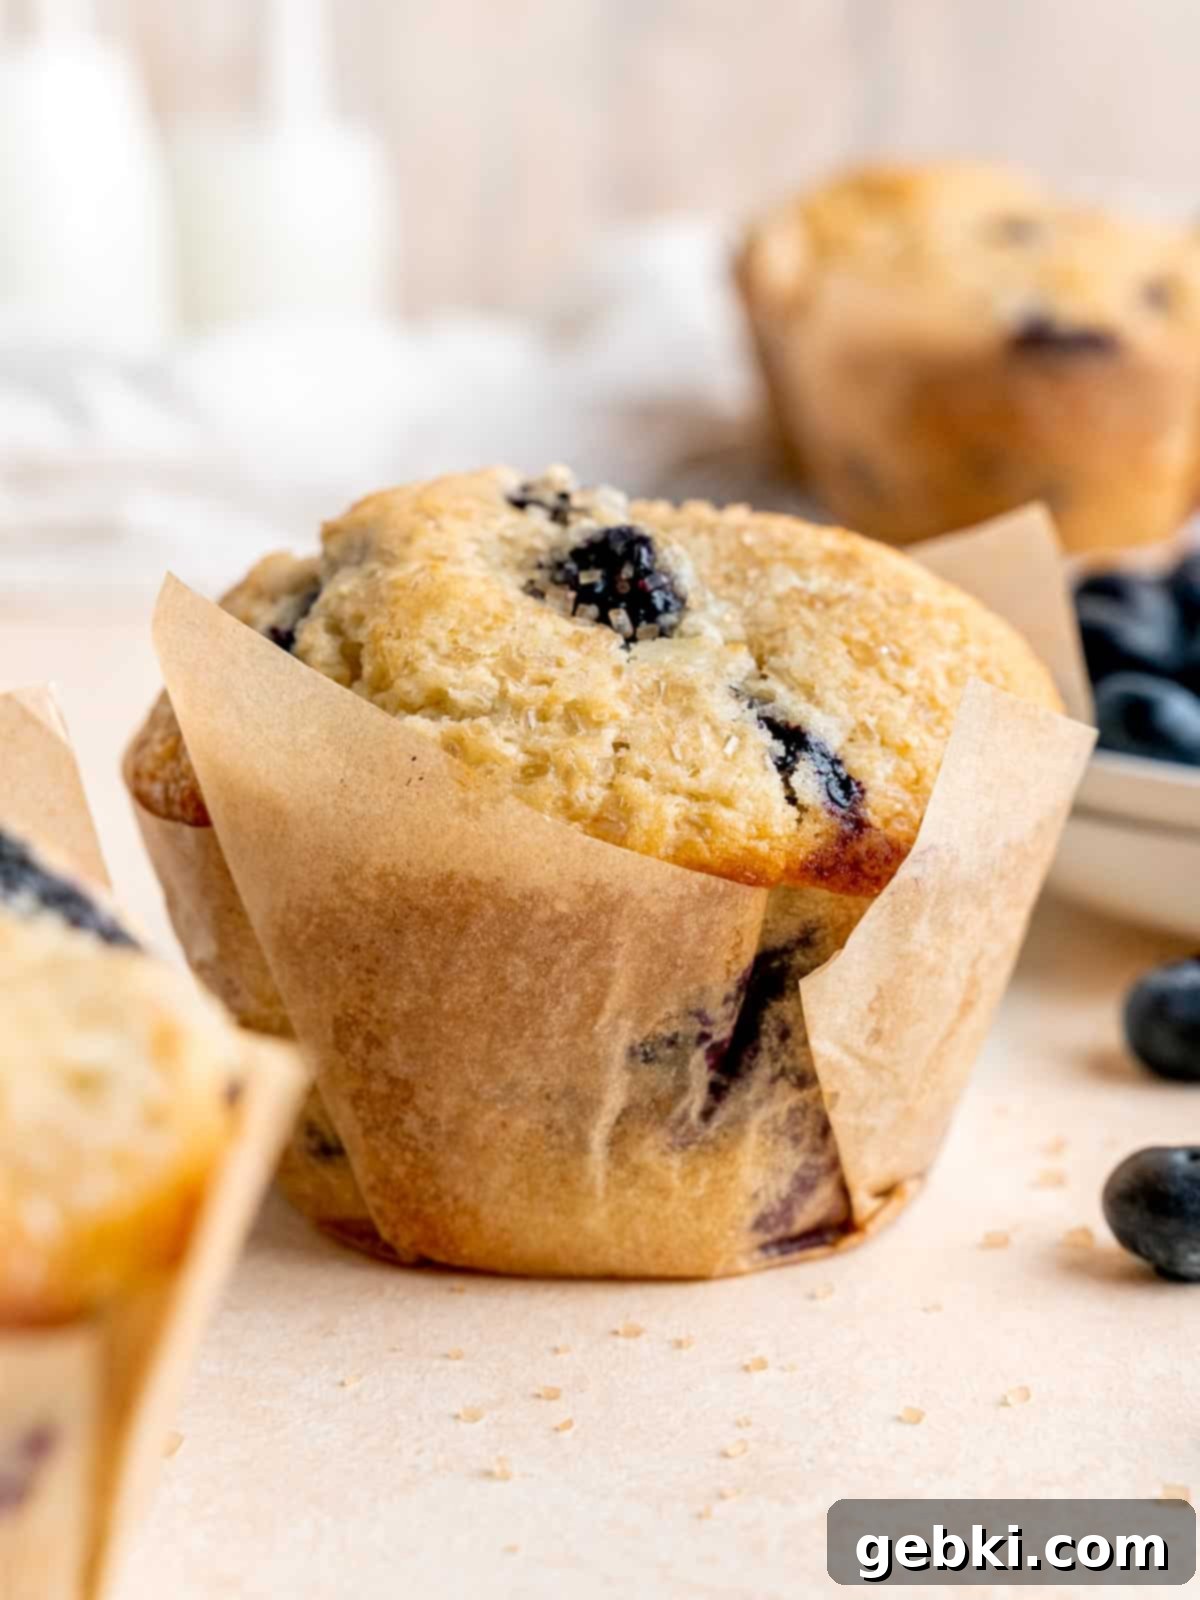
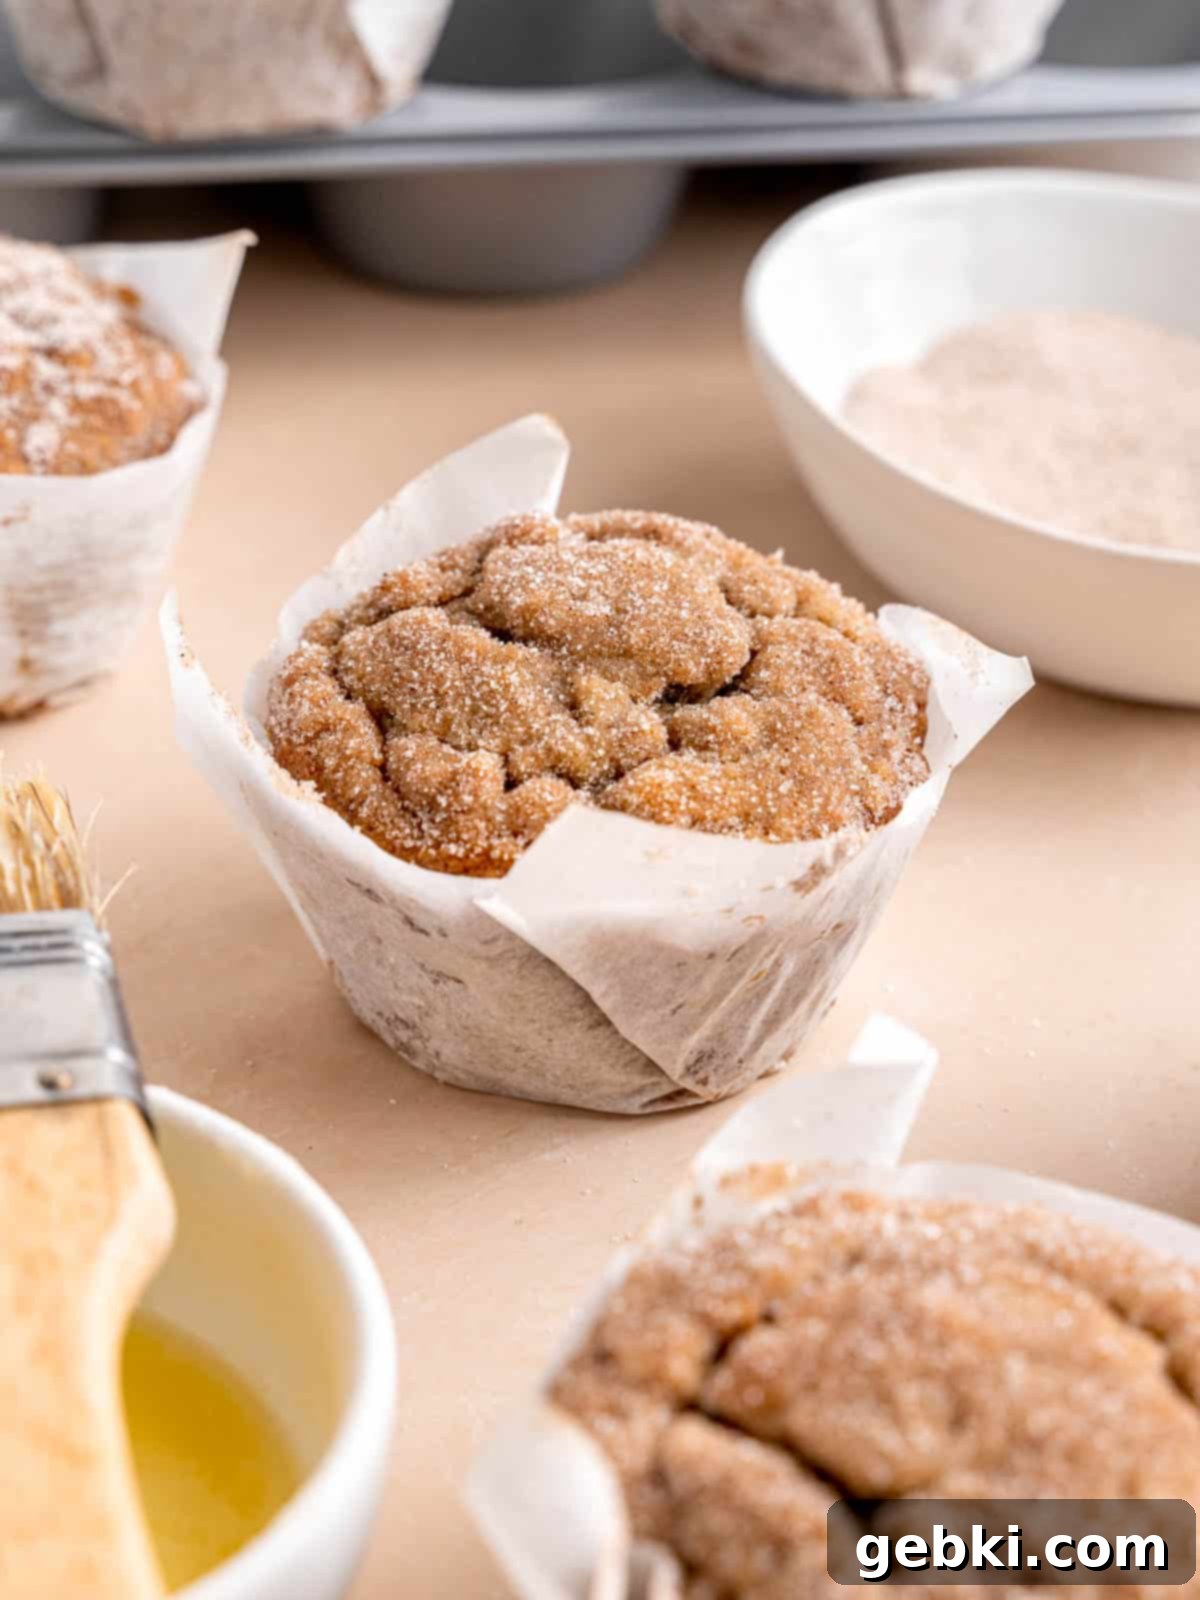
- Rustic Charm and Homemade Aesthetic: There’s an undeniable appeal to the imperfect, yet beautiful, folds of a homemade parchment paper liner. The natural paper creases and often unbleached brown paper give each baked good a charming, rustic look and a special touch that signals “made with love.” This can significantly enhance the presentation, especially if you’re gifting your muffins or cupcakes.
- Superior Non-Stick Properties: One of the biggest advantages of parchment paper liners is their exceptional non-stick quality. Unlike some paper baking cups where the batter can stubbornly adhere, parchment paper is naturally grease-resistant. This means your muffins and cupcakes will release effortlessly from the liners, resulting in less crumbled cake and a cleaner eating experience. No more fighting with your muffin to get it out of its wrapper!
- Customizable Size and Shape: This DIY method offers unparalleled flexibility. You can easily adjust the size of your squares to perfectly fit any muffin or cupcake pan, whether it’s jumbo, standard, or mini. You can also control the height of the liner, opting for a classic cup or a taller, more elegant “tulip” style, which not only looks professional but also prevents overflow with generous batter amounts.
- Cost-Effective: A roll of parchment paper is typically more economical than multiple packs of store-bought liners, especially if you bake frequently. You’re getting more liners for your money and avoiding specialized baking cup purchases.
- Eco-Friendly Potential: If you choose unbleached parchment paper, you’re opting for a more environmentally friendly choice compared to some bleached or heavily processed store-bought liners. Plus, by using what you have, you reduce the need for additional manufacturing and packaging.
Pros of Store-Bought Muffin Liners
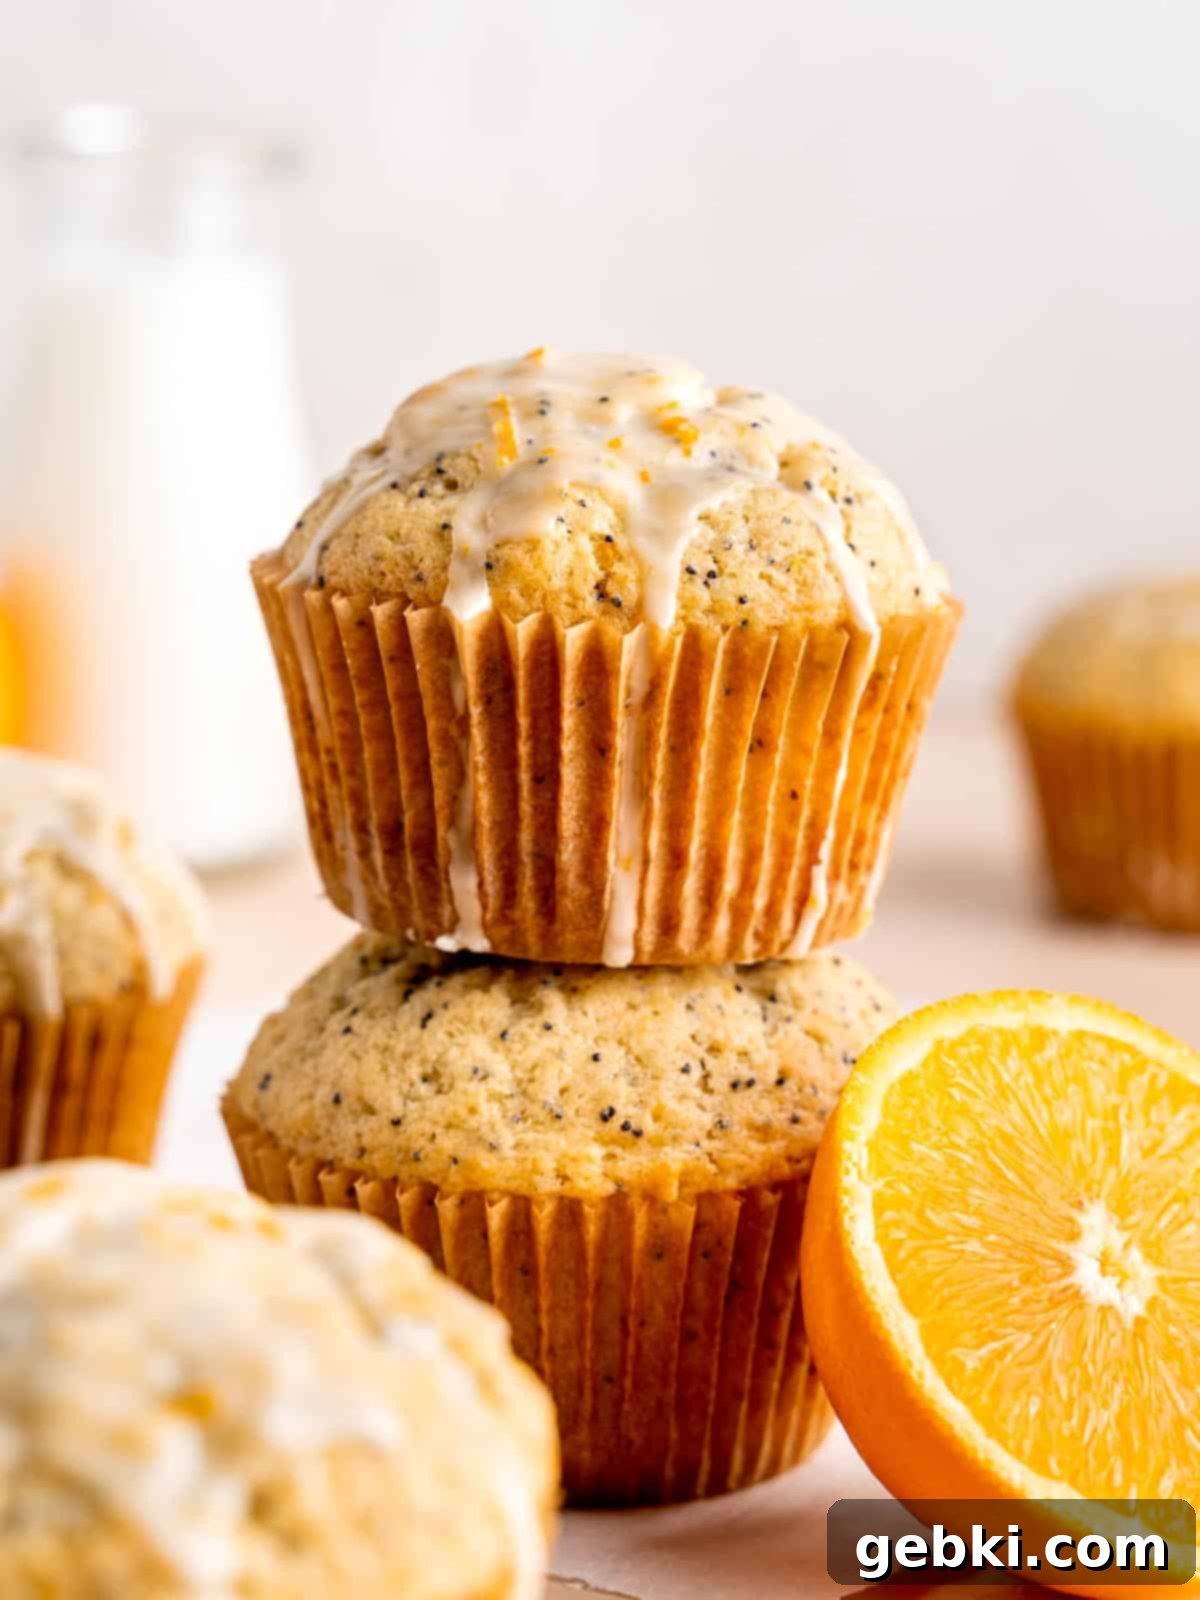
- Unbeatable Convenience and Storage: Store-bought muffin liners are the epitome of convenience. They’re ready in an instant – just grab and go. They’re also designed to hold their shape perfectly, making them ideal for bulk baking or when you need a quick solution. Unfortunately, DIY parchment paper liners aren’t ideal for making far in advance, as they tend to lose their crisp folds over time if not immediately used.
- Time-Saving: When you’re in a hurry or tackling a large baking project, the few minutes it takes to cut and shape parchment paper can add up. Store-bought liners save you this precious time, allowing you to focus more on the baking process itself or other delicious desserts.
- Variety of Designs and Materials: The market for store-bought baking cups is vast, offering an incredible array of colors, patterns, and designs to match any occasion or aesthetic. Beyond traditional paper, some are made of silicone, which are fantastic for being reusable, easy to clean, and extremely durable, providing an eco-friendly option in a different form.
- Portability: Store-bought liners, especially those made from sturdier paper or foil, often provide more structural integrity, making muffins easier to transport without damage.
So, which do you prefer: homemade or store-bought muffin liners? Share your thoughts and experiences! Comment below and let us know your go-to!
Frequently Asked Questions About Muffin Liners
Muffin liners, also known as baking cups, are primarily used to hold individual muffins or cupcakes. Their main purpose is to prevent the batter from sticking to the muffin pan, making cleanup a breeze and ensuring your baked goods can be easily removed without damage. Beyond practicality, they also add a touch of presentation, making muffins easier and more hygienic to handle, especially when sharing with family, friends, or guests.
Yes, you can absolutely make muffins without liners, but you’ll need to take extra precautions to prevent sticking. If you opt for no liners, it’s crucial to thoroughly grease each muffin pan well with butter, baking spray, or shortening, ensuring every nook and cranny is coated. Dusting with a little flour or cocoa powder (for chocolate muffins) after greasing can provide an additional non-stick barrier. While possible, liners are highly recommended as they greatly simplify the baking process, ensure easy release, and help maintain the muffin’s shape, preventing overflows and sticky situations.
Technically, parchment paper is designed to be naturally non-stick and grease-resistant, so your muffins should release easily without additional greasing. For most standard muffin recipes, greasing parchment paper liners is not necessary. However, if you’re baking a particularly rich batter, one with a high sugar content, or a recipe containing fruits (which can sometimes stick), a light spray of non-stick baking spray or a quick brush with melted butter on the inside of the parchment liner can provide extra insurance and ensure the cleanest release possible.
Any non-stick, oven-safe parchment paper will work wonderfully for making DIY muffin liners. The key is to ensure it’s specifically labeled as “parchment paper” or “baking paper” and not wax paper, as wax paper is not oven-safe. I personally have great success with brands like Kirkland Signature Culinary Parchment Paper from Costco for its durability and value, and the Unbleached Parchment Baking Paper Roll from Amazon for a more natural look and eco-friendly option.
While store-bought silicone liners are designed for multiple uses, DIY parchment paper liners are generally intended for single use. Although parchment paper is durable and greaseproof, the baking process (especially with moist batters) can cause them to become soft, slightly stained, or lose their crisp shape. For optimal hygiene and best results, it’s recommended to use fresh parchment liners for each batch of baking.
So, the next time you’re aiming to truly highlight that “homemade-with-love” effect in your bakes, or simply find yourself in a pinch, try swapping out your store-bought liners with these charming and practical DIY parchment paper ones! You’ll love the rustic look and the easy release.
Delicious Muffin Recipes to Try with Your New Homemade Liners
Now that you’re a pro at making your own parchment paper liners, it’s time to put them to good use! I’ve personally used these homemade liners in the following muffin recipes, and they always turn out beautifully. Have a look and get inspired for your next baking session:
- Almond Poppy Seed Muffins
- The Best Sourdough Discard Blueberry Muffins
- Jumbo Cinnamon Chocolate Chip Muffins
- Easy Cinnamon Banana Bread Muffins
Did you try this tutorial and make your own muffin liners? I’d absolutely love to see how they turned out and hear about your experience! Please leave a ⭐️⭐️⭐️⭐️⭐️ rating below and don’t forget to tag me on social media @brokenovenbaking so I can admire your creations!
📖 Recipe
How to Make Muffin Liners From Scratch
Kayla Burton
Pin Recipe
Equipment
-
Parchment paper
-
Scissors
-
Muffin pan
-
Glass or can that fits inside muffin pan
Instructions
-
Fold a sheet of parchment paper inwards from the short end (like a hot dog bun, but without fully creasing the length yet). Place the bottom of your chosen glass on top of this fold. Adjust the paper so that it extends 1-2 inches on each side of the glass. Lightly crease the paper around the base of the glass to mark your desired liner height.
-
Using your scissors, carefully cut the bottom layer of the parchment paper along the fold you just created. You should now have one neatly folded strip of parchment paper that matches your desired liner height.
-
Now, take this folded strip and create additional folds in the opposite direction (perpendicular to the first fold). Aim to divide the paper into equal sections, resulting in equal-sized squares when unfolded. This is where your chosen glass/can acts as your guide for spacing.
-
Carefully cut along all the creases you’ve made, both the initial long fold and the perpendicular trifold lines. This will yield multiple parchment squares of equal sizes, ready for shaping.
-
Repeat the above cutting and folding steps if you need more squares, until you have one square for each muffin well in your pan. Feel free to cut extra squares and store them flat for future use – they’ll be ready for shaping when you need them next!
-
Place your glass upside-down on a flat surface. Take one parchment square at a time and center it over the bottom of the glass. Bring the edges of the paper down around the glass, folding and creasing it firmly to begin forming a cup shape.
Next, carefully place the glass (with the parchment paper still wrapped around it) into an empty well of your muffin pan. Press down firmly and twist the glass gently to help the paper conform to the pan’s shape and set the creases. Finally, remove the glass, and you’ll be left with a perfectly formed, tulip-shaped DIY muffin liner. Repeat for the remaining squares and enjoy your freshly made muffin cups!
Video
Notes
Do I need a ruler for precise measurements? No, a ruler is completely optional for this tutorial. Since muffin pan sizes and individual preferences for liner height vary so much, this method relies on an intuitive folding technique using a glass or can as your guide. The folds are made based on the diameter of the glass/can that fits best inside your specific muffin pan’s wells, giving you perfectly tailored liners every time.
General Square Size Guidelines: While precise measurements aren’t critical, here are some general square sizes to aim for if you prefer a starting point:
- For Jumbo muffin pans: Cut 6-inch squares. This will give you nice tall, crinkly edges.
- For Regular (standard) muffin pans: Cut 5-inch squares. This is ideal for most everyday muffins and cupcakes.
- For Mini muffin pans: Cut 3-4 inch squares. These smaller squares ensure the paper doesn’t overwhelm your mini treats.
