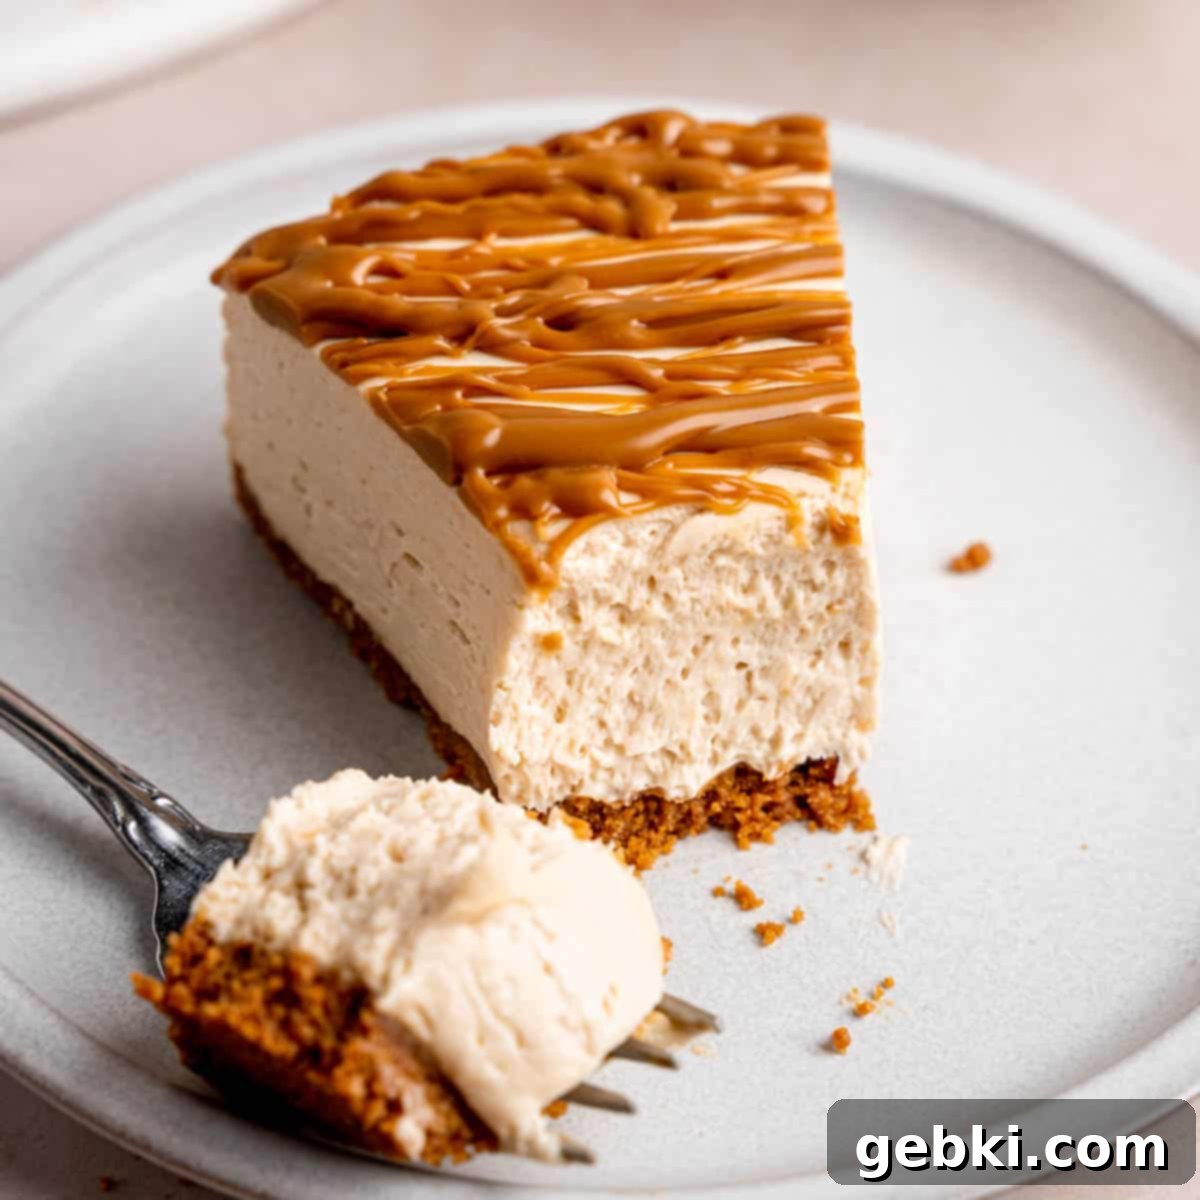
The Ultimate No-Bake Biscoff Cheesecake: Easy & Decadent Cookie Butter Delight
This No Bake Biscoff Cheesecake is a true masterpiece for dessert lovers, offering a rich and undeniably decadent experience. It’s brimming with that distinctive speculoos flavor, all built upon a delightfully crunchy Biscoff cookie crust. The smooth, creamy cheesecake filling combines luscious whipped cream, velvety cream cheese, a touch of tangy sour cream, and the irresistible warmth of creamy Biscoff spread, creating a harmonious blend of textures and tastes.

As a huge enthusiast of no-bake desserts, particularly no-bake cheesecakes (you absolutely *must* try my No Bake Strawberry Crunch Cheesecake!), this Speculoos cheesecake holds a truly special place in my heart. My love affair with Biscoff cookies and their delightful spread began years ago, and crafting this recipe was a joyous journey into maximizing that unique, spiced caramel flavor. If you share my passion for Biscoff, you’ll also adore my Cookie Butter Cookies recipe – it’s another absolute winner that captures the essence of this beloved treat!
The beauty of no-bake cheesecakes lies in their incredible simplicity and speed. You can effortlessly assemble both the satisfyingly firm Biscoff crust and the lusciously creamy filling in approximately 20 minutes, all without the need for an oven or a tricky water bath. Instead, a quick freeze for the crust and an overnight chill for the filling transform this Lotus Biscoff cheesecake into the perfect make-ahead dessert. It’s ideal for entertaining, holidays, or any time you crave a show-stopping treat with minimal effort, ensuring a stress-free dessert experience.
[feast_advanced_jump_to]
Why You’ll Adore This Easy No-Bake Biscoff Cheesecake
This no-bake Biscoff cheesecake isn’t just a dessert; it’s an experience! Here are compelling reasons why this recipe will become a cherished favorite in your kitchen:
- Effortless Preparation: Say goodbye to ovens and complicated baking steps! This simple dessert requires absolutely no baking, making it a fantastic addition to my collection of no-bake recipes. It’s perfect for warm weather or when you just want a delicious treat without turning on the oven, saving you time and energy.
- Explosion of Speculoos Flavor: Every bite is packed with the warm, spiced caramel notes of speculoos cookies. From the rich Biscoff crust to the velvety filling, the distinctive Biscoff flavor shines through, making it an irresistible treat for any cookie butter enthusiast. The deep, aromatic spices are truly captivating.
- Irresistible Textural Contrast: The crisp, buttery Biscoff cookie crust provides a delightful crunch that perfectly complements the smooth, airy creaminess of the cheesecake filling. This exquisite contrast elevates the entire dessert, offering a satisfying mouthfeel in every spoonful. You’ll find similar delightful crusts in my Pear Raspberry Buttermilk Tart and Mini Lemon Cheesecakes recipes!
- No Eggs Required: For those who prefer egg-free desserts or want a simpler recipe, this cheesecake is a dream come true. It achieves its perfect texture and richness without any eggs, simplifying the ingredient list and preparation while still delivering a luxurious result.
- Perfect Make-Ahead Dessert: Planning a party or need a dessert that’s ready when you are? This no-bake Biscoff cheesecake is ideal! Prepare it the day before, chill it overnight, and simply serve when it’s time for dessert. Its stability makes it excellent for meal prepping or entertaining.
Delving into Biscoff: Cookies and Cookie Butter Explained

Lotus Biscoff isn’t just a cookie; it’s a global phenomenon! These distinctively crunchy biscuits, originating from Belgium, are renowned for their unique, warm spiced caramel flavor. Often enjoyed with coffee or as a complimentary treat on airplanes, their popularity stems from a delightful blend of cinnamon, ginger, nutmeg, and cloves, which creates an unforgettable taste. The name “Biscoff” itself is a portmanteau of “biscuit” and “coffee,” perfectly encapsulating their traditional pairing and unique heritage.
Taking this beloved cookie a step further, the biscuits are finely ground into a smooth, irresistible spread known as cookie butter (also called Biscoff spread or speculoos spread). Much like peanuts transform into peanut butter, Biscoff cookies become this versatile, creamy delight. This spread is available in both creamy and crunchy varieties, allowing for different textural experiences and culinary applications. Both the cookies and the butter can be found in many major grocery stores worldwide, making them easily accessible for your baking adventures or simply to enjoy as a snack. It’s worth noting that other brands, like Trader Joe’s, also offer their own delicious versions of speculoos cookies and cookie butter, providing even more options for fans of this unique, comforting flavor!
Essential Ingredients for Your No-Bake Biscoff Cheesecake
Crafting this incredible no-bake Biscoff cheesecake requires a handful of key ingredients, each playing a crucial role in achieving its perfect texture and unforgettable flavor. Here’s a closer look at what you’ll need to create this decadent treat:

- Biscoff Cookies and Creamy Biscoff Spread: These are the undisputed stars of the show, infusing every layer of this cookie butter cheesecake with its signature speculoos flavor. For the crust, you’ll need one 8.8 oz package of Biscoff cookies, which will be crushed into buttery crumbs. The creamy Biscoff spread, a 14.1 oz jar of cookie butter, forms the luxurious heart of our luscious filling. If you prefer an extra textural element, feel free to substitute with crunchy cookie butter. Remember, if you plan on garnishing your cheesecake with additional whole or crushed cookies, it’s wise to grab a second package!
- Unsalted Butter: Essential for binding the cookie crumbs together to form a firm, delicious crust. Using unsalted butter allows you to control the overall saltiness of the dessert. Ensure it’s melted before mixing with the cookie crumbs.
- Cream Cheese and Sour Cream: These dairy staples are crucial for creating the rich, tangy creaminess that is characteristic of a traditional cheesecake. For the best possible results and a truly luxurious texture, always opt for full-fat block cream cheese (not the spreadable kind) and full-fat sour cream. It’s absolutely vital that your cream cheese is softened to room temperature before mixing; this ensures a perfectly smooth filling without any unwanted clumps or grainy texture.
- Heavy Whipping Cream: Once whipped to stiff peaks, this ingredient transforms into light and airy clouds, which are then gently folded into the filling. This not only lightens the density of the cheesecake but also helps it set beautifully, contributing to its melt-in-your-mouth texture. Ensure your heavy whipping cream is well-chilled before whipping for optimal volume and stability.
- Lemon Juice: A small but mighty addition, fresh lemon juice serves two important purposes. As an acid, it aids in the setting process of the cheesecake filling, helping it to firm up properly during chilling. Beyond its functional role, it also introduces a subtle, bright tang that wonderfully balances the sweetness and richness of the Biscoff, adding a layer of refreshing complexity to the flavor profile.
- Powdered Sugar: This finely milled sugar dissolves effortlessly into the cold filling, ensuring a silky-smooth and uniform consistency without any graininess. It provides the perfect level of sweetness to complement the spiced cookie butter flavor, preventing it from being overly cloying.
- Vanilla Extract: A touch of pure vanilla extract enhances all the other flavors, adding a warm, aromatic depth that makes the cheesecake even more inviting and undeniably delicious. Choose a good quality extract for the best flavor.
For a precise list of quantities and measurements, please refer to the comprehensive recipe card located at the bottom of this page. These carefully selected ingredients will ensure your no-bake Biscoff cheesecake is a resounding success!
Exciting Substitutions & Creative Variations for Your Biscoff Cheesecake
While this no-bake Biscoff cheesecake recipe is perfectly delicious as is, it also offers fantastic opportunities for customization. Feel free to experiment with these ideas to adapt it to your taste, dietary needs, or occasion:
- Make Mini Biscoff Cheesecakes: For individual servings or a charming party spread, easily transform this recipe into adorable mini cheesecakes. Simply use a standard cupcake pan lined with parchment paper liners or foil liners, press the crust mixture into each, and fill with the cheesecake mixture. Adjust chilling time as needed for smaller portions, typically 2-3 hours. These are perfect for portion control and elegant presentation.
- Swap for Crunchy Spread: If you’re a fan of extra crunch and textural intrigue, swap out the creamy Biscoff spread for its crunchy counterpart. This will introduce delightful, tiny cookie pieces throughout your cheesecake filling, adding an exciting textural dimension that many find irresistible.
- Intensify Cookie Butter Flavor: Craving an even more pronounced Biscoff punch? Fold approximately ½ cup of coarsely crushed Biscoff cookies directly into the cheesecake filling before spreading it over the crust. This ensures a burst of spiced cookie flavor in every single forkful, deepening the overall Biscoff experience.
- Biscoff and Chocolate Harmony: The warm spices of Biscoff pair beautifully with chocolate. To create this delightful combination, gently fold in about ½ cup of mini chocolate chips or finely chopped milk or dark chocolate into your cheesecake filling. You could also melt some chocolate and drizzle it artfully over the finished cheesecake for an elegant touch.
- Add a Fruit Compote Topping: While Biscoff is rich on its own, a light fruit compote can add a refreshing contrast. Pears or apples, given their compatibility with speculoos spices, would be excellent choices. A simple pear compote cooked with a hint of cinnamon and a squeeze of lemon juice would be a divine addition.
- Gluten-Free Alternative: To make this cheesecake suitable for gluten-free diets, replace the Biscoff cookies in the crust with a gluten-free graham cracker alternative or a certified gluten-free speculoos-style cookie. Ensure that any cookie butter spread used is also certified gluten-free, as not all brands are.
Please note: This recipe has been thoroughly tested with the original ingredients as listed. Should you choose to replace or add any ingredients, we’d love to hear how your creation turned out! Kindly share your results and any helpful tips in the comments section below to assist fellow bakers and enthusiasts.
Mastering Your Springform Pan for Perfect Cheesecakes
A springform pan is an absolute game-changer when it comes to preparing and serving cheesecakes, especially delicate no-bake varieties. Its unique design, featuring a removable bottom and sides that clamp open, makes serving delicate desserts incredibly easy without the risk of damaging your beautiful creation. Here’s how to use it for flawless results every time:
First, for a seamless and effortless release, I highly recommend **lining the bottom of your springform pan with parchment paper**. To do this, simply place a sheet of parchment paper flat on the bottom disc of the pan. Then, carefully align the sides of the springform pan over the parchment-covered bottom and firmly lock the clamp. Trim any excess parchment paper that extends awkwardly beyond the pan’s edges. This simple but effective trick will allow you to effortlessly slide the finished cheesecake off the metal base and onto your serving plate without any sticking, tearing, or breakage, ensuring a pristine presentation.
When your Biscoff cheesecake is perfectly chilled and ready to serve, **removing it from the pan requires a gentle touch and a bit of care**. Begin by carefully running a thin, sharp knife (a paring knife works well) around the inner edge of the cheesecake, separating the chilled filling from the sides of the pan. This step is crucial to prevent the sides from sticking and tearing the cheesecake’s edges. Once loosened, release the springform clamp and lift the sides straight up to remove them completely. With the sides removed, you can then gently slide the entire cheesecake, still on its parchment paper base, onto your chosen serving platter. For an even more professional presentation, you can carefully slide a large, thin spatula between the cheesecake and the parchment to remove the paper as well, but it’s often easier and perfectly acceptable to leave it on and slice from there.
Step-by-Step Guide: Crafting Your No-Bake Biscoff Cheesecake
Follow these easy, detailed instructions to create a show-stopping Biscoff cheesecake that will impress everyone with its creamy texture and rich flavor:
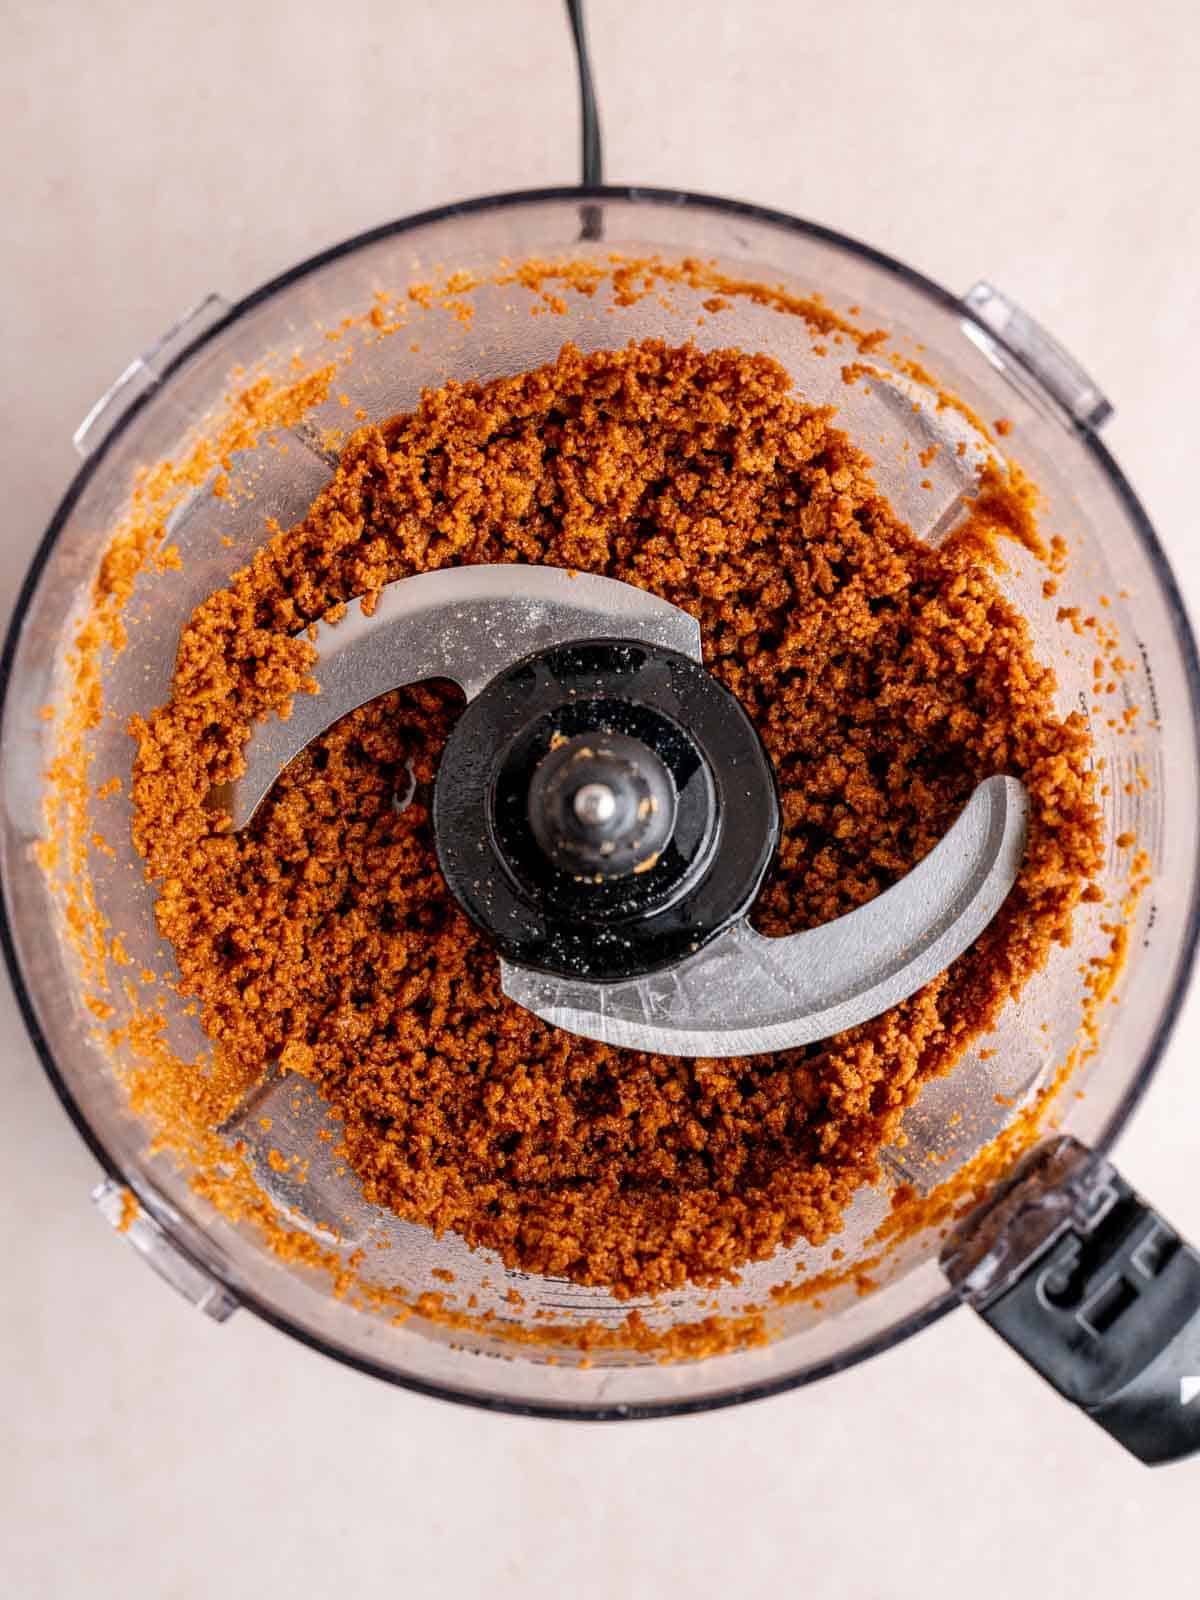
Step 1: Prepare the Biscoff Crust. Begin by adding the Biscoff cookies and melted unsalted butter to a food processor. Pulse the ingredients until the mixture is finely ground and resembles moist, wet sand. It’s crucial that all cookie pieces are uniform to ensure a consistent and sturdy crust. If you don’t own a food processor, simply place the cookies in a large, sturdy zip-top bag and crush them thoroughly with a rolling pin or the bottom of a heavy pan, then mix them with the melted butter in a bowl until fully combined.
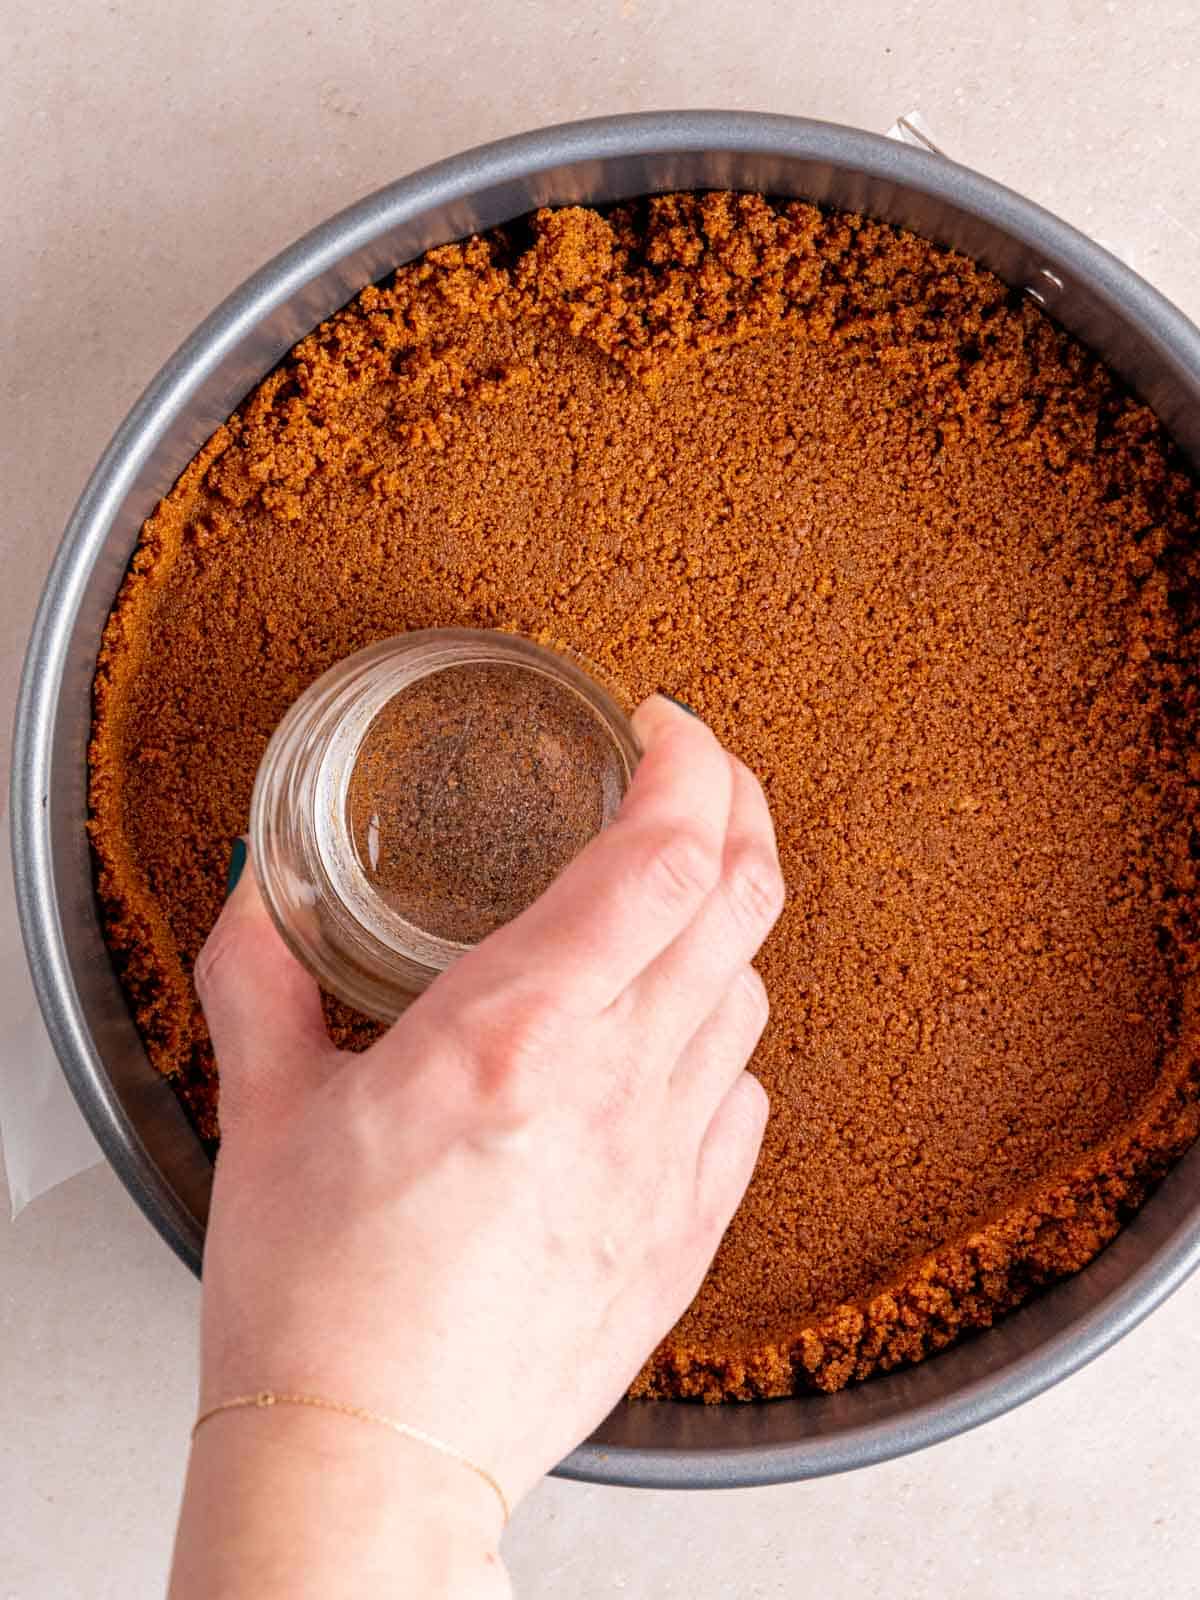
Step 2: Form and Chill the Crust. Transfer the crumb mixture into your meticulously prepared 9-inch springform pan. Using the flat bottom of a glass or a measuring cup, firmly and evenly press the crumbs into the bottom and slightly up the sides of the pan. This creates a compact and sturdy base for your cheesecake, preventing it from crumbling when sliced. Once formed, place the crust in the freezer for at least 15-20 minutes to firm up while you prepare the filling. This crucial step helps prevent the crust from becoming soggy.
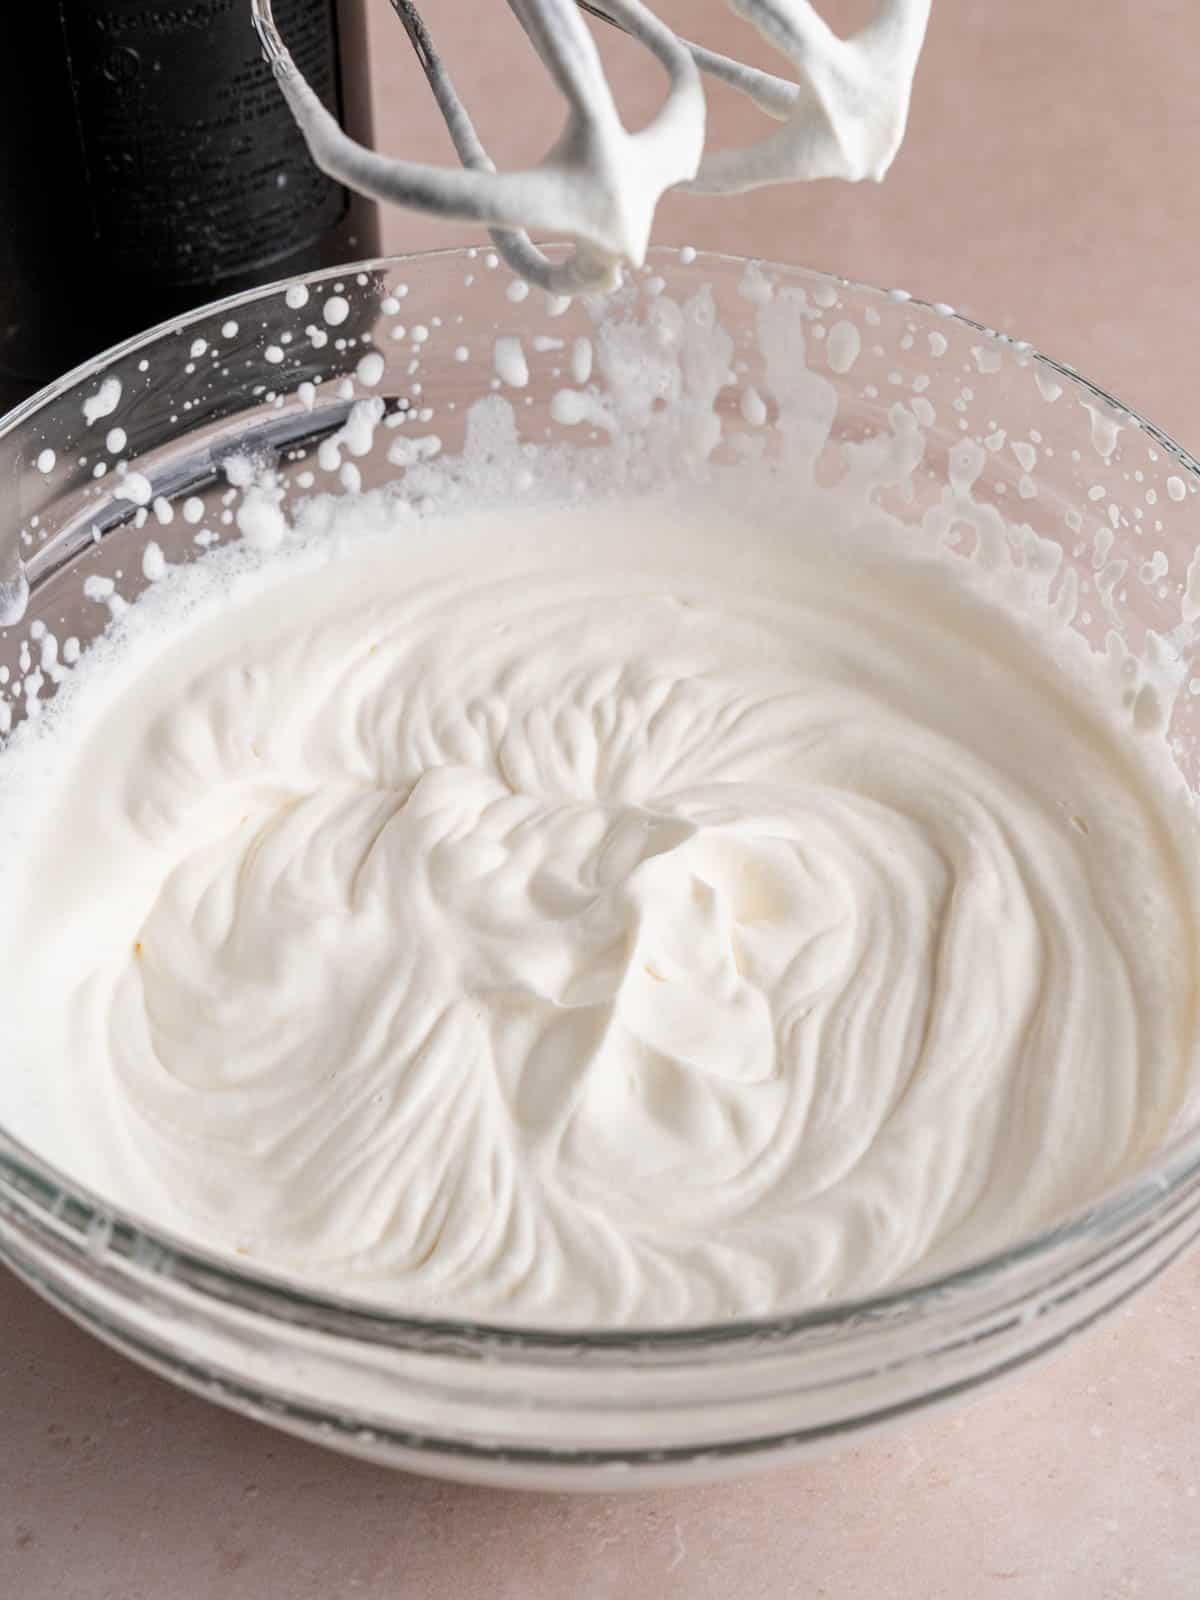
Step 3: Whip the Heavy Cream. In a clean, cold mixing bowl, using an electric mixer (highly recommended for speed and effectiveness) or a sturdy hand whisk, whip the heavy cream until it forms stiff peaks. This means the cream will be thick and hold its shape firmly when you lift the whisk. Ensure your cream is very cold for the best results and maximum volume.
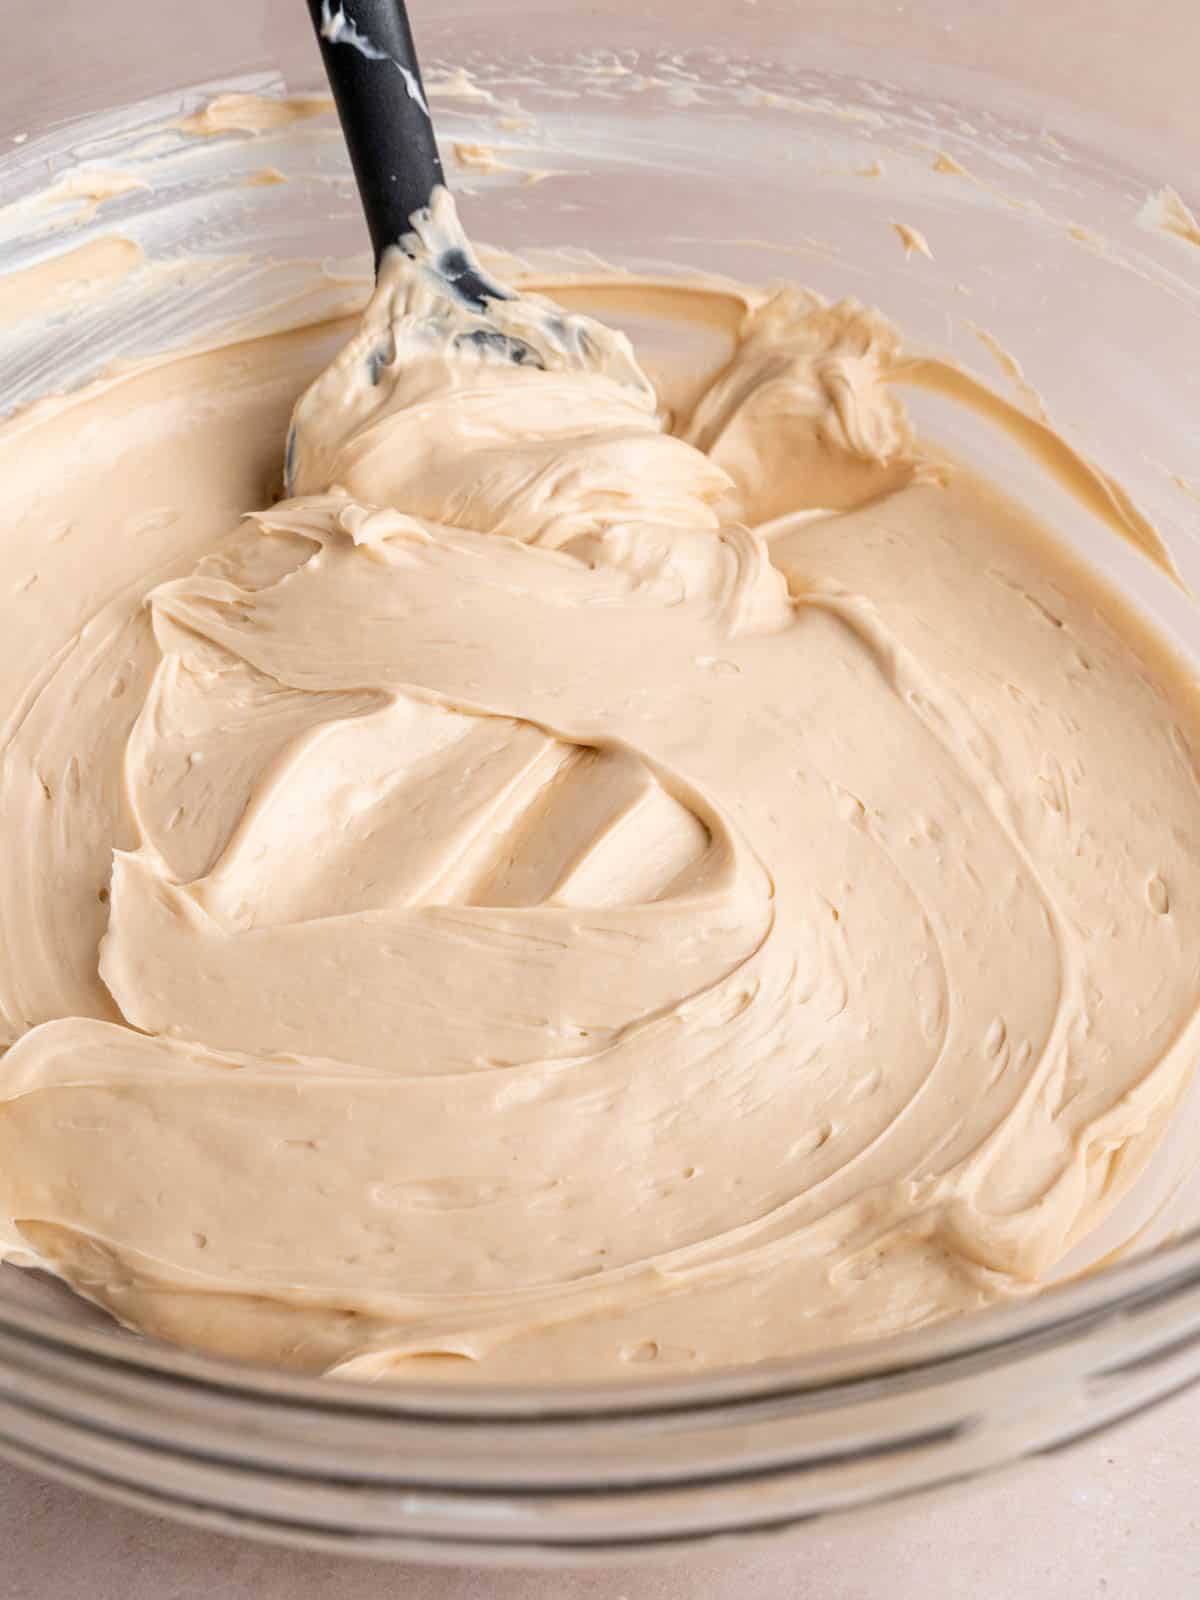
Step 4: Prepare the Cream Cheese Mixture. In another large mixing bowl, using an electric mixer or whisk, beat the softened cream cheese until it is perfectly smooth and utterly free of any lumps. Then, gradually mix in the sour cream, fresh lemon juice, powdered sugar, and vanilla extract until well combined and creamy. Finally, incorporate the luscious Biscoff spread, ensuring it’s thoroughly blended into the mixture for an even flavor distribution.

Step 5: Fold in the Whipped Cream. With great care and a light hand, gently fold the whipped cream into the Biscoff cream cheese mixture. Use a spatula and a sweeping motion, folding just until the ingredients are fully incorporated and no streaks of plain cream cheese or whipped cream remain. This step is crucial, so be careful not to overmix, as this can easily deflate the whipped cream and result in a denser, less airy cheesecake texture. The goal is a light, cloud-like consistency.

Step 6: Assemble and Chill. Spoon the irresistible cheesecake filling over the now-chilled and firm Biscoff cookie crust. Use a spatula to gently spread the filling evenly across the pan, creating a smooth and appealing top surface. Cover the springform pan tightly with plastic wrap to prevent any odors from permeating and transfer it to the refrigerator. For the best firm texture and most satisfying flavor, allow the cheesecake to chill overnight, or for a minimum of 6-8 hours. Patience is key here for a truly magnificent result that slices beautifully!
Pro Tips for Your Best No-Bake Biscoff Cheesecake
Achieve cheesecake perfection with these invaluable tips from a seasoned baker, ensuring your no-bake Biscoff cheesecake is a showstopper every time:
- Optimal Whipping Cream: Always use **cold, high-fat heavy whipping cream** for the best results. Cold cream whips up faster, holds its volume better, and contributes a superior richness to your cheesecake filling. For an extra boost, chill your mixing bowl and whisk attachments in the freezer for 10-15 minutes before whipping.
- No Food Processor? No Problem! If you don’t have a food processor, you can still create a perfect Biscoff crust. Place your Biscoff cookies in a large, sturdy zip-top bag and crush them thoroughly with a rolling pin or the bottom of a heavy pan until fine, even crumbs are achieved. Then, transfer them to a bowl and mix them with the melted butter until completely combined and resembling wet sand.
- Softened Cream Cheese is Key: For a lump-free, silky-smooth cheesecake filling, ensure your cream cheese is at true room temperature. Take it out of the refrigerator at least an hour or two before you plan to mix it. If you’re short on time, you can carefully soften it in the microwave for 10-15 second intervals (without melting it), but the natural softening method is always best.
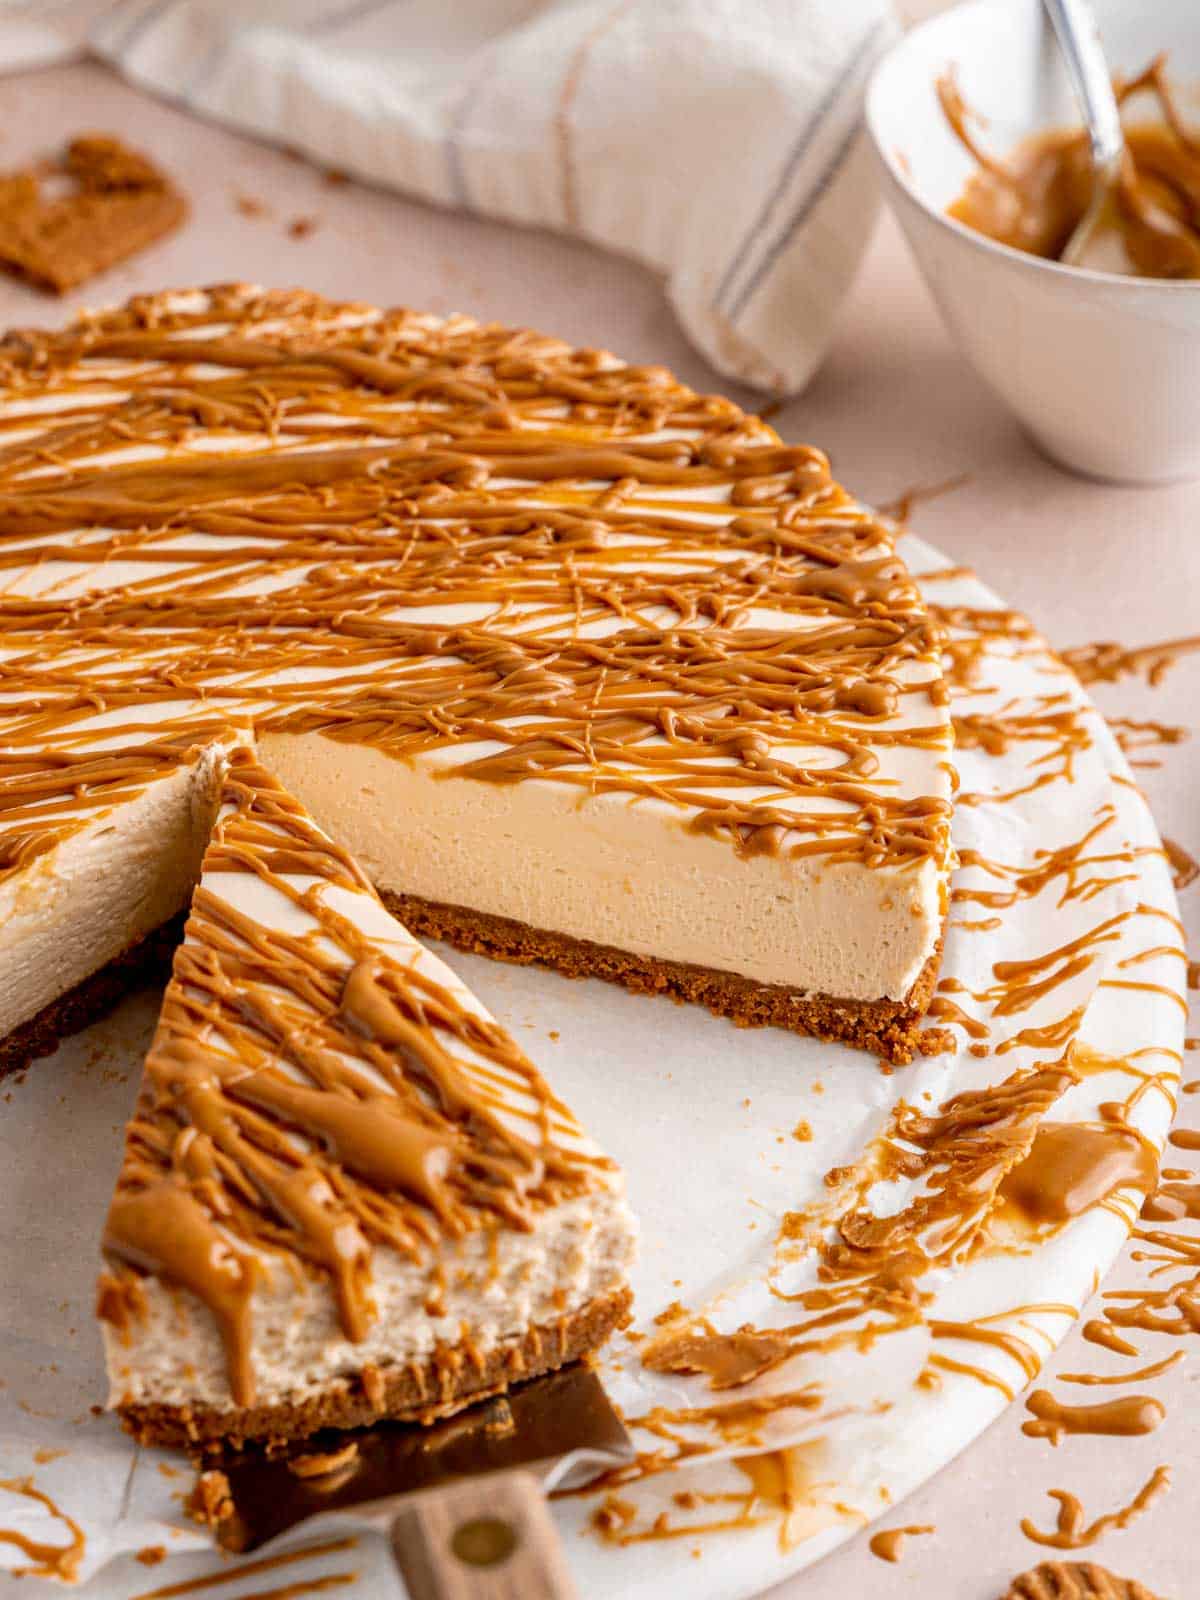
- Decorate with Flair: Elevate the presentation of your Biscoff cheesecake! A simple yet elegant touch is to drizzle melted cookie butter (gently warmed in the microwave) over the top just before serving. You could also pipe swirls of extra whipped cream around the edges, sprinkle additional crushed Biscoff cookies, or even place whole cookies artfully on top for a truly professional and inviting finish.
- Clean Slices Every Time: To get beautiful, clean slices, especially when serving a rich, creamy cheesecake, use a sharp, thin-bladed knife. For the cleanest cuts, run the knife under hot water, wipe it clean, and make each slice with a single, smooth motion. Repeat this process (warm and wipe) between each slice to prevent sticking and dragging, resulting in picture-perfect portions.
- Avoid Overmixing the Filling: Once the whipped cream is gently folded into the cream cheese mixture, mix just until combined. Overmixing can deflate the air incorporated by the whipped cream, leading to a denser, less airy cheesecake texture. Gentle folding preserves the desired light and mousse-like consistency.
Frequently Asked Questions About No-Bake Biscoff Cheesecake
Biscoff cookies and spread are famous for their unique and incredibly addictive flavor profile. Imagine a rich, caramelized sugar taste with a distinct, warm blend of spices, primarily cinnamon, but also prominent hints of ginger, nutmeg, and cloves. It’s often described as tasting like a gingersnap cookie or spiced shortbread, but with its own unique charm and a surprisingly smooth finish. It’s not overly sweet, making it wonderfully balanced and versatile in desserts.
Absolutely not! This recipe is specifically formulated as a “no-bake” cheesecake. Unlike traditional baked cheesecakes, which rely on eggs for structure and are cooked in an oven, this recipe does not contain eggs and utilizes whipped cream to achieve its light, airy, and creamy texture that sets when chilled. Attempting to bake this no-bake cheesecake would result in a runny, oily, and completely different (and likely unpleasant) outcome, as the ingredients are not designed to withstand oven heat or achieve the desired firm custard-like consistency.
The primary difference lies in texture and preparation. Baked cheesecakes are typically denser, richer, and have a firmer, custardy texture, often made with eggs and baked in a water bath for even cooking. No-bake cheesecakes, like this Biscoff version, are much lighter, creamier, and have a delightful mousse-like consistency. They achieve their set structure solely through refrigeration, relying on ingredients like cream cheese and heavy cream (and sometimes gelatin, though not in this particular recipe) to firm up. The preparation is also significantly quicker and simpler, as it bypasses the oven entirely, making it less prone to cracks and overbaking.
For optimal results, I strongly recommend refrigerating your no-bake Biscoff cheesecake overnight. This extended chilling period allows the flavors to meld beautifully and, more importantly, ensures the filling has ample time to firm up completely, making it easier to slice into clean, picture-perfect portions. While it can be consumed after a minimum of 4-6 hours of chilling, it will be extra creamy and might be a bit too soft to slice neatly without squishing. For the best presentation and firmest, most satisfying texture, overnight chilling is definitely the way to go.
While the core cheesecake filling is naturally gluten-free, the Biscoff cookies and Biscoff spread inherently contain wheat, meaning they are not gluten-free. To make this recipe suitable for those with gluten sensitivities, you would need to substitute the Biscoff cookies for a gluten-free speculoos-style cookie or another gluten-free graham cracker alternative for the crust. Additionally, ensure that any cookie butter spread used is specifically certified gluten-free, as not all brands offer this. Always double-check ingredient labels carefully if dietary restrictions are a concern.
For the richest flavor, ideal creaminess, and best setting capabilities in a no-bake cheesecake, it’s absolutely essential to use full-fat block cream cheese, not the spreadable variety that comes in tubs. Spreadable cream cheese often has a higher water content and won’t yield the same firm, luxurious texture needed for a stable no-bake cheesecake. Furthermore, ensure your chosen cream cheese is softened to true room temperature before you begin mixing to guarantee a perfectly smooth, lump-free filling.
Storage & Make-Ahead Tips for Your Biscoff Cheesecake
One of the many benefits of this delightful no-bake Biscoff cheesecake is its excellent storage capabilities, making it a fantastic option for preparing in advance for parties or simply to enjoy throughout the week. Here’s how to ensure your dessert stays fresh and delicious:
Refrigerator Storage
Any leftover slices of this delectable no-bake Biscoff cheesecake can be kept fresh in an airtight container in the refrigerator for up to 4 days. To prevent the cheesecake from absorbing other odors in the fridge and to maintain its creamy texture, it’s a good idea to press a piece of plastic wrap directly onto the surface of any cut slices before sealing the container. This simple trick also helps to prevent the cheesecake from drying out and maintains its appealing appearance.
Freezing Instructions
This cheesecake freezes beautifully, allowing you to enjoy it weeks later! For longer storage, you can freeze individual slices or the entire cheesecake (if uncut) in an airtight container for up to 1 month. To freeze a whole cheesecake, ensure it’s fully chilled and firm, then wrap it tightly in several layers of plastic wrap, followed by a layer of aluminum foil to prevent freezer burn. For individual slices, wrap each piece separately before arranging them in an airtight freezer-safe container. When you’re ready to enjoy, simply let them thaw gradually in the refrigerator for several hours or overnight. This makes it an ideal dessert to have on hand for unexpected guests or future cravings, offering convenience without compromising on taste!
More Irresistible Recipes You’ll Love
- Cookie Butter Cookies
- Tim Tam Cheesecake
- No Bake Mini Lemon Cheesecakes
Did you create this amazing dessert?
Leave a ⭐️ review below and tag @brokenovenbaking on Instagram & Facebook! We’d love to see your creations and hear your thoughts!
📖 Recipe

Creamy No Bake Biscoff Cheesecake
Kayla Burton
