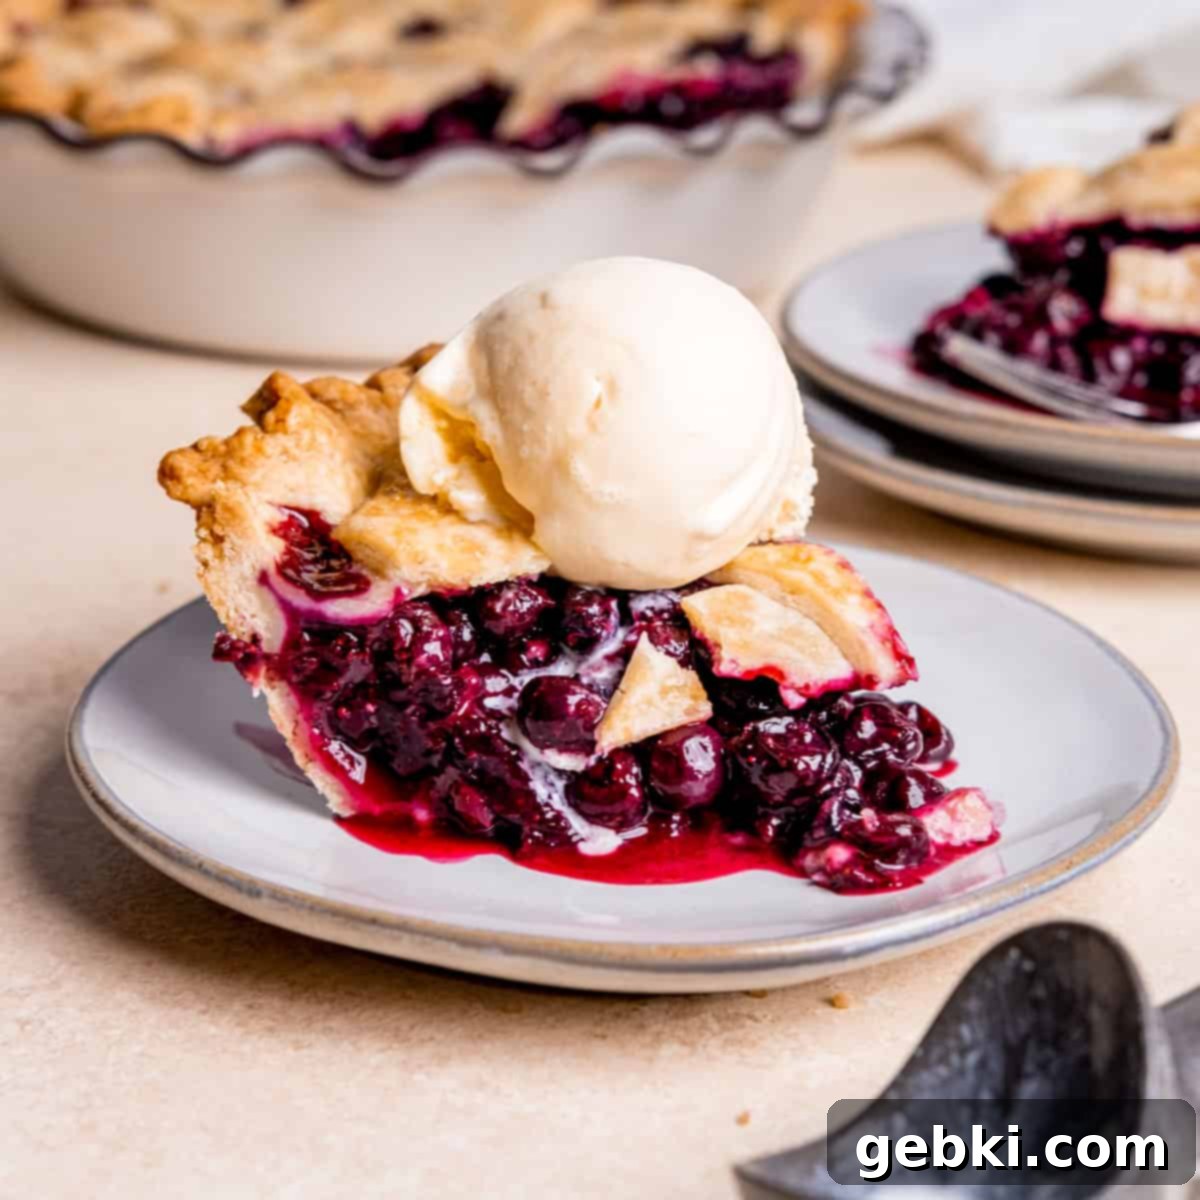
Easy Spiced Blueberry Pie: The Ultimate Recipe for a Flavorful Dessert
Prepare to delight your taste buds with this incredibly easy Spiced Blueberry Pie, a dessert bursting with an explosion of flavors in every single bite! While it’s undeniably a quintessential summer bake, much like our beloved Lemon Blueberry Blondies, its deliciousness isn’t confined to warm weather. Thanks to the versatility of frozen blueberries, you can whip up this comforting treat any time the craving strikes. All you need are a few basic tools – a pie crust (whether you prefer homemade or store-bought), a sturdy pie dish, and a mixing bowl. It’s truly a quick project to assemble, and whether you opt for a simple top crust or get creative with a decorative lattice design, the result will always be absolutely amazing.
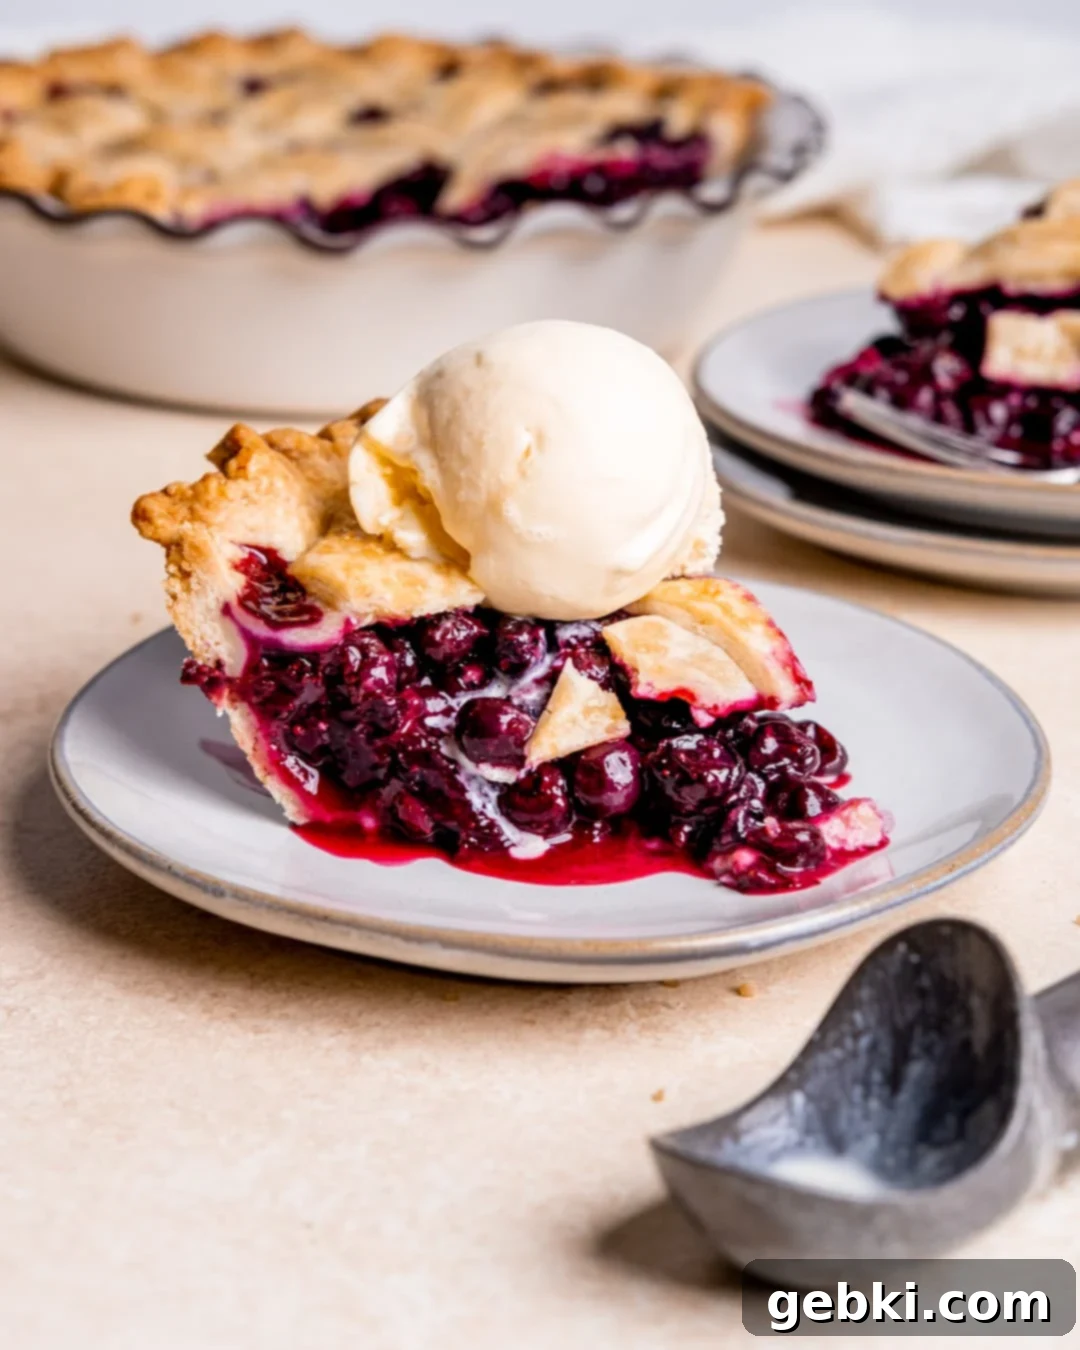
The Joy of Blueberry Picking and Fresh Flavors
There’s something truly magical about picking your own wild blueberries. My first experience in 2020 was so delightful that it quickly became a cherished summer tradition. Last year, I managed to gather almost two full buckets of these tiny, flavor-packed gems! Blueberry picking offers more than just a harvest; it’s an opportunity to embrace mindfulness and see things from a fresh perspective. Often, the ripest berries are hidden beneath leaves or nestled deep within the bush, requiring you to move branches and observe from different angles. It’s a surprisingly fun and incredibly calming activity that connects you with nature and the ingredients you’re about to transform into something wonderful. Using fresh-picked berries elevates this pie to an even higher level, but as mentioned, frozen ones are a fantastic alternative.
If you’re looking for other delightful and simple summer blueberry desserts, be sure to explore my Blueberry Peach Crisp recipe or my elegant Mixed Berry Galette!
Don’t miss out on more fruity recipes that you’ll absolutely adore!
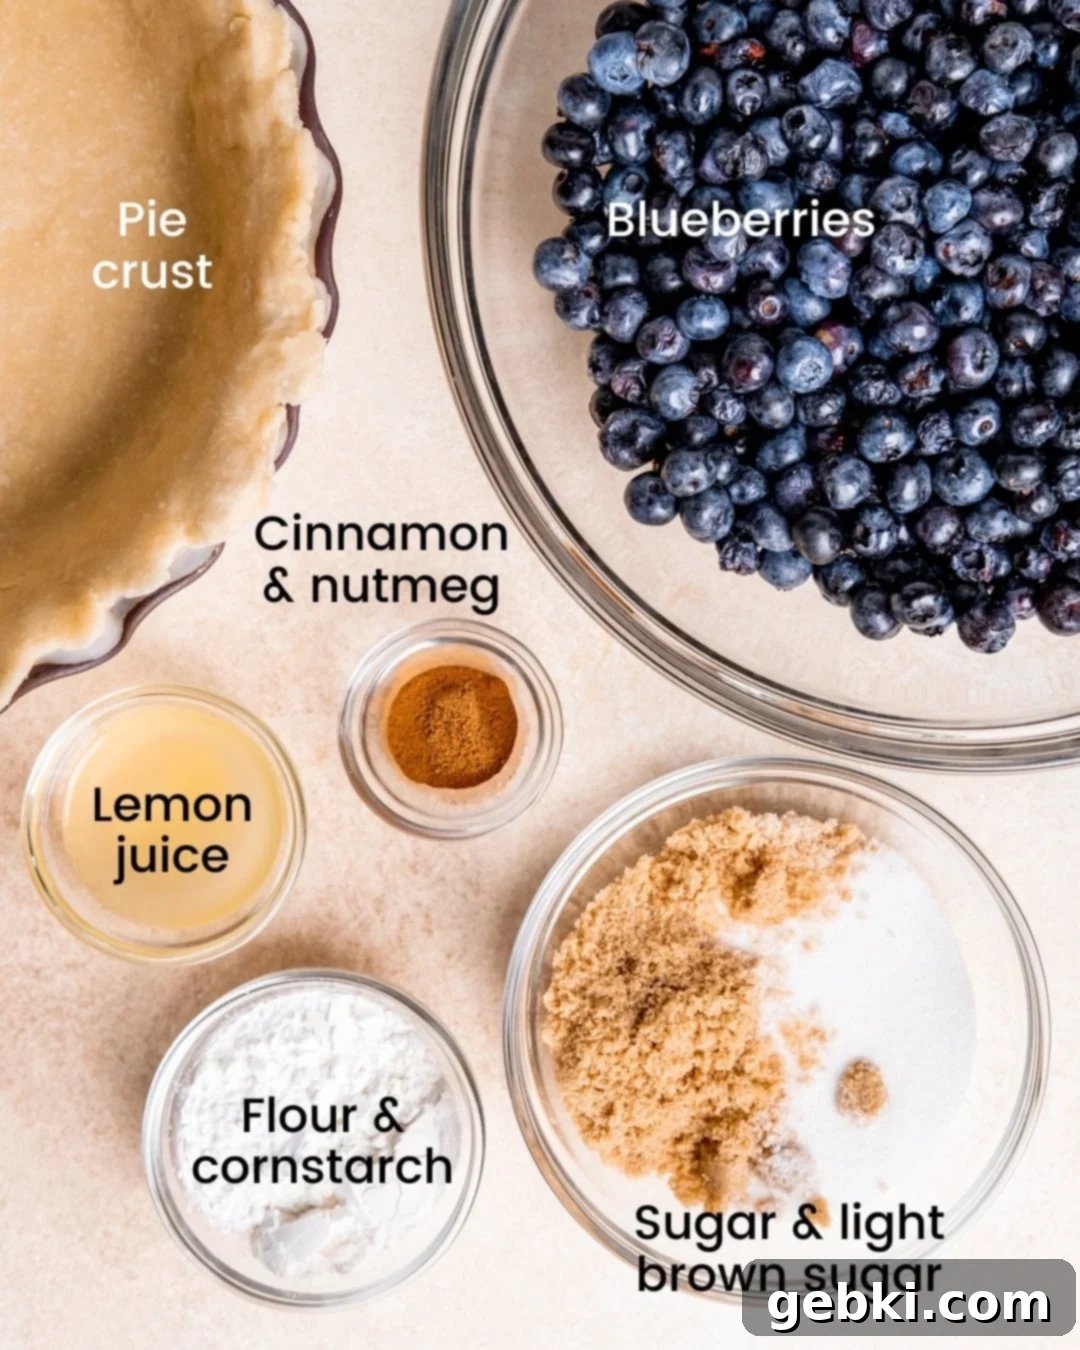
Crafting the Perfect Spiced Blueberry Pie Filling
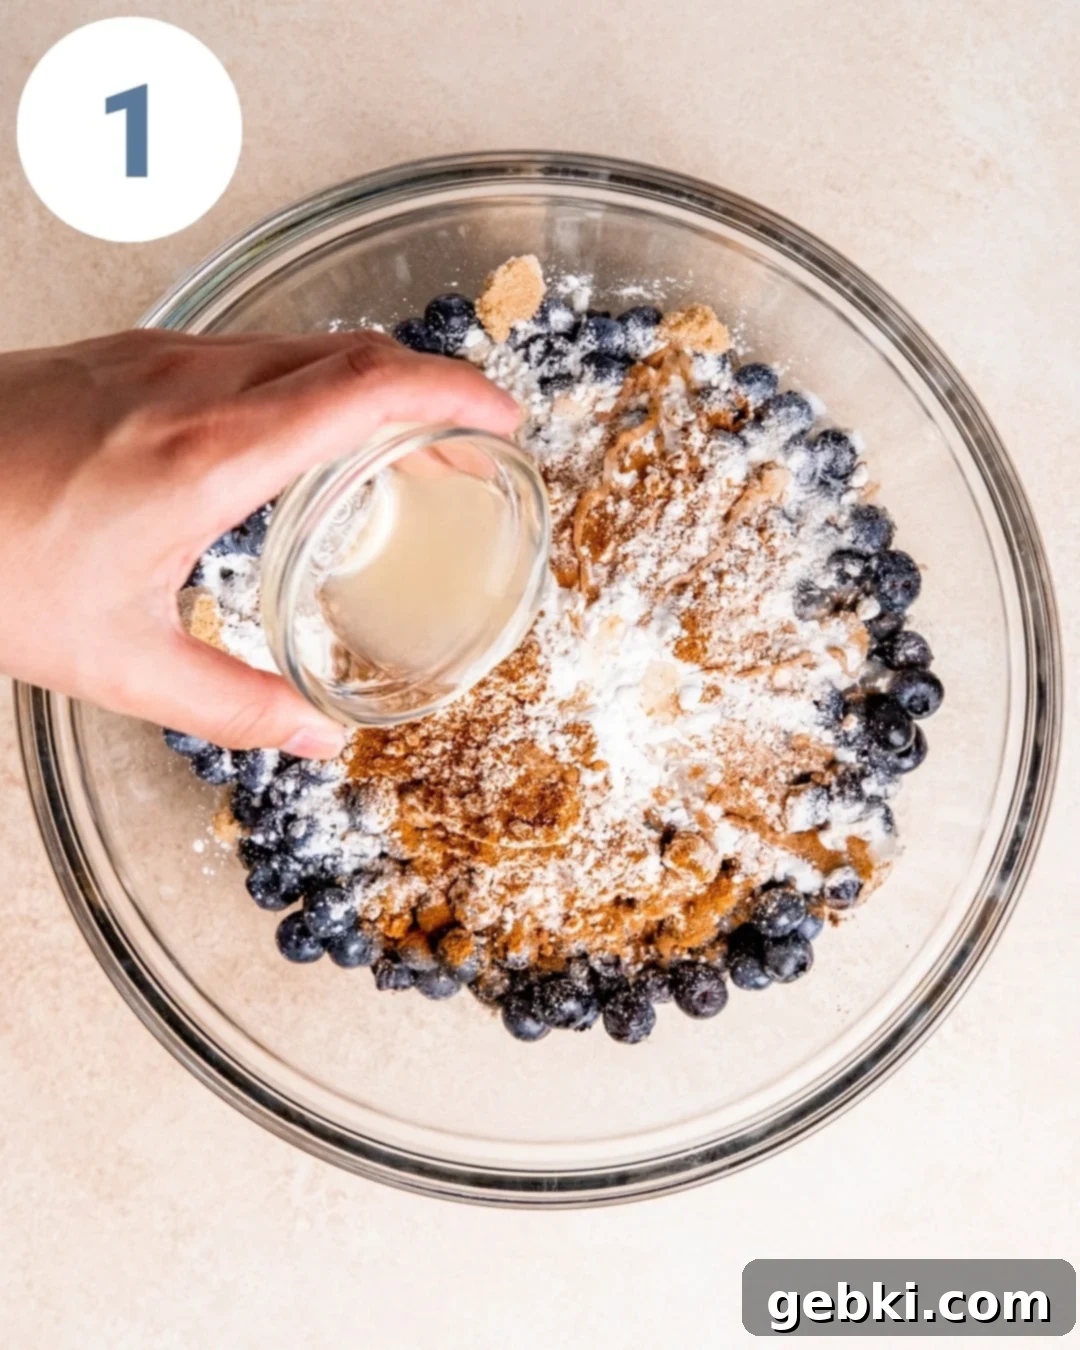
The heart of this pie is its incredibly simple yet deeply flavorful filling. To create it, you’ll simply combine the star of the show – fresh or frozen blueberries (no need to thaw if frozen!) – with a blend of granulated sugar, brown sugar, a hint of zesty lemon juice, fragrant cinnamon, a dash of warm nutmeg, and the thickening power of all-purpose flour and cornstarch. A quick mix with a spatula in a large bowl is all it takes. Then, let this vibrant mixture rest while you prepare your pie crust. This short resting period allows the flavors to meld beautifully, creating a more harmonious and complex taste profile when baked.
The beauty of this spiced blueberry pie recipe lies in its adaptability. Whether you have access to peak-season fresh blueberries or rely on the convenience of frozen ones, the pie will turn out perfectly. The only element that might present a slight challenge for some bakers is the pie crust itself. While a good quality store-bought crust is absolutely acceptable and makes this recipe even quicker, many home bakers find joy in crafting a homemade crust or mastering the art of the lattice top. If you’re eager to try your hand at either, I’m here to guide you through my proven techniques for success.
Mastering the Art of the Lattice Pie Crust
A lattice pie crust, with its beautiful woven pattern, might appear daunting at first glance. However, I promise you, it’s actually quite achievable! In my experience, perfecting the crimped edges can be the trickier part. But fear not, I’m going to walk you through both processes step-by-step and share my not-so-secret key to achieving a truly spectacular pie crust every time.
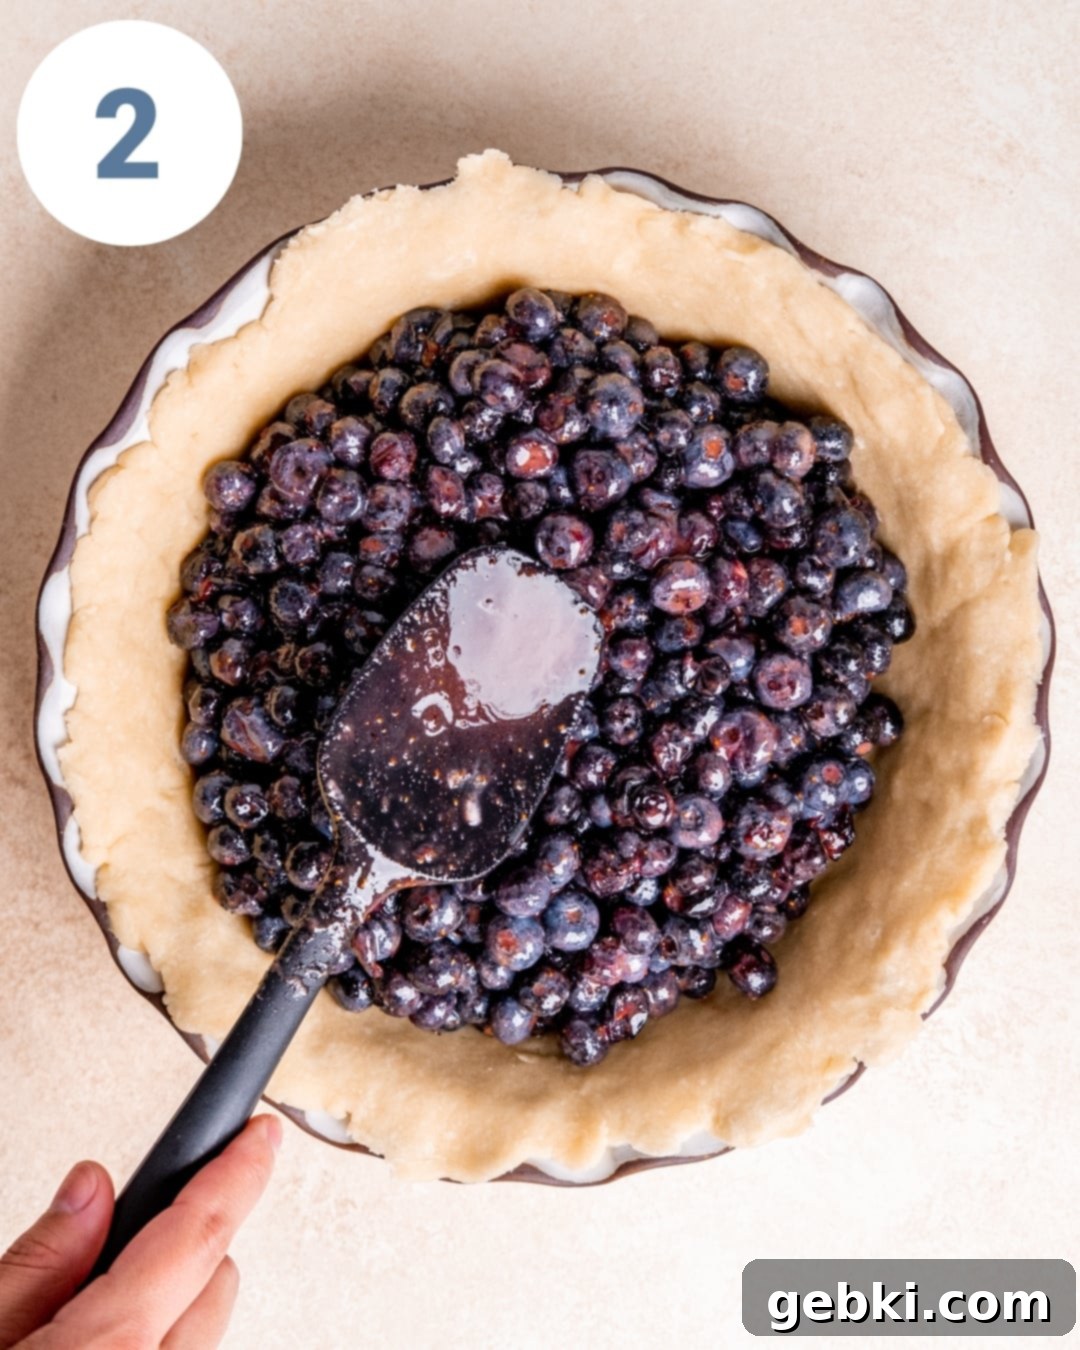
Before we dive into the top crust, it’s crucial to ensure your bottom pie crust is properly seated. It should fit snugly against your pie dish, extending to (or almost to) the very edges, as demonstrated in photo #2 above. This provides a stable foundation for your delicious filling and the decorative top.
The Secret to a Flaky Crust: Keep It Cold!
Here’s the #1 secret and key to a truly exceptional, flaky pie crust: **cold dough!** This isn’t just a suggestion; it’s a golden rule. The dough should remain cold at every single stage of the process, from mixing to baking. Cold butter in the dough creates steam during baking, which separates the layers of dough, resulting in that coveted flaky texture.
My first practical tip for this is to use a pie dough recipe that allows you to use your stand mixer, or at least one that minimizes handling with your warm hands. The less direct contact, the better! I often double a reliable recipe like this basic pie dough recipe and then divide it in half for the top and bottom crusts. After rolling out and placing the bottom crust into your pie dish, immediately wrap the remaining top dough in plastic wrap and pop it into the freezer. Then, transfer the pie dish with the bottom crust to the freezer as well, while you focus on rolling out the top crust. The takeaway? If you’re not actively working with the dough, keep it chilling in the freezer or refrigerator. This intermittent chilling prevents the butter from melting and ensures your crust stays beautifully flaky.
Weaving Your Lattice: Step-by-Step
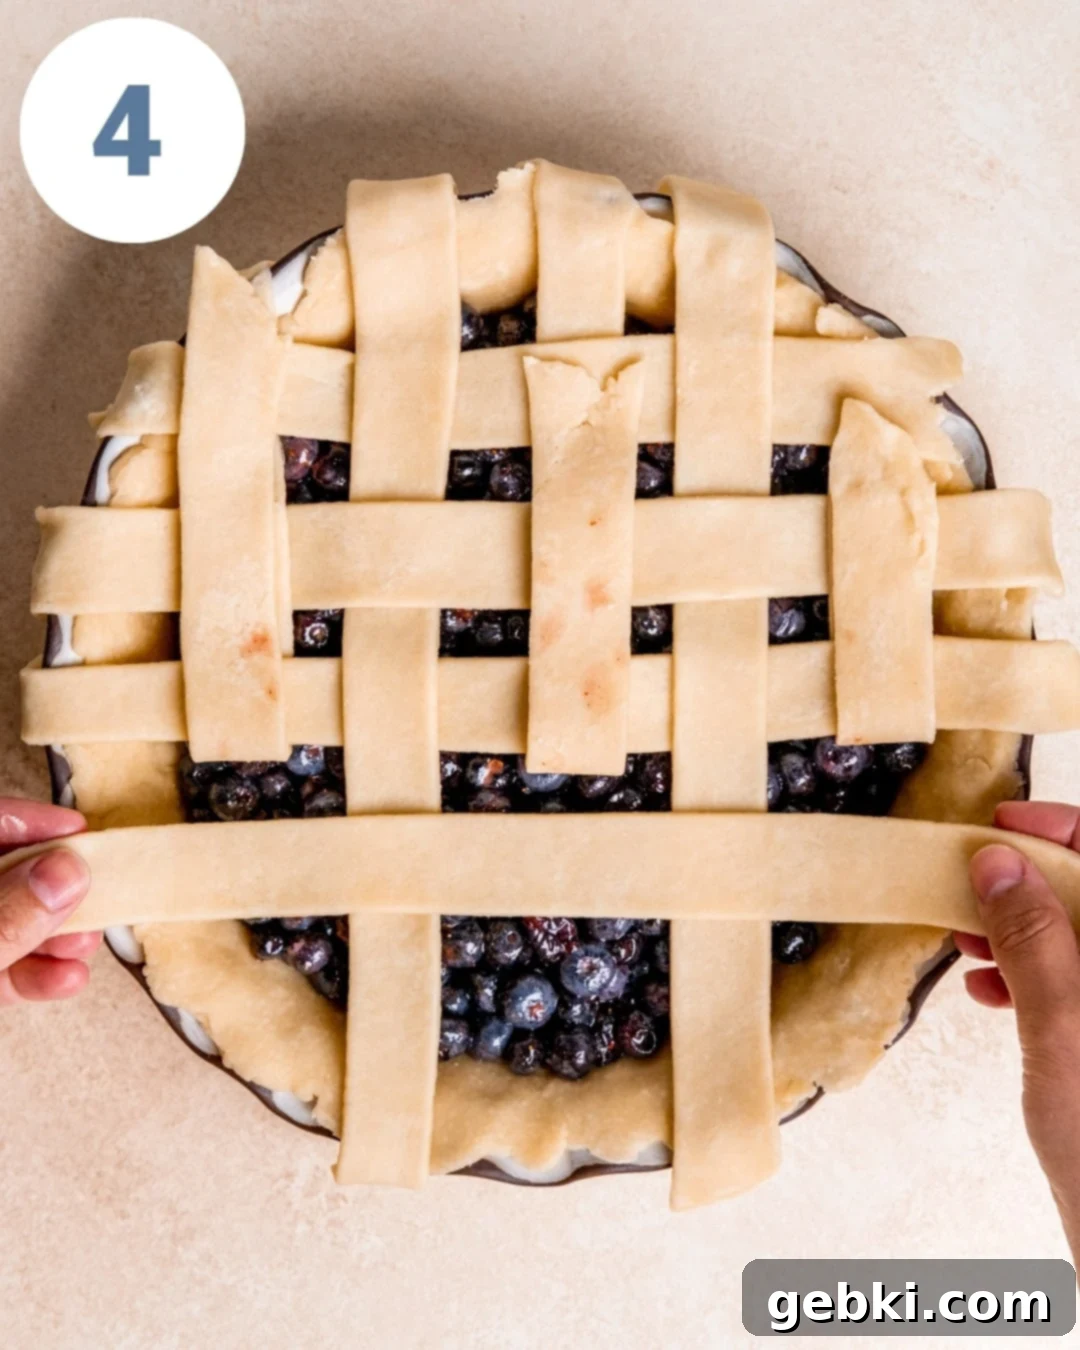
Once your top dough is perfectly rolled out, begin by trimming about half an inch off the sides to create straight, even strips. Aim for about 10 equal strips for a standard 9-inch pie.
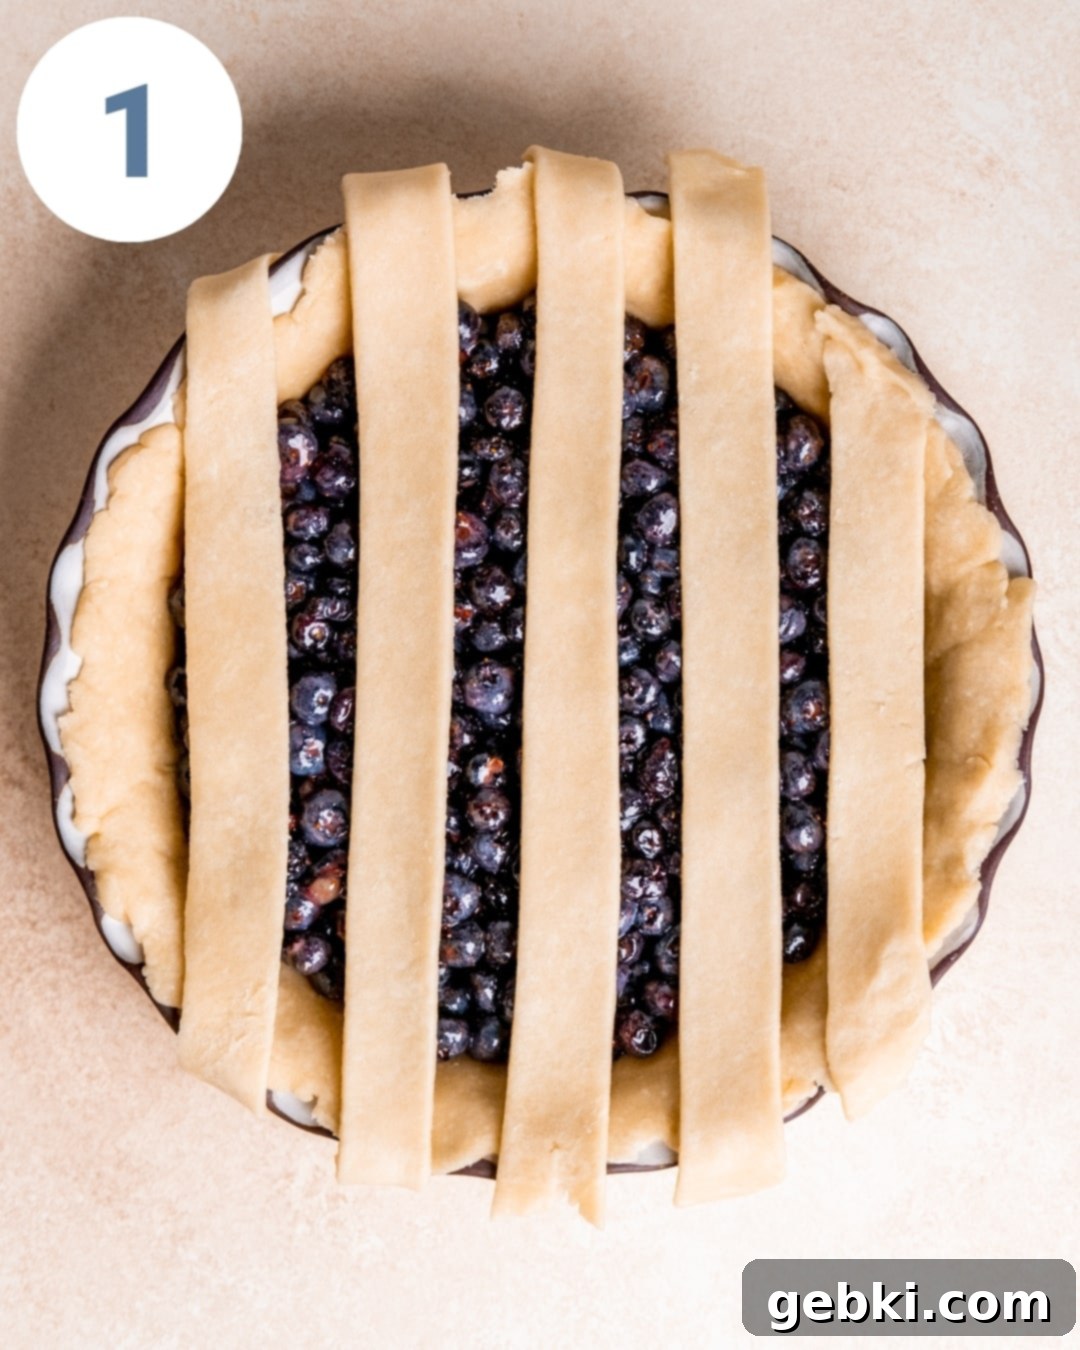
- **Lay the First Vertical Strips:** Place five of your dough strips vertically and evenly spaced over your blueberry filling, just like you see in photo #1 above.
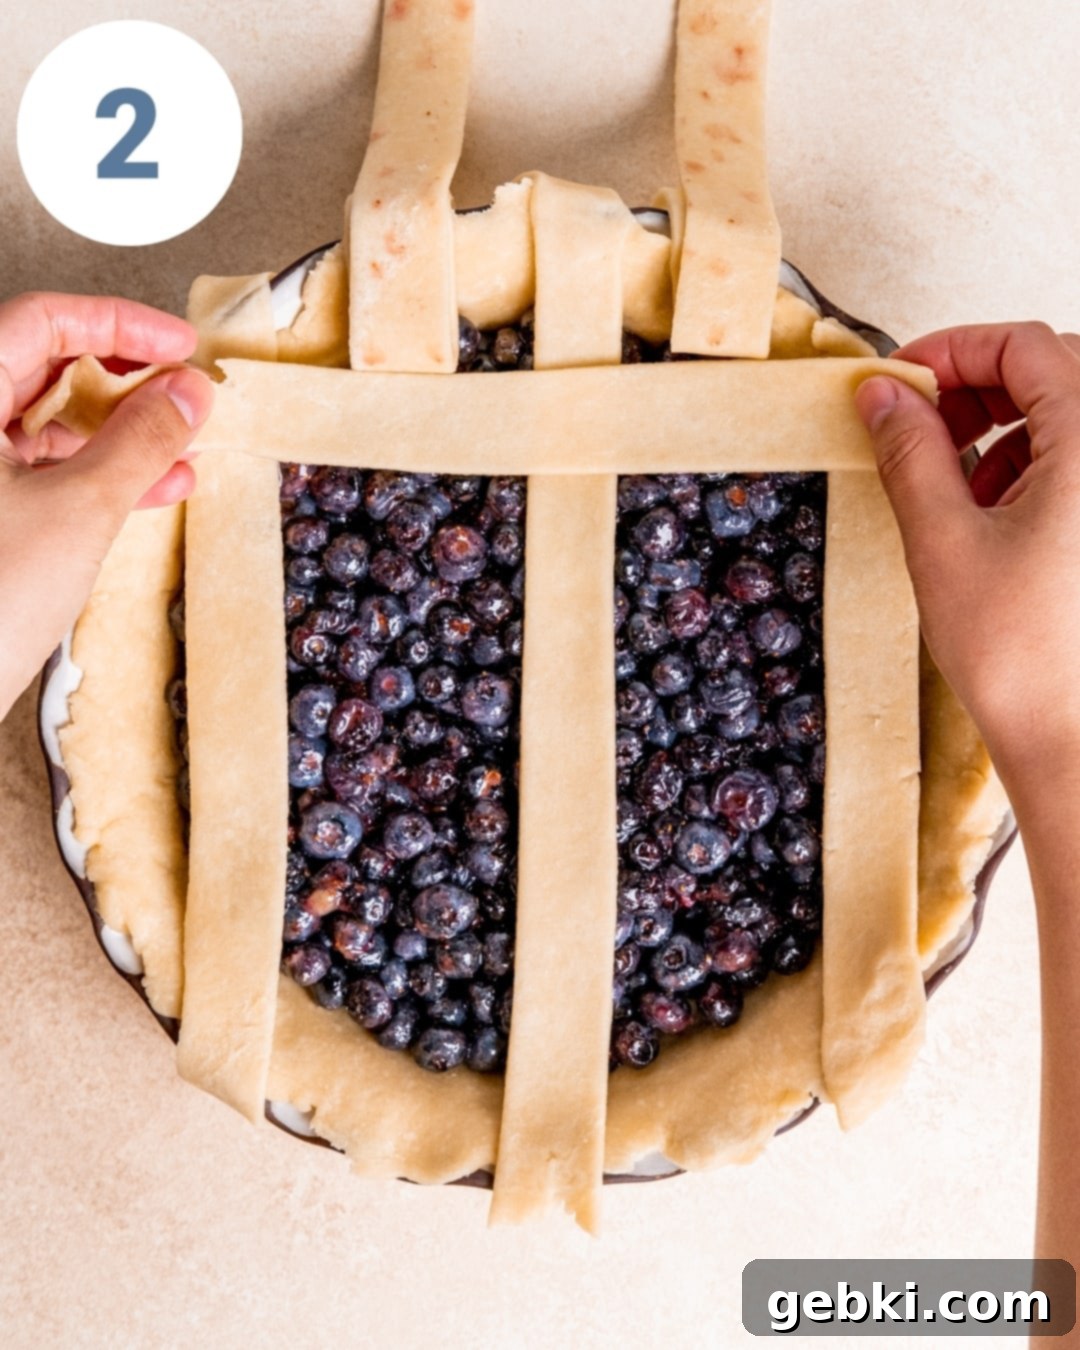
- **Fold and Weave:** Take strips #2 and #4 (the second and fourth vertical strips) and gently fold them back towards the center, exposing the filling underneath.
- **Place First Horizontal Strip:** Now, lay one of your remaining strips horizontally over the exposed vertical strips (#1, #3, and #5).
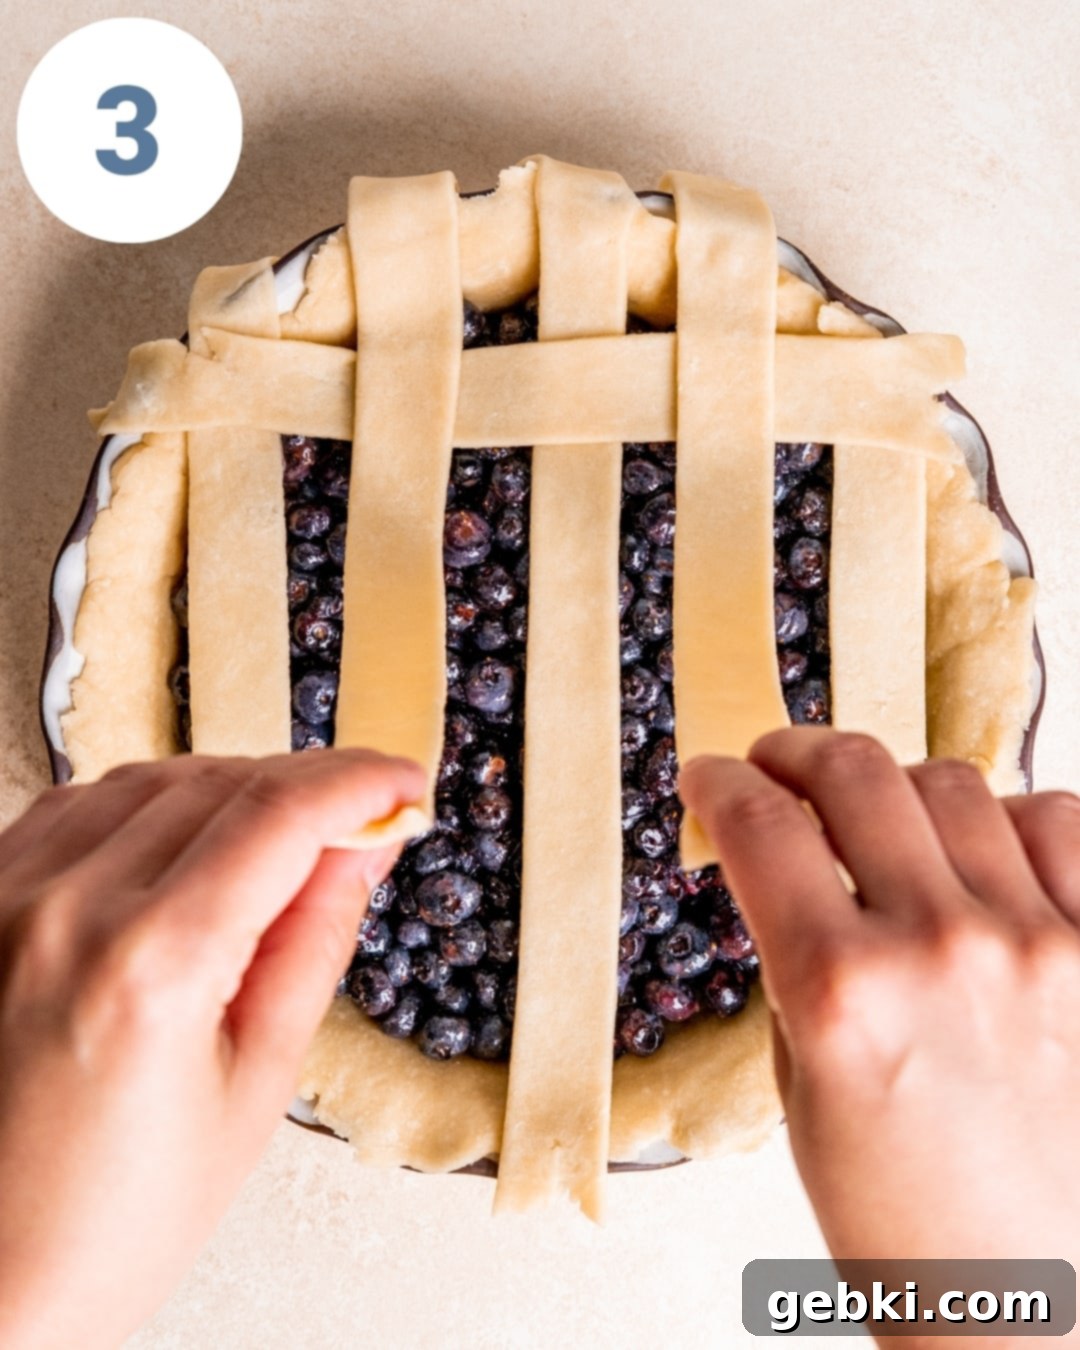
- **Unfold and Lock:** Carefully fold strips #2 and #4 back down over the newly placed horizontal strip, securing it in place (as shown in photo #3).
- **Continue Alternating:** Repeat this alternating process: fold back the other set of vertical strips (strips #1, #3, and #5), lay down another horizontal strip, and then fold the vertical strips back over. Continue until all your strips are woven into a beautiful lattice pattern.
Remember, maintaining a cold crust is paramount! If at any point the dough becomes too warm and difficult to work with, don’t hesitate to place the entire pie or even just the individual strips back into the freezer for a few minutes. A short chill break will work wonders and ensure a crisp, flaky result.
Finishing Touches: Crimping and Chilling
Now for the crimping – the artistic edge that truly elevates your pie!
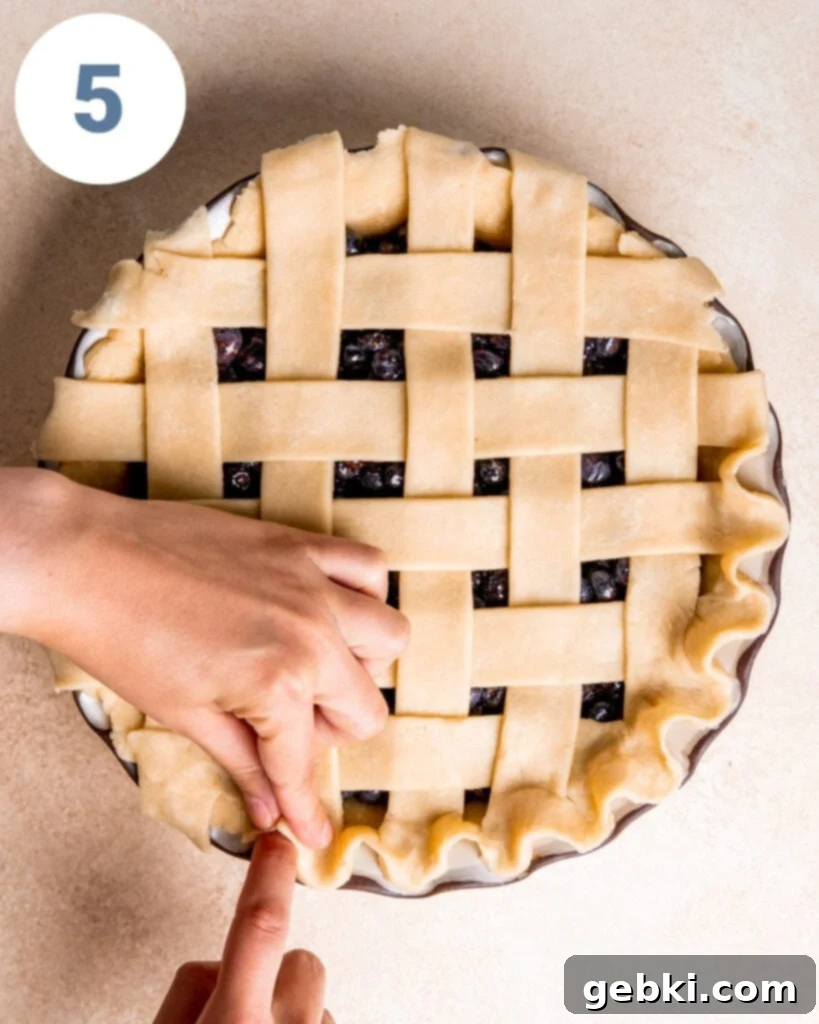
- **Trim Excess Dough:** Carefully cut off any excess dough from your lattice strips that extends more than about half an inch past the edge of the bottom crust.
- **Seal the Edges:** Gently fold the ends of the lattice strips underneath the bottom crust. Press them together firmly but smoothly, ensuring a neat and sealed edge all around.
- **Create the Crimp:** Go around the entire edge of the pie. Use the thumb and pointer finger of one hand to pinch the crust, while simultaneously using the pointer finger of your other hand to push the dough between those fingers (as illustrated in photo #5). This creates a beautiful, wavy crimped pattern.
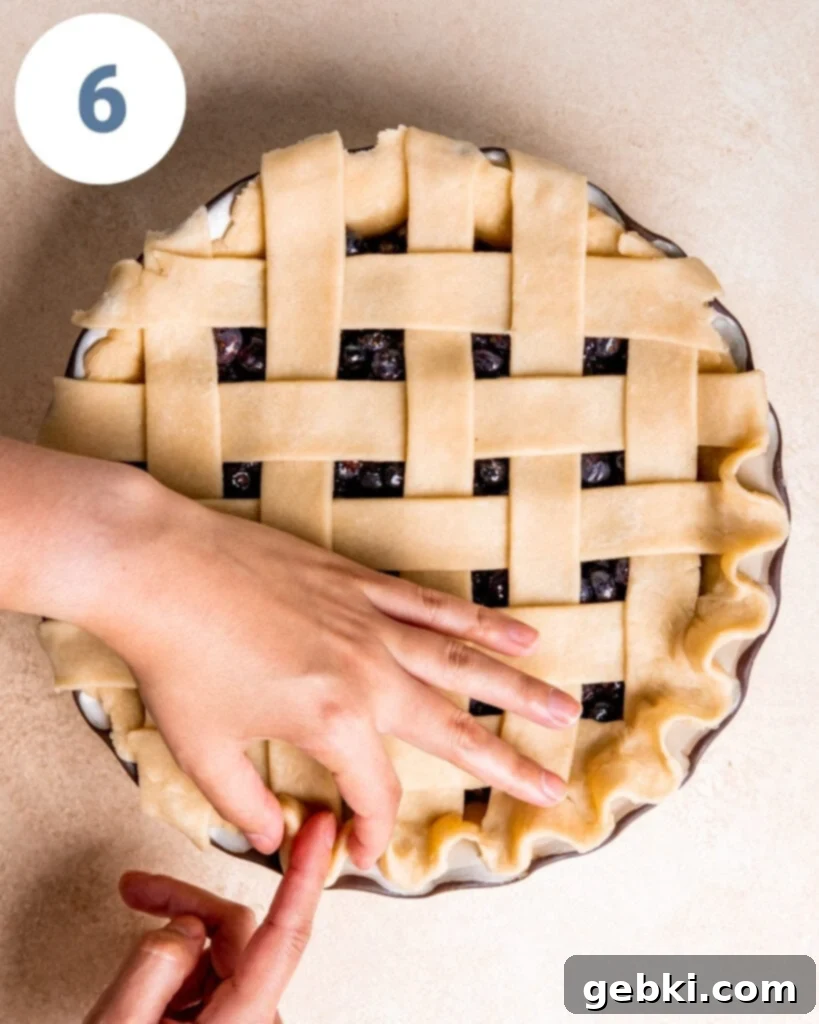
- **Secure the Crimp:** To ensure the crimp holds its shape and adheres well to the pie dish, gently push down on it with your pointer finger (refer to photo #6). This flattens and secures the decorative edge.
Finally, and this is another critical step: **chill the pie before baking!** The crust needs to be thoroughly cold and firm before it enters the hot oven. This chilling process is essential for the crust to hold its intricate shape and prevent shrinking or slumping during baking, guaranteeing that beautiful, flaky result. For an extra touch of golden crispness and sparkle, brush the entire crust with an egg wash (one egg beaten with a teaspoon of water) and generously sprinkle demerara or turbinado sugar on top just before baking. This adds both visual appeal and a delightful crunch.
Expert Tips & Storage Solutions for Your Spiced Blueberry Pie
Absolutely! Frozen blueberries work wonderfully in this pie, especially since it’s baked. There’s no need to thaw them beforehand; simply add them straight to your filling mixture. Keep in mind that using frozen blueberries might slightly extend the overall baking time, as the oven will need to work a bit harder to bring them up to temperature. Just keep an eye on your crust for golden-brown perfection and the filling for a bubbly, thickened consistency.
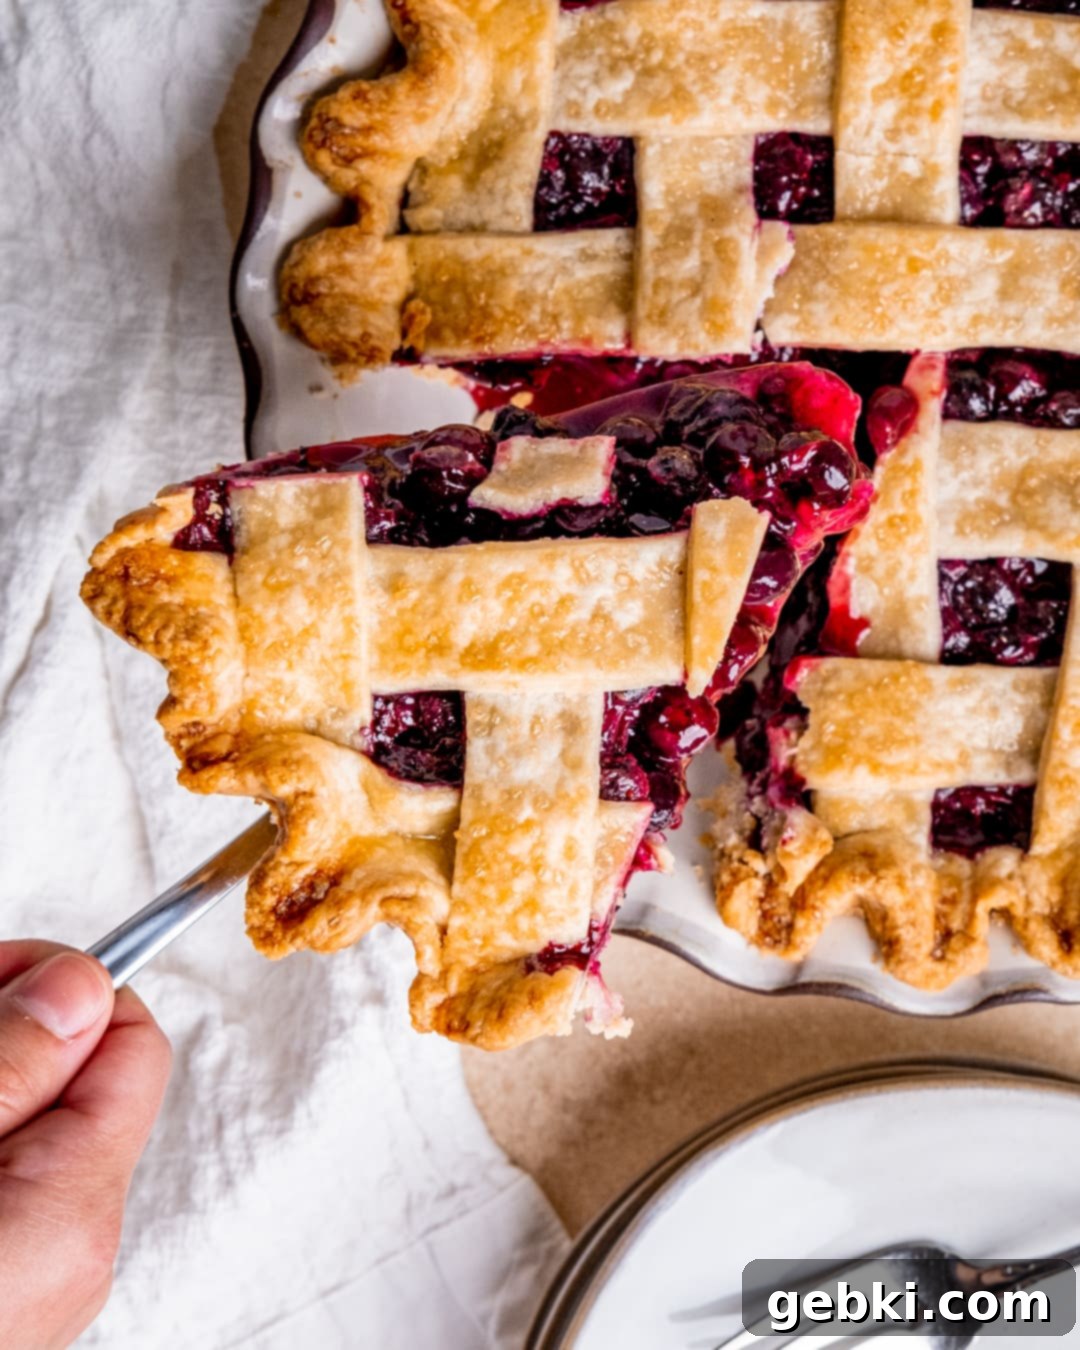
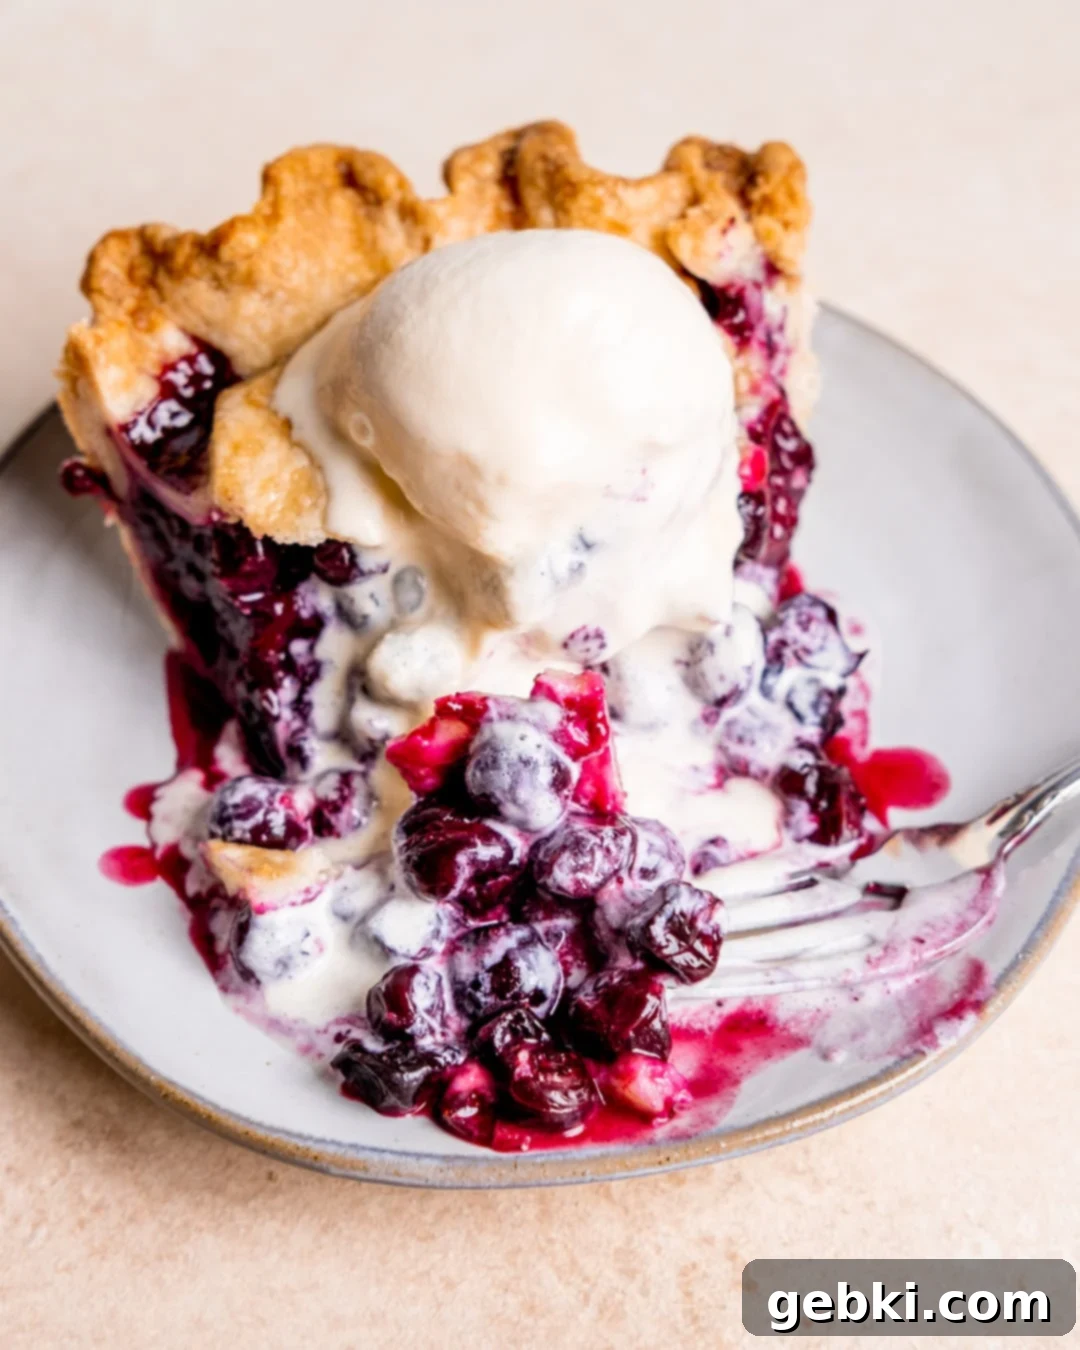
For optimal flavor and texture, it’s essential to allow your pie to cool down after removing it from the oven. This allows the filling to set properly and its delightful flavors to fully develop and absorb. It can be served warm, which is incredibly comforting, or cold, which offers a refreshing contrast. For the ultimate indulgence, we highly recommend serving it with a generous scoop of creamy vanilla ice cream or a dollop of freshly whipped cream. The cool, rich dairy perfectly complements the warm, spiced blueberries.
Leftover pie can be stored in the refrigerator for up to 1 week. If you plan to refrigerate it immediately after baking, ensure it cools completely to room temperature first to prevent condensation, which can make the crust soggy. For longer storage, you can freeze individual slices or the entire pie for up to 3 months. When ready to enjoy, thaw frozen pie overnight in the refrigerator. You can gently reheat slices in the oven or microwave, or simply enjoy them cold!
While blueberries are fantastic on their own, the addition of cinnamon and nutmeg elevates the pie to a new level. Cinnamon brings a warm, sweet, and slightly woody note that perfectly complements the tartness of the blueberries, enhancing their natural sweetness. Nutmeg adds a subtle, earthy, and slightly pungent aroma, providing depth and complexity to the overall flavor profile. Together, these spices create a comforting and sophisticated taste that makes this pie truly special and irresistible, especially during colder months or holidays.
Absolutely! Using a store-bought pie crust is a fantastic shortcut that makes this recipe even easier and quicker to prepare. Many high-quality refrigerated or frozen pie crusts are available that will yield a delicious result. Simply follow the package directions for baking, and don’t forget to implement the chilling steps for the top crust as described in the recipe to ensure it holds its shape beautifully.
Did you try this recipe?
Tag @brokenovenbaking on Instagram and leave a star review below!
📖 Recipe
Spiced Blueberry Pie
Kayla Burton
Pin Recipe
Equipment
-
9″ Pie Dish
Ingredients
- 6 cups (6 cups) blueberries fresh or frozen (do not thaw if using frozen)
- ½ cup (100 g) granulated sugar
- ¼ cup (50 g) light brown sugar
- 2 tablespoons (15 g) all-purpose flour
- 2 tablespoons (16 g) cornstarch
- 2 tablespoons (2 tablespoons) lemon juice
- ¾ teaspoon (¾ teaspoon) ground cinnamon
- ⅛ teaspoon (⅛ teaspoon) ground nutmeg
- 1 (1) pie crust top and bottom
- 1 (1) egg wash (optional) 1 egg + 1 teaspoon water mixed together
- 2-3 tablespoons (2-3 tablespoons) demerara or turbinado sugar (optional)
Instructions
-
In a large bowl, thoroughly mix together the blueberries, granulated sugar, brown sugar, all-purpose flour, cornstarch, fresh lemon juice, ground cinnamon, and ground nutmeg. Set this flavorful filling aside to allow the spices to meld and the fruit to release some of its juices while you prepare your pie crust.
-
After the filling mixture has rested for approximately 15 minutes (or once your pie crust is fully prepared), spoon the vibrant blueberry filling onto the bottom pie crust, which should already be nestled in your pie dish. Be sure to leave behind any excess liquid that may have accumulated at the bottom of the bowl.
-
Carefully place the top pie crust over the filling. You can choose any design you like; refer to the blog post above for detailed photos and instructions on how to create an impressive lattice top. Once assembled, place the entire pie into the freezer for 20-30 minutes. This crucial chilling step helps the crust hold its shape during baking. During this time, preheat your oven to 400°F (200°C).
-
Optional step for a beautiful finish: Before baking, lightly brush the top crust with an egg wash (one egg whisked with 1 teaspoon of water) and then generously sprinkle with demerara or turbinado sugar. This will give your pie a gorgeous golden-brown color and a delightful crunchy texture.
-
Carefully place the chilled pie onto a baking sheet (this catches any potential drips and helps with even baking). Bake at 400°F (200°C) for the initial 10 minutes. Then, without opening the oven door, reduce the temperature to 350°F (175°C) and continue to bake for another 20-30 minutes, or until the crust is a deep golden brown and the filling is visibly bubbling through the lattice or vents. The exact baking time may vary depending on your oven and how cold the pie was.
-
Once baked, remove the pie from the oven and let it cool on a wire rack for at least an hour before slicing and enjoying. This cooling time is essential for the filling to fully set and achieve the perfect consistency.*
Save This Recipe! 💌
We’ll email this post to you, so you can come back to it later!
Notes
Store any leftover pie tightly covered in the refrigerator for up to 1 week. For longer preservation, you can freeze it for up to 3 months.
To Make Ahead: Bake the pie as directed and let it cool completely to room temperature. Wrap the cooled pie securely in plastic wrap, then in foil, and freeze for up to 3 months. Alternatively, cut the pie into individual slices, wrap them, and freeze in airtight containers. To serve, thaw the pie (or slices) in the refrigerator overnight.
The nutritional information provided is an estimate for the entire pie and its calorie accuracy is not guaranteed.
The provided nutritional information is an estimate per serving. Accuracy is not guaranteed.
More Delicious Recipes You’ll Love:
- Apple Pie Ice Cream (Ninja Creami Recipe)
- Strawberry Matcha Ice Cream (Ninja Creami Recipe)
- Soft Lemon Sugar Cookies (That Actually Taste Like Lemon!)
- 5-Ingredient Blueberry Lemon Cheesecake Ice Cream (Ninja Creami Recipe)
- Easy Cookies and Cream Kefir Ice Cream (Ninja Creami Recipe)
- 5 Ingredient No-Bake Mini Chocolate Cheesecakes
- Banana Berry Protein Smoothie Recipe
- Easy Blueberry Cheese Puff Pastry
