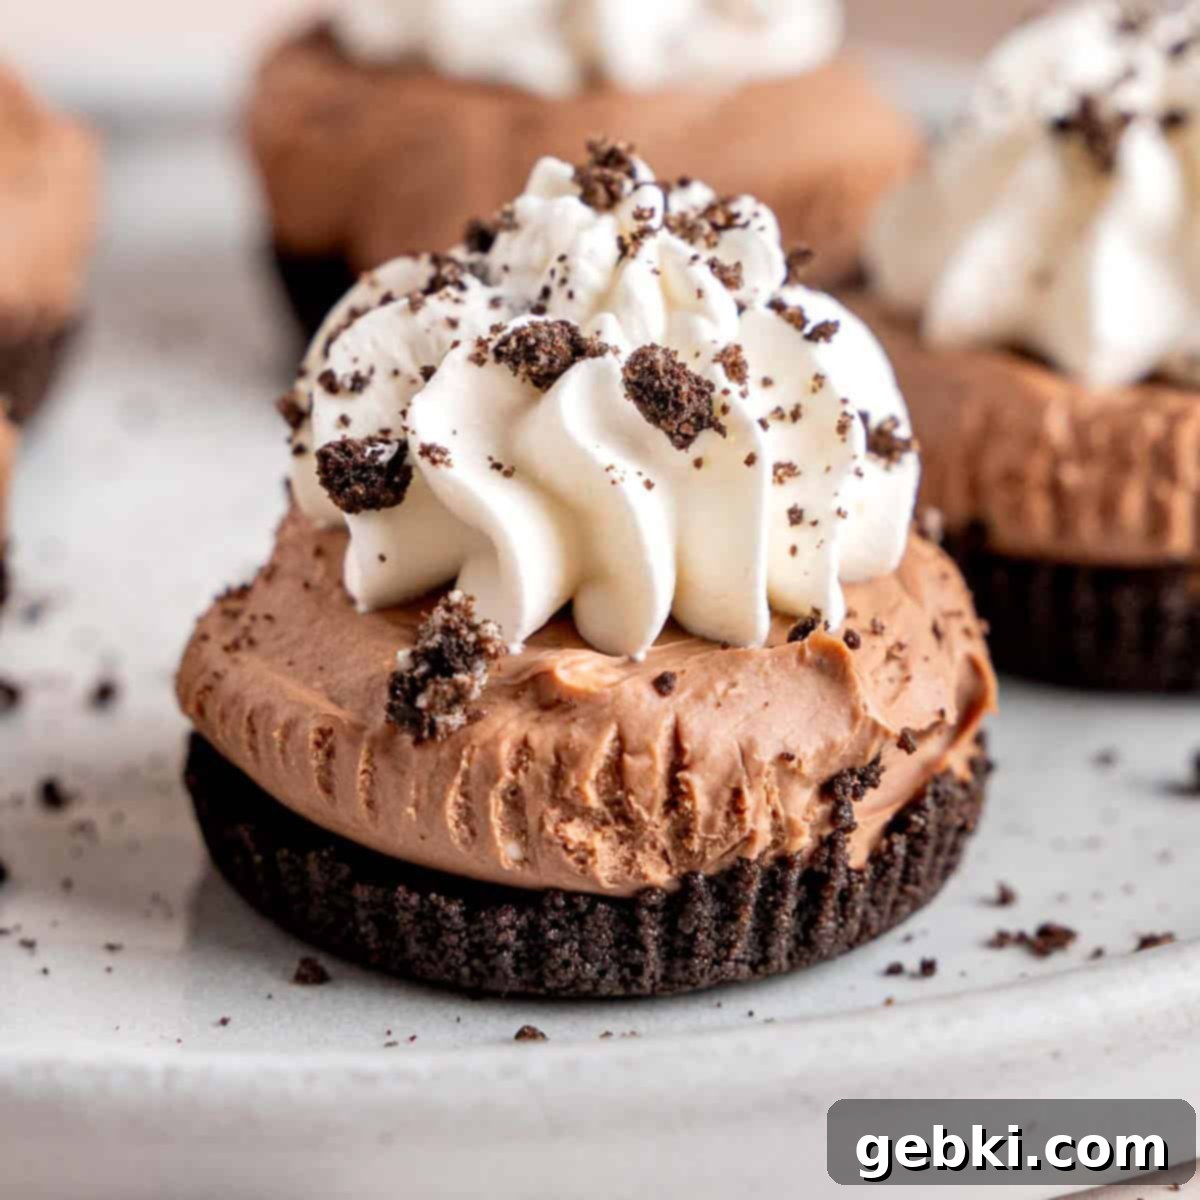
Effortless & Decadent: 5-Ingredient No-Bake Mini Chocolate Cheesecakes
Are you yearning for a sumptuously creamy chocolate dessert that demands minimal effort and comes together in a flash? Look no further! These incredibly easy mini no-bake chocolate cheesecakes are precisely what you need. Boasting a mere 5 staple ingredients, they can be whipped up in less than 30 minutes of active prep time, making them an ideal treat for any occasion. Whether you’re hosting a gathering, looking for a quick weeknight indulgence, or simply craving something sweet, these individual chocolate delights are guaranteed to impress everyone who takes a bite.
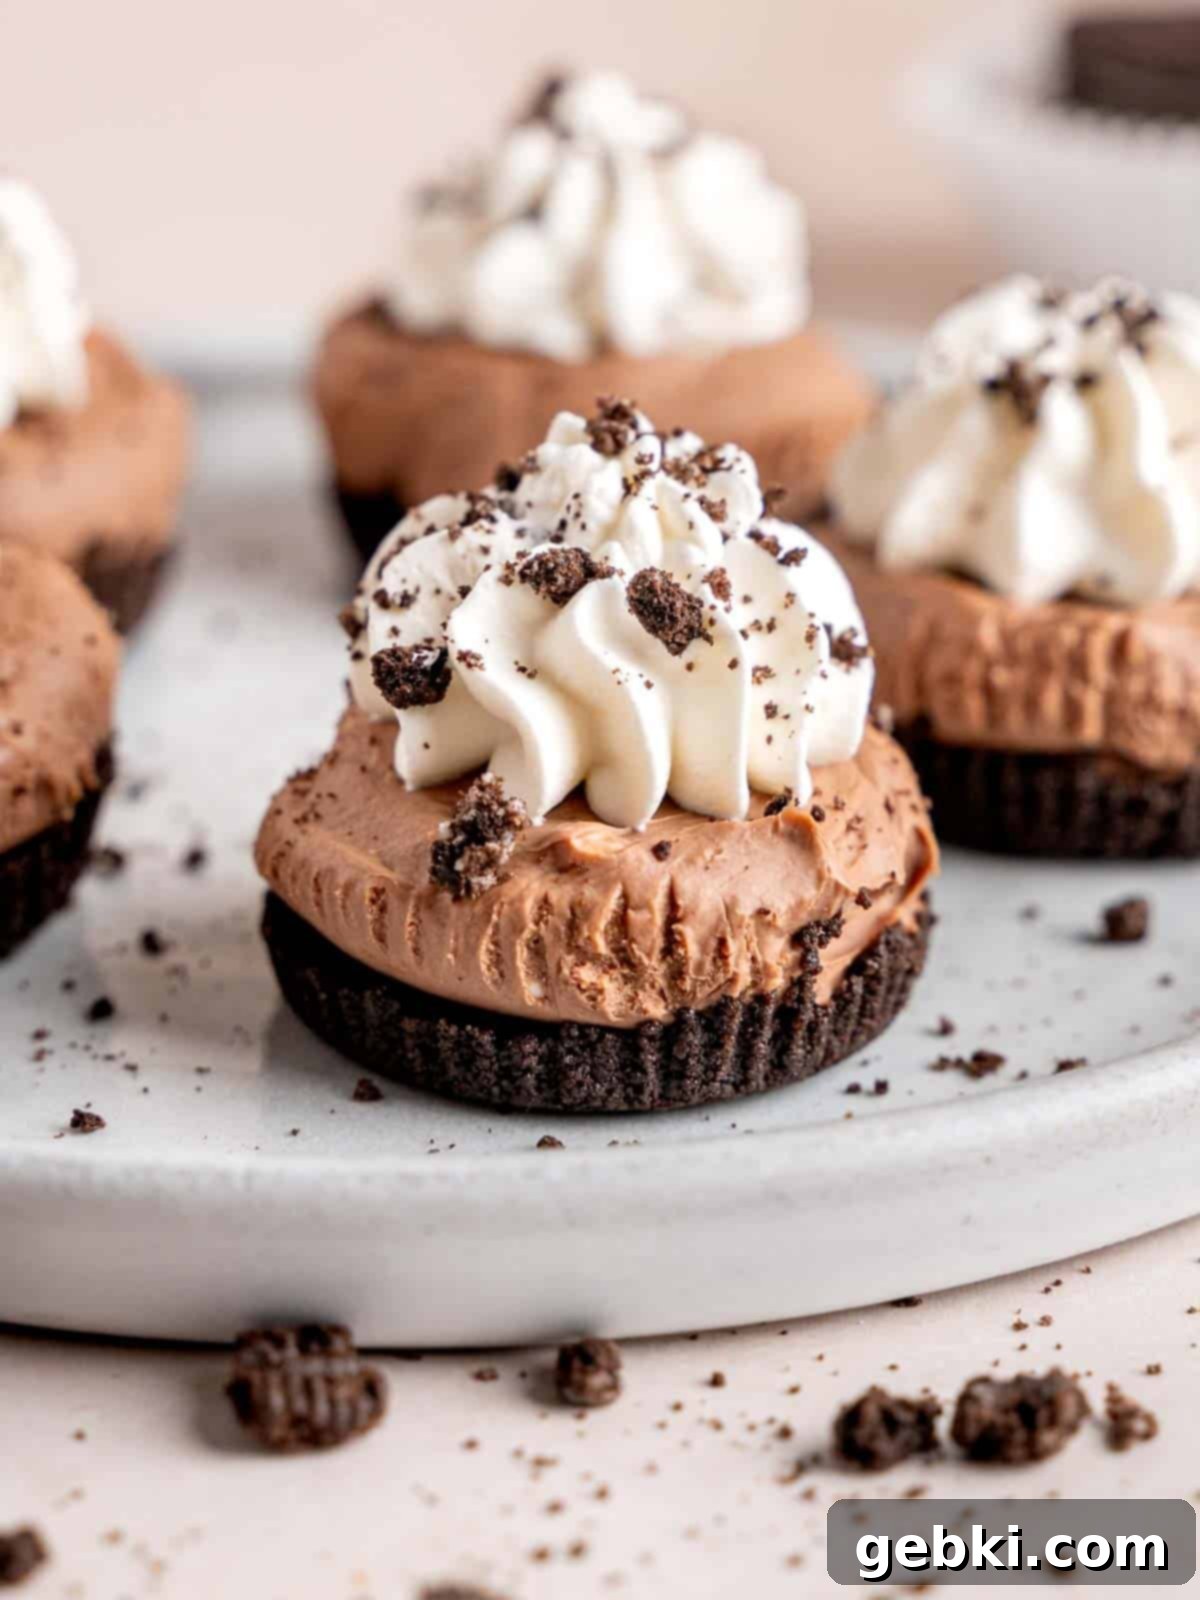
For years, my original no-bake cheesecake bites have been a fan favorite, consistently ranking among my most popular recipes. It’s truly a mystery how I didn’t think to create a chocolate version sooner! After all, I’m quite passionate about cheesecake recipes, and many of my top picks are delightful no-bake treats.
These individual chocolate cheesecakes boast a lusciously creamy chocolate filling that will remind you of a rich chocolate mousse. The texture is akin to my beloved chocolate cherry cheesecake, offering a deep, satisfying chocolate flavor. While they are perfect on their own, feel free to get creative with toppings. Cherries are always a classic pairing with chocolate, but a dollop of whipped cream, a sprinkle of extra Oreo crumbs, or even fresh berries would elevate these mini marvels even further!
Why You’ll Fall in Love with This Easy Recipe
These no-bake mini chocolate cheesecakes aren’t just delicious; they’re a dream come true for anyone who loves rich desserts without the fuss. Here’s why this recipe will quickly become a go-to in your kitchen:
- Effortless & Quick: This recipe is incredibly simple, requiring less than 30 minutes of active preparation time. With only 5 common ingredients, you won’t need to hunt for obscure items. Plus, unlike many no-bake cheesecakes, this one doesn’t rely on sweetened condensed milk, offering a different, equally delightful texture and sweetness level. It’s perfect for last-minute dessert cravings or when you need a crowd-pleaser in a hurry.
- No Oven Required: Say goodbye to heating up your kitchen! These cheesecakes require absolutely no baking. This makes them an ideal choice for hot summer days, when your oven is already occupied, or simply when you want to avoid the complexities of baked desserts. It’s a truly hands-off approach once the mixing is done.
- Stress-Free Dessert: Forget the worries of water baths, cracked tops, or sunken centers commonly associated with baked cheesecakes. This no-bake method eliminates all those traditional cheesecake challenges, guaranteeing a smooth, perfectly set, and beautiful dessert every single time. It’s a foolproof recipe even for novice bakers.
- Creamy, Refreshing & Versatile: The texture of these mini cheesecakes is wonderfully creamy and light, almost like a rich chocolate mousse, making them incredibly refreshing. While they are a perfect summer treat, their decadent chocolate flavor makes them suitable for any season or celebration. Serve them chilled for a cool, satisfying dessert that balances richness with a light, airy feel.
Essential Recipe Ingredients
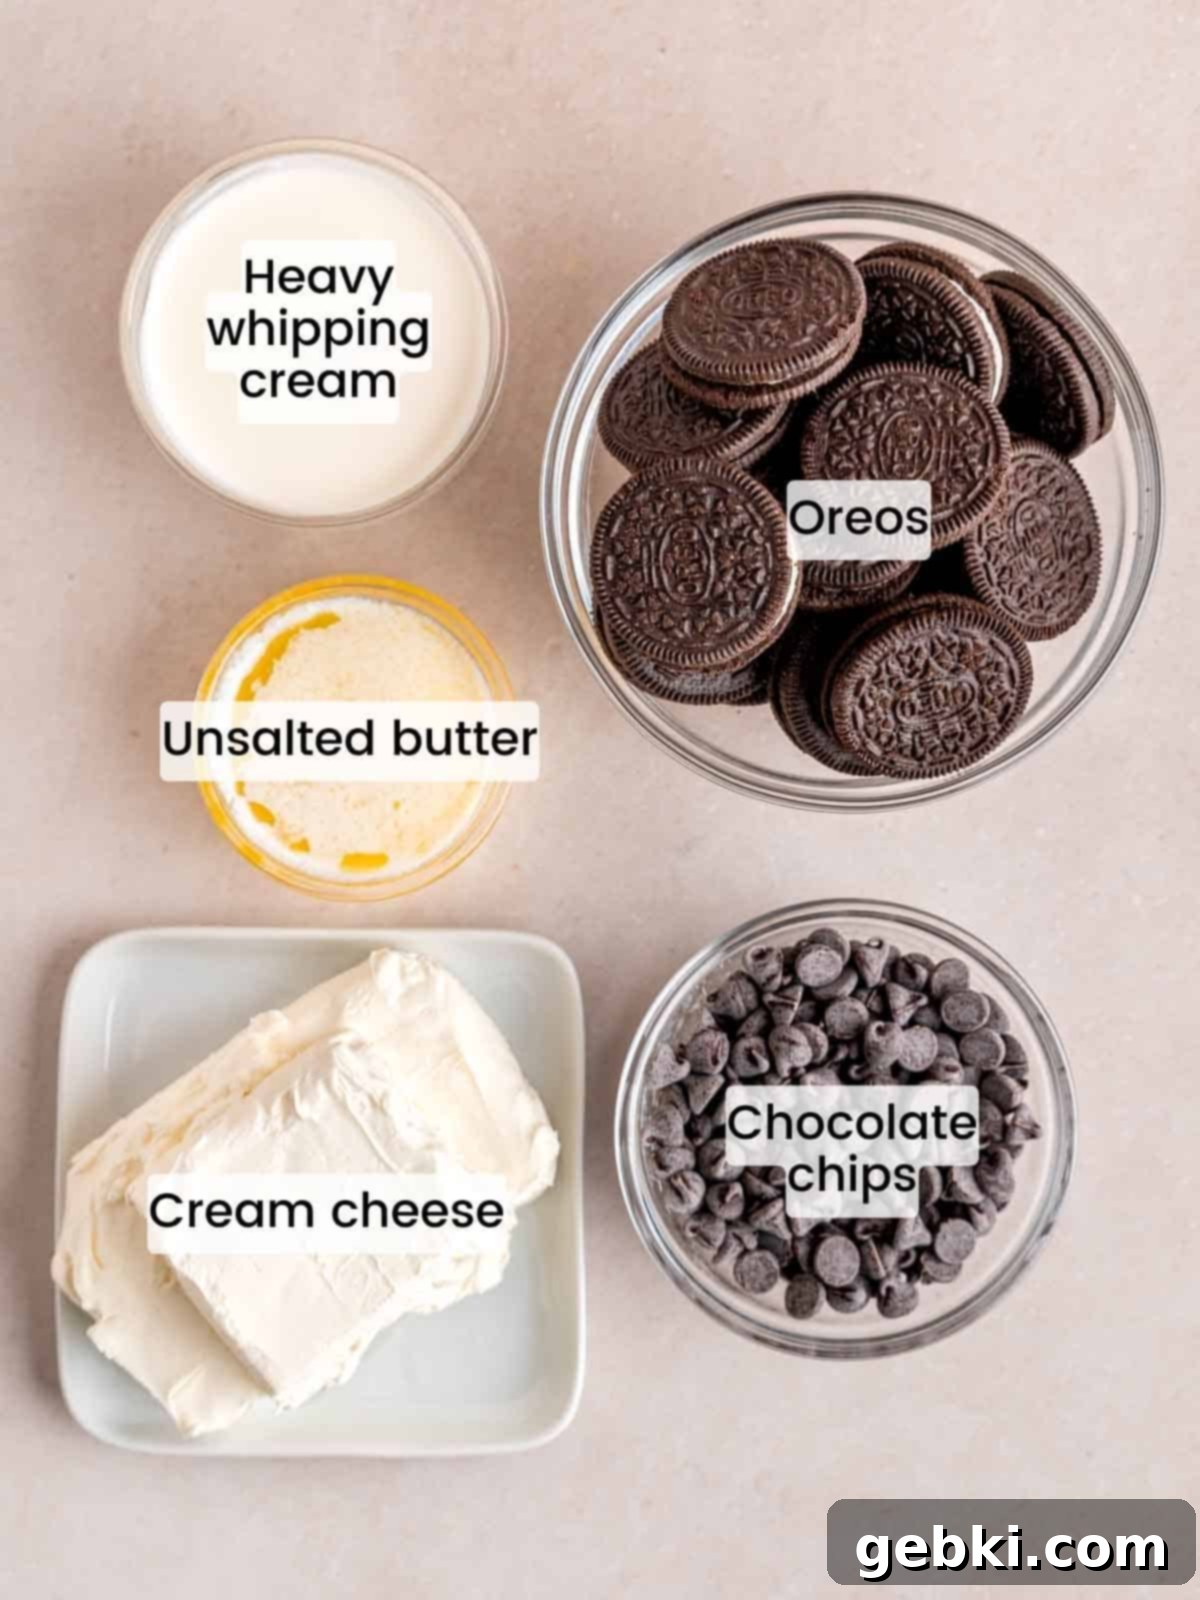
To create these irresistibly delicious chocolate no-bake cheesecakes, you’ll only need a handful of readily available ingredients. The magic truly lies in their quality and how they come together to form a rich, creamy, and satisfying dessert.
Ingredient Notes:
- Oreos: These iconic chocolate sandwich cookies form the perfect base for our no-bake crust. When crushed and combined with melted butter, they create a wonderfully rich, chocolatey, and slightly salty crust that perfectly complements the creamy filling. While regular Oreos are my go-to for their balanced flavor and texture, if you’re a fan of extra creaminess, feel free to use Double Stuf Oreos! Keep in mind that depending on the brand or type of chocolate sandwich cookie you choose, the amount of melted butter needed might vary slightly to achieve that ideal “wet sand” consistency.
- Unsalted Butter: Melted butter is the binding agent for our cookie crust. It helps transform the crushed Oreos into a firm, cohesive base that won’t crumble when you bite into your cheesecake. Using unsalted butter allows you to control the overall saltiness of the crust.
- Chocolate Chips: The quality of your chocolate chips truly shines through in this recipe, as they form the backbone of our luscious chocolate ganache. For the best flavor and a smooth, silky texture, I highly recommend using high-quality chocolate that is semi-sweet or darker (at least 60% cocoa). Avoid using expired chocolate, as it can seize and prevent your ganache from coming together smoothly. The richness of the chocolate chips, when combined with simmering heavy whipping cream, creates a decadent ganache that makes the cheesecake filling taste almost like a sophisticated chocolate mousse.
- Heavy Whipping Cream: This ingredient serves two crucial purposes. First, when heated and poured over the chocolate chips, it creates a rich and glossy ganache. Second, when this ganache is whipped and then folded into the cream cheese, it incorporates air, contributing to the filling’s light, airy, and incredibly creamy texture. Ensure you use heavy whipping cream (not half-and-half or milk) for optimal results.
- Cream Cheese: What is cheesecake without cream cheese? This recipe calls for a block and a half (12 ounces) of full-fat cream cheese, which provides the signature tangy and rich foundation of our dessert. The most important tip for working with cream cheese in a no-bake recipe is to let it soften completely at room temperature for about an hour before you start mixing. This ensures a lump-free, silky-smooth filling that perfectly blends with the chocolate ganache.
For a detailed breakdown of all ingredients and precise measurements, please refer to the recipe card conveniently located below.
Creative Substitutions & Delicious Variations
While this recipe for no-bake mini chocolate cheesecakes is perfect as is, it’s also wonderfully adaptable! Feel free to experiment with these ideas to customize your treats:
- Simplified Crust with Whole Oreos: If you’re looking to make this chocolate cheesecake recipe even faster and easier, skip crushing the cookies and mixing them with butter. Instead, simply place a whole Oreo cookie directly into the bottom of each muffin liner. This creates an instant, sturdy, and delicious crust with minimal effort. It’s a fantastic shortcut for busy bakers!
- Personalize Your Filling with Mix-ins: The creamy chocolate filling is a blank canvas for your favorite additions. Try folding in mini chocolate chips for extra texture, chopped nuts like pecans or walnuts for a delightful crunch, or even a swirl of caramel or peanut butter. For a fun, kid-friendly “dirt cake” inspired version, toss in some gummy worms or crushed candy bars! The possibilities are endless, allowing you to tailor each batch to your specific cravings.
- Tiny Bite-Sized Treats: For an even more adorable and portion-controlled dessert, use a mini muffin pan with mini liners and smaller Oreo cookies (or break regular ones) for the crusts. These tiny chocolate cheesecakes are perfect for parties, dessert platters, or simply as a small, satisfying bite when a full cheesecake feels like too much.
- Experiment with Toppings: Beyond whipped cream and crushed Oreos, consider other toppings. Fresh raspberries or strawberries add a burst of fruity freshness and color. A drizzle of chocolate syrup, a sprinkle of sea salt, or even a dusting of cocoa powder can further enhance the chocolate experience. For a hint of mint, a small mint sprig or a few finely chopped mint chocolates would be lovely.
Please note that this recipe has been thoroughly tested with the original ingredients. If you decide to replace or add any ingredients, we’d love to hear how it turned out! Share your creative substitutions and variations in the comments section below to inspire other bakers!
How to Make Decadent Mini Chocolate Cheesecakes
Creating these delightful no-bake mini chocolate cheesecakes is surprisingly simple. Follow these step-by-step instructions to achieve perfectly creamy and delicious results every time. Remember to read through all steps before you begin!
Quick Recipe Video
Step-by-Step Instructions
1. Prepare the Silky Chocolate Ganache
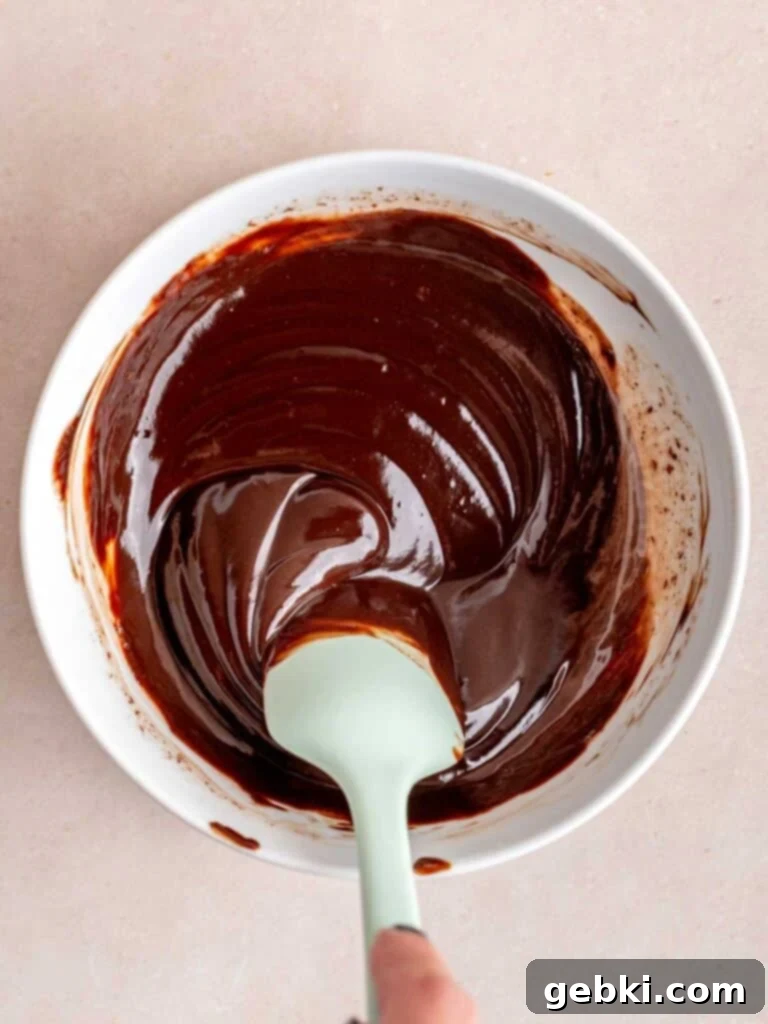
Begin by measuring your high-quality chocolate chips into a heat-proof bowl. Next, gently heat the heavy cream until it reaches a simmer – you’ll see small bubbles forming around the edges, but don’t let it come to a rolling boil. You can do this in the microwave (heating in 30-second intervals) or on the stovetop over medium-low heat. Once simmering, carefully pour the hot cream over the chocolate chips, ensuring they are fully submerged. Immediately cover the bowl with a plate or lid to trap the steam, allowing the chocolate to melt gently for 5 minutes. This gentle melting process prevents the chocolate from seizing. After 5 minutes, uncover and slowly stir the mixture with a rubber spatula, starting from the center and working your way outwards, until it transforms into a perfectly smooth, glossy, and homogeneous ganache. Set this aside to cool to room temperature.
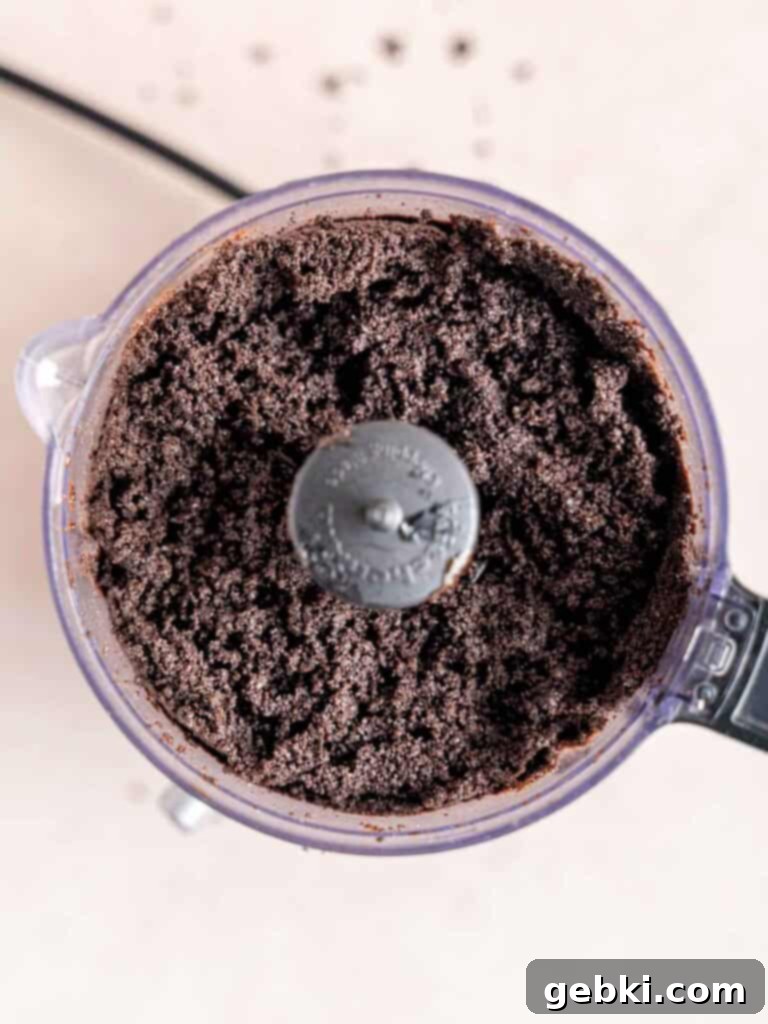
2. Create the Perfect Oreo Crumb Crust
For the classic Oreo crust, combine the whole Oreo cookies and melted butter in a food processor. Pulse the mixture until the cookies are finely crushed and thoroughly combined with the butter. The resulting texture should be similar to wet sand – moist enough to hold together when pressed, but still crumbly. If you don’t have a food processor, no worries! Place the cookies in a sturdy Ziploc bag, seal it, and use a rolling pin or the bottom of a heavy glass to carefully crush them into fine crumbs. Once crushed, transfer them to a bowl and mix in the melted butter until well-incorporated.
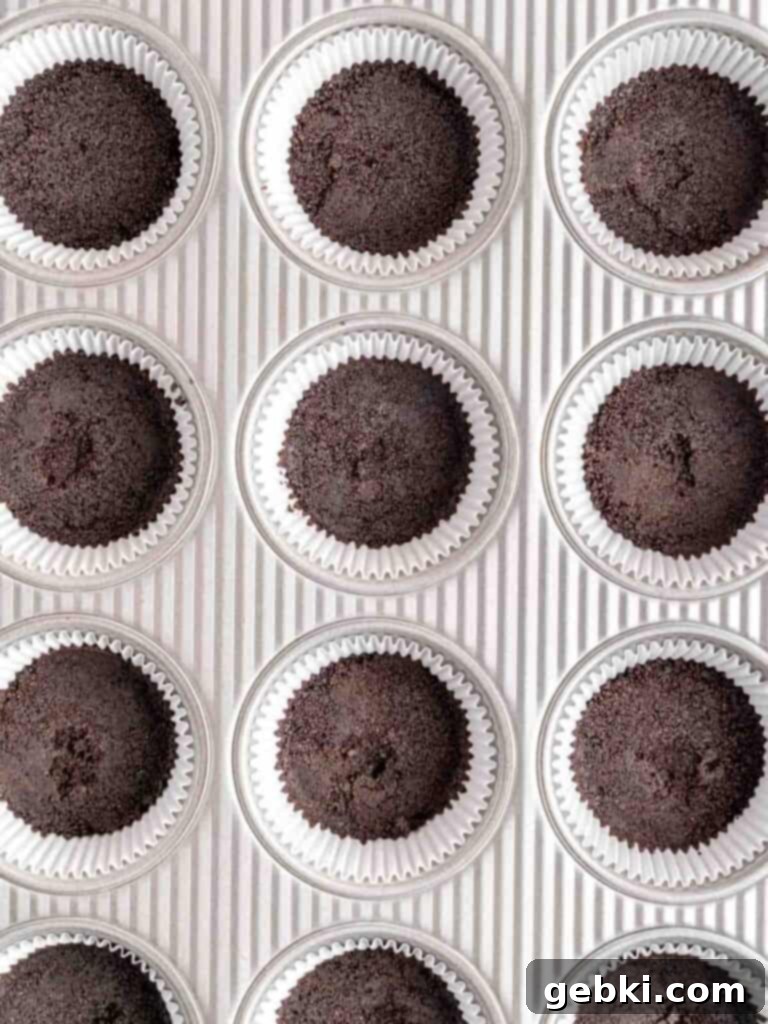
3. Form and Chill the Crusts
Line a 12-cup muffin pan with paper or silicone liners – this is key for easy removal later! Evenly distribute the prepared Oreo crumbs among the 12 muffin cups, aiming for approximately 1 to 2 tablespoons per cup. Using the bottom of a small cup or a tamper that fits snugly into the muffin wells, firmly press down on the crumbs. This compacts them into a solid, sturdy crust that will hold up well. Once all crusts are formed, transfer the muffin pan to your freezer. Chilling the crusts for a short while helps them set and prevents them from crumbling when the filling is added.
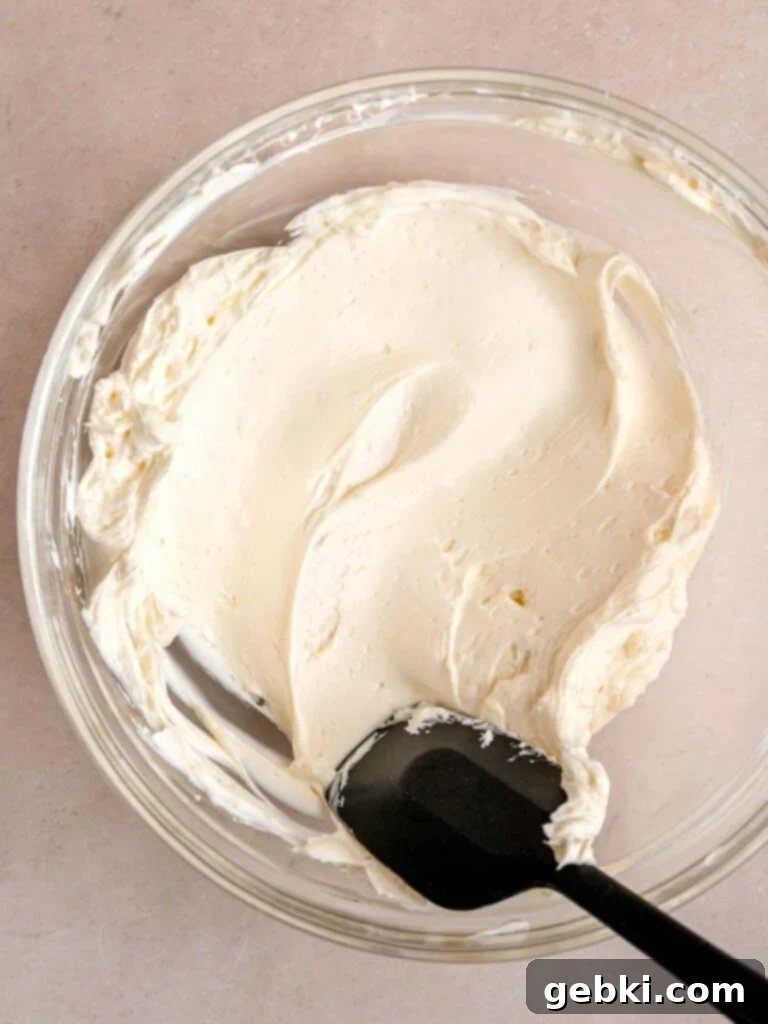
4. Prepare the Cream Cheese Base
Once your cream cheese has reached a soft, room temperature consistency (this usually takes about an hour), place it in a large mixing bowl. Using either a hand mixer on medium speed or a sturdy spatula, beat or mix the cream cheese until it is completely smooth and free of any lumps. This step is crucial for achieving a perfectly smooth cheesecake filling. If you notice any stubborn clumps, continue mixing for another 10 minutes or so, or allow it to sit a bit longer before resuming. Scrape down the sides of the bowl frequently to ensure even mixing.
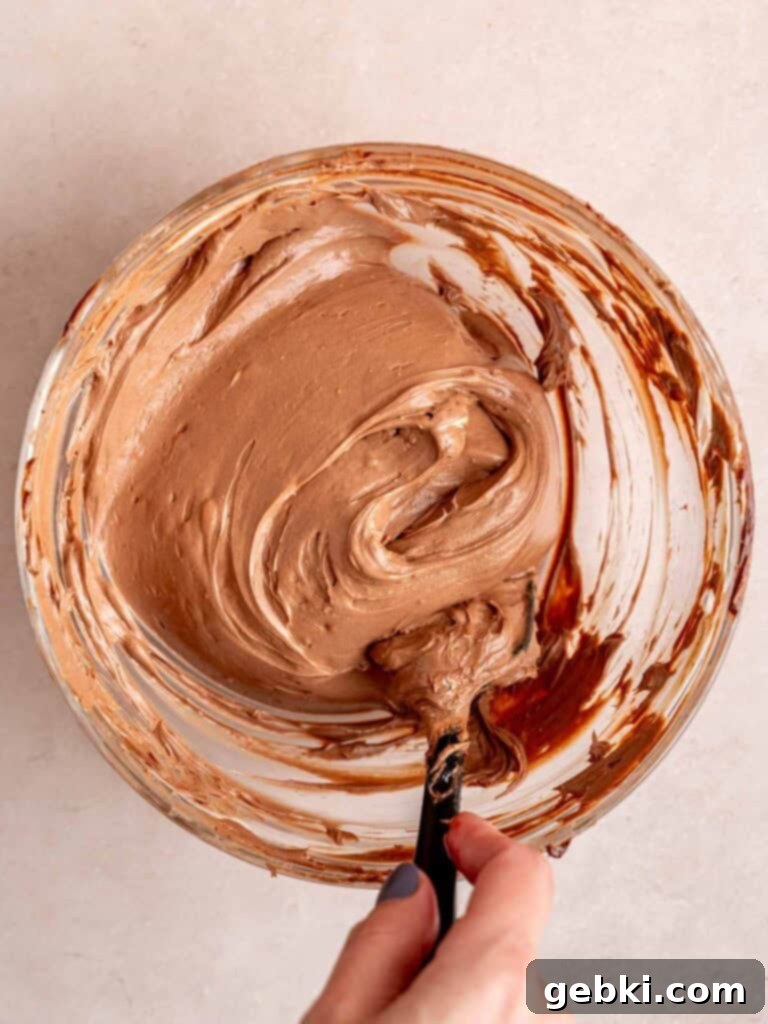
5. Combine for Creamy Chocolate Filling
Now, it’s time to bring the chocolate ganache to life! Using your hand mixer or a whisk, whip the cooled chocolate ganache for a few minutes until it lightens in color and becomes slightly airy and fluffy. This process incorporates air, giving the cheesecake filling its signature light and creamy texture. Once whipped, gently fold the aerated ganache into the smoothed cream cheese using a spatula. Mix just until both components are well-combined and there are no streaks of plain cream cheese or ganache visible. Be careful not to overmix, as this can deflate the air you’ve whipped in.
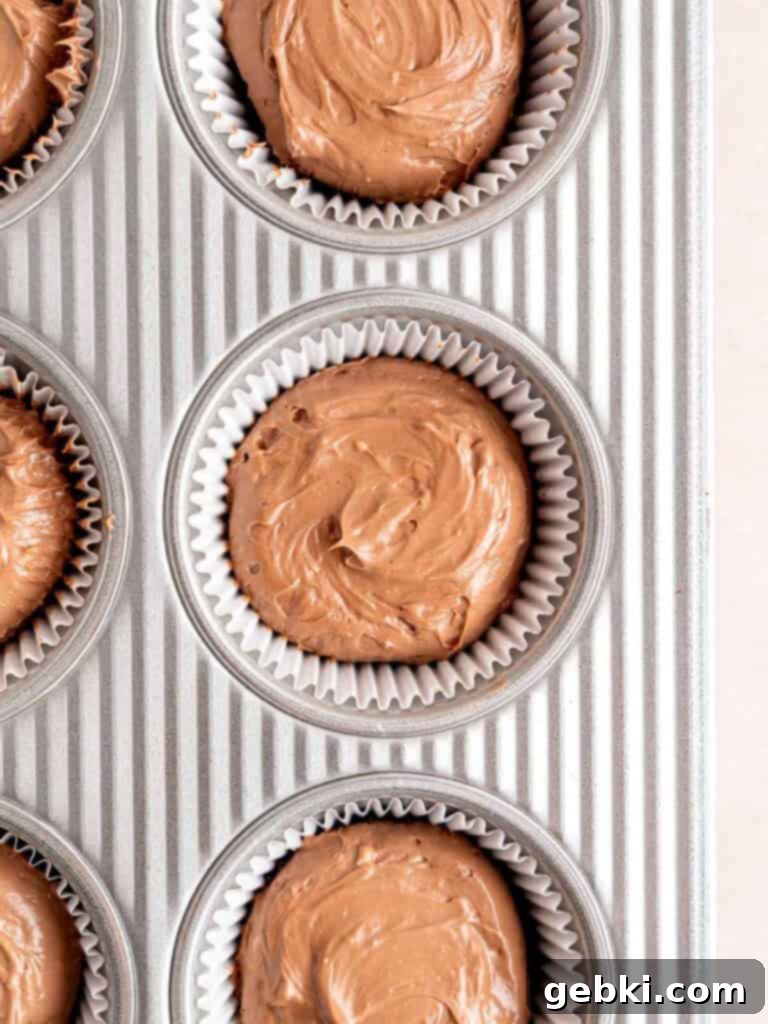
6. Assemble Your Mini Cheesecakes
Retrieve your chilled Oreo crusts from the freezer. Evenly distribute the rich chocolate cheesecake filling over each crust. For a neat and consistent look, I find that a small to medium-sized cookie scoop works perfectly for portioning the filling. Once scooped, use the back of the scooper or a spoon to gently flatten and smooth the tops of each cheesecake. Ensure the filling covers the entire crust for a beautiful finish. This step is where your mini cheesecakes truly begin to take shape!
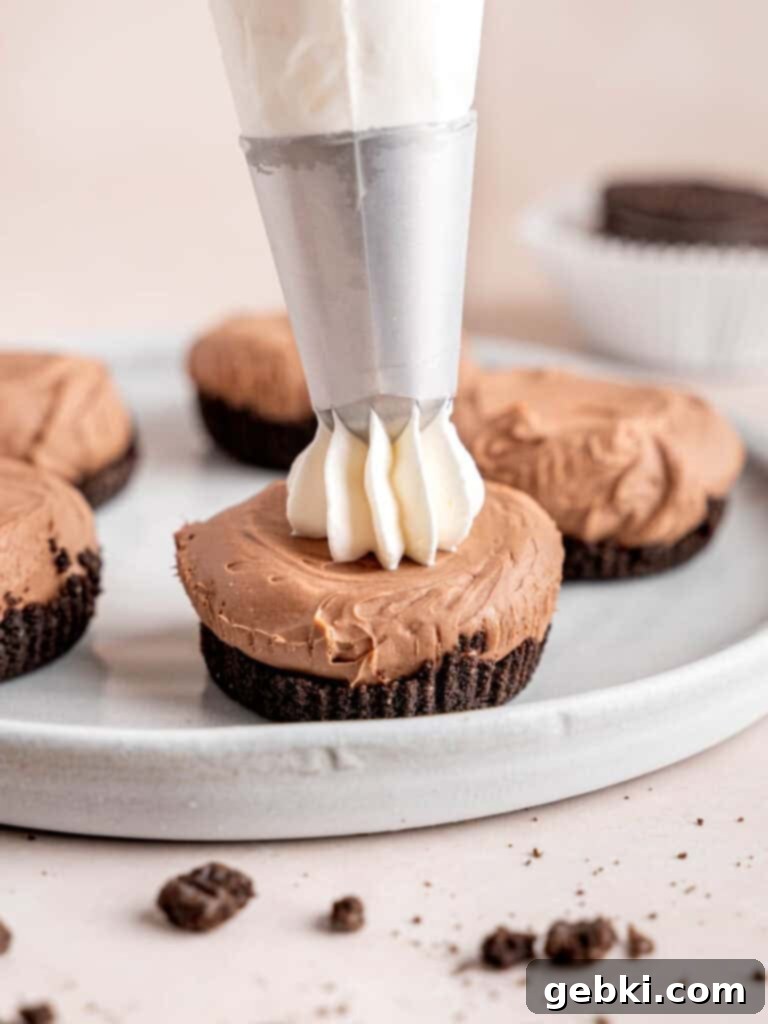
7. Chill, Garnish & Indulge!
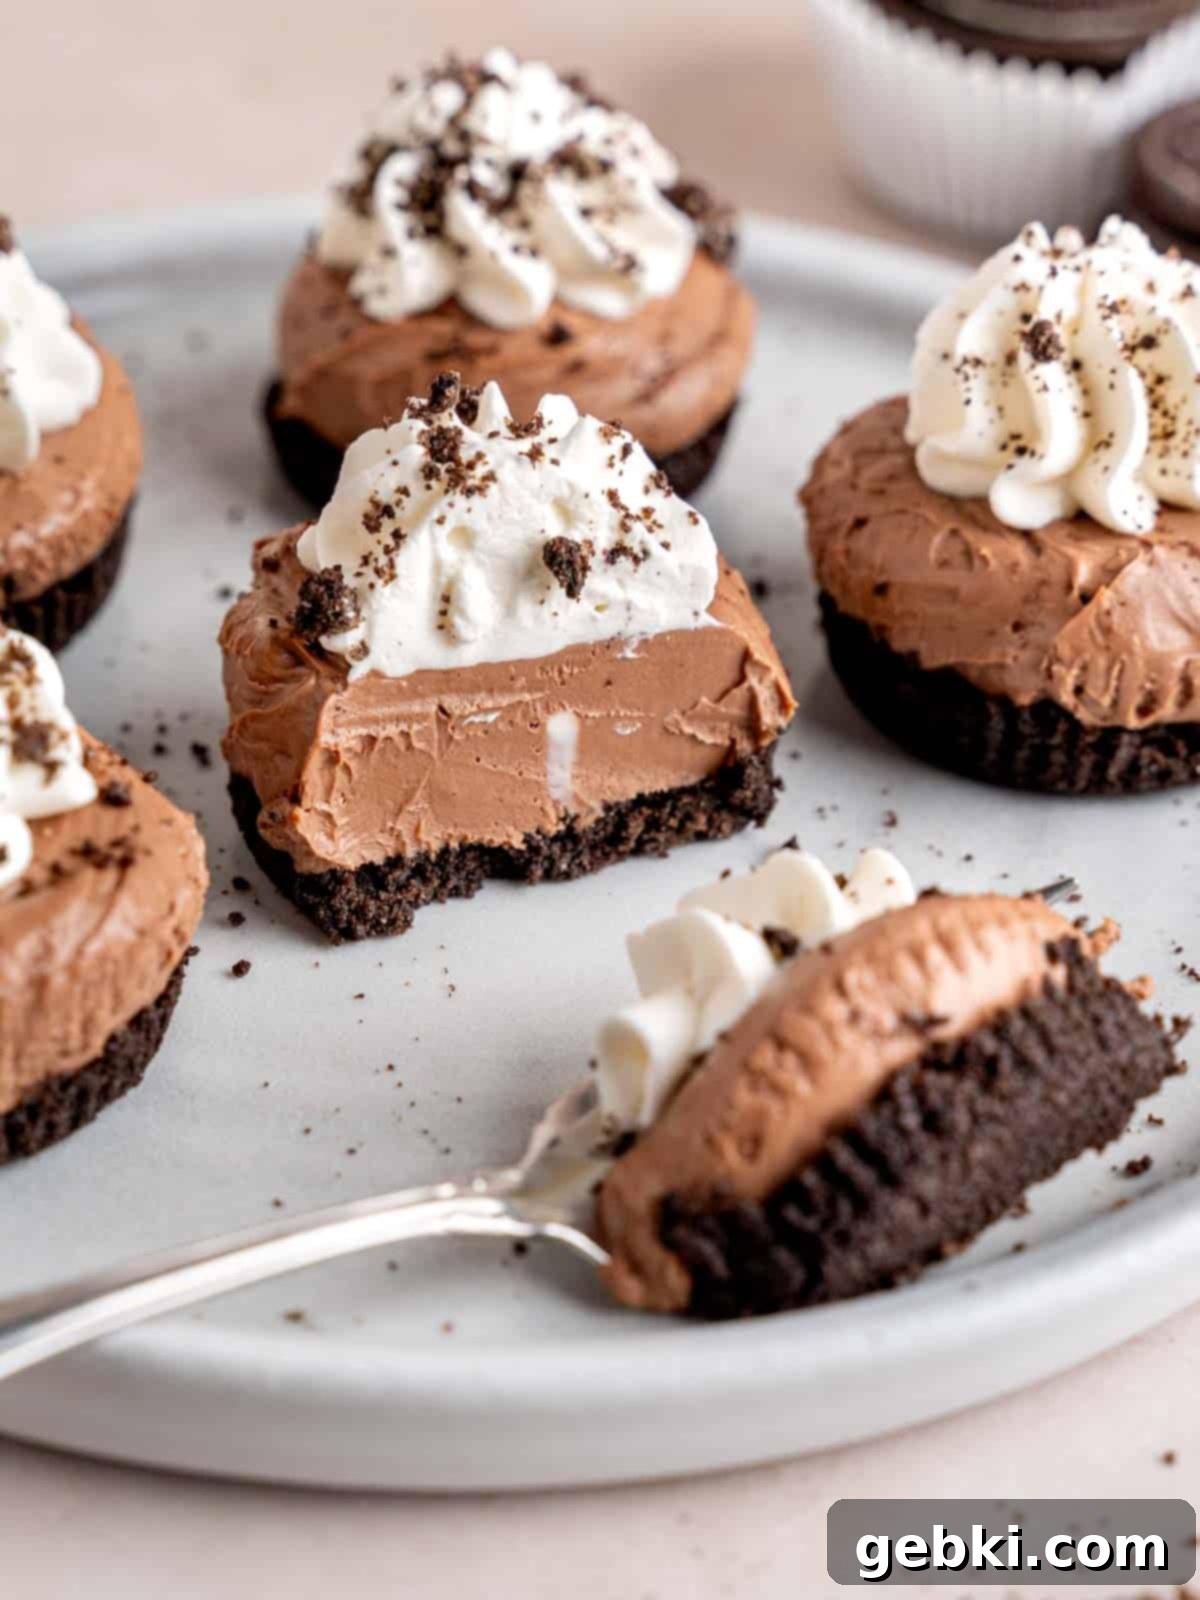
The final step before enjoying these masterpieces is crucial for setting: chilling. Place the assembled cheesecakes in the refrigerator for at least a few hours. This allows them to firm up beautifully, ensuring a clean bite and optimal creamy texture. While you technically could eat them sooner, proper chilling significantly enhances their consistency and flavor. Before serving, unleash your creativity with toppings! A swirl of homemade or store-bought whipped cream and a sprinkle of extra crushed Oreos are classic choices. You could also add fresh berries, a drizzle of chocolate syrup, or even a cherry on top for an extra touch of elegance. Then, simply serve and savor every delightful bite!
Expert Tips for No-Bake Cheesecake Perfection
Achieving the perfect no-bake cheesecake is simpler than you might think, especially with a few insider tricks. These expert baking tips will help ensure your mini chocolate cheesecakes are absolutely flawless:
- Don’t Skip the Muffin Liners: Muffin liners are your best friend when making individual cheesecakes! They make removing the delicate cheesecakes from the pan incredibly easy and mess-free. Without them, you risk having the crust stick or break apart. Standard paper liners work well, but for an even easier experience and reusability, consider making your own parchment paper liners or using silicone baking molds. The liners also make these mini desserts easy to handle and serve.
- Gentle Removal is Key: Once your cheesecakes are thoroughly chilled and firm, removing them from the muffin pan is straightforward. The easiest method is to place a butter knife or a small offset spatula on the side of the liner and gently lift the cheesecake out. They tend to be easier to remove when they are very cold, almost frozen, as the crust is more rigid. If you’re using silicone molds, simply pop them out from the bottom.
- Prioritize Chilling Time: While the allure of eating these immediately is strong, resisting the urge and allowing the cheesecakes to chill in the refrigerator for at least a few hours is a non-negotiable step for the best results! Chilling not only helps the filling firm up to a delightful, scoopable, yet stable consistency, but it also allows the flavors to meld and deepen. A properly chilled cheesecake is less messy to eat, retains its shape beautifully, and offers a more satisfyingly creamy and refreshing experience.
- Room Temperature Cream Cheese: We’ve mentioned it in the ingredients, but it’s worth reiterating: ensure your cream cheese is truly at room temperature. Cold cream cheese will result in a lumpy filling, no matter how much you try to beat it. An hour on the counter is usually sufficient. This ensures a smooth, homogeneous base for your chocolate filling.
- Measure by Weight (Grams): For the most consistent and accurate results, especially with dry ingredients like chocolate chips and butter, using a food scale to measure in grams (g) is highly recommended. Volume measurements can vary greatly depending on how ingredients are packed, leading to inconsistencies.
Common Questions & Troubleshooting
Got questions about making these mini chocolate cheesecakes? Here are some frequently asked questions and their helpful answers:
Absolutely! Making these mini chocolate cheesecakes gluten-free is very simple. All you need to do is swap out the regular Oreo cookies for your favorite brand of gluten-free cream-filled chocolate sandwich cookies. The rest of the ingredients are naturally gluten-free, so you won’t need to make any other adjustments. Enjoy your delicious gluten-free treat!
Yes, you certainly can! If you prefer a full-sized cheesecake, I recommend adapting my no-bake chocolate cherry cheesecake recipe. Simply follow the instructions for that recipe, but omit the cherry topping. It’s designed for a larger pan and will give you a thick, creamy chocolate cheesecake that’s perfect for slicing. Note that chilling times will be longer for a large cheesecake.
Lumps in cheesecake filling are almost always due to the cream cheese not being fully softened before mixing. When cream cheese is cold, it’s very difficult to beat into a smooth consistency. To prevent this, ensure your cream cheese sits at room temperature for at least an hour (or even two, depending on your kitchen’s temperature) until it’s very soft. Using an electric mixer on medium speed and scraping down the sides of the bowl frequently also greatly helps in achieving that perfectly smooth texture.
Several factors can cause ganache to be lumpy or seize. The most common reasons include using low-quality chocolate chips or chocolate that is expired. Ensure you’re using high-quality chocolate (semi-sweet or darker, at least 60% cocoa) and that it’s fresh. Another culprit can be the cream not being hot enough to fully melt the chocolate, or over-stirring aggressively as soon as the cream is poured in. Remember to cover the bowl to trap steam and let the chocolate melt undisturbed for 5 minutes before gently stirring to combine.
The key to a firm, non-crumbly Oreo crust lies in two steps: adequate butter and proper pressing. Ensure you’re using enough melted butter to achieve a “wet sand” consistency where the crumbs easily hold their shape when squeezed. Then, when pressing the crumbs into the muffin liners, use the bottom of a glass or a measuring cup to compact them very firmly. Don’t be shy with the pressure! Finally, chilling or freezing the crust before adding the filling is essential as it helps the butter solidify and bind the crumbs together.
Yes, you can certainly experiment with different types of chocolate, but be mindful of the cocoa percentage. Using milk chocolate will result in a much sweeter and less intense chocolate flavor, and might require slightly less cream as milk chocolate tends to be softer. For a richer, more sophisticated flavor, opt for a dark chocolate with 70% cocoa or higher. Always use baking chocolate or high-quality chocolate chips for the best melting and ganache texture.
Proper Storage for Freshness
Proper storage ensures your mini chocolate cheesecakes remain fresh and delicious for as long as possible. Here’s how to store them:
Refrigerator Storage
These delightful mini chocolate cheesecakes are best enjoyed within 1-2 days of making them for optimal freshness and crust texture. To store, place them in an airtight container to prevent them from absorbing odors from other foods in the refrigerator and to keep them from drying out. They will remain safe to eat for about 4-5 days, however, do be aware that the Oreo crusts may gradually become softer and less crisp over time due to moisture from the filling. If serving for a special occasion, prepare them closer to the event for the best experience.
Freezing Instructions
Yes, you can absolutely prepare these cheesecakes ahead of time and store them in the freezer for later enjoyment! This is a fantastic option for meal prepping desserts or having a sweet treat on hand. Once assembled and firmed up, transfer the individual cheesecakes (without toppings like whipped cream) to an airtight freezer-safe container. They should maintain their quality for up to 1 month. When you’re ready to indulge, simply transfer them from the freezer to the refrigerator and allow them to thaw for a few hours until softened and creamy. Add your desired toppings just before serving.
More Delicious No-Bake & Mini Desserts You’ll Love
If you enjoyed these easy no-bake mini chocolate cheesecakes, you’re in for a treat! Here are a few more simple and decadent recipes that are sure to satisfy your sweet tooth:
-
Easy Mini No Bake Cheesecake Bites
★★★★★ -
Chocolate Cherry Cheesecake (No Bake)
★★★★★ -
Creamy No Bake Biscoff Cheesecake
★★★★★ -
Mini Brownie Bites
★★★★★

Did you try this recipe?
We’d absolutely love to hear about your experience with these mini no-bake chocolate cheesecakes! Let us know what you thought by leaving a comment below. Your feedback and ratings are incredibly valuable. Don’t forget to share your delicious creations on social media and tag us on Instagram, Facebook, & Pinterest! We love seeing your baking adventures!
Thank you for baking with us!
-Kayla from Broken Oven Baking Company
📖 Recipe
5 Ingredient No-Bake Mini Chocolate Cheesecakes
Kayla Burton
Pin Recipe
Equipment
-
Muffin pan with liners
-
Food Processor recommended
-
Electric mixer recommended
-
Mixing bowls
-
Spatula
Ingredients
Oreo Crusts
- 18 whole (216 g) Oreo cookies or similar cream-filled chocolate sandwich cookie
- 6 tablespoons (84 g) unsalted butter measured then melted
Chocolate Cheesecake Filling
- ⅔ cup (120 g) chocolate chips high-quality, semi-sweet or bittersweet
- ⅓ cup (80 g) heavy whipping cream
- 12 ounces (340.2 g) cream cheese room temperature
Optional Toppings
- whipped cream
- crushed Oreos
Instructions
Make the Chocolate Ganache
-
Place the chocolate chips in a small-medium bowl. Heat the heavy whipping cream (in the microwave or over the stove) until it’s simmering.
-
Pour the hot cream over the chocolate chips so they’re completely covered in it. Place a plate over the bowl to trap the steam for 5 minutes.
When the time’s up, stir in a circular motion until it’s a smooth ganache. Set aside.
Make the Oreo Crusts
-
Add the Oreo cookies and melted butter into a food processor. Pulse until they’re crushed into a wet sand-like texture.
-
Evenly distribute the crumbs throughout 12 muffin liners in a muffin pan (about 1-2 tablespoons per muffin cup).
-
Press down with the bottom of a small cup to pack them down firmly. Place the pan in the freezer while making the filling.
Make the Chocolate Cheesecake Filling
-
In a medium-large bowl, mix the cream cheese with an electric mixer (or spatula). This is to make sure it’s softened and doesn’t have any lumps.
-
Using your electric mixer or a whisk, whip the chocolate ganache until it’s light and airy. Fold it into the cream cheese just until combined.
Assemble the Cheesecakes
-
Evenly distribute the chocolate cheesecake filling on top of the Oreo crusts. I like to use a small-medium cookie scoop for this! Spread the filling so it covers the crusts and is smooth on top.
-
Let the cheesecakes firm up by chilling them in the refrigerator for a few hours before serving. Top with whipped cream and extra crushed Oreos, and enjoy!
Save This Recipe! 💌
We’ll email this post to you, so you can come back to it later!
Video
Notes
Make Ahead: You can make and freeze these cheesecakes for up to 1 month. Let them thaw in the refrigerator for a few hours before enjoying.
The provided nutritional information is an estimate per serving. Accuracy is not guaranteed.
