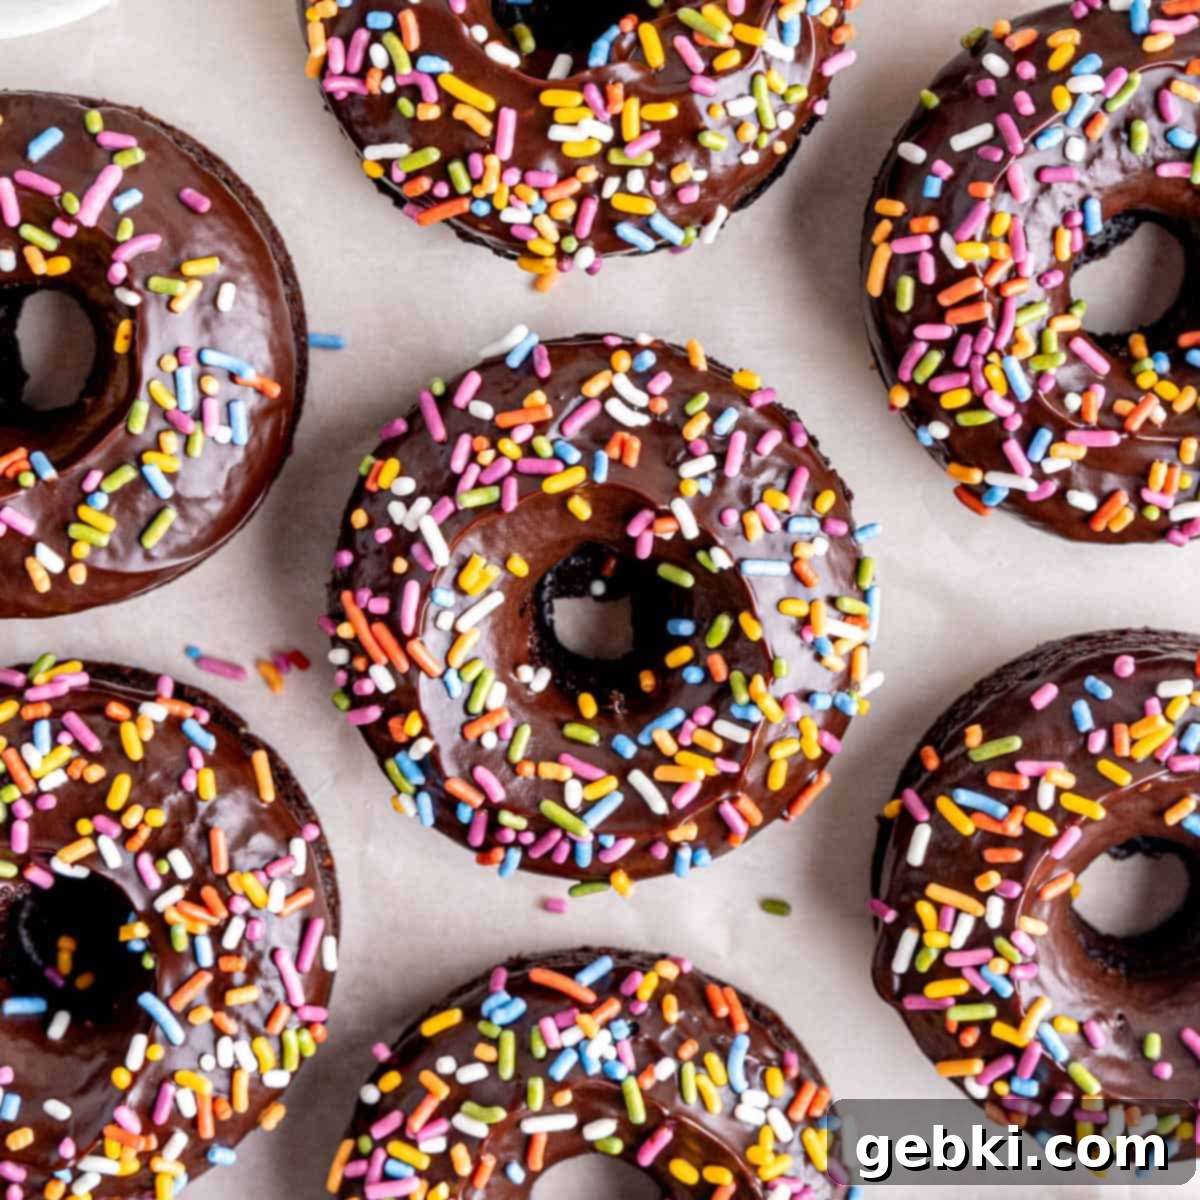
Easy Baked Chocolate Donuts with Sprinkles: Your Go-To Homemade Recipe
Some days call for an irresistible dessert that combines rich, decadent chocolate with a playful touch, and these **baked chocolate donuts with sprinkles** are the ultimate answer. Forget the fuss of deep-frying; our easy recipe delivers perfectly moist, cakey chocolate donuts that are then generously coated in a luxurious, shiny chocolate glaze and adorned with your favorite colorful sprinkles. It’s the perfect harmony of sophisticated indulgence and nostalgic fun, making them a fantastic treat for any time of day!
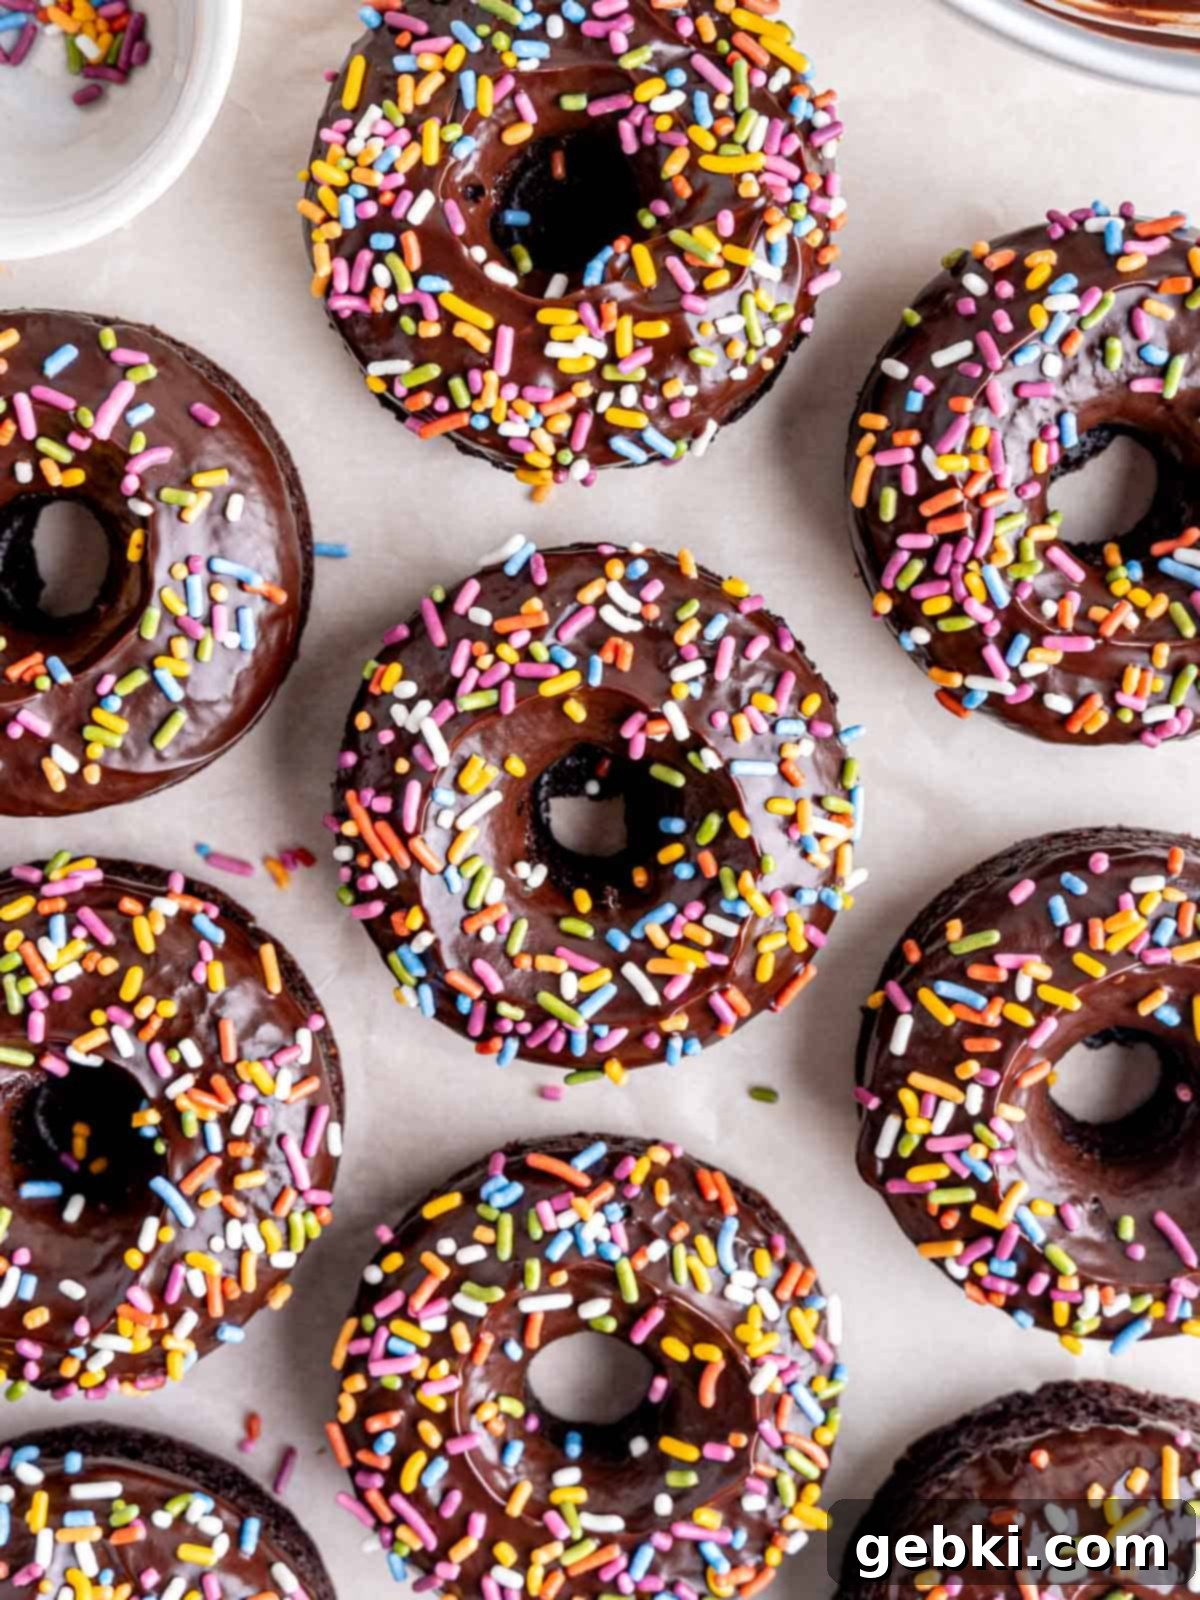
If you’re a fan of these delectable cake donuts, you might also love exploring other unique flavors. For a delightful twist on these chocolatey treats, be sure to check out my Cookies and Cream Donuts with Chocolate Ganache, featuring crushed Oreos for an extra layer of flavor and texture. And for something vibrantly delicious, my Red Velvet Cake Donuts are equally popular and guaranteed to impress!
Why You’ll Adore This Baked Chocolate Donut Recipe
These **homemade chocolate donuts** aren’t just a dessert; they’re an experience waiting to happen. Here’s why this recipe will quickly become a cherished favorite in your kitchen:
- Unforgettable Flavor and Fun: Each bite offers a deep, rich chocolate flavor from the moist cake donut, perfectly complemented by a silky, easy-to-make chocolate glaze. The vibrant pop of sprinkles adds a delightful texture and a playful, whimsical touch that brings a smile to everyone’s face, making them especially appealing to both kids and adults.
- Baked, Not Fried – Less Mess, More Joy: One of the biggest advantages of this recipe is that these delicious donuts are *baked* in the oven rather than deep-fried. This means no messy pots of oil to deal with, no need for the batter to rest for hours, and a significantly lighter, less greasy result. It’s a healthier and much more convenient way to enjoy fresh donuts at home, without sacrificing any flavor.
- Homemade Convenience at Your Fingertips: Why trek to the local donut shop on a busy Saturday morning when you can whip up a batch of these incredible **baked chocolate donuts** in your own kitchen in no time? This recipe is designed for ease and speed, allowing you to enjoy warm, fresh donuts whenever the craving strikes, making it perfect for spontaneous treats or last-minute gatherings.
- A Versatile Treat for Any Occasion: These **chocolate cake donuts** are incredibly versatile. They are perfect for a special breakfast or brunch spread, a comforting afternoon snack, or an elegant dessert after dinner. Their appealing look and delicious taste make them suitable for holiday gatherings, birthday parties, or simply a cozy treat for yourself.
- Sparkle and Shine with Sprinkles: Just like my beloved Sprinkle Sugar Cookies, these donuts embrace the joy of sprinkles! You can customize them with different colors and shapes to match any theme or simply add a burst of rainbow cheer. Sprinkles don’t just look good; they add a subtle crunch and extra layer of fun that makes these donuts truly special.
Craving more delicious donut recipes? Explore these other delightful options:
- Glazed Blueberry Cake Donuts
- S’mores Donuts
- Banana Baked Donuts
- Cinnamon Roll Donuts
Essential Ingredients for Perfect Chocolate Sprinkles Donuts
Crafting these delectable **chocolate sprinkle donuts** requires a few simple ingredients, each playing a crucial role in achieving their tender texture and rich flavor. Here’s a detailed look at what you’ll need:
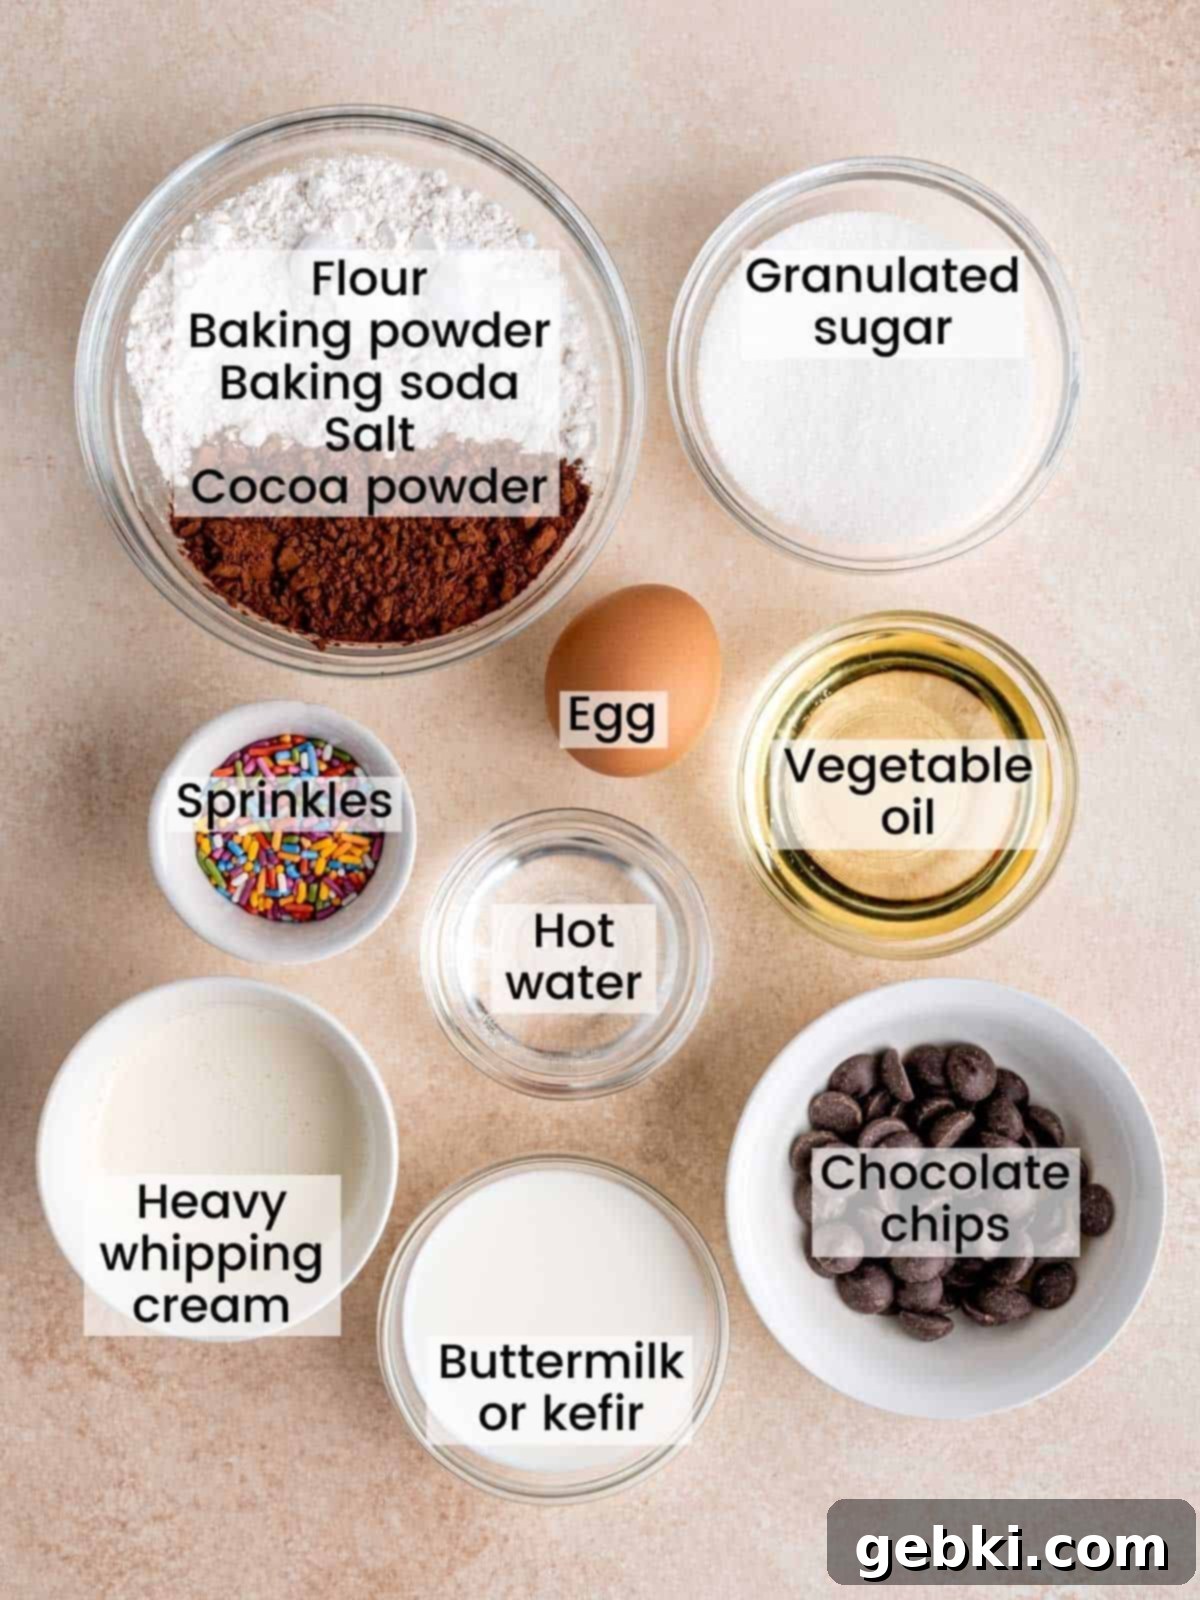
- All-Purpose Flour: The structural base for our cakey donuts. For the most accurate results, weigh your flour using a kitchen scale (recommended) or use the “spoon and level” method rather than scooping directly from the bag.
- Unsweetened Cocoa Powder: This is where the deep chocolate flavor comes from. Using unsweetened cocoa allows you to control the sugar content of the donuts. While Dutch-processed cocoa gives a darker color and milder flavor, natural cocoa will react more strongly with the baking soda for a greater rise. Either works here.
- Baking Powder & Baking Soda: These are our leavening agents, crucial for giving the donuts their soft, fluffy, cake-like texture. Baking soda reacts with the acidity in the buttermilk, while baking powder provides additional lift.
- Salt: A small but mighty ingredient that enhances all the other flavors, particularly the chocolate, balancing the sweetness.
- Granulated Sugar: Provides sweetness and moisture, contributing to the tender crumb of the donuts.
- Vegetable Oil (or other neutral oil): Adds moisture and richness, resulting in a wonderfully tender donut. Canola oil, sunflower oil, or any other neutral-flavored oil will work well.
- Egg: Acts as a binder, adding structure, richness, and moisture to the donut batter. Ensure it’s at room temperature for better emulsification with other ingredients.
- Buttermilk or Plain Whole Milk Kefir: These acidic ingredients react with the baking soda to help the donuts rise, while also adding a subtle tang and keeping the donuts incredibly moist. Room temperature is best.
- Hot Water: Helps to “bloom” the cocoa powder, intensifying its chocolate flavor and contributing to a slightly thinner batter consistency that’s ideal for piping into donut pans.
- Heavy Whipping Cream: The base for our luscious chocolate ganache. Use full-fat heavy cream for the best rich and smooth consistency.
- Chocolate Chips (for ganache): The star of our glaze! It’s crucial to use high-quality chocolate chips or a chopped chocolate bar with at least 60% cocoa content. Lower quality chocolate often contains less cocoa butter and more stabilizers, which can lead to a grainy or separated ganache.
- Sprinkles: The fun, colorful finishing touch! I love using my favorite rainbow decorating sprinkles, but feel free to choose any color or shape to suit your mood or occasion.
Refer to the recipe card below for exact quantities and measurements.
Exciting Substitutions & Creative Variations
While this recipe for **baked chocolate donuts with sprinkles** is perfect as is, it’s also incredibly adaptable. Feel free to get creative and customize them to your liking with these simple substitutions and fun variations:
- Alternative Toppings: Instead of traditional sprinkles, try a different topping for your frosted donuts. Chopped nuts (like walnuts, pecans, or almonds) add a lovely crunch, while crushed sandwich cookies (such as Oreos or Biscoff) offer a unique flavor and texture. Shredded coconut, mini chocolate chips, or even a drizzle of white chocolate can also be fantastic options.
- Mix Up the Chocolate Icing: The ganache is wonderfully versatile! Experiment by using different types of chocolate chips in place of the dark chocolate. White chocolate ganache offers a sweeter, creamier contrast, while butterscotch chips provide a rich, caramelized flavor. For a nutty twist, try peanut butter chips, or stick with a classic semi-sweet chocolate for a slightly less intense chocolate flavor.
- Spicy Mexican Hot Chocolate Donuts: Transform these into a unique treat by adding a touch of spice. Incorporate a small amount of ground cinnamon (¼-½ teaspoon) and a pinch of cayenne pepper (⅛ teaspoon) into both the dry ingredients of the donut batter and the chocolate ganache. This combination creates a warm, subtly spicy kick that perfectly complements the rich chocolate.
- Coffee-Infused Donuts: For coffee lovers, add 1-2 teaspoons of instant espresso powder to the dry ingredients for an intensified chocolate flavor in the donuts. You can also add a hint of espresso to the hot cream for the ganache.
Please note that this recipe has not been extensively tested with all possible substitutions or variations. If you do replace any ingredients, we’d love to hear how they turned out in the comments below! Your feedback helps others in our baking community.
Essential Equipment for Homemade Baked Donuts
One of the beauties of making these **easy chocolate donuts** at home is that you don’t need a lot of specialized kitchen gadgets. Here’s a quick rundown of the simple equipment that will make your donut-making process smooth and enjoyable:
- Donut Pan: This is the star of the show for baked donuts! You’ll need a donut pan to give your donuts their classic shape without the need for frying. I highly recommend using a non-stick metal donut pan or a flexible silicone donut pan to ensure easy release and perfectly formed donuts every time.
- Mixing Bowls: You’ll need at least two medium-sized mixing bowls – one for your wet ingredients and one for your dry ingredients.
- Whisk and Spatula: Essential for combining your ingredients thoroughly and gently.
- Piping Bag (Optional, but Recommended): A reusable piping bag or disposable piping bag makes filling the donut pan a significantly cleaner and more efficient process, allowing for evenly sized donuts. If you don’t have one, a large resealable plastic bag with a corner snipped off works just as well! Alternatively, you can carefully spoon the batter into the donut molds.
- Wire Cooling Rack: Crucial for allowing your freshly baked donuts to cool evenly and for letting the chocolate glaze set properly without sticking.
- Small Saucepan or Microwave-Safe Bowl: For heating the heavy cream to make the ganache.
Step-by-Step Guide to Baking Delicious Chocolate Donuts
Making these **homemade chocolate donuts** is a straightforward process that yields incredibly rewarding results. Follow these detailed steps to create your own batch of delightful **chocolate cake donuts**:
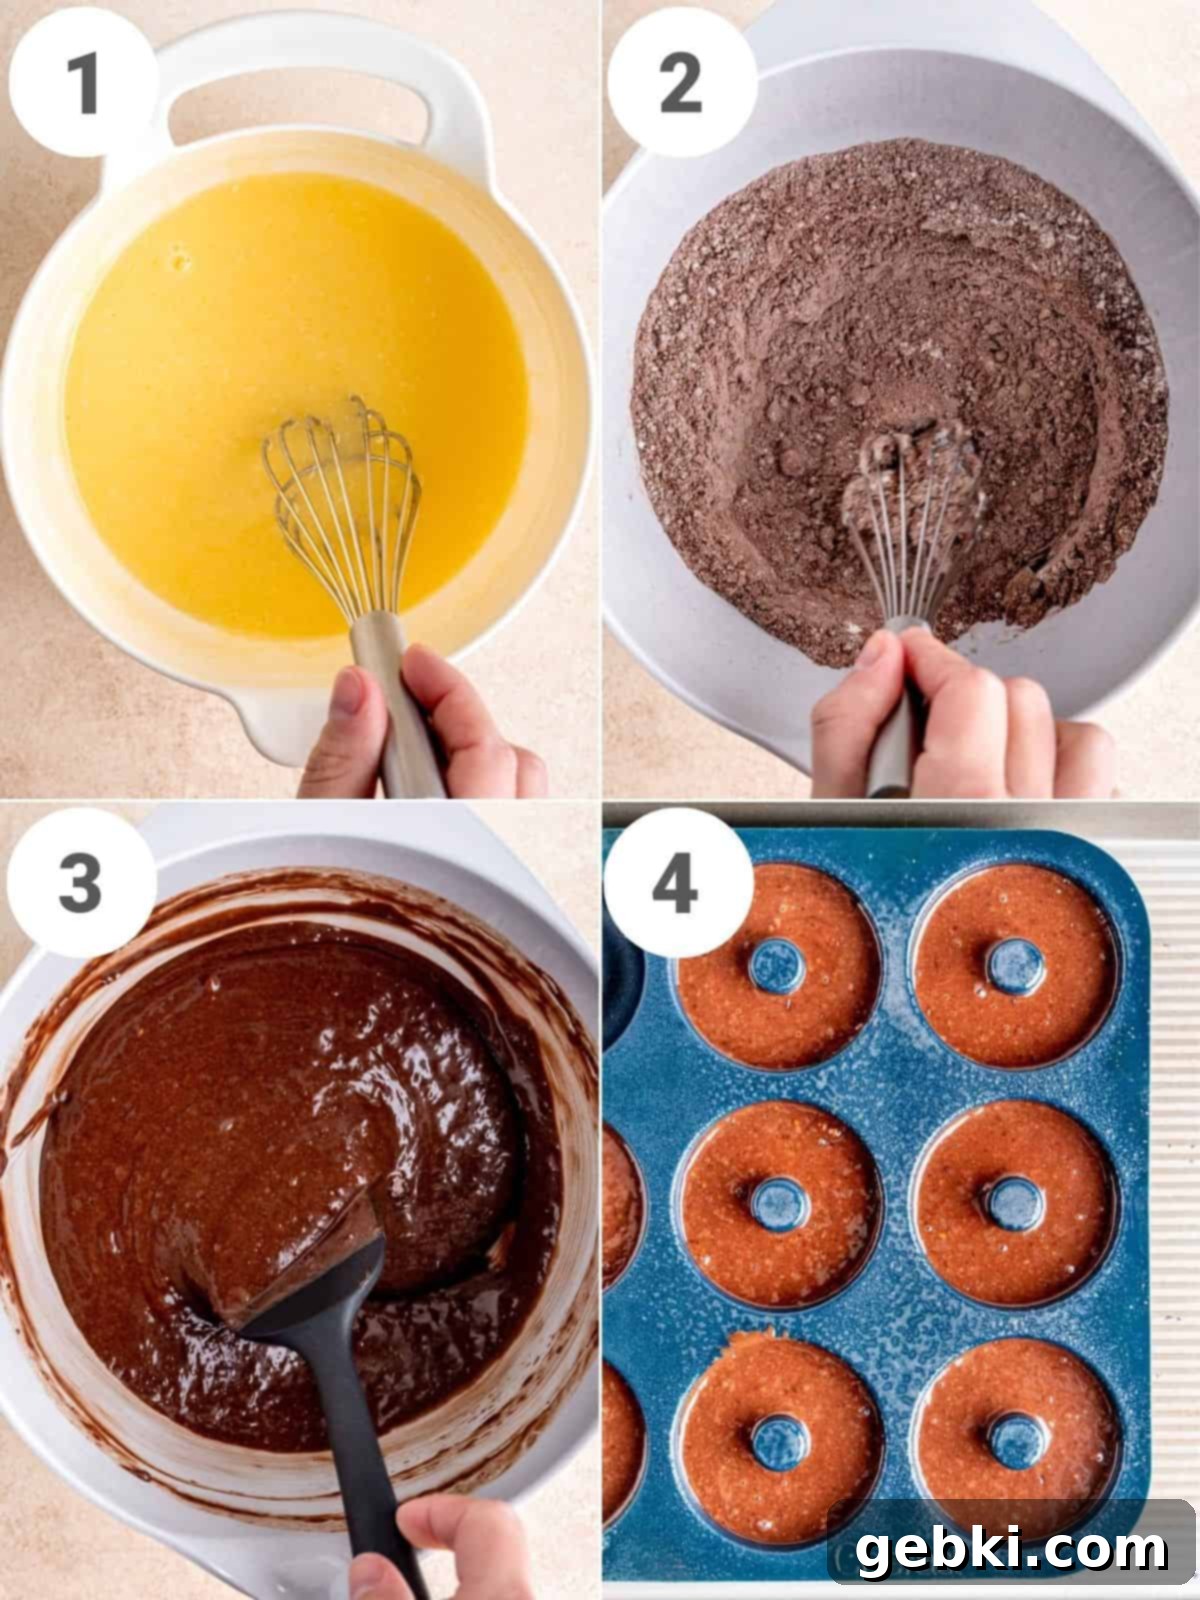
Step One (Picture 1 above) – Prepare the Wet Ingredients: In a medium-sized mixing bowl, combine the granulated sugar and vegetable oil. Whisk them together until they are well incorporated. Next, mix in the room temperature egg until fully combined, followed by the buttermilk (or plain kefir). Continue whisking until the wet mixture is smooth and homogenous.
Step Two (Picture 2 above) – Combine Dry Ingredients: In a separate, larger mixing bowl, add the all-purpose flour, unsweetened cocoa powder, baking powder, baking soda, and salt. Whisk these dry ingredients together thoroughly until they are uniformly combined, ensuring the leavening agents are well distributed.
Step Three (Picture 3 above) – Mix Batter & Add Hot Water: Gradually pour the wet ingredients into the dry ingredients. Stir gently with a spatula or whisk until just a few streaks of flour remain. Do not overmix! Then, slowly add the hot water, mixing until the batter is just combined. The batter will be slightly thinner and runnier than traditional cake batter, which is perfect for piping.
Step Four (Picture 4 above) – Fill Donut Pan & Bake: Transfer the donut batter into a piping bag (or a large resealable plastic bag with a corner snipped off). Cut off the tip of the piping bag and carefully pipe the batter into your greased donut pan, filling each mold about two-thirds of the way full. This recipe typically yields 8-9 donuts, depending on the specific depth of your donut pan.
Bake the donuts in a preheated oven at 350°F (177°C) for approximately 13-17 minutes. You’ll know they’re ready when the tops are puffed up, the edges are set, and they spring back lightly when gently pressed with your finger. Allow them to cool in the pan for a few minutes until they are just warm to the touch. This helps them firm up slightly before transferring. Once slightly cooled, carefully transfer the warm donuts to a wire rack to cool completely. While they finish cooling, prepare your decadent chocolate ganache.
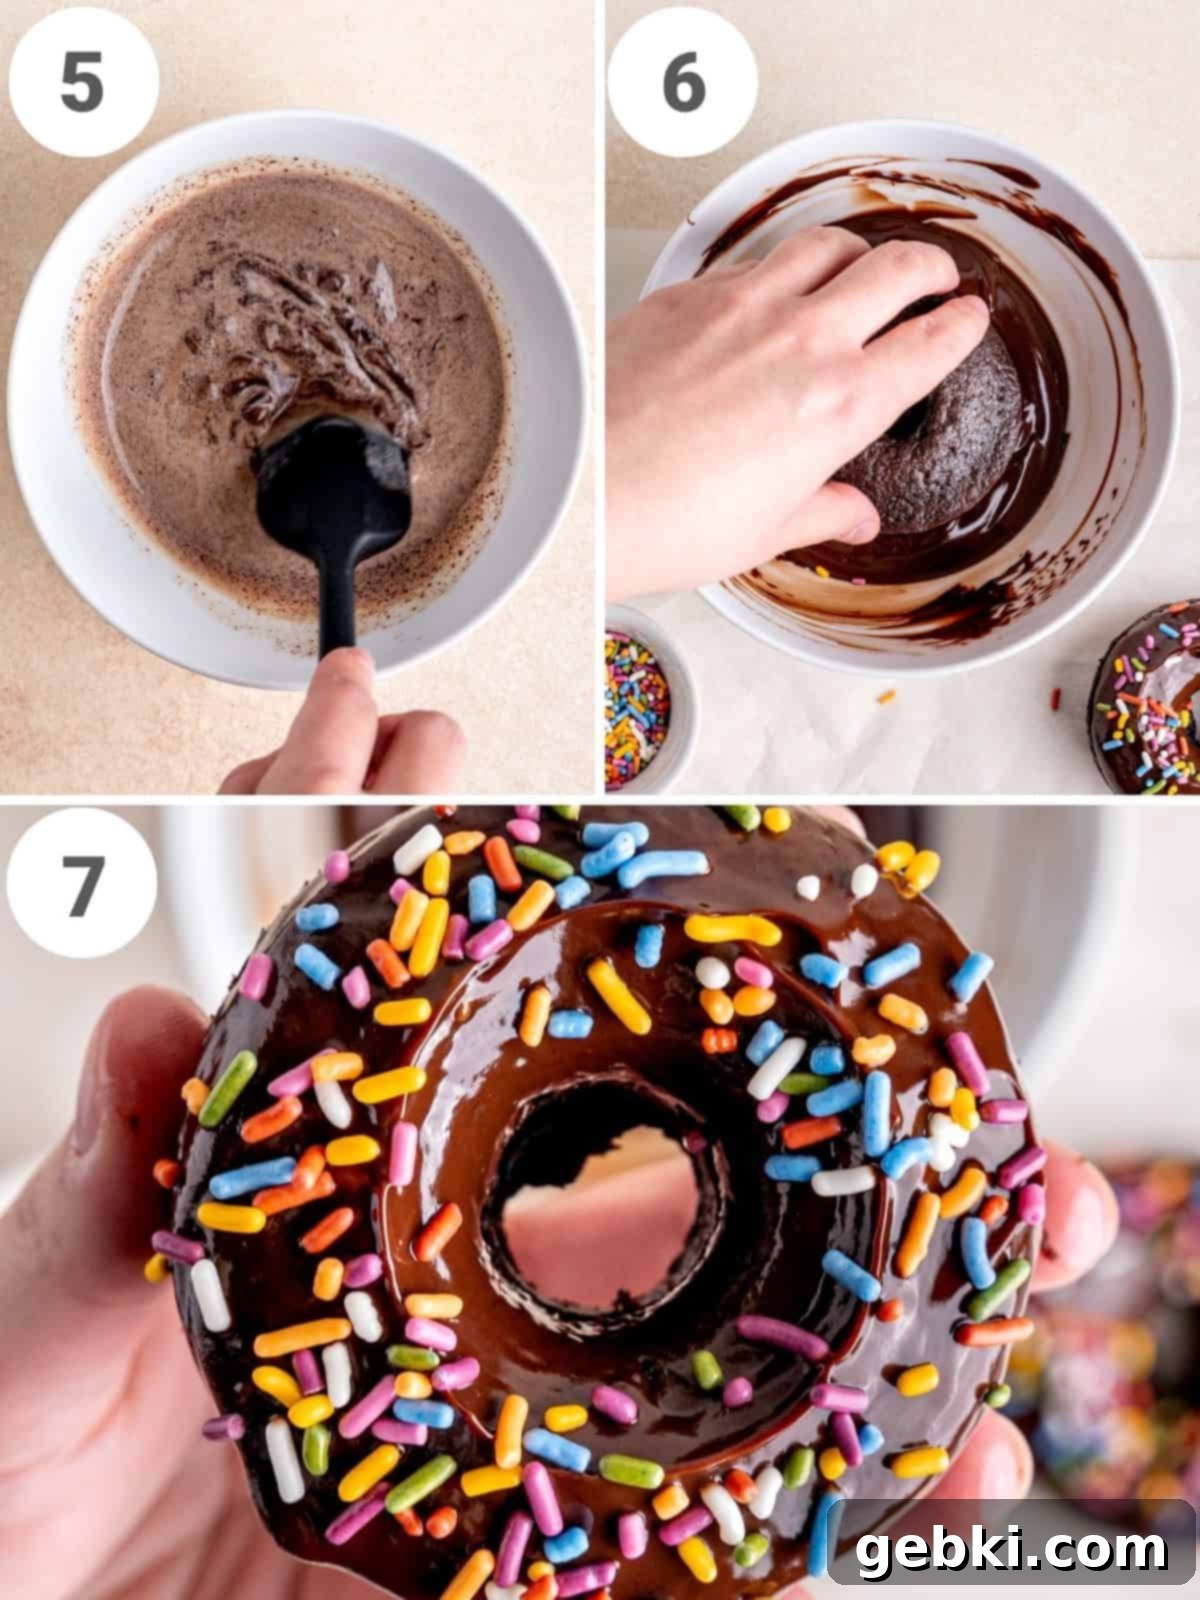
Step Five (Picture 5 above) – Create the Chocolate Ganache: While your **baked donuts** are cooling completely on the wire rack, prepare the luxurious chocolate ganache. Place your high-quality chocolate chips (or finely chopped chocolate bar) in a heatproof bowl. In a small saucepan, heat the heavy whipping cream over medium heat until it just begins to simmer, or microwave it in 20-second intervals, stirring in between, until hot. Once simmering, pour the hot cream directly over the chocolate chips, ensuring they are fully submerged. Immediately cover the bowl with a plate or plastic wrap to trap the heat and let it sit undisturbed for 5 minutes. This allows the hot cream to melt the chocolate thoroughly.
Step Six (Picture 6 above) – Achieve Silky Smooth Ganache: After 5 minutes, remove the plate. Using a rubber spatula, begin stirring the chocolate and cream mixture in a gentle circular motion, starting from the center of the bowl and gradually working your way outwards. Continue stirring until all the chocolate is melted and fully incorporated, resulting in a perfectly smooth, glossy, and homogenous chocolate ganache. The consistency should be thick enough to coat the donuts beautifully.
Step Seven (Picture 7 above) – Dip and Decorate with Sprinkles: Once the donuts are completely cool and the ganache is ready, it’s time to decorate! One at a time, gently dip the top of each chocolate donut into the warm ganache, allowing any excess to drip off. Immediately, while the ganache is still wet and sticky, cover the top of the donut generously with your chosen sprinkles. Place each decorated donut back on the wire cooling rack to allow the ganache to set. Repeat with the remaining donuts. Once set, these **chocolate donuts with sprinkles** are ready to be devoured!
Expert Baking Tips for Flawless Chocolate Donuts
Achieving bakery-quality **homemade chocolate donuts** is easier than you think with a few simple tricks. Keep these expert baking tips in mind for the best possible results:
- Tip #1 – No Piping Bag? No Problem! While a piping bag (or a large Ziploc bag with the corner snipped) offers the neatest way to fill your donut pan, it’s not strictly necessary. If you don’t have one, simply spoon the batter carefully into each donut cavity. You can also use two spoons to scoop and gently nudge the batter into place.
- Tip #2 – The Golden Rule: Don’t Overmix Your Batter! This is perhaps the most crucial tip for tender, cakey donuts. Overmixing develops the gluten in the flour, leading to a tough, dense texture. Mix the wet and dry ingredients only until they are *just combined* and you no longer see significant streaks of dry flour. A few small lumps are perfectly fine and preferable to an overmixed batter.
- Tip #3 – Stability for Silicone Donut Pans: If you’re using a flexible silicone donut pan, it’s a good idea to place it on top of a sturdy metal baking sheet before filling and putting it in the oven. This provides stability, prevents the flexible pan from flopping around, and makes it much easier to transfer in and out of the oven.
- Tip #4 – Room Temperature Ingredients are Key: For a smooth, well-emulsified batter and evenly baked donuts, ensure your egg and buttermilk (or kefir) are at room temperature. Cold ingredients can cause the batter to seize up and can affect the texture of the final product. Simply take them out of the fridge about 30 minutes before you start baking.
- Tip #5 – Cool Completely Before Glazing: Patience is a virtue when it comes to glazing! It’s essential that your **baked chocolate donuts** are completely cool before you dip them in the warm chocolate ganache. If the donuts are still warm, the ganache will melt, slide off, and not set properly, leading to a messy and unappeiling result.
Common Questions About Chocolate Donuts with Sprinkles
No problem! You can easily make your own homemade buttermilk substitute. Simply add 1 tablespoon of white vinegar or lemon juice to a liquid measuring cup. Then, fill the rest of the cup with regular milk (dairy or non-dairy) until it reaches the ⅓ cup line. Stir gently and let it sit for about 5-10 minutes until it slightly curdles. This “soured” milk will provide the necessary acidity for the recipe.
The primary difference lies in their leavening agents and texture. A **cake donut**, like these **baked chocolate donuts**, uses chemical leaveners such as baking soda and baking powder. This results in a dense, moist, and tender crumb, much like a cake. They are quicker to make because they don’t require any rise time. Traditional **yeasted donuts**, on the other hand, rely on yeast for their rise, giving them a lighter, airier, and slightly chewy texture. Yeasted donuts typically require proofing time for the dough to rise and are often deep-fried, while cake donuts are usually baked or fried quickly without proofing.
Absolutely! While the chocolate ganache is truly divine, these versatile **chocolate cake donuts** would also be delicious with your favorite alternative icing. Consider a classic vanilla buttercream, a tangy cream cheese frosting (especially if you like a little contrast), a simple powdered sugar glaze, or even a peanut butter frosting for an extra indulgent treat. Just ensure your chosen frosting has a good consistency for dipping or spreading.
Using high-quality chocolate (at least 60% cocoa) is essential for a smooth, glossy, and perfectly set ganache. Lower quality chocolate often contains more sugar, less cocoa butter, and various stabilizers or waxes that prevent it from emulsifying properly with the heavy cream. This can result in a ganache that is grainy, dull, or separates easily. Good quality chocolate ensures a rich flavor and a beautifully consistent, stable glaze that sets well on your **chocolate donuts**.
The best way to tell if your **baked chocolate donuts** are done is by gently pressing on the top with your finger. If they spring back readily and feel firm to the touch, they are likely cooked through. You can also insert a toothpick into the thickest part of a donut; if it comes out clean or with a few moist crumbs attached, it’s ready. Avoid overbaking to keep them moist and tender.
Storing Your Delicious Chocolate Donuts
To keep your **homemade chocolate donuts with sprinkles** fresh and delicious for as long as possible, proper storage is key:
Room Temperature: If your donuts are glazed, they are best enjoyed fresh within 1-2 days. Store them in an airtight container at room temperature. The glaze will set firm, but will soften slightly over time. Unglazed **baked chocolate donuts** can be stored at room temperature in an airtight container for 3-5 days.
Refrigerator: To extend their freshness, especially in warmer climates or if your ganache is particularly soft, you can store glazed **chocolate sprinkle donuts** in an airtight container in the refrigerator for up to 1 week. Bring them to room temperature for about 15-20 minutes before serving for the best flavor and texture.
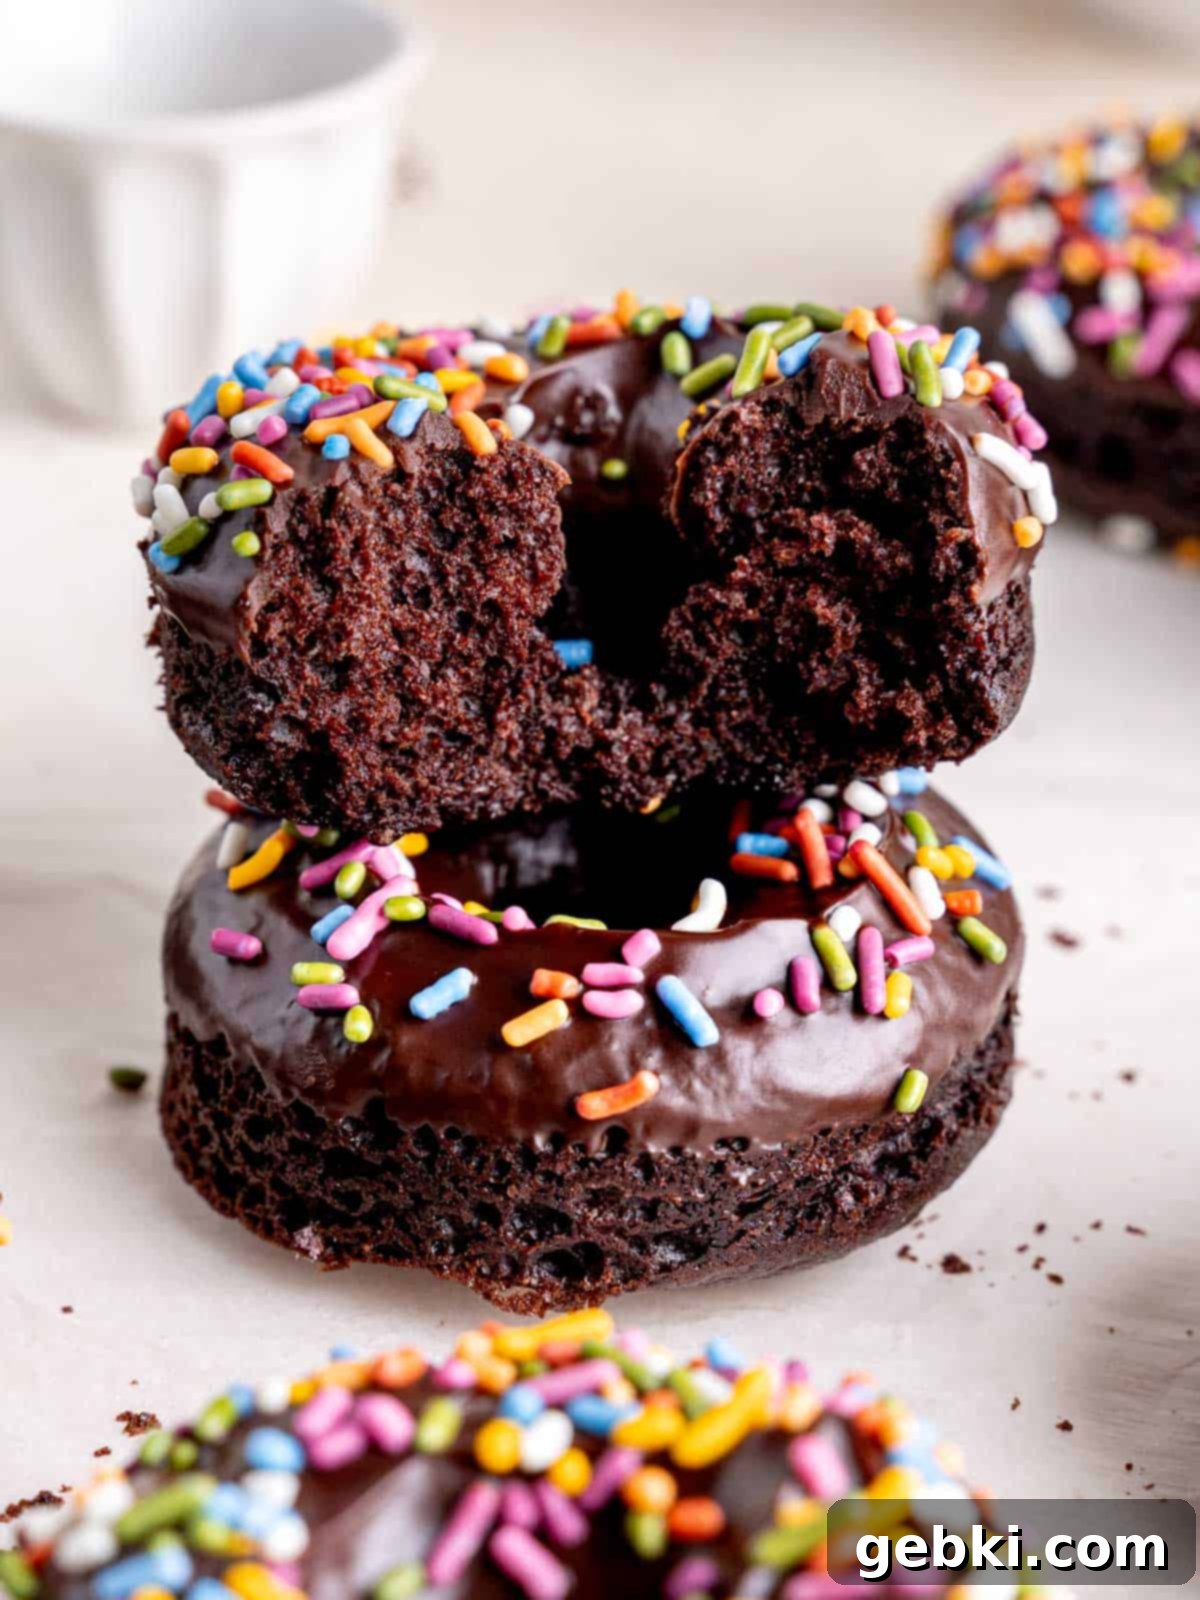
Freezing Instructions (Best for Unglazed Donuts): For longer storage, you can freeze your **chocolate cake donuts** *before* glazing them. Once the baked donuts are completely cooled, wrap each donut tightly in plastic wrap, then place them in a freezer-safe bag or airtight container. They can be stored in the freezer for up to 1 month. When you’re ready to enjoy them, thaw the donuts at room temperature for an hour or warm them gently in the microwave for 15-30 seconds. Then, prepare the fresh ganache, dip them, and add sprinkles as directed in the recipe for a freshly made taste!
More Irresistible Recipes You’ll Love
-
Mini Brownie Bites
-
Almond Poppy Seed Muffins
-
Orange Chocolate Cake with Ganache
-
Double Chocolate Pumpkin Muffins
Did you try this recipe? I’d love to see it!
Tag @brokenovenbaking on Instagram & Facebook and leave a ⭐️ review below!
📖 Recipe
Chocolate Donuts with Sprinkles
Kayla Burton
Pin Recipe
Equipment
-
Mixing bowls
-
Measuring spoons
-
Scale/measuring cups
-
Whisk
-
Spatula
-
Piping bag optional, for cleaner filling
-
Donut pan (non-stick or silicone recommended)
-
Wire cooling rack
Ingredients
Chocolate Donuts
- ½ cup (100 g) granulated sugar
- ⅓ cup (78.86 ml) vegetable oil or other neutral oil like canola or sunflower
- 1 large egg at room temperature
- ⅓ cup (78.86 ml) buttermilk or plain whole milk kefir at room temperature
- 1 cup (125 g) all-purpose flour weighed in grams or spooned and leveled
- ¼ cup (21.5 g) unsweetened cocoa powder
- ½ teaspoon baking powder
- ½ teaspoon baking soda
- ⅛ teaspoon salt
- ¼ cup (59.15 ml) hot water
Toppings
- ⅓ cup (78.86 ml) heavy whipping cream
- ½ cup (85 g) chocolate chips or chopped chocolate bar high quality (>60% cocoa)
- ¼ cup sprinkles
Instructions
Chocolate Donuts
-
Preheat your oven to 350°F (177°C) and thoroughly grease a donut pan with cooking spray or butter. This ensures your baked donuts release easily.
-
In a medium bowl, whisk together the granulated sugar and vegetable oil until smooth. Incorporate the room temperature egg, mixing well, then stir in the buttermilk or kefir until fully combined.
-
In a separate, large bowl, combine the all-purpose flour, unsweetened cocoa powder, baking powder, baking soda, and salt. Whisk these dry ingredients together to ensure they are evenly distributed.
-
Pour the wet ingredients into the dry ingredients. Stir gently using a spatula or whisk until only a few streaks of flour are visible. Be careful not to overmix! Finally, gradually mix in the hot water until the batter is just combined. The finished batter will be slightly runny.
-
Transfer the donut batter into a piping bag (or a large Ziploc bag with a small corner snipped off). Pipe the batter into each greased donut mold, filling it about two-thirds full. This recipe typically yields 8-9 delicious chocolate donuts.
-
Bake the donuts on the middle rack of your preheated oven for approximately 13-17 minutes. They are done when the tops appear puffed up and spring back lightly when gently pressed. If using a flexible silicone donut pan, place it on a metal baking sheet for stability.
Note: If you’re using a flexible silicone donut pan, I recommend placing it on top of a metal baking sheet while in the oven to prevent wobbling and ensure even baking.
-
Allow the baked donuts to cool in the pan for a few minutes until they are just warm to the touch. Then, carefully transfer them to a wire rack to cool completely. While they are cooling, proceed to make the luscious chocolate ganache.
Chocolate Ganache
-
Place your high-quality chocolate chips or chopped chocolate bar in the bottom of a small to medium-sized heatproof bowl.
-
Heat the heavy whipping cream in a small saucepan over medium heat or in the microwave (stirring every 20 seconds) until it just begins to simmer. Pour the hot cream over the chocolate chips, ensuring they are completely covered. Immediately place a plate or plastic wrap over the bowl to trap the heat and let it sit for exactly 5 minutes.
-
After 5 minutes, remove the plate. Using a rubber spatula, begin stirring the chocolate and cream mixture in a gentle circular motion, starting from the center of the bowl. Continue stirring patiently until all the chocolate has melted and it transforms into a smooth, glossy, and uniform chocolate ganache.
Assemble the Donuts
-
Once the donuts are completely cool and the ganache is ready, one at a time, dip the top of each baked chocolate donut into the ganache. Allow any excess ganache to drip back into the bowl. Immediately, while the ganache is still wet, generously sprinkle your chosen colorful sprinkles over the top. Place the decorated donuts back on the wire rack to allow the ganache to set completely. Enjoy your beautiful and delicious **chocolate donuts with sprinkles**!
Save This Recipe! 💌
We’ll email this post to you, so you can come back to it later!
Notes
Nutrition: The provided nutrition information is an estimate per serving and is for informational purposes only. Accuracy is not guaranteed and can vary based on specific ingredient brands and preparations.
The provided nutritional information is an estimate per serving. Accuracy is not guaranteed.
