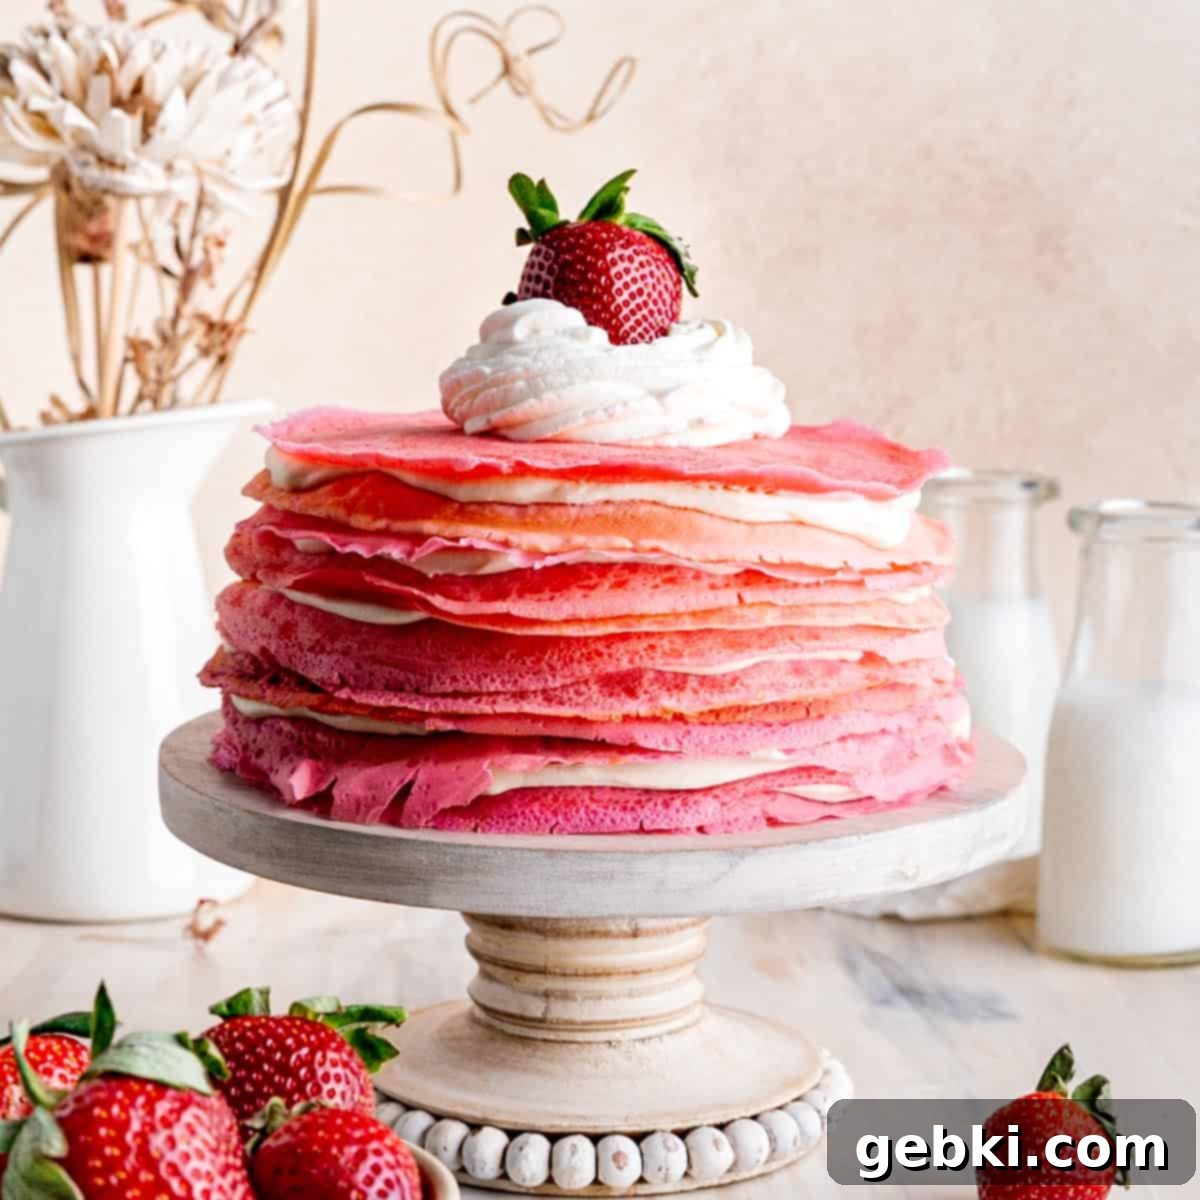
Luscious Strawberries and Cream Crepe Cake: Your Easy No-Bake Cheesecake Dessert
Imagine a dessert that’s both breathtakingly elegant and surprisingly simple to create. This Strawberries and Cream Crepe Cake is precisely that! Picture delicate, paper-thin crepes, lovingly layered with a rich, fluffy no-bake cream cheese filling and an abundance of fresh, juicy sliced strawberries. Every bite is a harmonious blend of textures and flavors, reminiscent of a classic strawberry cheesecake, yet presented in a unique and impressive way. The best part? You can whip up this show-stopping dessert in about an hour, making it perfect for impressing guests or simply treating yourself without spending hours in the kitchen.
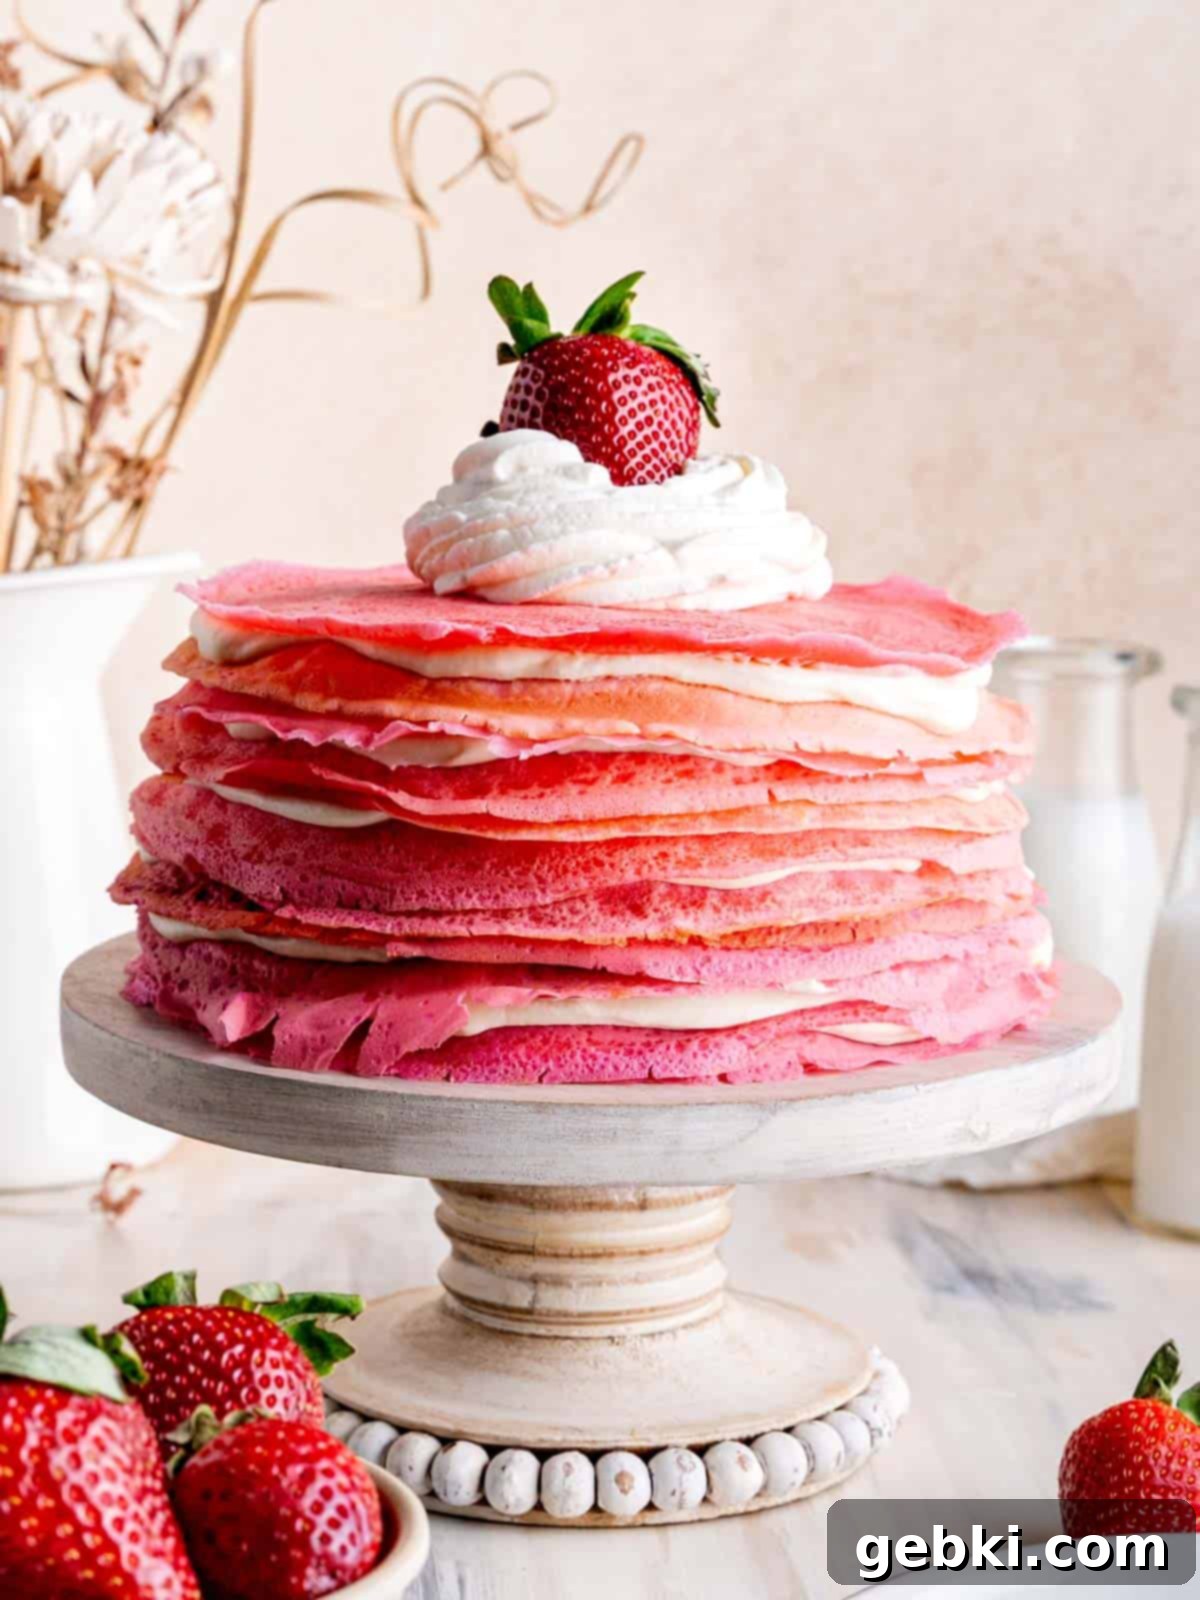
While this particular recipe is inspired by the grandeur of classic Mille Crêpes, it offers a delightful, accessible twist on the traditional French or Japanese crepe cake. My own journey with crepes began later in life, introduced through my boyfriend’s Polish family, who enjoyed them for dinner filled with savory farmer’s cheese or sweet applesauce. This sparked an idea: combining their love for crepes with our shared adoration for cheesecake. The result? A stunning strawberry crepe cake with no-bake cheesecake filling that has quickly become one of my boyfriend’s absolute favorite desserts. Foodie friends have even remarked on its likeness to the famous Lady M crepe cakes, a high compliment indeed!
One of the truly charming aspects of making crepes is the creative freedom they offer. With just a touch of food coloring, you can transform them into any hue you desire. Imagine layering various shades for a beautiful ombré effect, or even creating a vibrant rainbow cake for a festive occasion! For this particular recipe, I chose lovely shades of pink to complement the fresh strawberries, making it an ideal treat for celebrations like Valentine’s Day, Mother’s Day, or baby showers. Of course, you can always choose to let the crepes retain their natural, inviting golden color for a more classic look.
Note: This recipe was originally published on February 9th, 2021, and republished on January 22nd, 2022. No changes were made to the ingredient measurements.
Ingredients for Your Strawberry Crepe Cake
Crafting this delicious Strawberries and Cream Crepe Cake requires a selection of fresh, high-quality ingredients, divided into two main components: the light and airy crepes, and the rich, creamy no-bake cheesecake filling. Each ingredient plays a crucial role in achieving that perfect balance of flavor and texture that makes this dessert so irresistible.
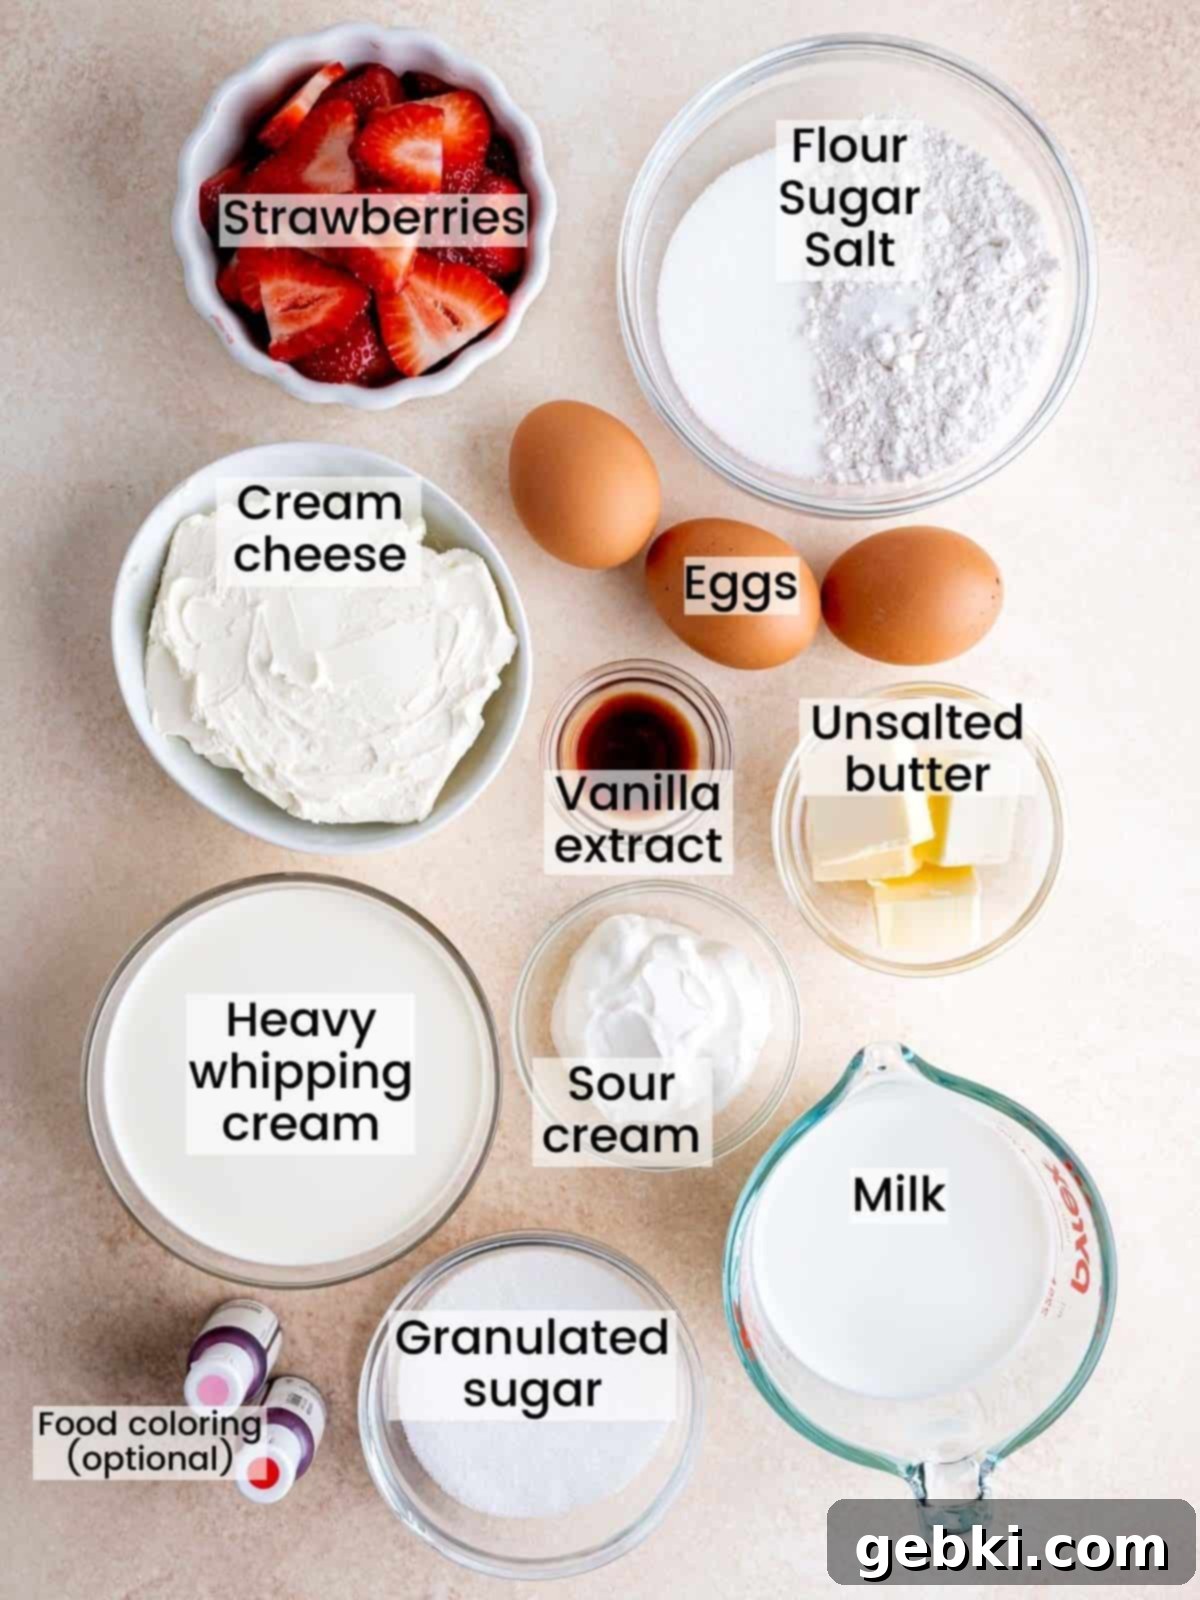
- Strawberries: Freshly sliced strawberries are key for that bright, natural flavor and vibrant color. They provide a delightful tartness that beautifully cuts through the richness of the cream. While fresh is recommended for the best texture and taste, a high-quality strawberry jam or fruit spread can be a convenient alternative if fresh berries are out of season.
- All-Purpose Flour: The foundation for our delicate crepes. It provides structure without making them tough.
- Granulated Sugar: Sweetens both the crepes and the cream cheese filling, ensuring a balanced dessert.
- Salt: A pinch of salt enhances all the other flavors, making them pop.
- Eggs: Essential for binding the crepe batter, adding richness, and contributing to their signature tender texture.
- Vanilla Extract: A crucial flavor enhancer for both crepes and the filling, adding warmth and depth.
- Unsalted Butter: Melted and cooled, it adds a lovely richness to the crepes and prevents sticking. Using unsalted butter gives you control over the overall saltiness.
- Cream Cheese: The star of our no-bake cheesecake filling. Ensure it’s at room temperature for a smooth, lump-free mixture.
- Heavy Whipping Cream: When whipped to stiff peaks, it creates the light and airy texture of the cheesecake filling.
- Sour Cream: Adds a subtle tang and moisture to the cream cheese filling, balancing the sweetness and enhancing that classic cheesecake flavor.
- Milk: I recommend using 2% or whole milk for the crepe batter. The fat content contributes to a richer, more pliable crepe.
- Food Coloring (optional): For those who love to add a playful touch! Choose pinks for strawberries, or any color to match your occasion.
See recipe card below for specific quantities.
Substitutions & Creative Variations
This Strawberries and Cream Crepe Cake is incredibly versatile, allowing you to tailor it to your preferences or whatever ingredients you have on hand. While the recipe is perfect as written, don’t hesitate to experiment with these ideas!
Fruit Forward: Feel free to swap out or combine strawberries with other fruits. Raspberries, blueberries, or thinly sliced peaches would be absolutely delicious, adding their unique sweetness and tartness. A combination of mixed berries could create a beautiful multi-colored filling. For an even easier option, a high-quality fruit spread, such as strawberry or raspberry jam, can be used in place of fresh berries, providing a burst of concentrated fruit flavor in every layer.
Flavor Twists: Beyond fruit, you can infuse the crepes or the cream cheese filling with different essences. A touch of almond extract in the crepes can provide a subtle nuttiness that pairs wonderfully with berries. Lemon zest in the cream cheese filling would brighten the flavor profile, creating a lemon-strawberry dynamic. Consider adding a hint of rosewater or orange blossom water for a more exotic touch. You could also experiment with chocolate shavings between layers for a chocolate-strawberry indulgence.
Dietary Considerations: While this recipe has not been extensively tested with alternative ingredients for specific dietary needs, some common substitutions might work. For a dairy-free version, you could try using plant-based milks and cream cheeses, and a dairy-free whipped topping. For gluten-free crepes, a high-quality gluten-free all-purpose flour blend could be attempted, though crepe texture might vary slightly. If you do make any substitutions, we’d love to hear how they turned out in the comments below!
Essential Equipment for Your Crepe Cake
Having the right tools can make all the difference in ensuring a smooth and enjoyable baking (or rather, no-baking) experience for your Strawberries and Cream Crepe Cake.
- 8-inch Nonstick Skillet: This is your most important tool for perfect crepes. An 8-inch nonstick skillet is ideal for achieving the perfect size and thickness. A slightly smaller or larger pan can work, but remember to adjust the amount of batter you pour per crepe accordingly. Too much batter in a small pan makes thick crepes; too little in a large pan results in thin, delicate ones that might tear easily. Adjusting the batter quantity will also affect the total number of crepes you yield.
- Blender: The quickest and easiest way to achieve a silky-smooth crepe batter. Blending helps to fully incorporate ingredients and break down any lumps of flour, which is crucial for thin crepes. An immersion blender or food processor might also work, though I haven’t personally tested these methods for this recipe. If using a regular blender, remember to scrape down the sides periodically to ensure everything is well combined.
- Hand Mixer: For effortlessly creating the fluffy cream cheese filling. While it’s possible to whisk the heavy cream and beat the cream cheese by hand, a hand mixer will save you significant time and energy, ensuring a perfectly smooth and airy consistency for your filling.
- Flexible Spatula and Flat Spatula: These will be your best friends for flipping those delicate crepes. A flexible spatula helps to loosen the edges, and a flat one slides easily underneath for a clean flip.
- Mixing Bowls: You’ll need at least two: one for whisking the heavy cream and another for the cream cheese mixture.
- Measuring Cups and Spoons: For accurate ingredient measurements, crucial for consistent results.
- Parchment Paper: Essential for lining your plate or tray where cooked crepes will stack, preventing them from sticking together.
Step by Step: Crafting Your Crepe Cake Masterpiece
Despite its luxurious appearance, this Strawberries and Cream Crepe Cake is surprisingly straightforward and quick to assemble. Forget the complexities of traditional layer cakes with their intricate baking and elaborate frosting techniques. This recipe involves no baking for the “cake” itself and relies on simple layering for its stunning presentation.
Preparing the Crepe Batter and Delicious Filling
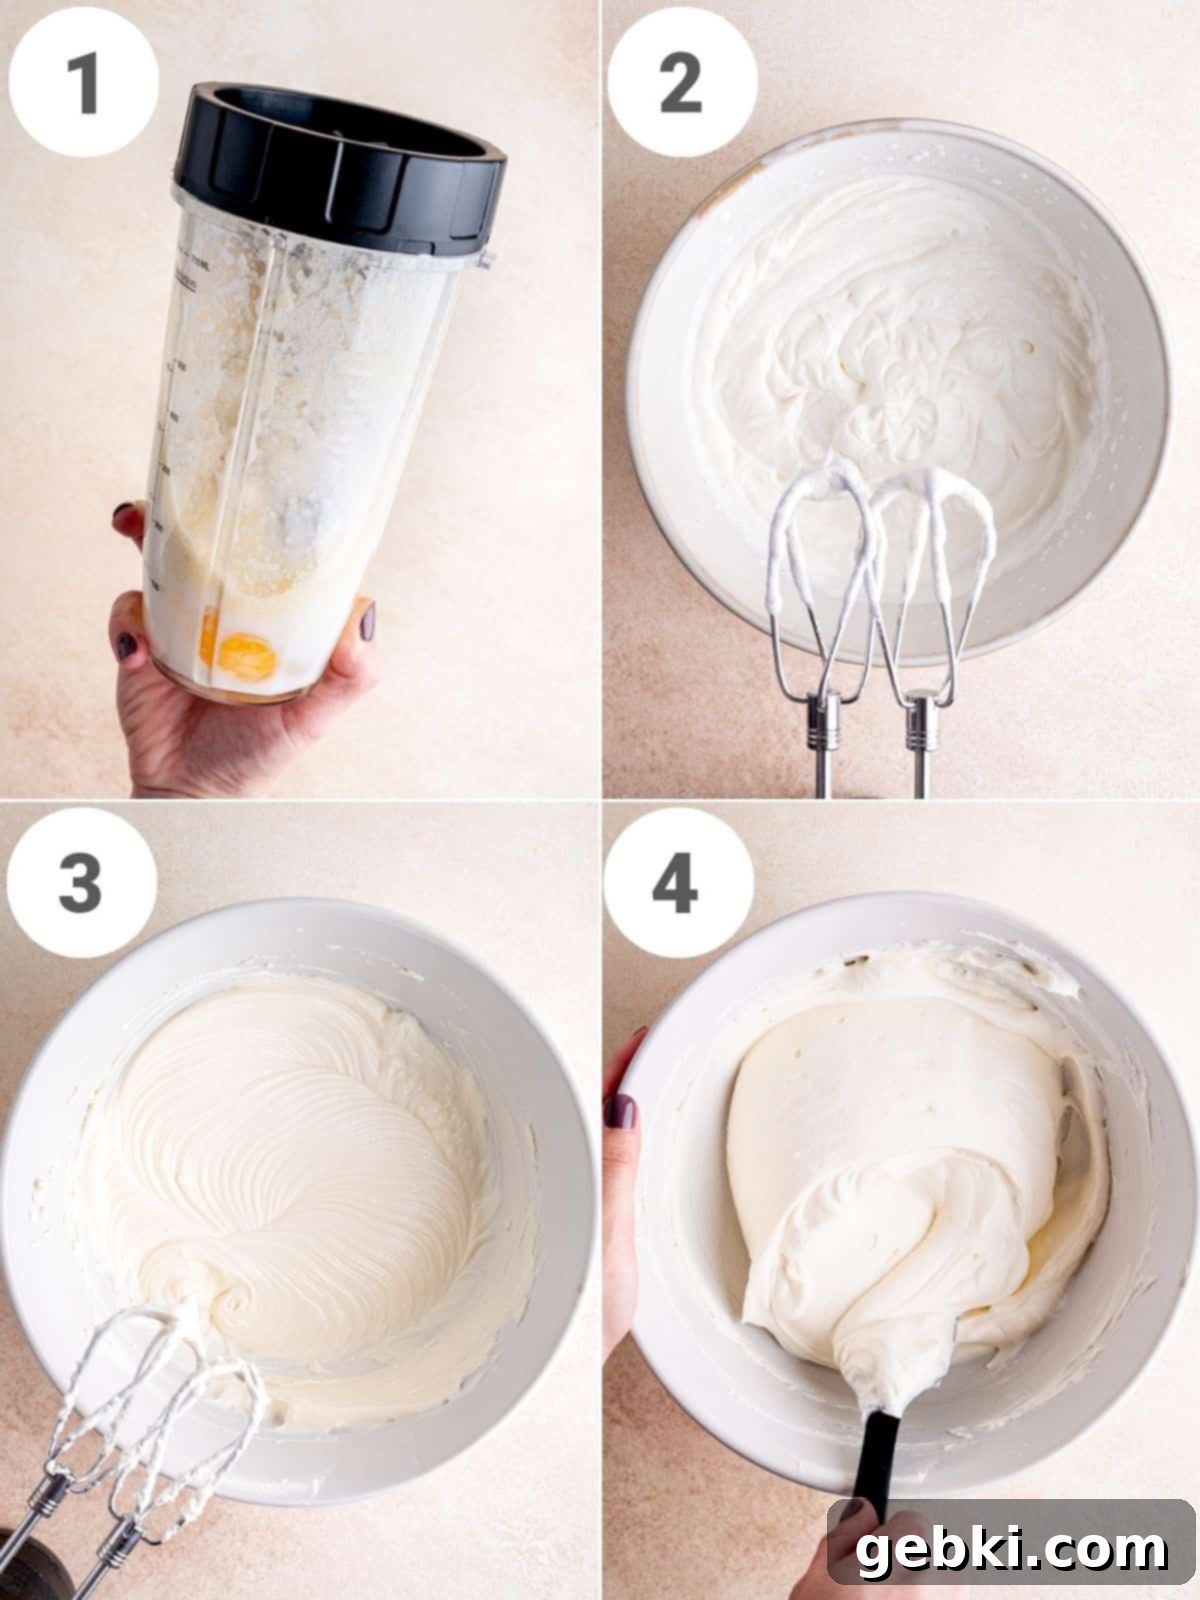
Step One (Picture 1 above) – Prepare the Crepe Batter: In a blender, combine all your crepe ingredients: milk, eggs, cooled melted butter, vanilla extract, all-purpose flour, granulated sugar, and salt. Blend for approximately 30 seconds. Pause halfway through to scrape down any ingredients clinging to the sides of the blender to ensure a uniformly smooth batter. Once blended, cover the batter and refrigerate it for at least 30 minutes. This crucial resting period allows the gluten to relax and the flour to fully absorb the liquids, resulting in exceptionally tender and pliable crepes.
Step Two (Picture 2 above) – Whip the Heavy Cream: Using a hand mixer, whisk the cold heavy cream in a medium bowl until it forms stiff peaks. You’ll know it’s ready when the cream is firm enough to hold its shape when you lift the beaters from the bowl. Place the whipped cream back in the refrigerator to keep it firm while you prepare the cream cheese mixture.
Step Three (Picture 3 above) – Create the Cream Cheese Base: In a large bowl, beat the room temperature cream cheese with your hand mixer until it is perfectly smooth and creamy, with no lumps. Then, thoroughly mix in the sour cream, granulated sugar, and vanilla extract until well combined and light.
Step Four (Picture 4 above) – Fold the Filling Together: Gently fold the prepared whipped cream into the cream cheese mixture using a spatula. Be careful not to deflate the whipped cream; use a light, upward motion until the mixture is uniform and fluffy. Your luscious no-bake cheesecake filling is now ready!
Cooking the Crepes & Assembling Your Stunning Cake
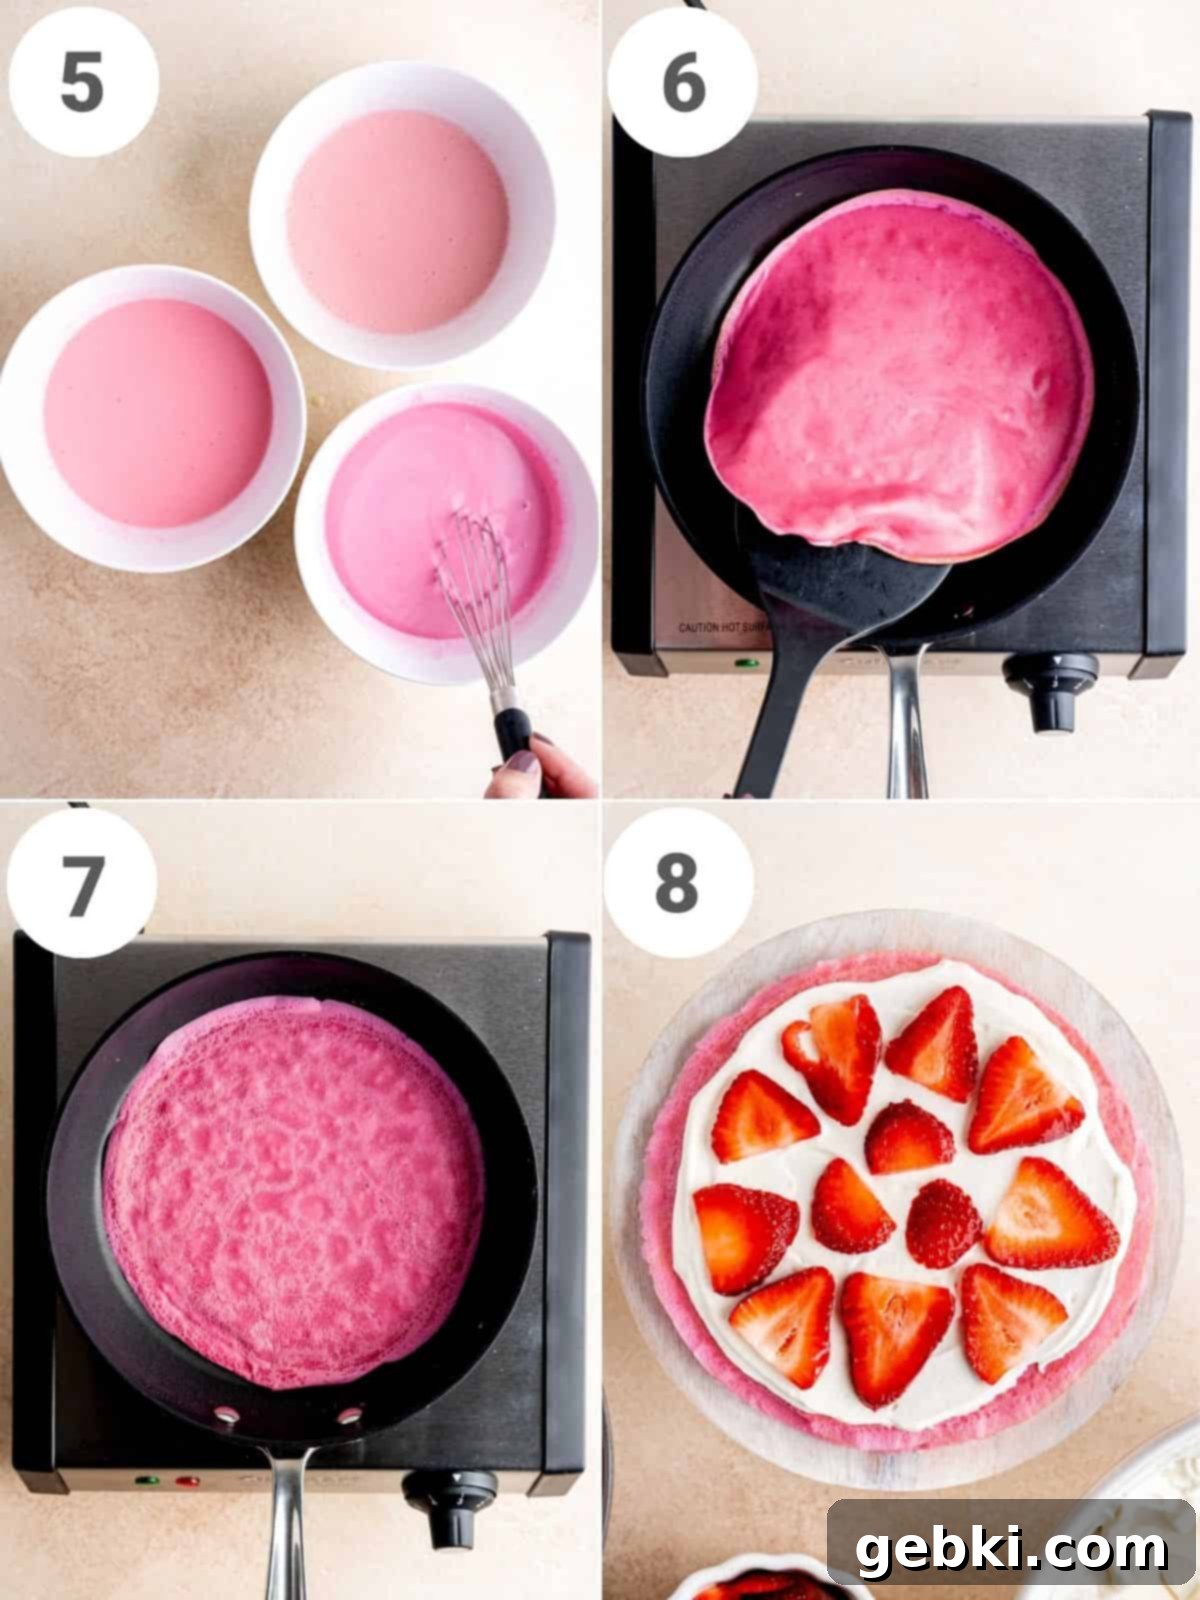
Step Five (Picture 5 above) – Color Your Crepes (Optional): If you’ve decided to add some flair with food coloring, divide your chilled crepe batter into separate bowls. Stir in a few drops of your desired food coloring into each bowl, whisking until you achieve the perfect shade. This is a fantastic way to customize your cake for specific events or themes!
Step Six (Picture 6 above) – Cook the Crepes: Place an 8-inch nonstick skillet over medium-low heat. Lightly grease the pan with a tiny bit of butter – just enough to coat the surface. Once the pan is hot, pour slightly less than ¼ cup of batter into the center. Immediately lift and tilt the pan in a circular motion to allow the batter to spread thinly and evenly across the entire bottom surface. Cook for about 30 seconds, or until the edges appear dry and slightly flaky. Carefully slide a flexible spatula underneath the crepe to loosen it, then use a flat spatula to gently flip it.
Expert Tip for Flipping Crepes – Patience is key! Ensure the edges are well-cooked before attempting to flip. Run a flexible spatula along the entire circumference to make sure no part is stuck to the pan. Then, gently lift an edge and swiftly slide a flat, wide spatula completely underneath the crepe. A quick, confident flip usually works best. Don’t worry if your first few crepes aren’t perfect or get a few small holes; these imperfections will be completely hidden once the cake is assembled.
Step Seven (Picture 7 above) – Finish Cooking Crepes: Allow the second side of the crepe to cook for another 30-45 seconds. Crepes are quite forgiving, so if it wrinkles slightly after flipping, you can gently smooth it out with your spatula. Once cooked, transfer the crepe to a large plate or tray lined with parchment paper. Continue this process, layering parchment paper between each cooked crepe to prevent sticking, until all the batter is used. You should yield at least 12 beautiful crepes from an 8-inch pan.
Step Eight (Picture 8 above) – Assemble Your Crepe Cake: Once your crepes have cooled completely (this is important for the filling to set properly), it’s time to build your cake! Place one crepe on your chosen cake stand or serving plate. Spread a thin, even layer of about two spoonfuls of your luscious cheesecake filling on top, aiming for about ¼ inch thick. Arrange a layer of thinly sliced fresh strawberries over the filling. Place another crepe on top and repeat the process of spreading filling and adding strawberries. Continue layering crepes with filling and strawberries until you’ve used all your crepes, finishing with a final crepe on top. I often add berries to every other layer to ensure a good ratio of cream to fruit, but feel free to add them to every layer if you desire a more intensely fruity cake!
Recipe FAQs: Your Questions Answered
Yes, absolutely! This step is crucial for achieving the soft, delicate texture that perfect crepes are known for. Refrigerating the batter allows the gluten from the flour to fully relax and gives the liquid ingredients ample time to be absorbed. This process results in crepes that are less prone to tearing, more pliable, and have a wonderfully tender mouthfeel. Don’t skip this step for the best results!
Yes, you can use a smaller pan, but you’ll need to adjust the amount of batter per crepe. For example, if using a 6-inch pan, you’d likely use closer to 2 tablespoons of batter. Using a smaller pan will result in more crepes, potentially allowing you to build a taller cake (ensure it’s stable!). Alternatively, you could make two smaller crepe cakes, or simply enjoy any extra crepes with your favorite toppings.
Using a bigger pan is possible, but you’ll need to increase the amount of batter you pour per crepe to ensure it covers the entire bottom surface evenly. For instance, in a 10-inch pan, you might need closer to ⅓ cup of batter. It can be quite challenging to make perfectly circular crepes that don’t reach the edges of a larger pan, so for consistency in size and appearance, I generally don’t recommend trying to make 8-inch crepes in a 12-inch pan.
To maintain its freshness and deliciousness, this Strawberries and Cream Crepe Cake should be stored in an airtight container in the refrigerator. When properly stored, it will remain fresh and delightful for up to 1 week. This makes it a fantastic dessert to prepare a day in advance for entertaining!
Yes, with a few considerations! The crepes themselves are excellent for making ahead. You can cook the crepes and store them in the refrigerator for up to 2 days, or even freeze them for up to 1 month. When storing, always layer wax or parchment paper between each crepe to prevent them from sticking together. Be sure to let frozen crepes thaw completely before gently separating them for assembly. The cream cheese filling, however, is best made fresh on the day you plan to assemble or serve the cake to ensure its optimal fluffy texture.
Simplicity is often the key to elegance! I love to finish this cake with a beautiful swirl of freshly whipped cream on top, adorned with a few vibrant whole strawberries. This minimalistic approach highlights the cake’s natural beauty and the fresh ingredients. You could also sprinkle a dusting of powdered sugar, add a few mint leaves, or incorporate some chocolate shavings for an extra touch.
Because it’s made with a decadent no-bake cream cheese filling, this strawberry crepe cake tastes remarkably similar to a classic strawberry cheesecake! You get the creamy tang of cream cheese, balanced sweetness, and the bright burst of fresh strawberries, all nestled between soft, delicate layers of crepe instead of a graham cracker crust. It’s truly a unique and satisfying dessert experience.
If you’re looking for an even quicker cheesecake fix, yes! These No Bake Cheesecake Bites are a bit less work and feature a delightful graham cracker crust, offering a different but equally delicious no-bake cheesecake experience.
Proper Storage for Leftovers
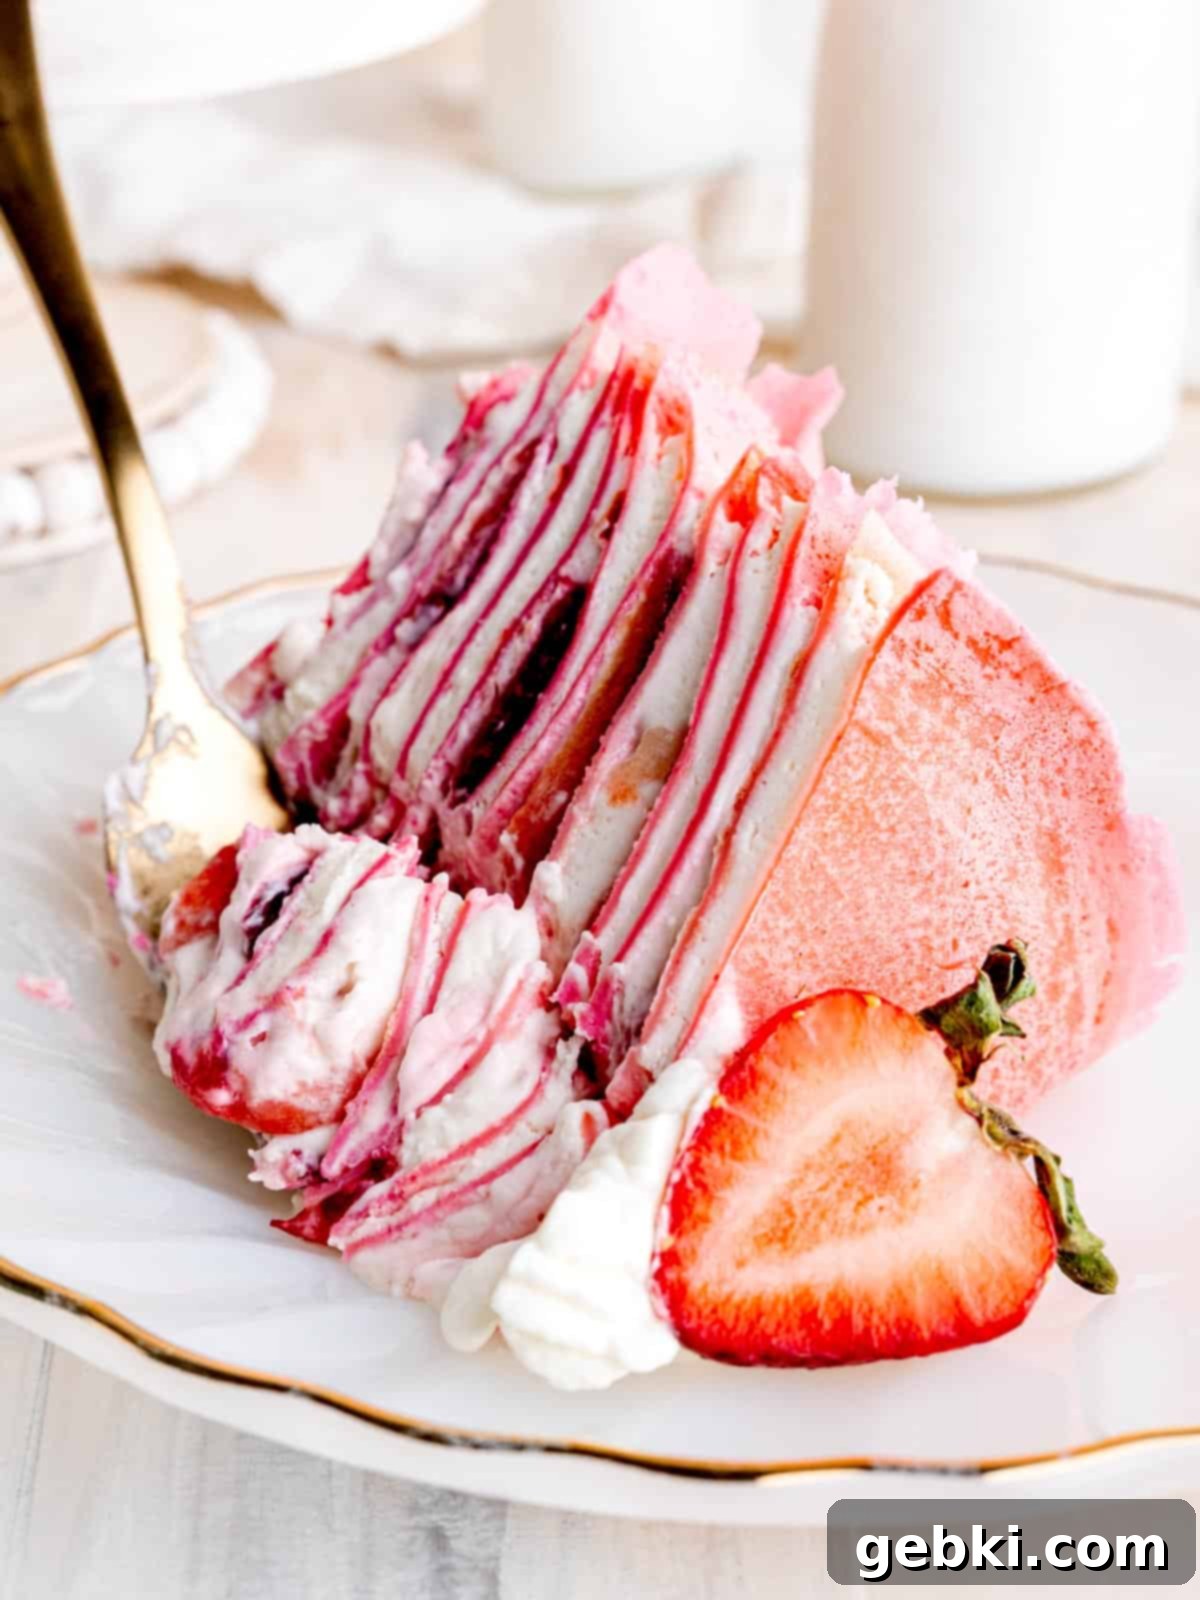
To keep your delicious Strawberries and Cream Crepe Cake fresh and enjoyable, it’s essential to store any leftovers correctly. Place the cake in an airtight container and refrigerate it promptly. When stored this way, the cake will remain fresh and flavorful for up to 1 week. This makes it a great make-ahead dessert, as the flavors often deepen and meld beautifully after a day in the fridge. I do not recommend freezing this cake, as the delicate texture of the crepes and the creamy consistency of the filling can be compromised upon thawing, leading to a less desirable eating experience.
More Delicious Recipes You’ll Love
If you enjoyed this elegant Strawberries and Cream Crepe Cake, you might be looking for more delightful dessert ideas! Here are some other recipes that share a similar sweet appeal or innovative approach to classic treats:
-
Apple Pie Ice Cream (Ninja Creami Recipe)
-
Strawberry Matcha Ice Cream (Ninja Creami Recipe)
-
Soft Lemon Sugar Cookies (That Actually Taste Like Lemon!)
-
5-Ingredient Blueberry Lemon Cheesecake Ice Cream (Ninja Creami Recipe)
Did you try this recipe? I’d love to see how it turned out!
Tag @brokenovenbaking on Instagram or Facebook & leave a ⭐️ review below!
📖 Recipe: Strawberries and Cream Crepe Cake

Strawberries and Cream Crepe Cake
Kayla Burton
📌 Pin Recipe
Equipment
- ☐
Blender
- ☐
Non-stick 8 inch pan
- ☐
Mixing bowls (2 large)
- ☐
Measuring spoons
- ☐
Measuring cups
- ☐
Electric mixer (hand mixer recommended)
- ☐
Flexible spatula
- ☐
Flat spatula
- ☐
Whisk (if not using electric mixer)
- ☐
Parchment paper
Kayla’s Top TipWeigh dry ingredients in grams (g) with a food scale for best results!
Ingredients
Crepes
- ☐ 1 cup (236.59 ml) whole milk
- ☐ 3 large (3 large) eggs
- ☐ 5 tablespoons (70 g) unsalted butter melted and cooled
- ☐ ½ teaspoon (½ teaspoon) vanilla extract
- ☐ ¾ cup (93 g) all-purpose flour
- ☐ ¼ cup (50 g) granulated sugar
- ☐ ⅛ teaspoon (⅛ teaspoon) salt
- ☐ food coloring optional
Cream Cheese Frosting
- ☐ 12 ounces (1½ blocks) (354.37 g) cream cheese room temperature
- ☐ ¼ cup (65 g) sour cream
- ☐ ⅓ cup + 2 tablespoons (92 g) granulated sugar
- ☐ ½ teaspoon (½ teaspoon) vanilla extract
- ☐ 1⅛ cup (266.16 ml) heavy whipping cream
- ☐ ½ pound (8 ounces) (½ pound (8 ounces)) strawberries (or more/less as preferred) thinly sliced (leave a few whole for decorating)
Instructions
Crepe Batter
-
Add all the crepe ingredients (milk through salt) into a blender and pulse for 15 seconds. Carefully remove the lid, scrape down the sides, and pulse for another 15 seconds until completely smooth. Cover and refrigerate for at least 30 minutes to allow the batter to rest.
-
While the crepe batter is chilling, proceed to prepare the creamy no-bake cheesecake filling.
Cream Cheese Filling
-
In a medium bowl, use an electric mixer to whisk the cold heavy whipping cream until it becomes thick and forms stiff peaks. Once firm, gently transfer it to the fridge to keep it chilled while you prepare the remaining filling components.
-
In a separate, large bowl, beat the room temperature cream cheese until it is smooth and completely lump-free. Then, thoroughly mix in the sour cream, granulated sugar, and vanilla extract until the mixture is uniform and creamy. Finally, gently fold the chilled whipped cream into the cream cheese mixture until everything is just combined and airy.
Cooking Crepes
-
If you plan to color your crepes, transfer the chilled crepe batter to a clean bowl. Add a few drops of your chosen food coloring and whisk gently, adding more drops as needed, until you reach your desired color intensity.
-
Prepare a large plate or tray by covering it with parchment paper for stacking the cooked crepes. Heat an 8-inch non-stick pan over low-medium heat and lightly grease its surface with a very small amount of butter.
-
Once the pan is hot, pour slightly less than ¼ cup of the crepe batter into the absolute center of the pan. Immediately lift the pan off the heat and swirl it around gently but quickly, allowing the batter to spread thinly and evenly to coat the entire bottom surface.
-
Cook the crepe for approximately 30 seconds, or until the edges begin to look dry and slightly curled. Carefully run a flexible spatula along the perimeter of the crepe to ensure it’s not sticking. Then, gently lift one edge with the flexible spatula and slide a flat, wide spatula completely underneath the crepe to flip it over. Let the other side cook for another 30-45 seconds.
-
Carefully transfer the cooked crepe from the pan to your parchment-covered dish. Repeat this process for the remaining batter, ensuring to layer parchment paper between each crepe to prevent them from sticking. This recipe should yield approximately 12 crepes, perfect for building a beautiful cake.
Assemble the Cake
-
Once all the crepes have cooled completely to room temperature, you can begin the exciting process of assembling your masterpiece!
-
Place one cooled crepe on your desired cake stand or serving plate. Evenly spread about two spoonfuls of the cheesecake filling over the crepe, aiming for a layer approximately ¼ inch thick. Arrange a generous layer of thinly sliced strawberries on top of the filling. Place another crepe on top and continue this layering pattern: crepe, filling, strawberries, crepe. Repeat until you have used all your crepes and filling. (Note: For a balanced taste, I typically add strawberries to every other layer, but feel free to add them to every layer for a more intense fruit flavor!)
-
While the cake can be enjoyed immediately, I highly recommend allowing it to chill in the refrigerator for at least 1 hour, or ideally 2-4 hours. This chilling time is crucial as it allows the cream cheese filling to firm up and the flavors to meld beautifully, making it much easier to achieve clean, elegant slices.
-
Before serving, adorn the top of your exquisite crepe cake with a swirl of fresh whipped cream and a few whole, pristine strawberries for a final, inviting touch. Slice, serve, and enjoy this delightful creation!
Save This Recipe! 💌
We’ll email this post to you, so you can come back to it later!
Video
Notes
Feel free to experiment with other fruits or fruit jams in place of the strawberries to create your own unique flavor combinations.
The provided nutrition information is an estimate based on the cake being cut into 12 slices. Please note that the calorie accuracy is not guaranteed and can vary based on exact ingredients and portion sizes.
Carbohydrates: 24g
Protein: 5g
Fat: 26g
Saturated Fat: 15g
Polyunsaturated Fat: 1g
Monounsaturated Fat: 7g
Trans Fat: 1g
Cholesterol: 125mg
Sodium: 155mg
Potassium: 146mg
Fiber: 1g
Sugar: 16g
Vitamin A: 987IU
Vitamin C: 11mg
Calcium: 83mg
Iron: 1mg
The provided nutritional information is an estimate per serving. Accuracy is not guaranteed.
Tried this recipe?Leave a comment below & tag @brokenovenbaking on social!
