Indulge in the Ultimate No-Bake Chocolate Cherry Cheesecake: An Effortless & Decadent Dessert Recipe
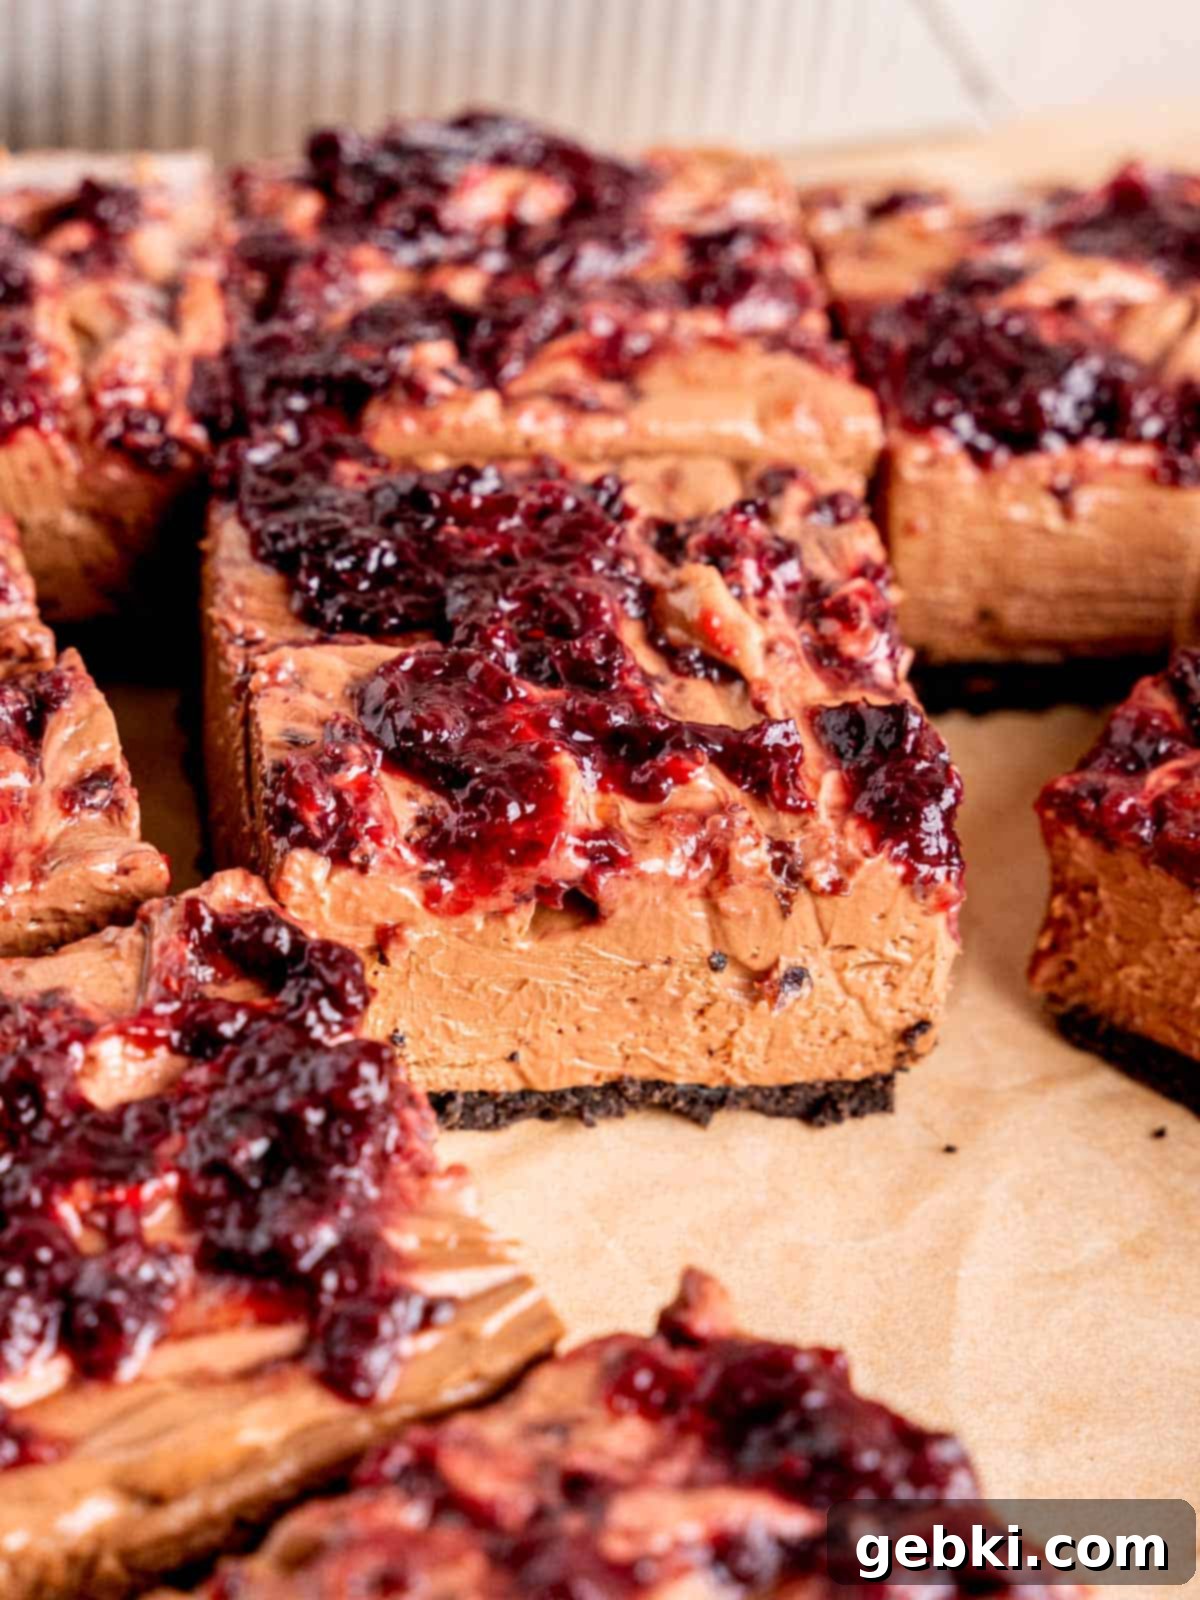
Prepare to be enchanted by the exquisite flavor combination of this Chocolate Cherry Cheesecake. This no-bake marvel beautifully marries the classic pairing of rich chocolate and sweet-tart cherries, presenting a fresh, delightful twist on traditional cheesecake. Imagine a luscious chocolate cheesecake filling, nestled atop a crunchy Oreo crust, and crowned with a vibrant homemade cherry topping. The best part? This incredibly easy recipe can be prepared in about 30 minutes of active time, then simply chills overnight to perfection, requiring no oven at all!
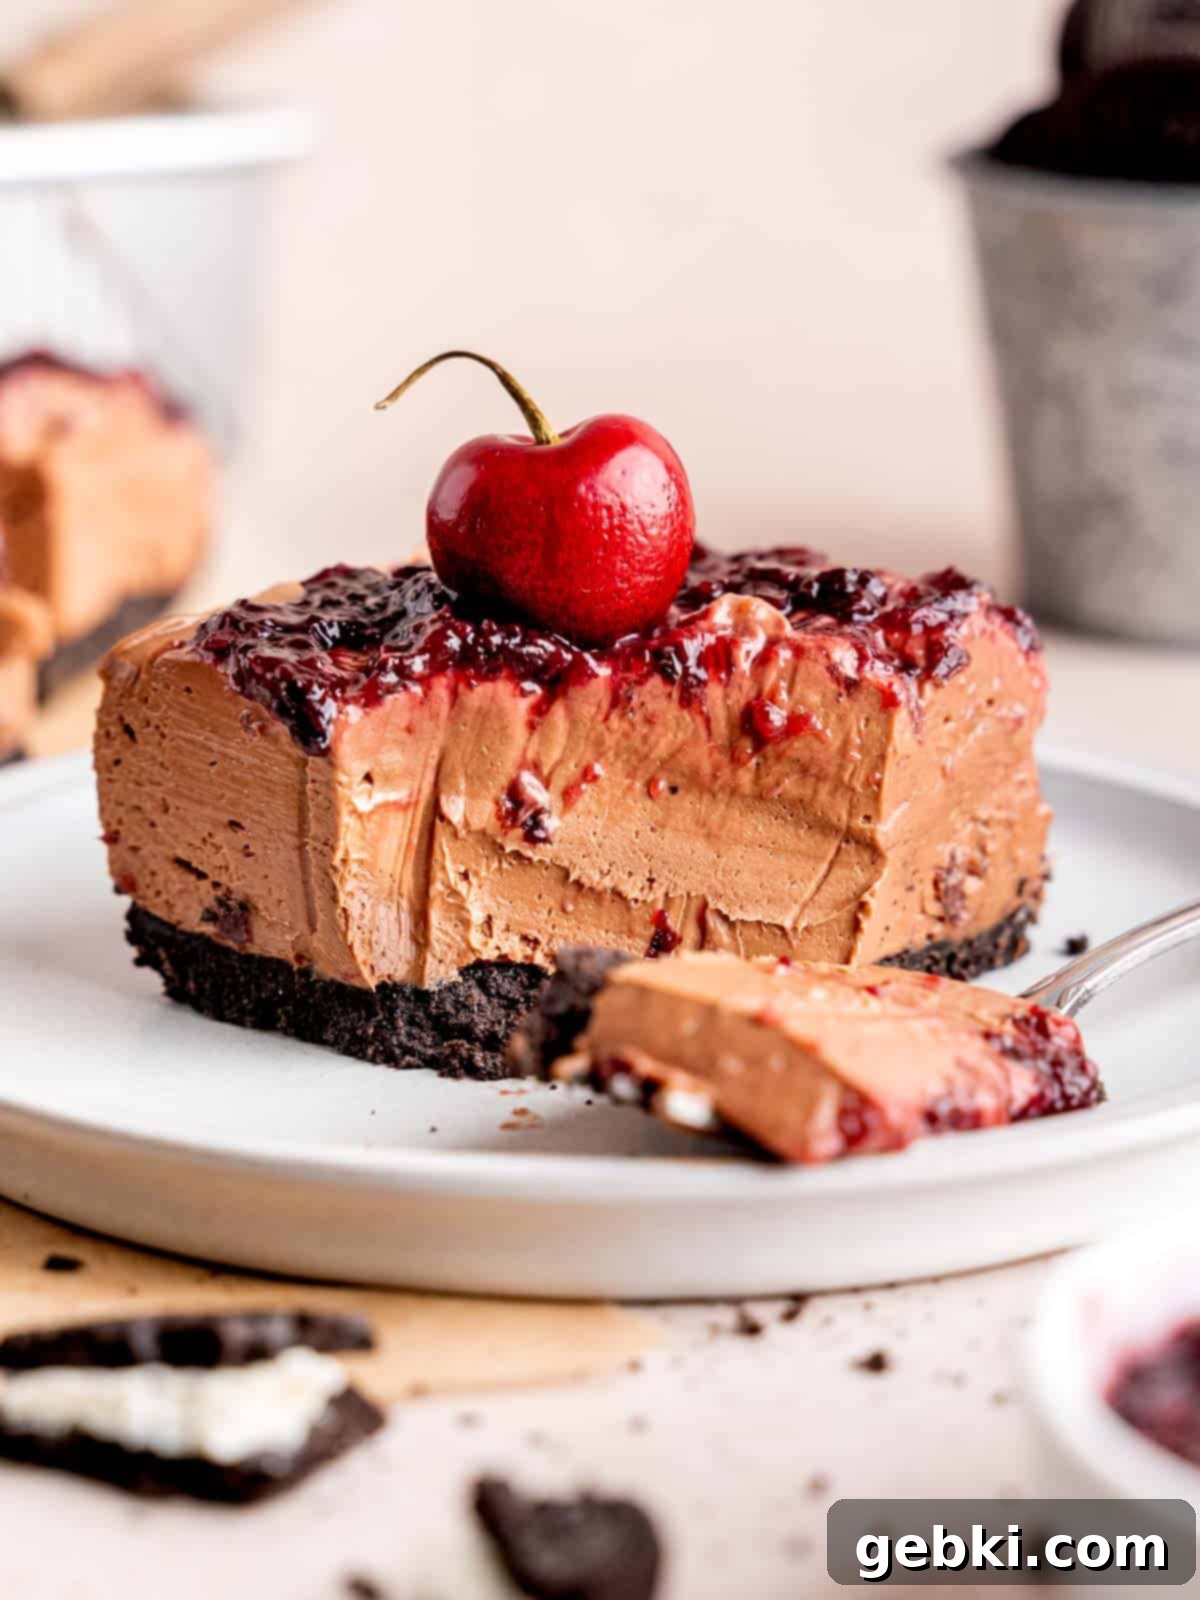
This cherry no-bake cheesecake recipe is designed for maximum ease and minimal fuss, making it a dream dessert for any home baker. Its “no-bake” nature makes it an extra perfect summer dessert since you don’t need to turn on your oven, keeping your kitchen cool. But don’t limit yourself to just the warmer months; using both fresh and frozen cherries means you can enjoy this no-bake chocolate cheesecake all year long! If you find yourself with extra cherries after preparing this decadent treat, consider trying my delightful cherry loaf cake for another fruity indulgence.
Why You’ll Adore This No-Bake Chocolate Cherry Cheesecake
This no-bake chocolate cherry cheesecake is more than just a dessert; it’s an experience. Here’s why this particular recipe will quickly become a favorite in your kitchen:
- Versatile Cherry Topping: While it features a luscious homemade cherry sauce, perfect for those who crave that classic chocolate-cherry pairing, the cheesecake is equally amazing without it if you prefer a pure chocolate delight. The tartness of the cherry topping beautifully cuts through the richness of the chocolate, creating a balanced flavor profile that’s truly irresistible.
- No Baking Required: Say goodbye to water baths, cracked cheesecakes, and overheating your kitchen! This cherry cheesecake with a chocolate crust is entirely no-bake, offering unparalleled convenience. It’s especially ideal for hot summer days or when you simply want a stress-free dessert that delivers on flavor without the fuss of an oven.
- Incredibly Creamy Texture: Made with generous amounts of full-fat cream cheese and high-quality heavy whipping cream, this cheesecake boasts an extra creamy, melt-in-your-mouth texture that sets it apart. Unlike many baked cheesecakes, there’s no flour or eggs, resulting in a dense yet unbelievably smooth consistency. If you’re a fan of this rich, unbaked style, you’ll love exploring my top 10 easy no-bake cheesecake recipes for more inspiration.
- Perfect Balance of Textures: Every bite offers a delightful contrast. The crisp, buttery Oreo crust provides a satisfying crunch, while the filling delivers a velvety smoothness. This interplay of textures, reminiscent of my popular Tim Tam cheesecake, makes for an incredibly enjoyable eating experience.
- Tastes Like a Giant Chocolate-Covered Cherry: The harmonious blend of dark chocolate and sweet-tart cherries evokes the nostalgic flavor of a classic chocolate-covered cherry, but in a grand, creamy cheesecake form. It’s a sophisticated yet comforting dessert that will leave a lasting impression.
Essential Recipe Ingredients for Your No-Bake Delight
Crafting this heavenly Chocolate Cherry Cheesecake begins with selecting the right ingredients. Here’s what you’ll need to create this irresistible dessert, along with some tips for each:
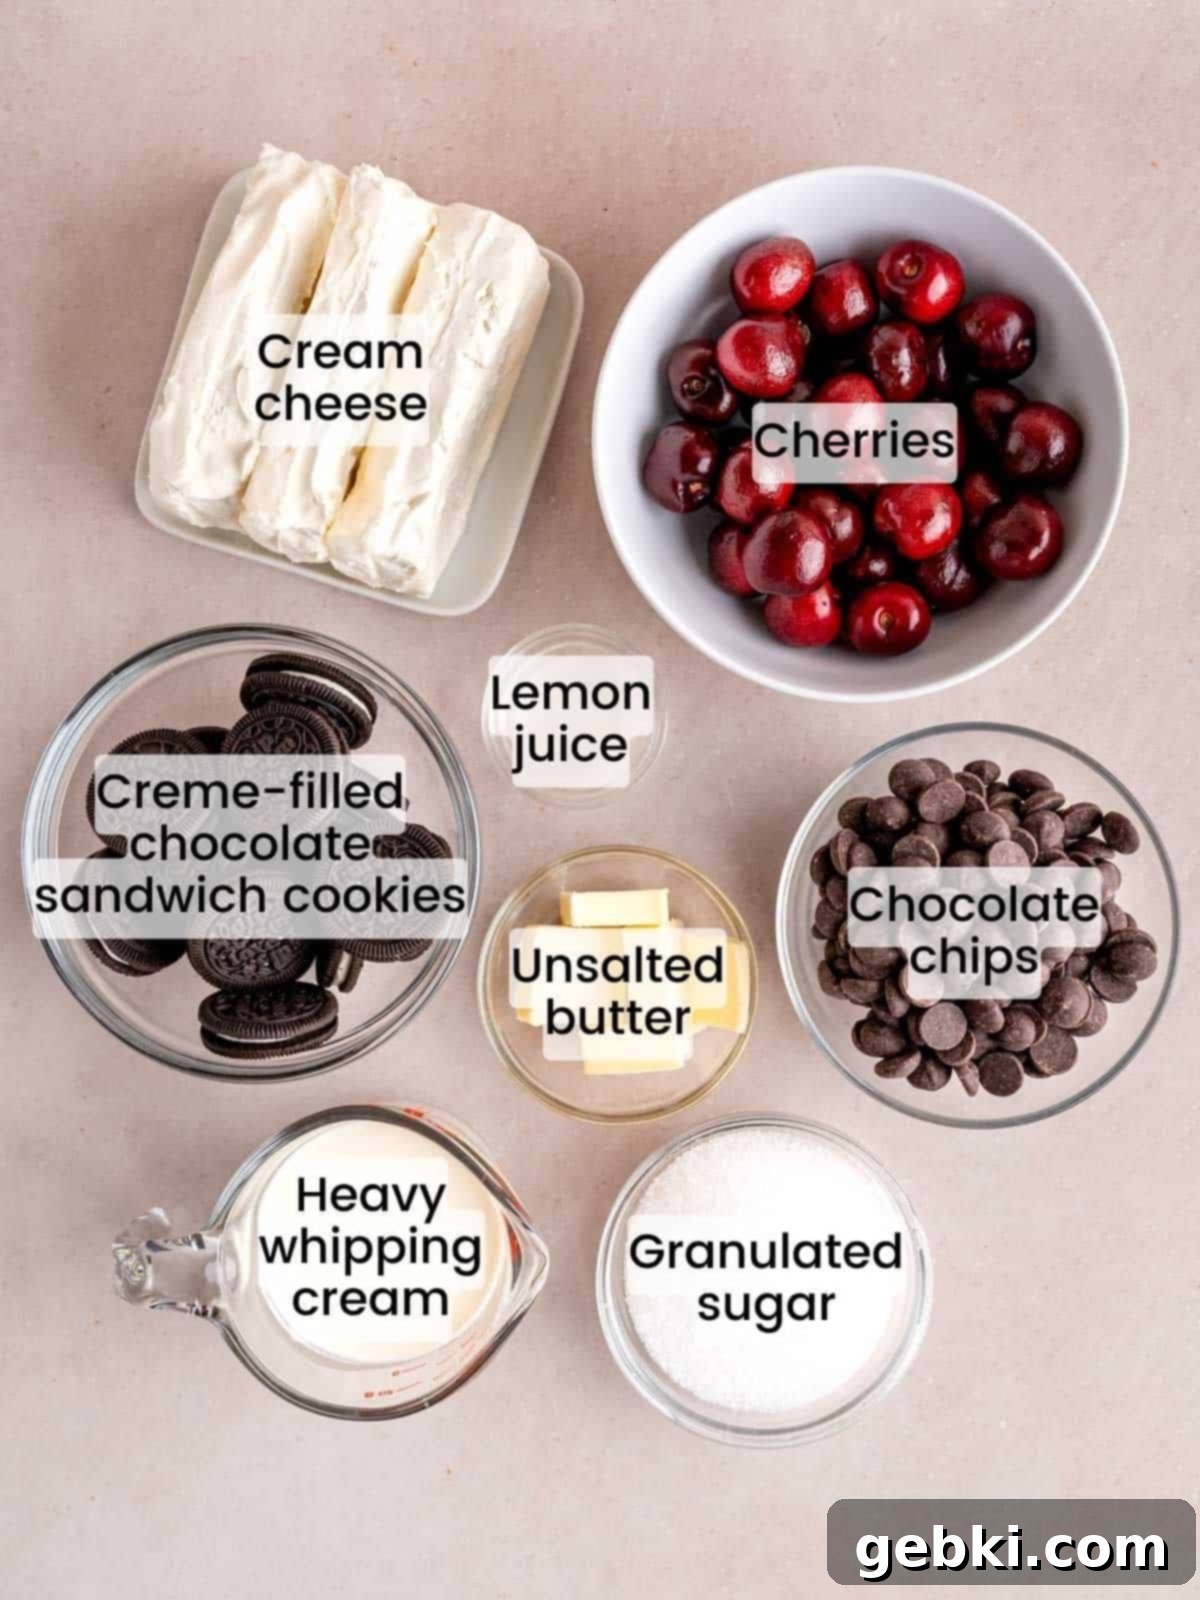
Ingredient Notes & Tips:
- Creme-filled chocolate sandwich cookies (like Oreos): These form the base of your irresistible no-bake chocolate crust. The chocolate flavor of the cookies perfectly complements the cheesecake, and their texture creates a wonderfully crunchy foundation when mixed with butter.
- Melted butter: This acts as the binding agent for your cookie crumbs, ensuring a firm and stable crust that holds its shape when chilled.
- Semi-sweet chocolate chips: The quality of your chocolate chips significantly impacts the flavor and texture of your cheesecake filling. Opt for a good quality brand that melts smoothly. Semi-sweet offers a balanced chocolate flavor that isn’t too bitter or overly sweet, allowing the cherry notes to shine. Feel free to experiment with milk or dark chocolate chips if you prefer a different intensity.
- Full-fat cream cheese: This is the heart of any great cheesecake! Using full-fat cream cheese (softened to room temperature) is crucial for achieving that classic, rich, and incredibly creamy cheesecake flavor and texture. Avoid low-fat versions, as they can result in a less satisfying consistency.
- Granulated sugar: Provides the perfect amount of sweetness to both the cherry topping and the chocolate cheesecake filling, balancing out the tartness of the fruit and the bitterness of the chocolate.
- Lemon juice: A small but mighty ingredient, lemon juice adds a hint of acidity to the cream cheese mixture, which helps to cut through the richness and brightens the overall flavor. It also aids in the thickening process as the cheesecake chills, contributing to a firmer set.
- Heavy whipping cream: Whipped until light and fluffy, this cream is essential for creating the airy, mousse-like texture of the cheesecake filling. It’s also used to create the smooth chocolate ganache that forms the base of the chocolate flavor.
- Cherries (fresh or frozen, stemless): The star of the topping! You can use either fresh or frozen cherries, making this dessert adaptable for any season. If using fresh, make sure they are pitted. Frozen cherries work wonderfully and are often more readily available year-round. Tart cherries tend to pair exceptionally well with chocolate, but sweet cherries also work if that’s what you have on hand.
See the full recipe card below for precise measurements and detailed instructions.
Creative Substitutions & Delicious Variations
While this no-bake chocolate cherry cheesecake recipe is perfect as is, it’s also incredibly versatile! Feel free to customize it to your taste or what you have on hand. Here are some ideas to get you started:
- Store-bought cherry topping: For an even quicker dessert, you can absolutely use high-quality store-bought cherry preserves, pie filling, or compote instead of making your own topping from scratch. Just ensure it’s a flavor you love!
- Alternate pan sizes and shapes:
- Mini Cheesecakes: Make individual portions by pressing the crust into the bottom of a cupcake pan lined with paper liners. Adjust chilling time as they will set faster.
- Thinner Cheesecake Bars: If you prefer a slightly thinner bar, use a 9-inch square pan.
- Round Cheesecake: For a more traditional round presentation, a 9-inch springform pan works beautifully. Just be sure to properly grease and line the bottom to prevent sticking.
- Different chocolate types: Experiment with your favorite chocolate! Instead of semi-sweet, try rich dark chocolate chips for a more intense flavor or creamy milk chocolate chips for a sweeter, milder profile.
- Alternative crusts: While the Oreo crust is fantastic, you can swap it out for a classic graham cracker crust, a crushed digestive biscuit crust, or even a shortbread cookie crust for a different flavor foundation.
- Additions for extra texture: For an added textural element and more chocolatey goodness, mix a handful of mini chocolate chips directly into the cheesecake filling. Alternatively, fold in small chunks of fresh or dried cherries for bursts of fruit throughout the creamy filling.
This recipe has not been extensively tested with other substitutions or variations. If you decide to replace or add any ingredients, please share your results in the comments below! We’d love to hear how it turned out.
Mastering Your No-Bake Chocolate Cherry Cheesecake: Step-by-Step Guide
Creating this easy chocolate cherry cheesecake is a straightforward process when you follow these simple steps. Precision in preparation, especially with temperatures, will ensure a perfectly creamy and firm dessert.
Part 1: The Decadent Oreo Crust
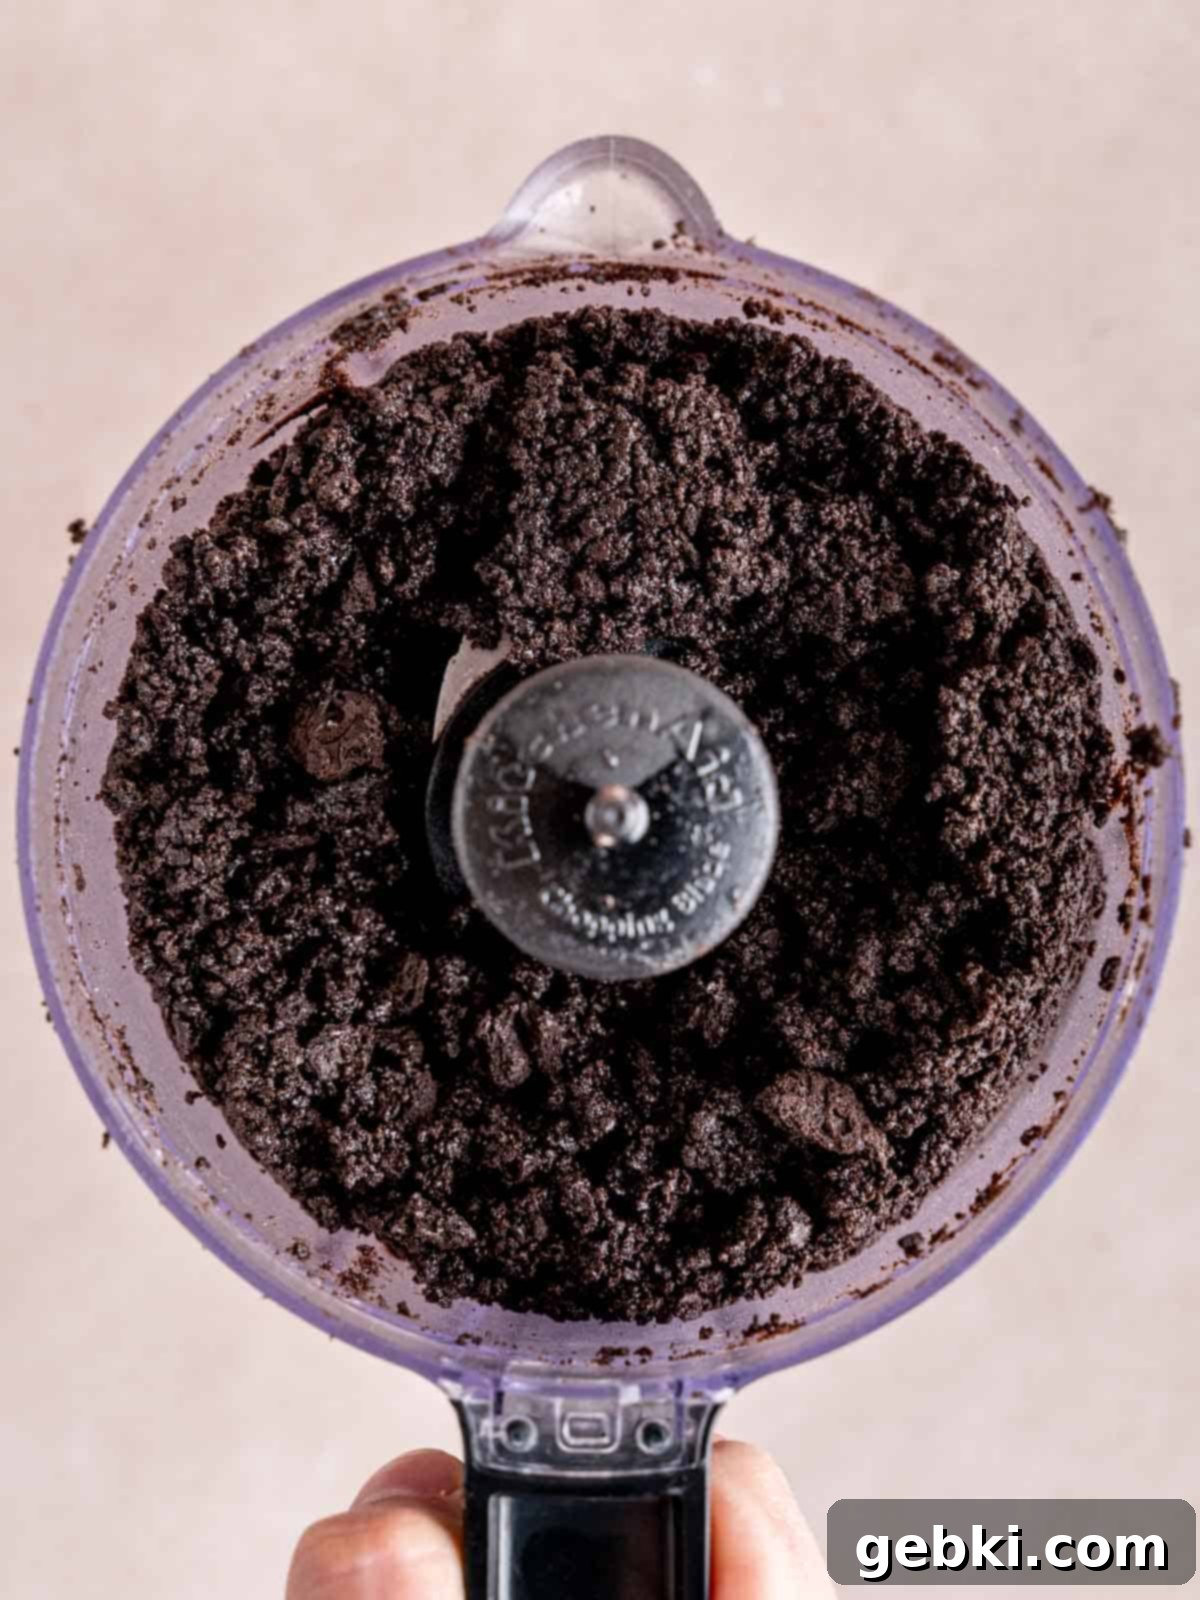
Step 1: Create the Crumb Base. In a food processor or blender, combine the creme-filled chocolate sandwich cookies (Oreos) and the melted butter. Process them together until the mixture resembles wet sand. Ensure the crumbs are fine and evenly coated with butter for a cohesive crust.
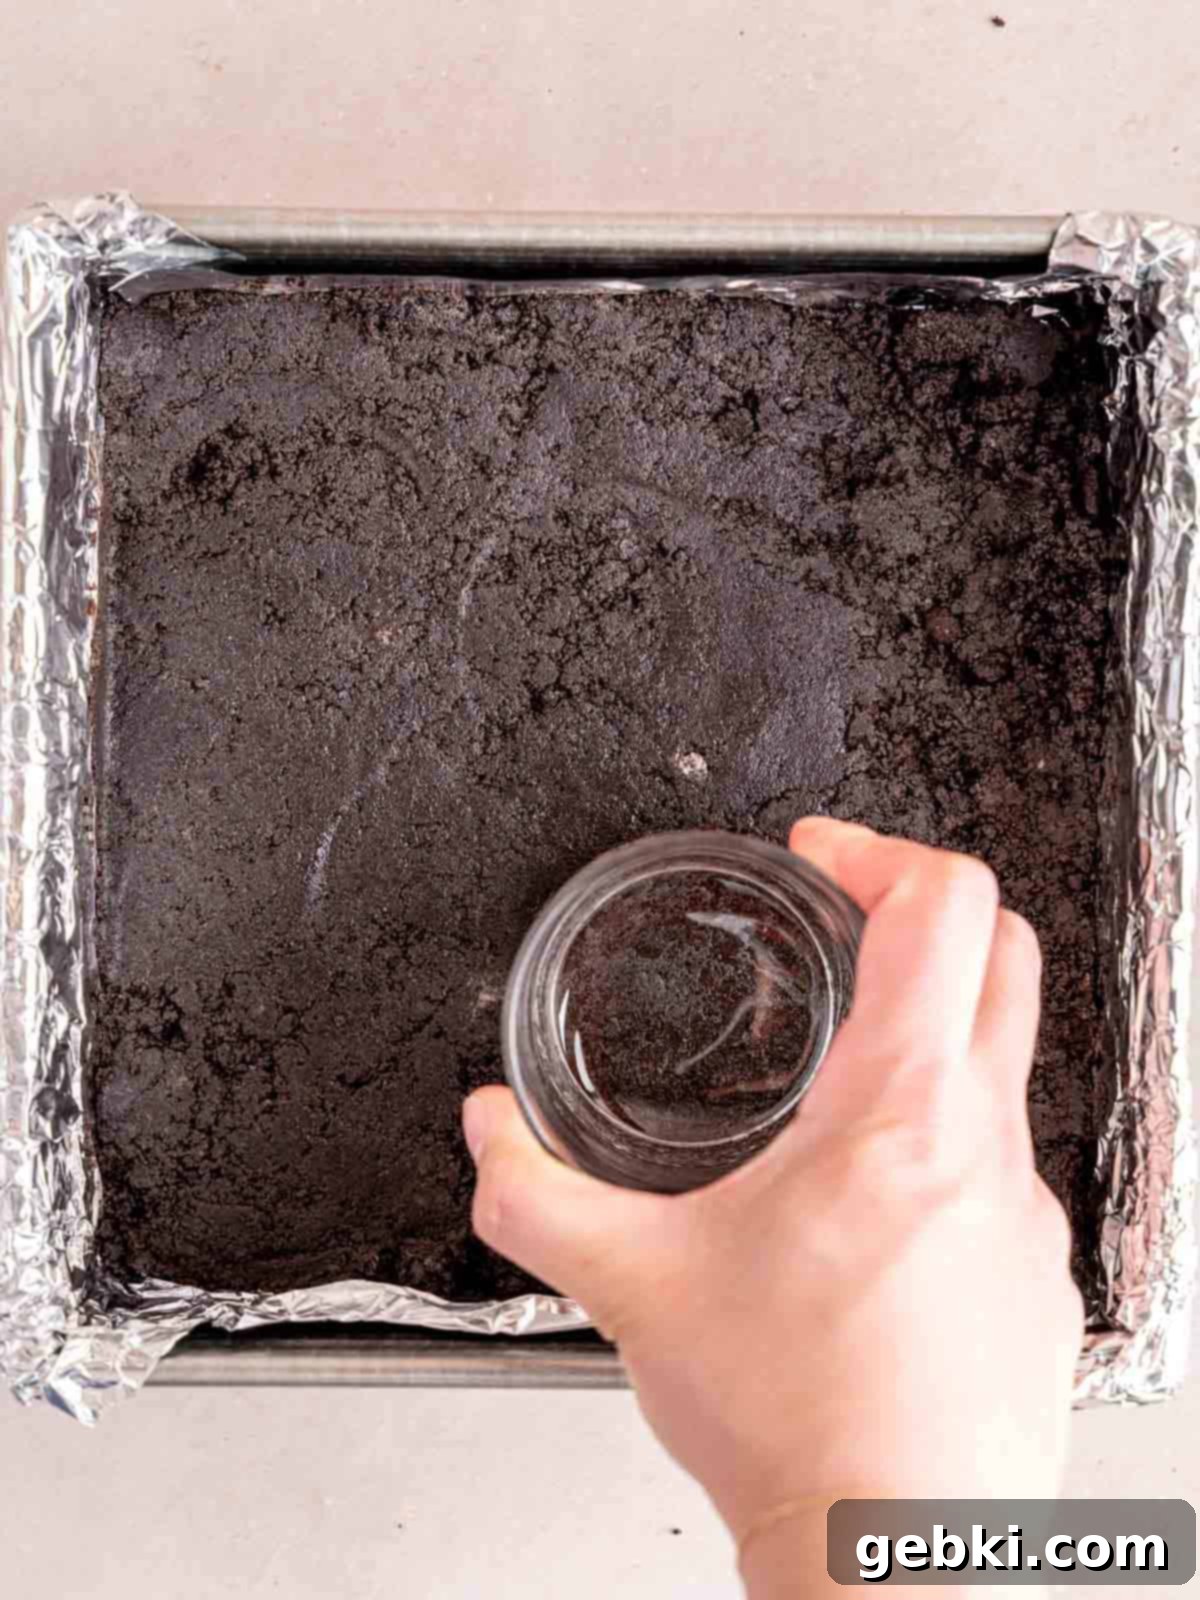
Step 2: Form and Chill the Crust. Line an 8×8 inch pan with parchment paper or foil, ensuring it extends over the sides to create “handles” for easy removal. Press the crumb mixture firmly and evenly into the bottom of the prepared pan. Use the bottom of a flat glass or your hands to compact it well. Place the pan in the freezer while you prepare the filling to help it set.
Part 2: Crafting the Luscious Cherry Topping
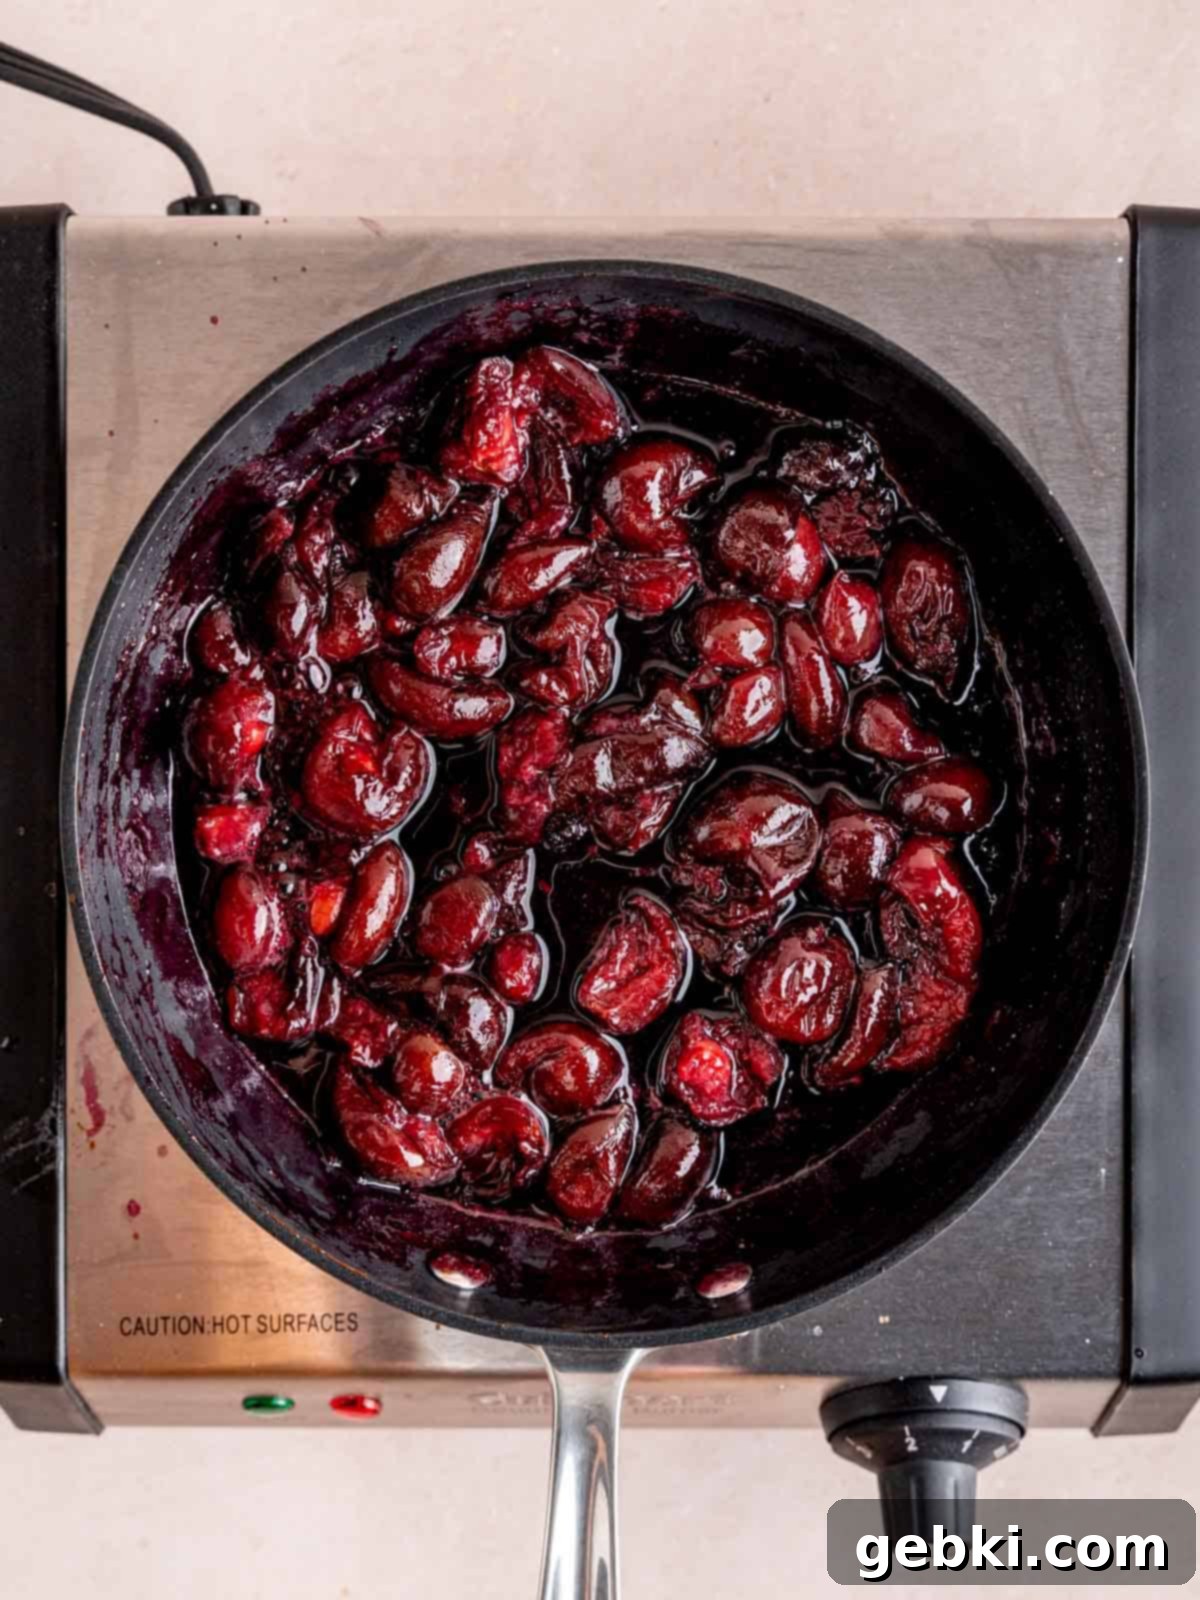
Step 3: Cook the Cherries. If your cherries have pits, you can remove them either before or after cooking. A cherry pitter makes this task quick and easy! Place the cherries in a medium pot or saucepan over medium-low heat. Stir occasionally until they begin to soften and release their juices. Stir in the granulated sugar and continue cooking, stirring, until the cherries are very soft and the mixture is bubbly and slightly thickened. If some cherries haven’t burst, gently mash them with a spoon. Remove any remaining pits at this stage.
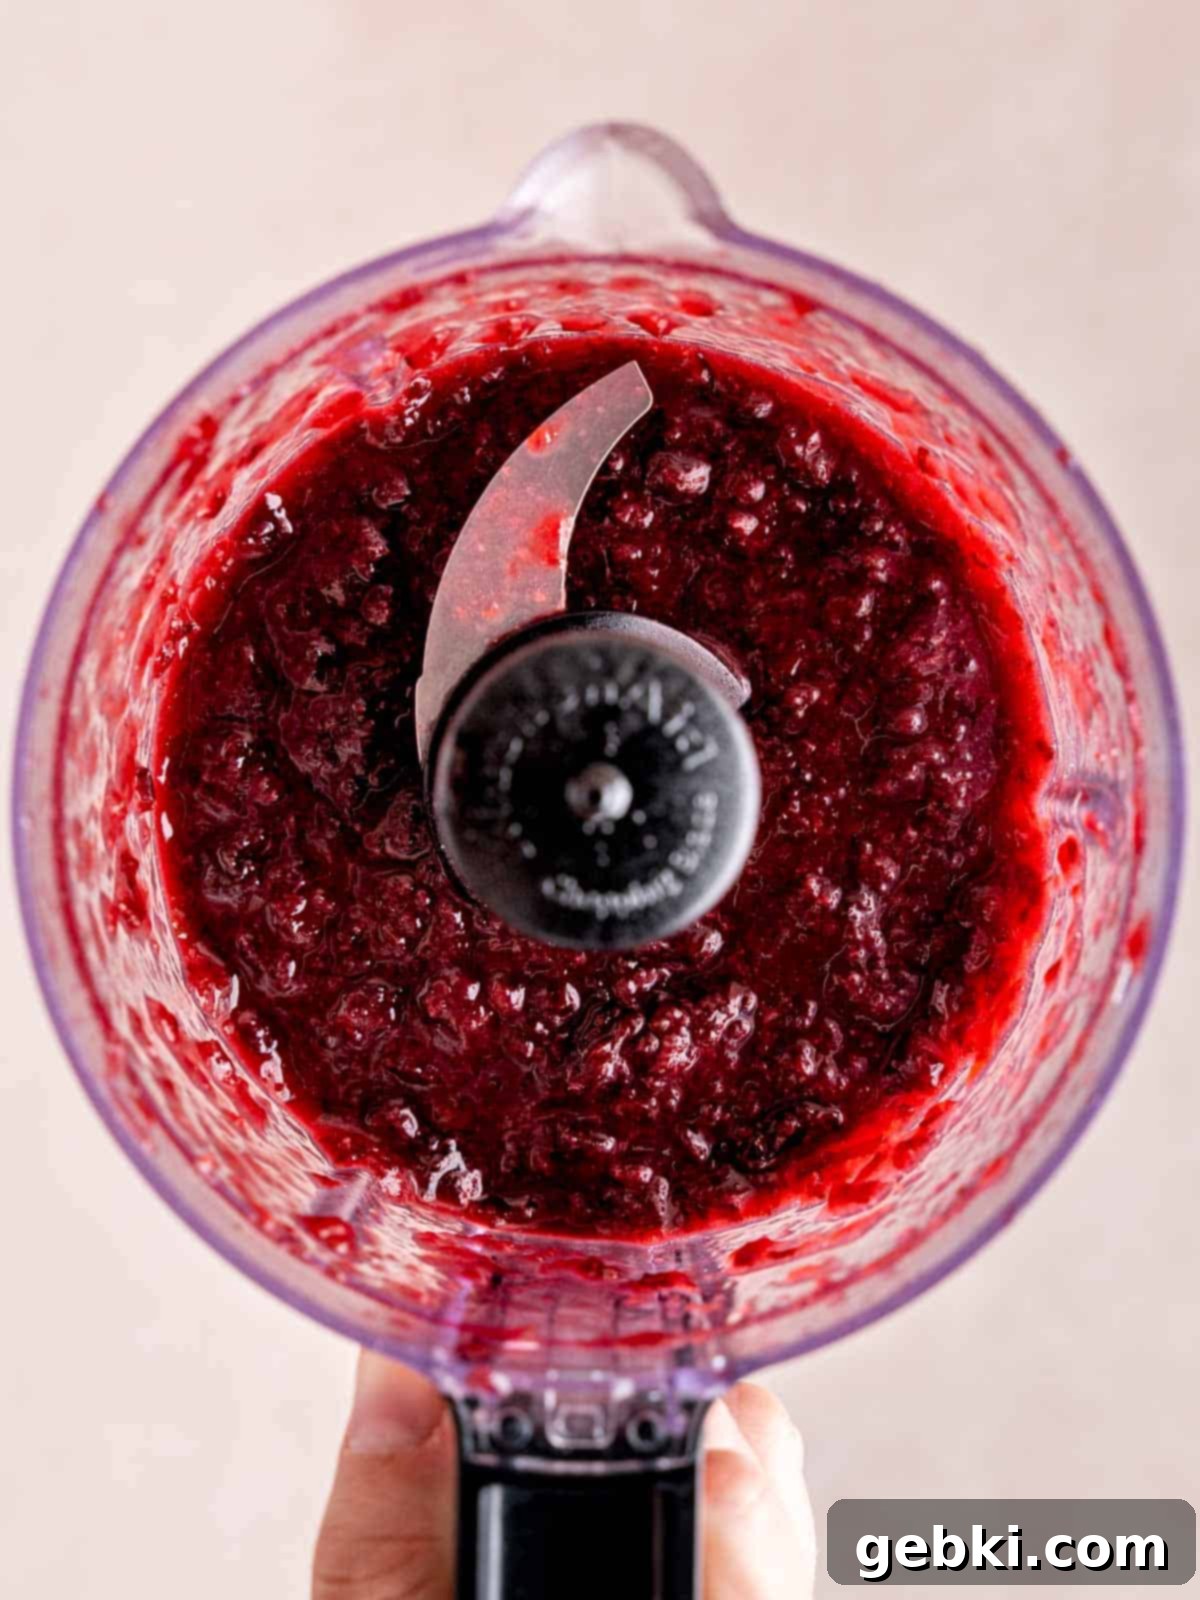
Step 4: Puree and Cool. Transfer the cooked cherry mixture to a food processor and pulse until you achieve a creamy puree with small chunks remaining, or completely smooth if you prefer. Then, transfer this vibrant topping into a small bowl and set it aside to cool completely while you prepare the chocolate cheesecake filling.
Part 3: The Creamy Chocolate Cheesecake Filling
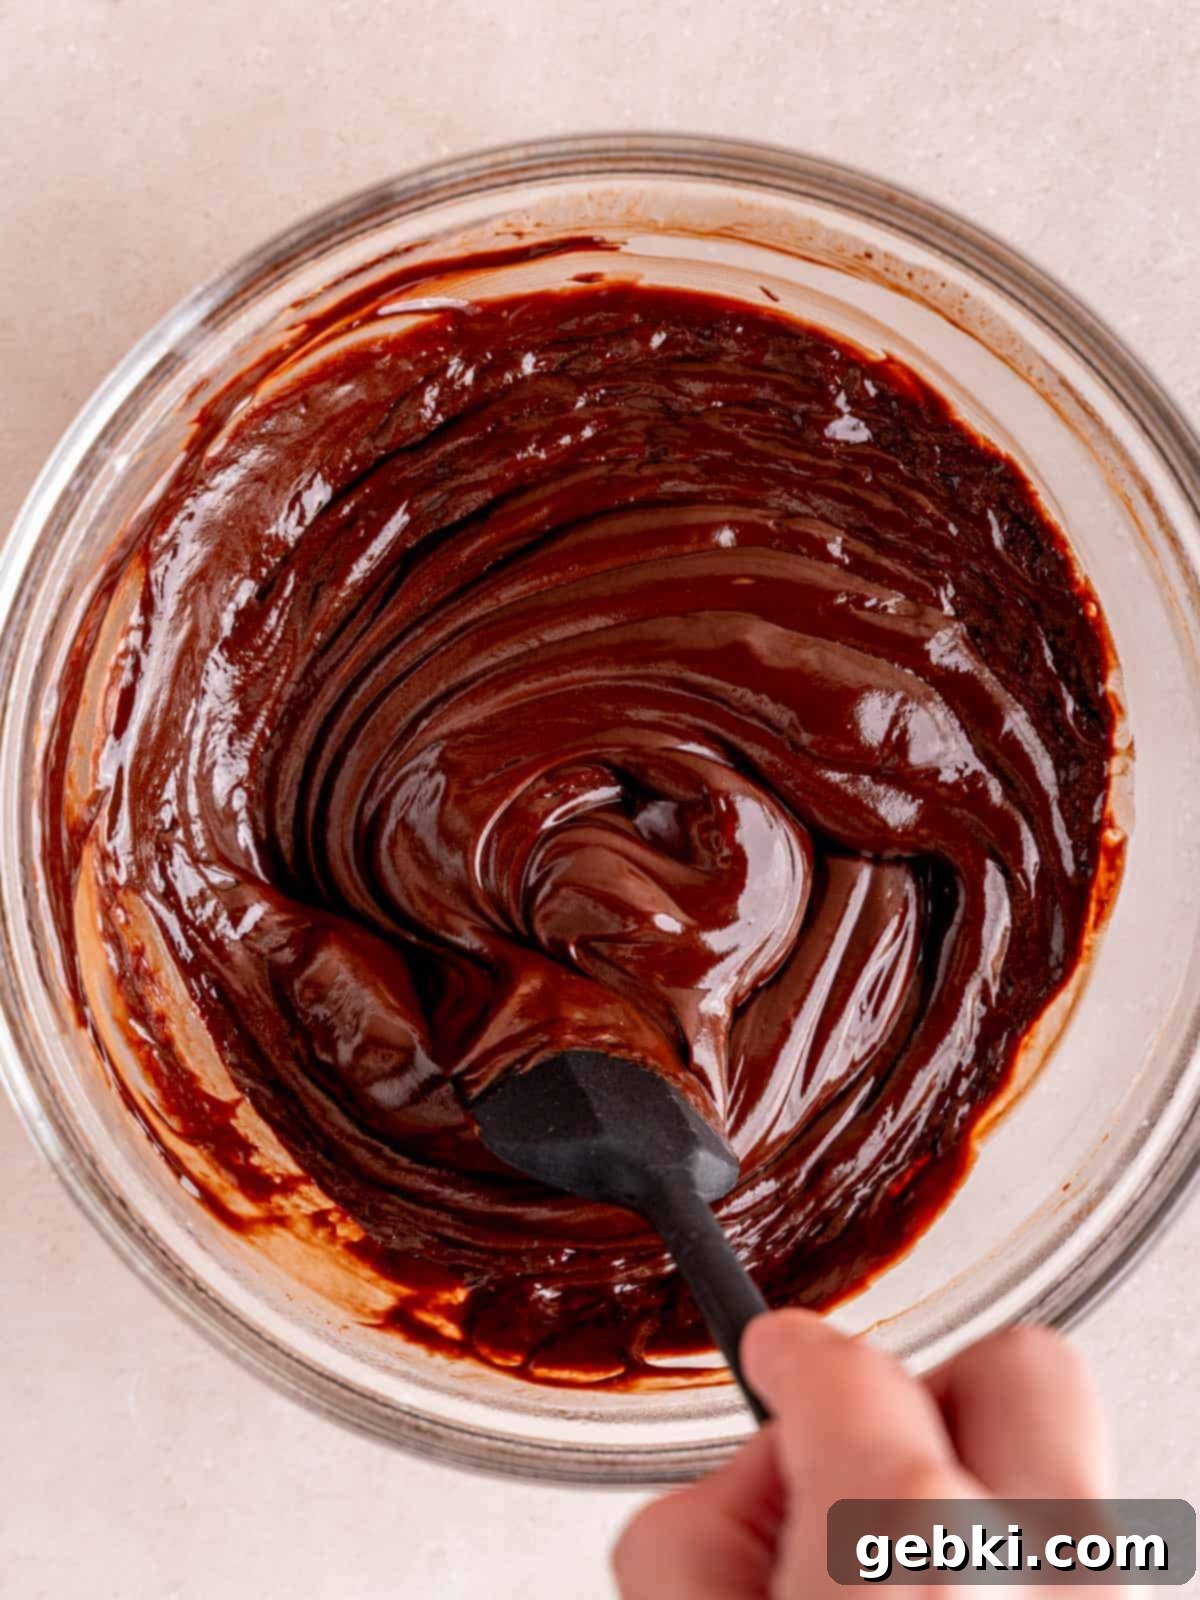
Step 5: Make the Chocolate Ganache. Place your semi-sweet chocolate chips in a shallow, heat-resistant bowl. In a separate microwave-safe dish or saucepan, heat the heavy cream until it just begins to simmer (you’ll see small bubbles around the edges). Pour the hot cream over the chocolate chips, ensuring they are completely covered. Cover the bowl with a lid or plate and let it sit undisturbed for 5 minutes. This allows the residual heat to melt the chocolate evenly. After 5 minutes, gently stir the mixture with a rubber spatula from the center outwards until it forms a smooth, glossy ganache. Set aside to cool to room temperature.
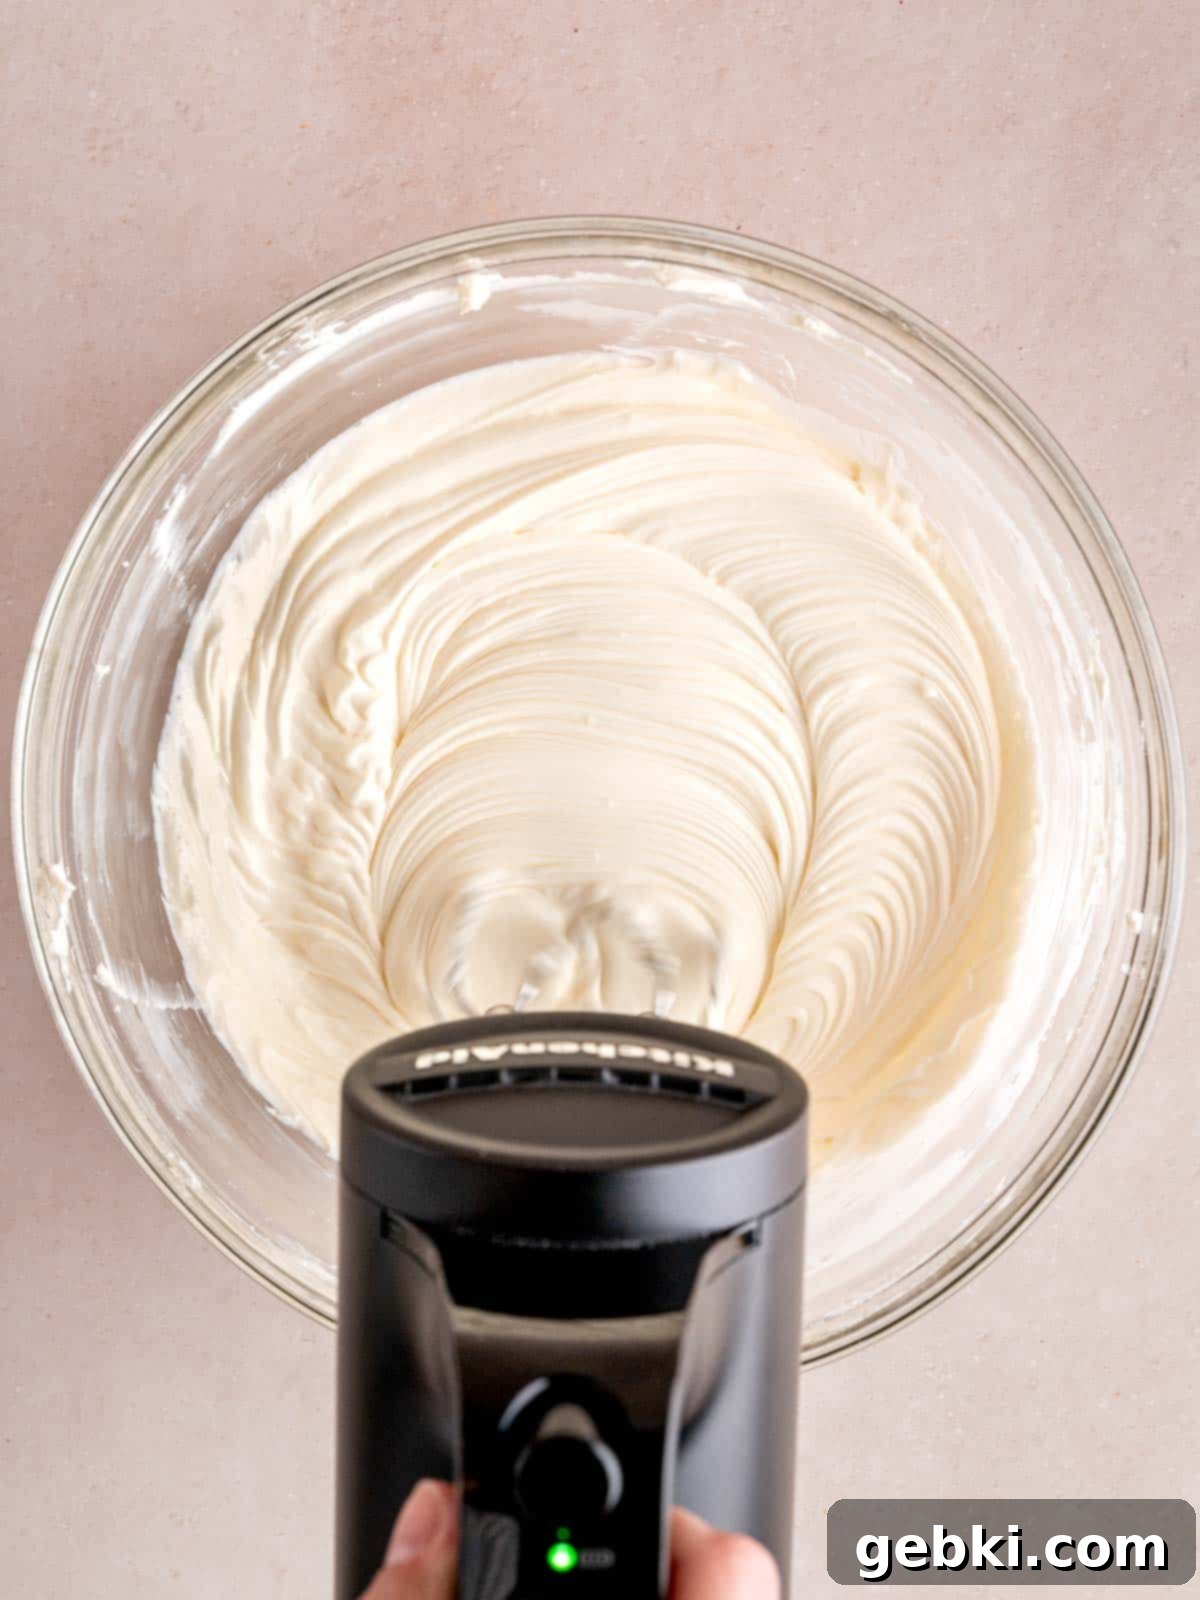
Step 6: Prepare the Cream Cheese Base. In a large mixing bowl (using a stand mixer with a paddle attachment or a hand mixer), beat the softened room temperature cream cheese until it is completely smooth and free of any lumps. This is crucial for a silky cheesecake texture. Gradually add the granulated sugar and lemon juice, mixing until fully combined and light and fluffy. Scrape down the sides of the bowl as needed.
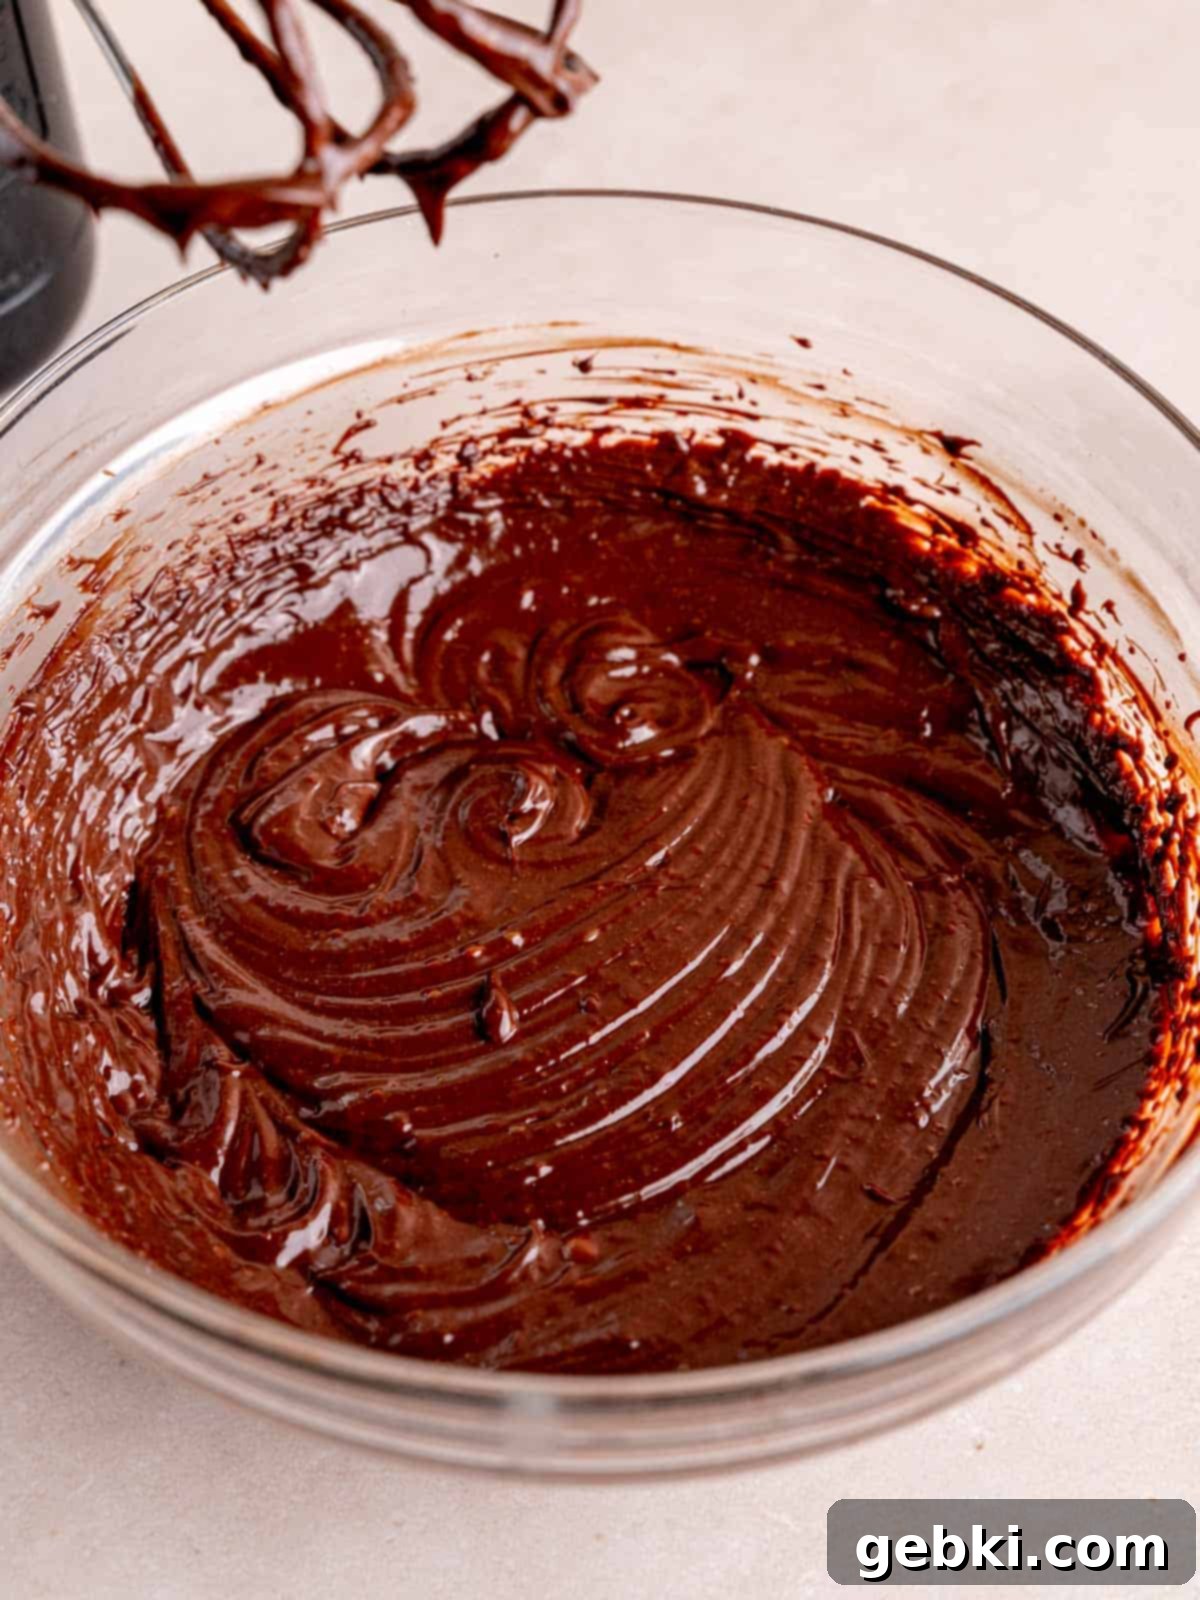
Step 7: Whip the Ganache. Once the chocolate ganache has cooled to room temperature and has thickened slightly (it should still be pourable but not hot), use a hand mixer or whisk to beat it vigorously for a few minutes. It should become lighter in color, fluffy, and somewhat stiff, similar to whipped cream. This step incorporates air and helps the cheesecake set properly.
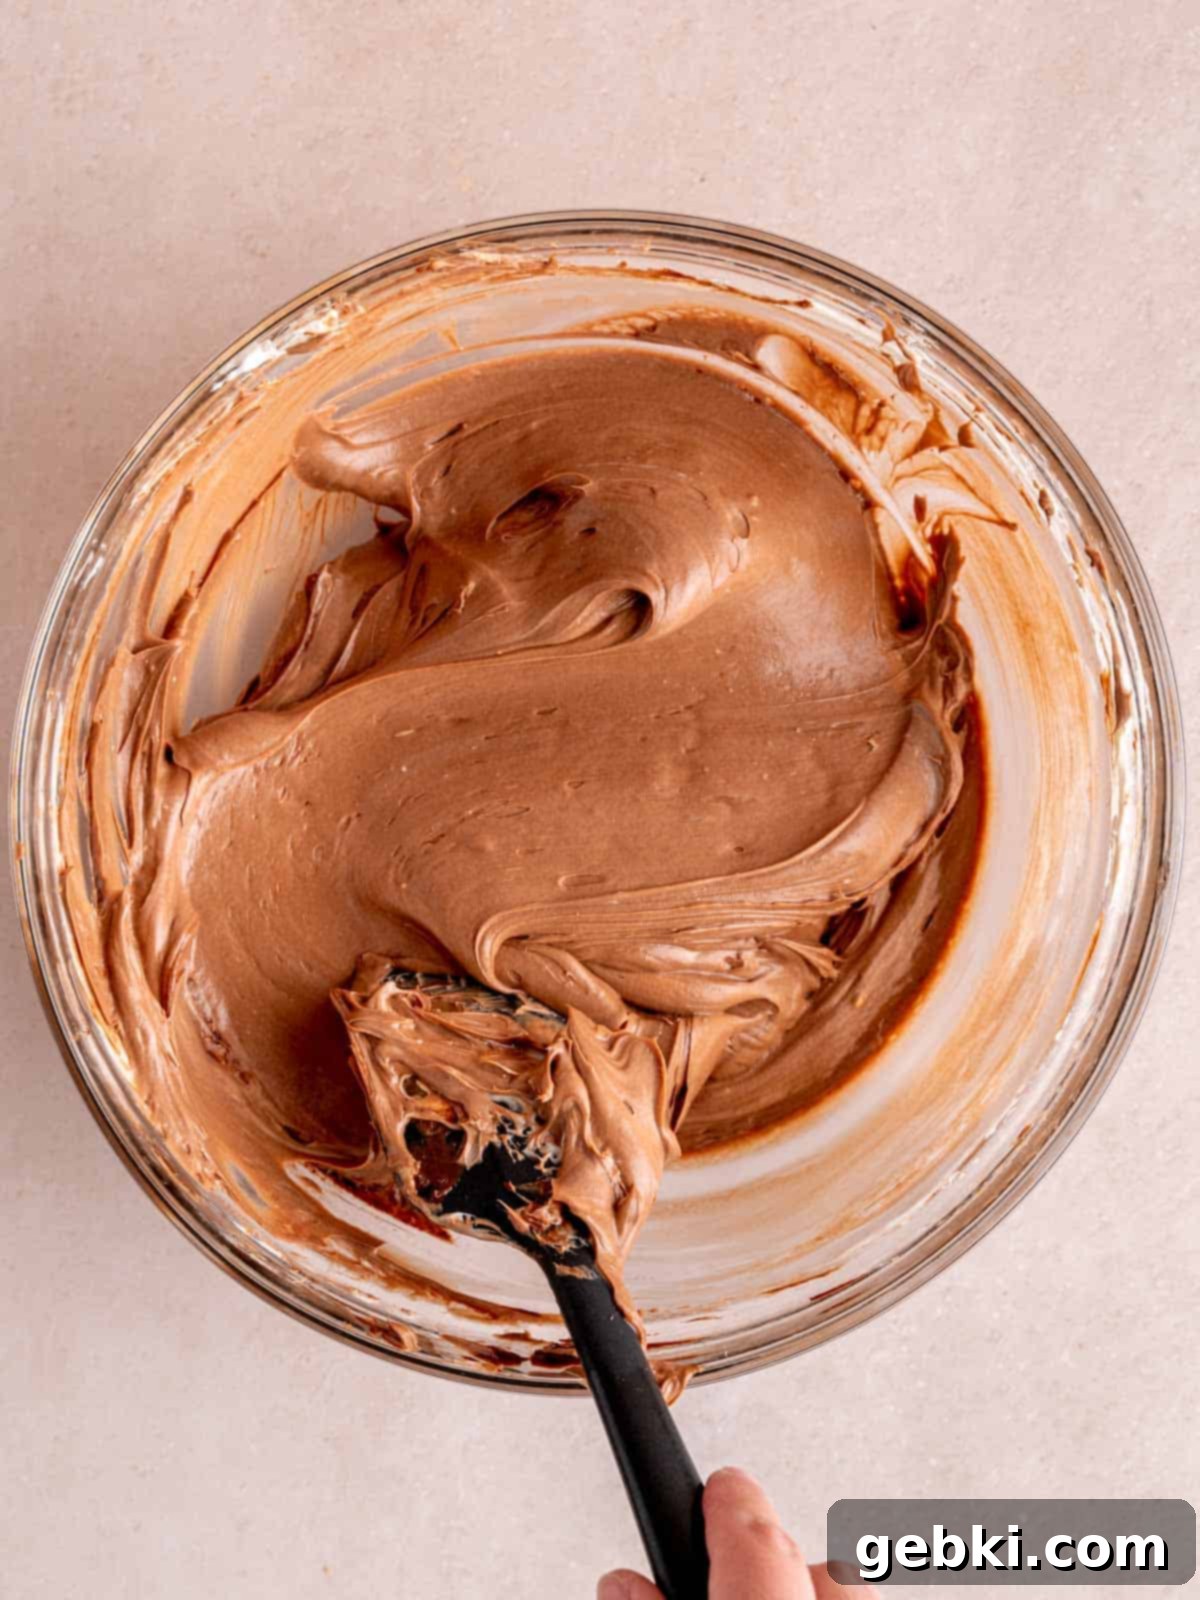
Step 8: Combine the Filling. Gently fold the whipped chocolate ganache into the prepared cream cheese mixture using a rubber spatula. Use a light hand to avoid deflating the air you’ve incorporated. Continue folding until no streaks of cream cheese or chocolate remain, and the mixture is uniformly smooth and creamy.
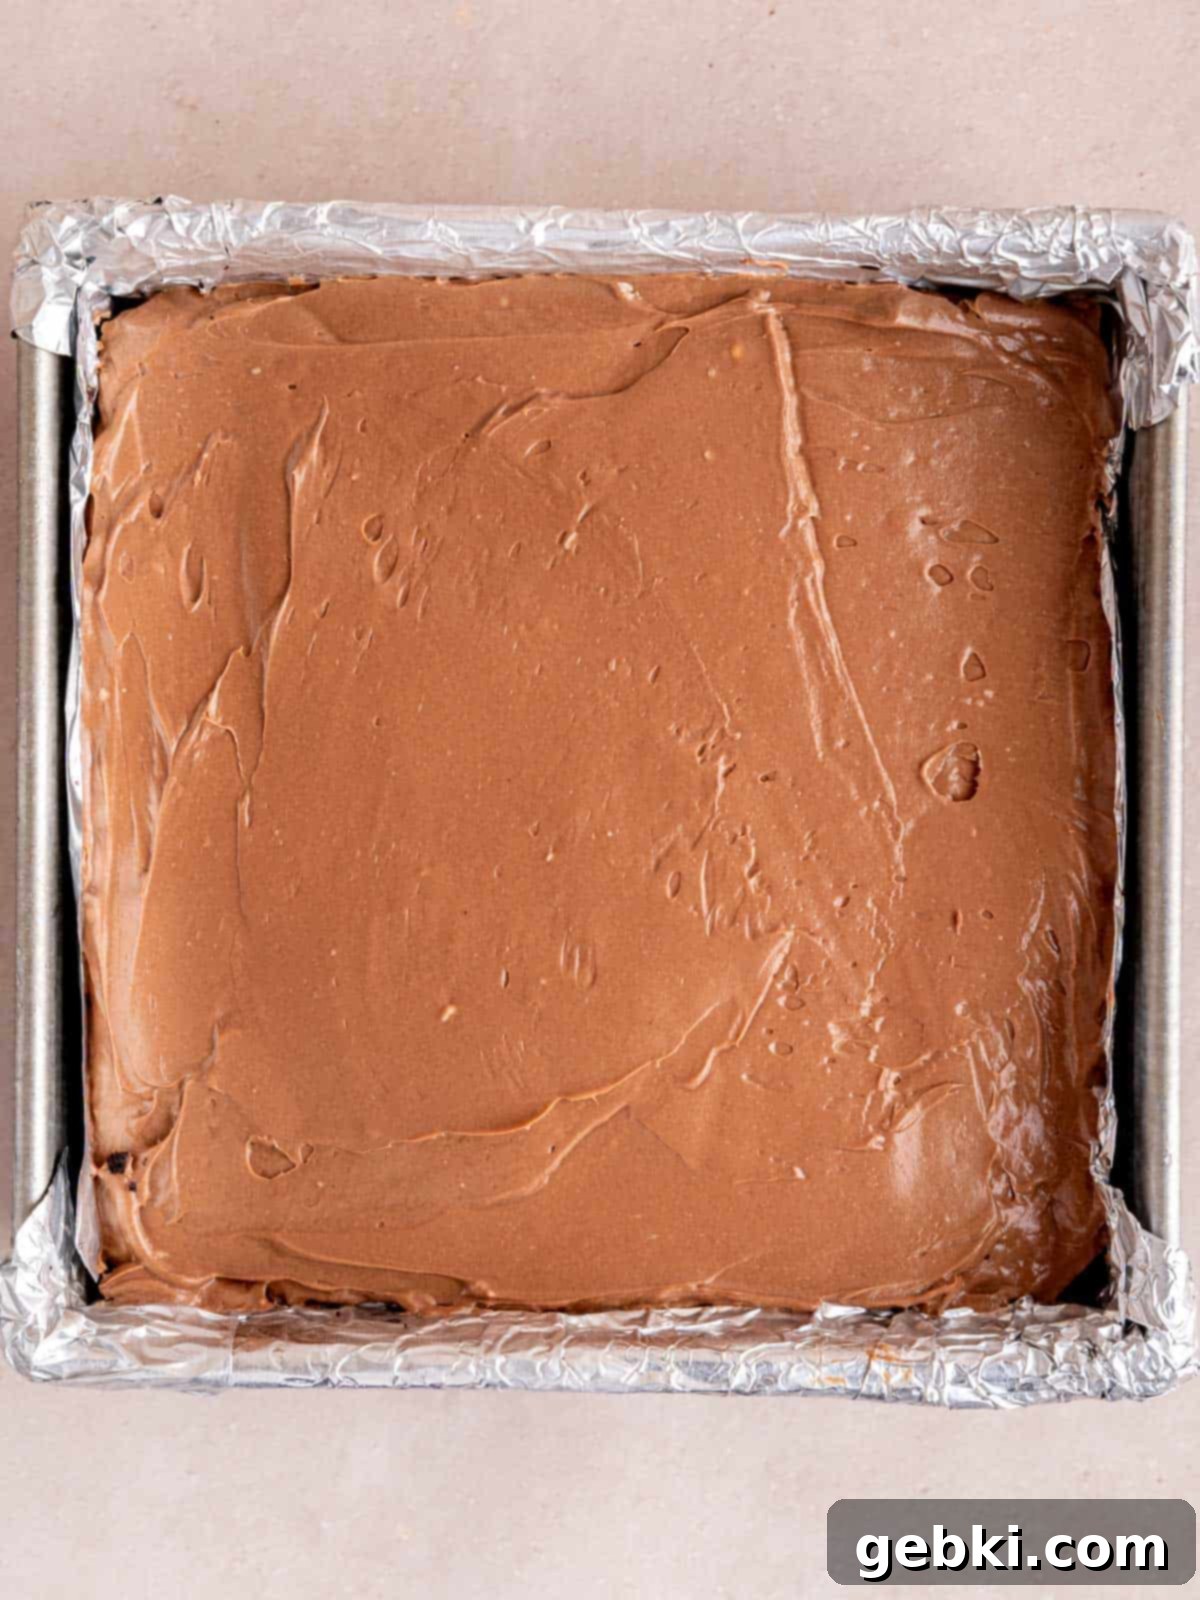
Step 9: Assemble the Layers. Retrieve your frozen Oreo crust from the freezer. Carefully spread the prepared chocolate cheesecake filling evenly over the solid crust. An offset spatula works wonders for creating a smooth, level top.
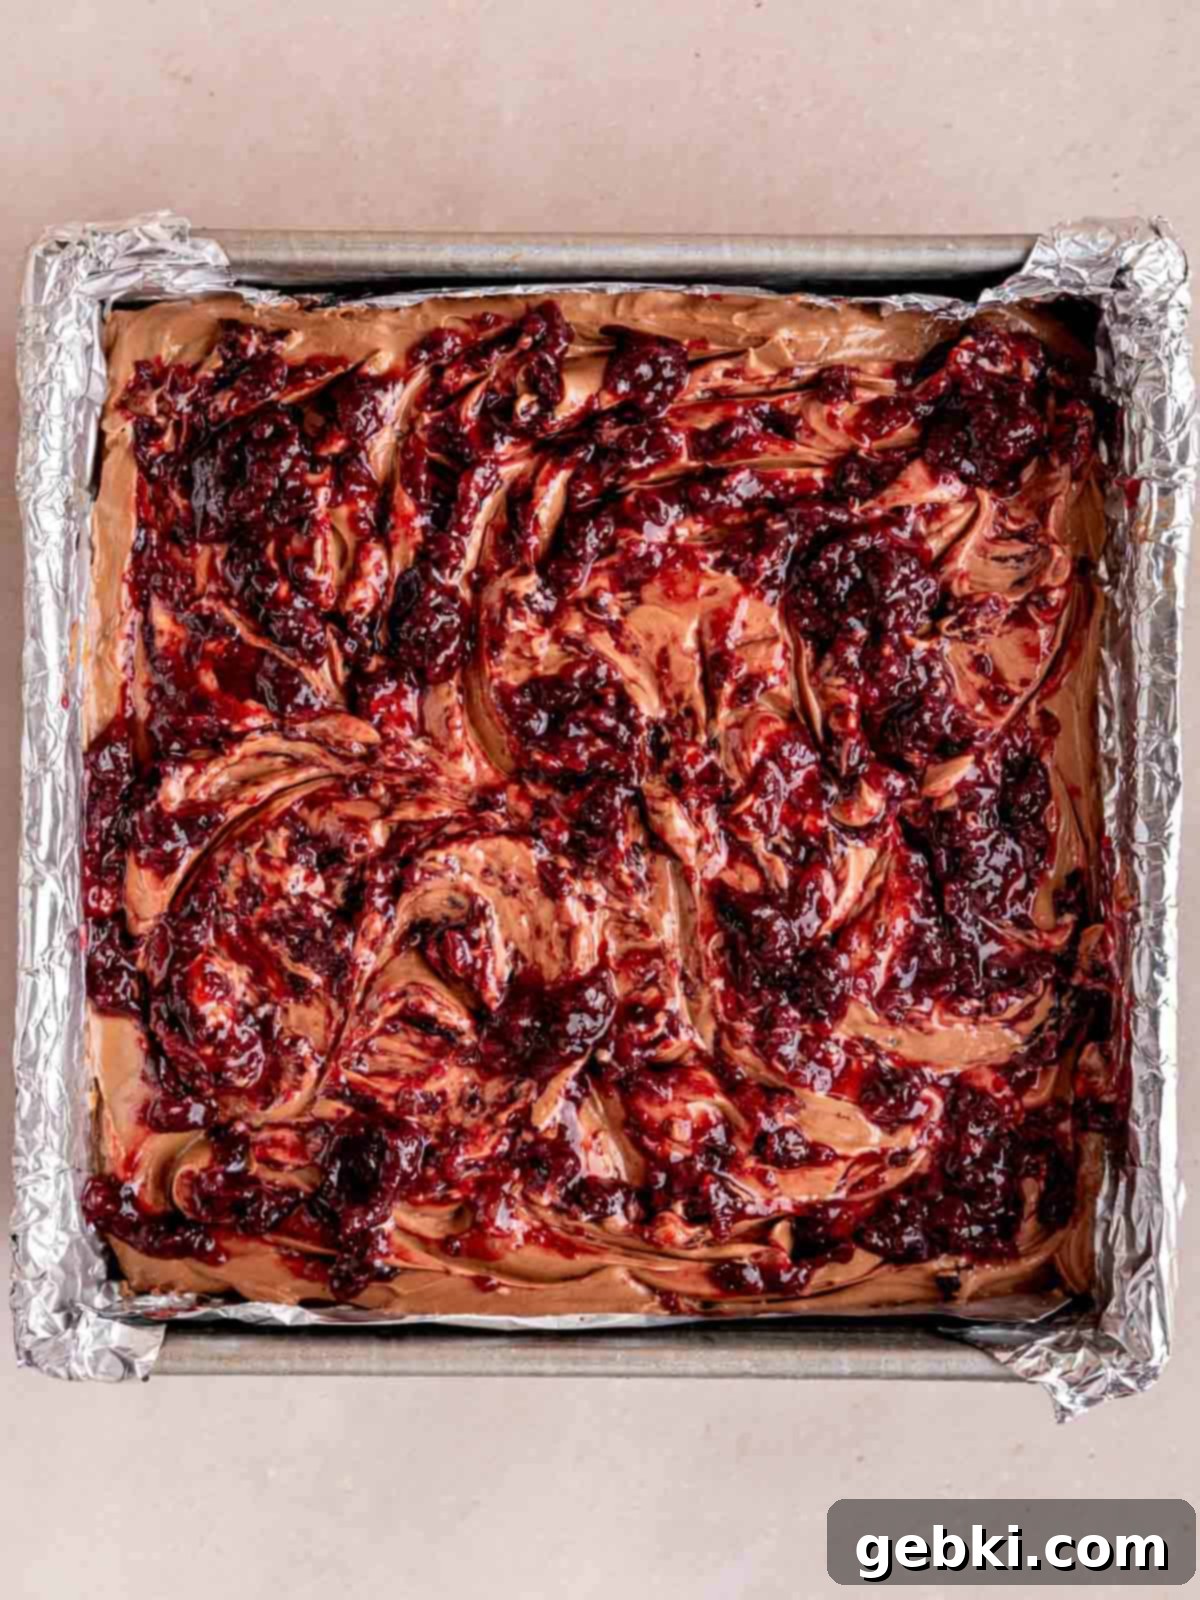
Step 10: Add Topping and Chill. Once the chocolate filling is spread, gently spoon dollops of the cooled cherry topping over the cheesecake. Using a knife or a toothpick, create beautiful swirls for a marbled effect. Cover the pan loosely with plastic wrap and refrigerate the cheesecake overnight (or for at least 8 hours) to allow it to firm up completely.
Expert Tips for Your Perfect No-Bake Cheesecake
Achieving a flawless no-bake chocolate cherry cheesecake is easy with a few insider tips. These expert suggestions will help you get the best results every time:
- Smooth Filling Application: An offset spatula is your best friend when spreading the chocolate cheesecake filling over the crust. Its angled blade allows you to evenly distribute the mixture and create a beautifully smooth, level surface with minimal effort. This contributes to a professional-looking dessert.
- Room Temperature Cream Cheese is Key: Ensure your cream cheese is at true room temperature (soft to the touch) before you begin mixing. Cold cream cheese will result in a lumpy filling that’s difficult to smooth out, compromising the luxurious texture of your cherry chocolate cheesecake. Mix it well until it’s completely smooth before adding other ingredients.
- Patience with Chilling: This cheesecake is wonderfully thick and creamy, similar to my strawberry crunch cheesecake, and requires adequate time to set. Do not rush the chilling process! Refrigerating it overnight (a minimum of 8 hours is recommended) is essential to ensure it firms up properly, allowing for clean slices and a stable, decadent texture.
- Weigh Dry Ingredients for Accuracy: For the most consistent and precise results, especially with ingredients like chocolate chips and sugar, I highly recommend using a food scale to weigh your dry ingredients in grams (g). This eliminates discrepancies that can occur with volume measurements (cups) and ensures your cheesecake comes out perfectly every time.
Common Questions About Your Chocolate Cherry Cheesecake
Have some questions before or after making your delicious no-bake cheesecake? Here are answers to some frequently asked questions:
This cherry no-bake cheesecake is a fantastic make-ahead dessert! You can prepare and refrigerate it for up to 1 week in advance, making it perfect for entertaining or meal prep. Alternatively, it can be made and stored in the freezer for up to 1 month. If freezing, simply thaw it in the refrigerator overnight before you plan to serve it to ensure it reaches its optimal creamy texture.
There are a couple of common reasons why a no-bake cheesecake might not set. Most likely, the chocolate ganache wasn’t whipped enough, or the cheesecake hasn’t chilled for a sufficient amount of time. Ensure you whip the cooled ganache until it’s light and fluffy, incorporating enough air to provide structure. And remember, an overnight chill (at least 8 hours) is crucial for the cheesecake to fully set and become firm.
That’s a great problem to have! If you have extra cherries, I highly recommend trying my simple and delicious cherry cake recipe. It’s another fantastic way to enjoy the wonderful flavor of fresh or frozen cherries.
Absolutely! To make this no-bake chocolate cherry cheesecake gluten-free, simply substitute the standard Oreo cookies in the crust with gluten-free chocolate sandwich cookies. Many brands offer delicious gluten-free versions that will work perfectly for the crust.
For perfectly clean slices, particularly after chilling overnight, use a sharp knife and warm it by running it under hot water. Wipe the knife dry between each cut. This will help you glide through the creamy cheesecake and crust without dragging or crumbling.
Storage & Make-Ahead Tips
Proper storage is essential to keep your no-bake chocolate cherry cheesecake fresh and delicious for as long as possible. This dessert is also an excellent candidate for making ahead, which means less stress when entertaining!
Refrigerator Storage
After chilling overnight, any leftover cheesecake should be stored in an airtight container in the refrigerator. This will keep it fresh and prevent it from absorbing other odors from your fridge. Enjoy your cheesecake for up to 1 week.
Freezing Instructions
For longer storage, this cheesecake freezes beautifully. Once fully set, you can freeze the entire cheesecake (or individual slices) for up to 1 month. Wrap the cheesecake tightly in plastic wrap, then an additional layer of aluminum foil, to prevent freezer burn. When you’re ready to serve, simply transfer the frozen cheesecake to the refrigerator and let it thaw overnight. This slow thawing process will help maintain its creamy texture.
More Delicious No-Bake Recipes You’ll Love
If you’ve fallen in love with the ease and deliciousness of this no-bake chocolate cherry cheesecake, you’ll be thrilled to discover more simple and delightful dessert recipes that don’t require an oven. Expand your repertoire with these favorites:
-
5 Ingredient No-Bake Mini Chocolate Cheesecakes
-
Easy Mini No Bake Cheesecake Bites
-
Creamy No Bake Biscoff Cheesecake
- Top 10 Easy No-Bake Cheesecake Recipes

Did You Try This Recipe?
We’d love to hear your thoughts! Let us know what you thought by leaving a comment below and sharing your creation on Instagram, Facebook, & Pinterest! Tag us so we can see your amazing work!
Thank you!
-Kayla
📖 Recipe Card: Chocolate Cherry Cheesecake (No Bake)
Chocolate Cherry Cheesecake (No Bake)
By Kayla Burton
This no-bake Chocolate Cherry Cheesecake is so delicious and creamy! It’s an easy summer dessert you can prep in about 30 minutes without an oven!
Pin Recipe
Prep Time: 30 mins
Cook Time: 0 mins
Chill Time: 2 hrs (preferably overnight)
Total Time: 2 hrs 30 mins
Course: Dessert
Cuisine: American
Servings: 12 bars
Calories: 524 kcal
Kayla’s Top Tip
Weigh dry ingredients in grams (g) with a food scale for best results!
Equipment
- 8×8 inch cake pan
- Food processor or blender
- Medium pot or saucepan
- Mixing bowls
- Measuring spoons
- Scale/measuring cups
- Spatula
- Stand mixer with paddle attachment or hand mixer recommended
Ingredients
Crust
- 24 whole creme-filled chocolate sandwich cookies (like Oreos)
- 4 tablespoons (56 g) unsalted butter, measured then melted
Cherry Topping
- 2 cups (2 cups) cherries, fresh or frozen, stemless
- 2 tablespoons (24 g) granulated sugar
Chocolate Cheesecake
- 1⅓ cups (230 g) semi-sweet chocolate chips, high quality
- ⅔ cup (157.73 ml) heavy whipping cream
- 24 ounces (3 blocks) (680.39 g) cream cheese, softened at room temperature
- ⅔ cup (133 g) granulated sugar
- 1 teaspoon (1 teaspoon) lemon juice
Instructions
Oreo Crust
- Line an 8×8 inch pan with parchment paper or foil so that it’s flush around the edges and extends over the sides.
- Place creme-filled chocolate cookie sandwiches in a food processor or blender and chop for a few seconds. Add melted butter and continue chopping until they’re fine crumbs.
- Pour the crumbs into the prepared pan and spread them out as an even layer. Push down on the crumbs with the bottom of a flat glass (or your hand) to create a firm crust layer.
- Place the pan with the crust in the freezer while preparing the rest of the cheesecake.
Cherry Topping
- If your cherries have pits, you can either remove them before or after cooking them. I usually pick them out after cooking them down.
- Place the cherries in a saucepan or pot over med-low heat and stir occasionally until they begin to soften. Stir in the sugar and cook until they’re very soft and bubbly. You may have to break down the cherries if they don’t all burst while cooking. If there are pits in the mixture, pick them out at this time.
- Transfer the cherry mixture into a food processor and chop until it’s a creamy puree. Then, transfer it into a small bowl and let it cool.
Chocolate Cheesecake
- Measure the chocolate chips into a shallow heat-resistant bowl. Heat the heavy whipping cream in a separate microwave-safe dish or pot over the stove until it starts to simmer. Pour the hot cream over the chocolate chips so that they’re completely covered. Cover the bowl with a lid or plate for 5 minutes.
- Using a rubber spatula, begin to stir in a small circular motion in the center of the chocolate cream, working your way to a larger circular motion toward the edges of the bowl. Keep stirring until a smooth ganache forms. Set aside and let cool.
- In a large bowl (stand mixer with paddle attachment or using a hand mixer), mix the cream cheese until it’s smooth. Add the sugar and lemon juice and mix until well combined.
- When the chocolate ganache is cool and has thickened a bit, stir it vigorously with a hand mixer or whisk for a few minutes until it’s light, fluffy, and somewhat stiff.
- Gently fold the whipped chocolate mixture into the cream cheese mixture until completely combined.
- Spread the chocolate cheesecake filling evenly on top of the frozen crust. Then, swirl or spread the cherry topping over the chocolate cheesecake.
- Let the cheesecake chill in the refrigerator overnight.
- To serve, use the edges of the parchment/foil to carefully pull the cheesecake out of the pan and then use a warm knife to cut into 9-16 squares.
Notes
Pan: This recipe makes thick cheesecake bars. If you’d like to make them slightly thinner, the recipe also works in a 9×9 inch pan or 9-inch springform pan.
Cherry Topping: Store-bought cherry preserves or compote can be used in place of the homemade cherry topping. You can also leave it out completely for a delicious chocolate cheesecake.
Storage: Store leftovers in an airtight container in the refrigerator for up to 1 week or freezer for 1 month.
Nutrition Information (per serving):
- Calories: 524 kcal
- Carbohydrates: 41 g
- Protein: 6 g
- Fat: 39 g
- Saturated Fat: 22 g
- Polyunsaturated Fat: 2 g
- Monounsaturated Fat: 11 g
- Trans Fat: 1 g
- Cholesterol: 92 mg
- Sodium: 259 mg
- Potassium: 287 mg
- Fiber: 3 g
- Sugar: 31 g
- Vitamin A: 1098 IU
- Vitamin C: 2 mg
- Calcium: 84 mg
- Iron: 3 mg
The provided nutritional information is an estimate per serving. Accuracy is not guaranteed.
Tried this recipe?
Leave a comment below & tag @brokenovenbaking on social!