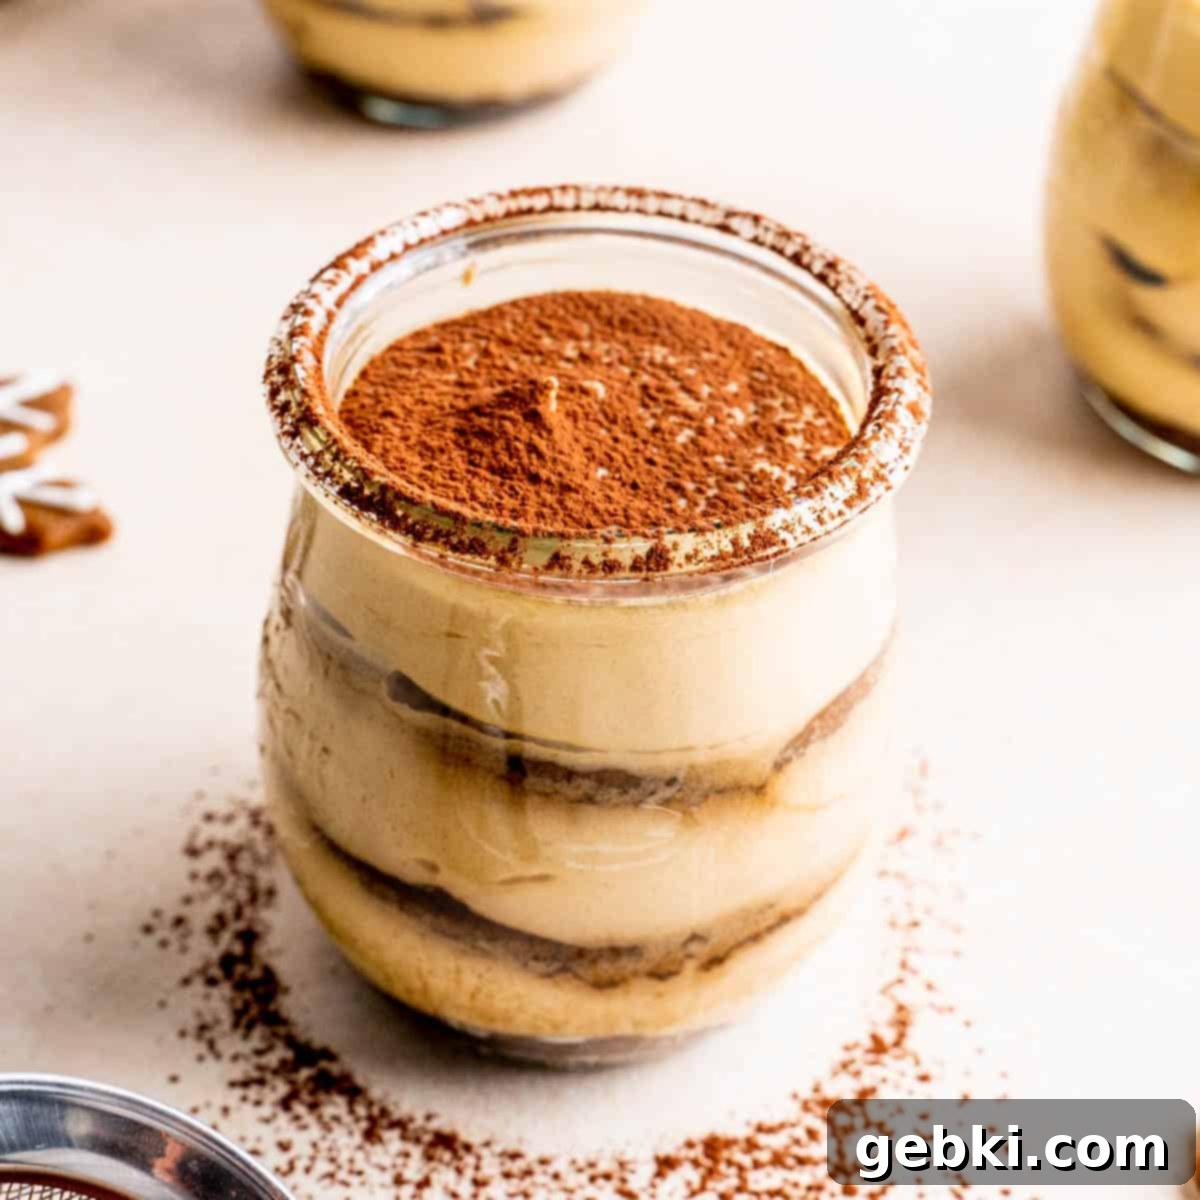
No-Bake Gingerbread Tiramisu Jars: Your Perfect Individual Holiday Dessert
Forget your traditional tiramisu; this recipe introduces a delightful, festive twist that will become your new holiday favorite! Our Gingerbread Tiramisu Jars feature delicious layers of aromatic gingerbread cookies, lightly dipped in rich espresso, and then perfectly complemented by a luscious, spiced molasses pudding. These individual desserts are not only incredibly easy to make with no baking required, but they’re also beautifully presented in charming jars, making them absolutely ideal for holiday parties, Christmas gatherings, or a cozy winter treat. It’s a wonderfully unique way to incorporate the beloved flavors of gingerbread into a truly special dessert experience that your guests will adore!
This post contains affiliate links, meaning that I could earn from purchases made through them. It doesn’t add any extra cost to you, but it does help support this blog!
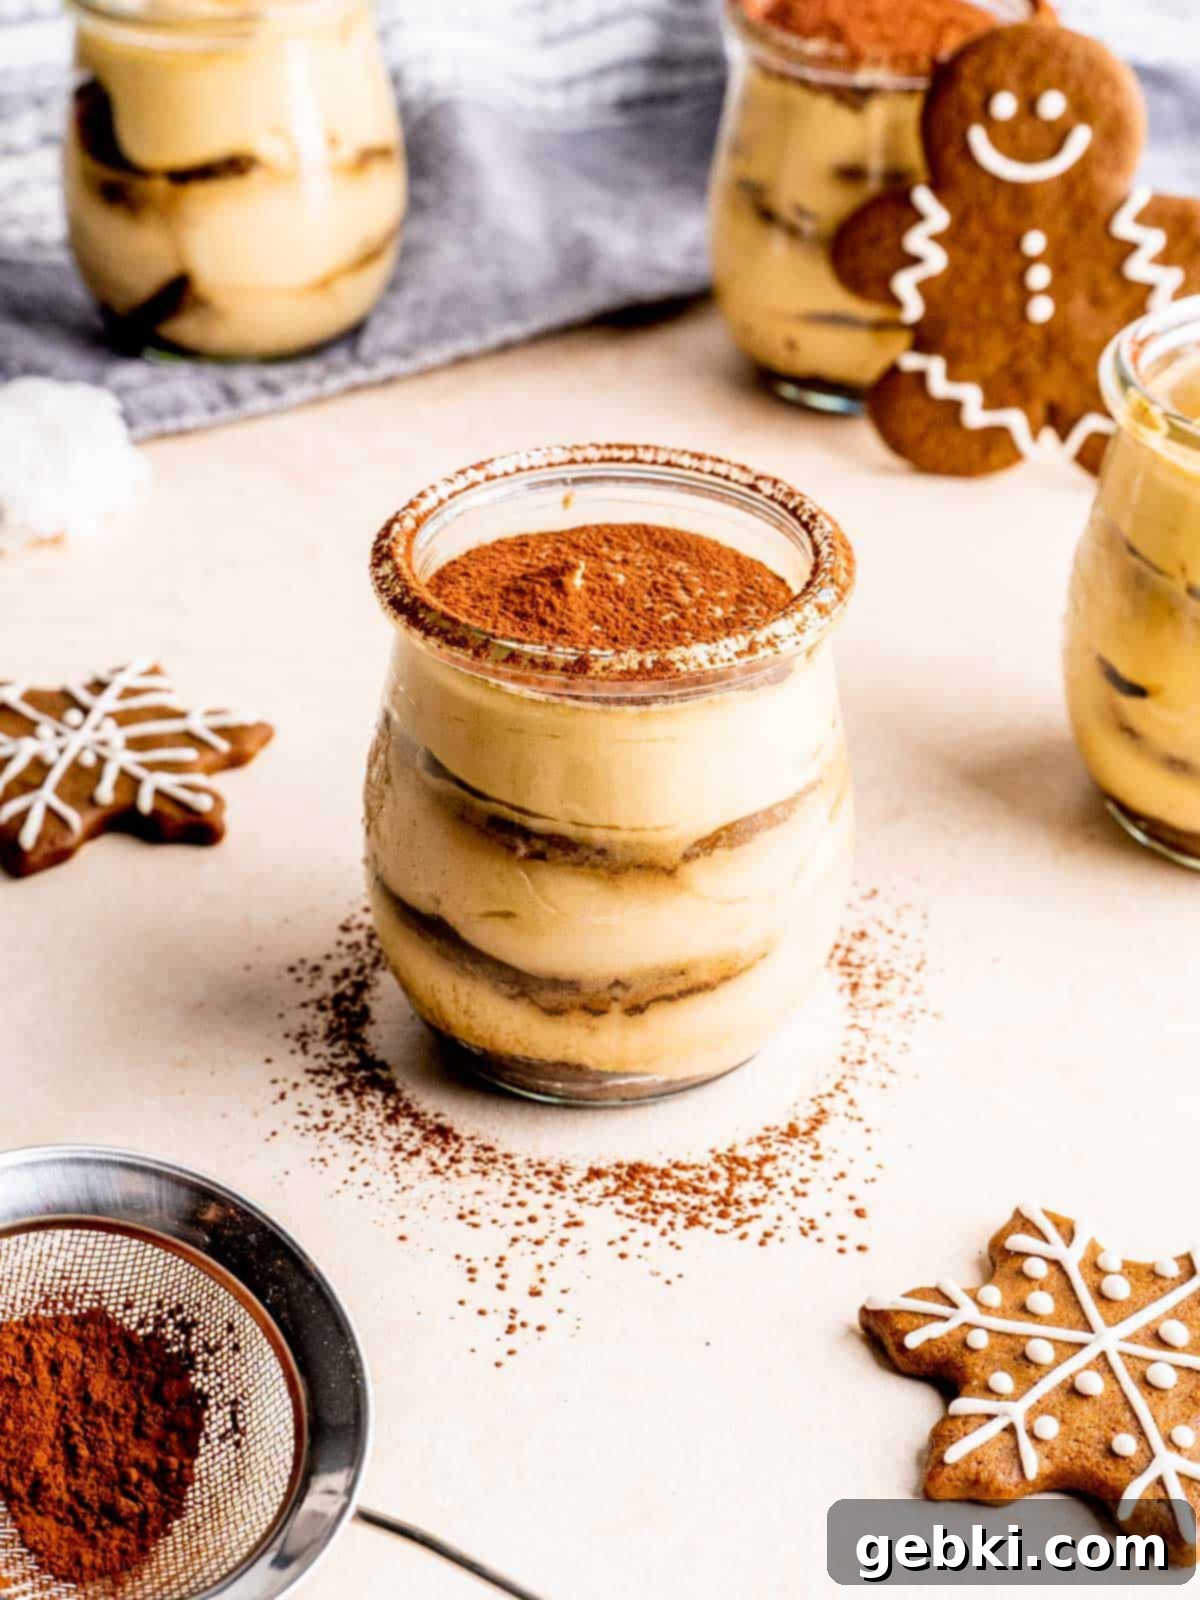
Are you searching for a show-stopping yet simple dessert to elevate your Christmas celebrations this year? Look no further! These individual Gingerbread Tiramisu Jars are an absolute game-changer. Your friends and family who adore the warm spices of ginger and molasses, combined with the rich kick of espresso, will find these personal dessert cups utterly irresistible. They offer a sophisticated, cozy, and perfectly portioned treat that stands out from the usual holiday fare, making them a fantastic addition to any festive menu.
If you love the convenience and charm of individual desserts, be sure to explore some of my other popular recipes like the refreshing Blueberry Cream Pie Jars, delightful Mini Brownie Bites, and irresistible No Bake Cheesecake Bites! Plus, discover an entire collection of mouth-watering Holiday recipes designed to make your festive season even sweeter.
Essential Ingredients for Your Gingerbread Tiramisu
Crafting these delectable Gingerbread Tiramisu Jars requires a careful selection of ingredients, each playing a crucial role in building the unique flavor profile. Here’s what you’ll need to create this festive no-bake dessert:
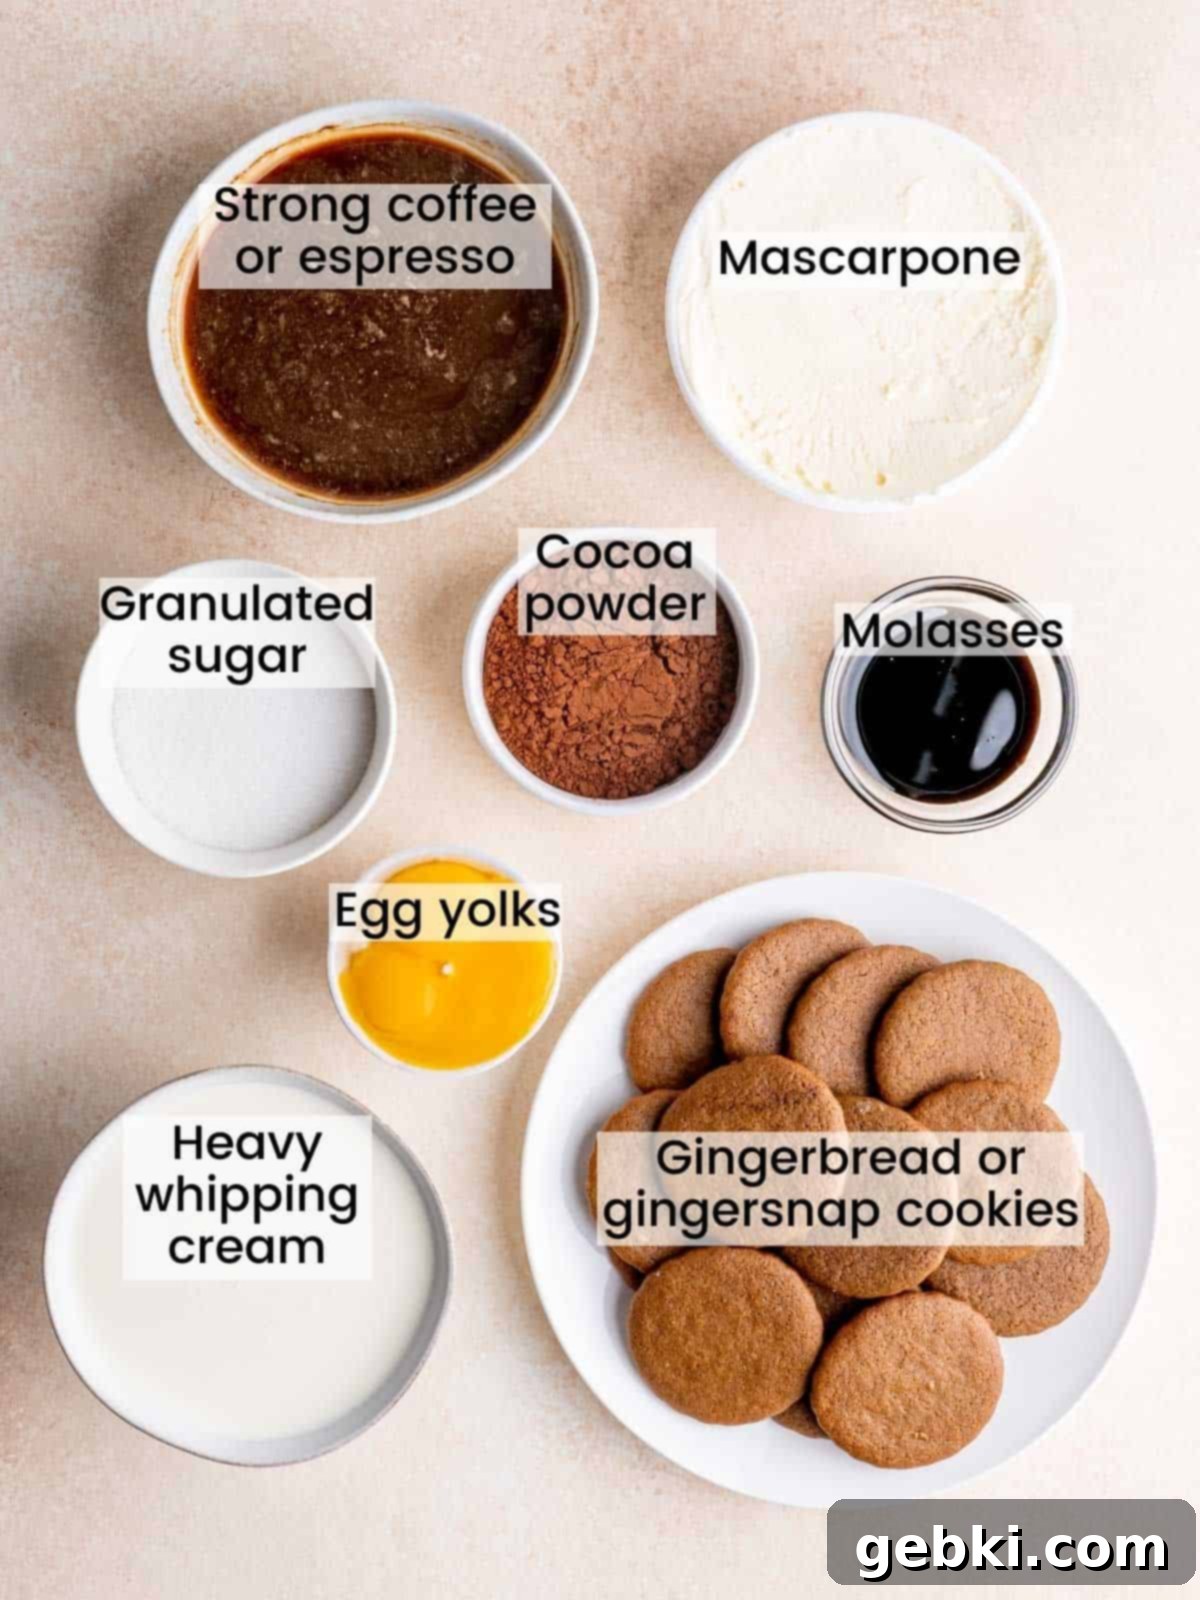
- Espresso or Strong Coffee: The backbone of tiramisu, providing a deep, rich flavor that perfectly contrasts the sweetness of the molasses and gingerbread. Ensure it’s cooled to room temperature before dipping the cookies.
- Mascarpone Cheese: This Italian cream cheese is essential for the smooth, rich, and creamy texture of the pudding. It should be at room temperature for easy mixing.
- Granulated Sugar: Sweetens the egg yolk mixture and helps create a stable, velvety custard.
- Cocoa Powder (Unsweetened Dutch-processed): Used for dusting, it adds a touch of bitterness and a beautiful dark finish. Dutch-processed cocoa provides a darker color and milder chocolate flavor.
- Unsulphured Molasses: The star ingredient that infuses the tiramisu with its signature gingerbread flavor, adding a deep, warm, and slightly smoky sweetness.
- Egg Yolks: Form the base of the rich, cooked custard, contributing to the pudding’s luxurious texture and flavor. Cooking them gently over a double boiler ensures they are safe to consume.
- Heavy Whipping Cream: Whipped to soft peaks, it lightens the mascarpone mixture, giving the pudding an airy and delicate consistency. Make sure it’s very cold for optimal whipping.
- Gingerbread or Gingersnap Cookies: These provide the classic gingerbread spice and texture. Gingersnaps are often preferred for their crunchier, drier texture, which absorbs espresso beautifully without becoming soggy.
- Cinnamon & Cardamom (optional): These extra spices can be added to the cocoa powder for an enhanced aromatic topping, boosting the festive flavor profile.
For precise measurements and detailed quantities, please refer to the complete recipe card provided below.
Essential Equipment for Crafting Your Jars
While this is a no-bake recipe, a few key pieces of equipment will make your gingerbread tiramisu journey smooth and enjoyable:
- Small Jars: These individual tiramisu portions are designed to be served in personal jars, making them not only adorable but also perfectly portioned and easy to transport. I personally love using little tulip jars with lids for an elegant presentation, but feel free to get creative! Reusing clean jars from jam, yogurt, or other food items is an excellent eco-friendly option. The lids are particularly useful for easy storage and gifting during the busy holiday season.
- Double Boiler: This is a crucial tool for gently and safely cooking the egg yolks with sugar, ensuring they reach the proper temperature (160°F) without scrambling. If you don’t have a dedicated double boiler, you can easily create one by placing a heatproof metal or glass bowl over a small pot containing about an inch of simmering water. Just make sure the bottom of the bowl doesn’t touch the water.
- Hand Mixer: While not strictly essential, a hand mixer will significantly simplify and speed up the process of whipping the heavy cream to soft peaks. It ensures a consistent, airy texture with minimal effort. However, if you’re up for a bit of a workout, a sturdy whisk and some good old-fashioned elbow grease will certainly get the job done!
- Mixing Bowls: Several sizes will be useful for combining different components.
- Measuring Spoons & Cups (or Kitchen Scale): Accurate measurements are key for successful baking (even no-bake!). A kitchen scale for dry ingredients is highly recommended for best results.
- Spatula: For folding the whipped cream gently into the filling.
- Thermometer: Essential for ensuring the egg yolk mixture reaches 160°F for safety.
Having these tools ready will ensure a seamless and enjoyable dessert-making experience.
Crafting Your Gingerbread Tiramisu: Step-by-Step
Follow these detailed steps to assemble your stunning and delicious Gingerbread Tiramisu Jars:
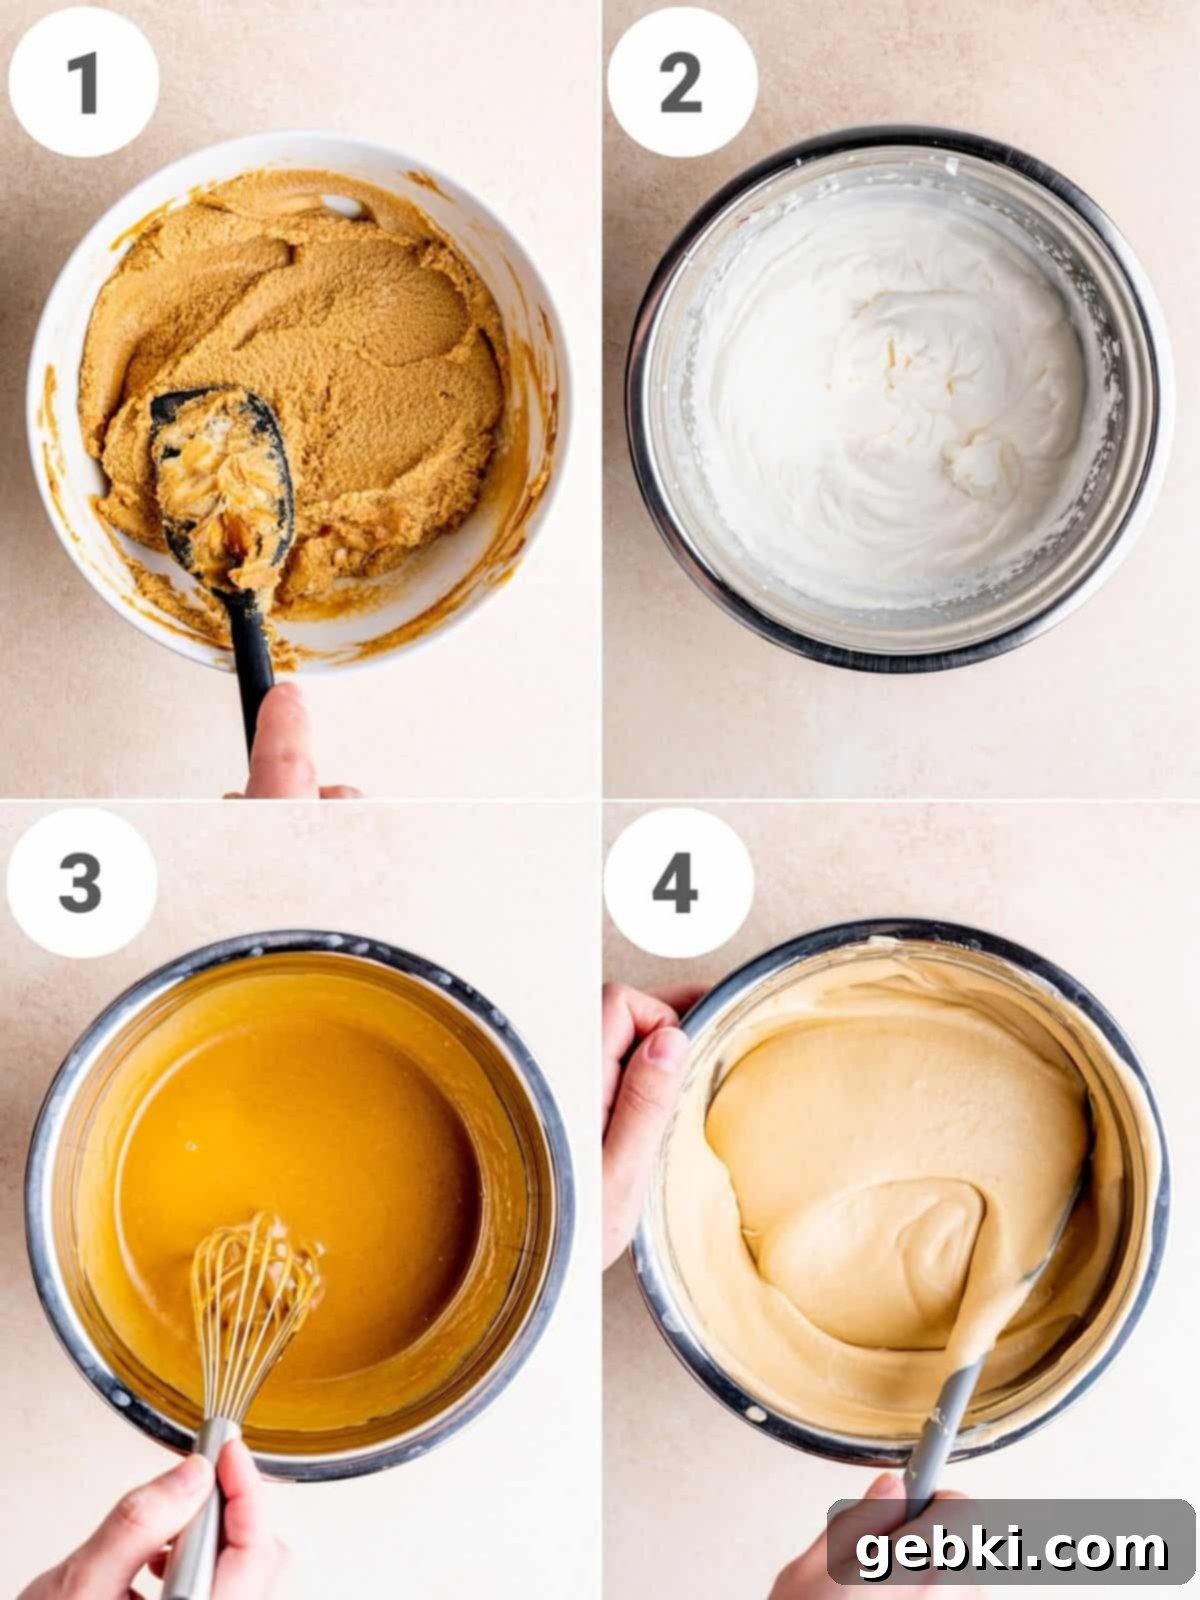
STEP ONE (Picture 1 above) – Prepare the Mascarpone-Molasses Base: In a medium-sized mixing bowl, combine the mascarpone cheese (ensure it’s at room temperature for easy blending) and the unsulphured molasses. Stir them together until well combined and smooth, then set this mixture aside. This will form the rich, spiced foundation of your pudding.
STEP TWO (Picture 2 above) – Whip the Heavy Cream: In a separate, chilled bowl, pour the cold heavy whipping cream. Using a hand mixer (or a whisk and plenty of arm power!), whip the cream until it forms soft peaks. This means the cream will hold its shape fairly well when you lift the whisk, but the peaks will still have a slight curl or droop at the tip. Be careful not to over-whip, as it can turn grainy.
STEP THREE (Picture 3 above) – Cook the Egg Yolk Mixture: Set up your double boiler. In the top bowl (or a heatproof bowl over simmering water), whisk together the egg yolks and granulated sugar. Stir continuously and gently over the simmering water until the mixture reaches a temperature of 160°F (71°C). This step is crucial for both safety and to create a stable custard. Once it reaches temperature, remove it from the heat and allow it to cool completely before proceeding. Once cooled, gently stir the mascarpone-molasses mixture into the egg yolk custard until fully incorporated.
STEP FOUR (Picture 4 above) – Combine for the Filling: With a spatula, gently fold the whipped cream into the cooled egg yolk and mascarpone mixture. Use a light, folding motion to maintain the airiness of the whipped cream, ensuring a light and fluffy final pudding consistency. Be patient and gentle to prevent deflating the cream.
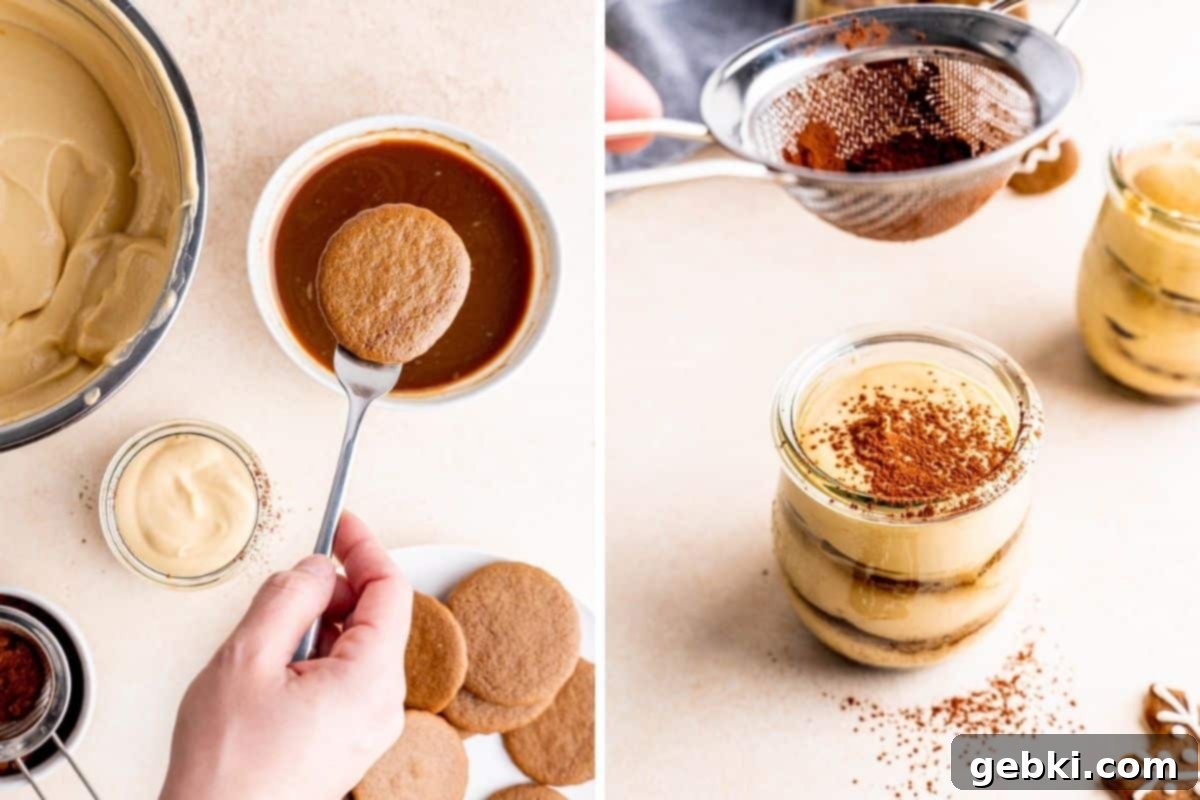
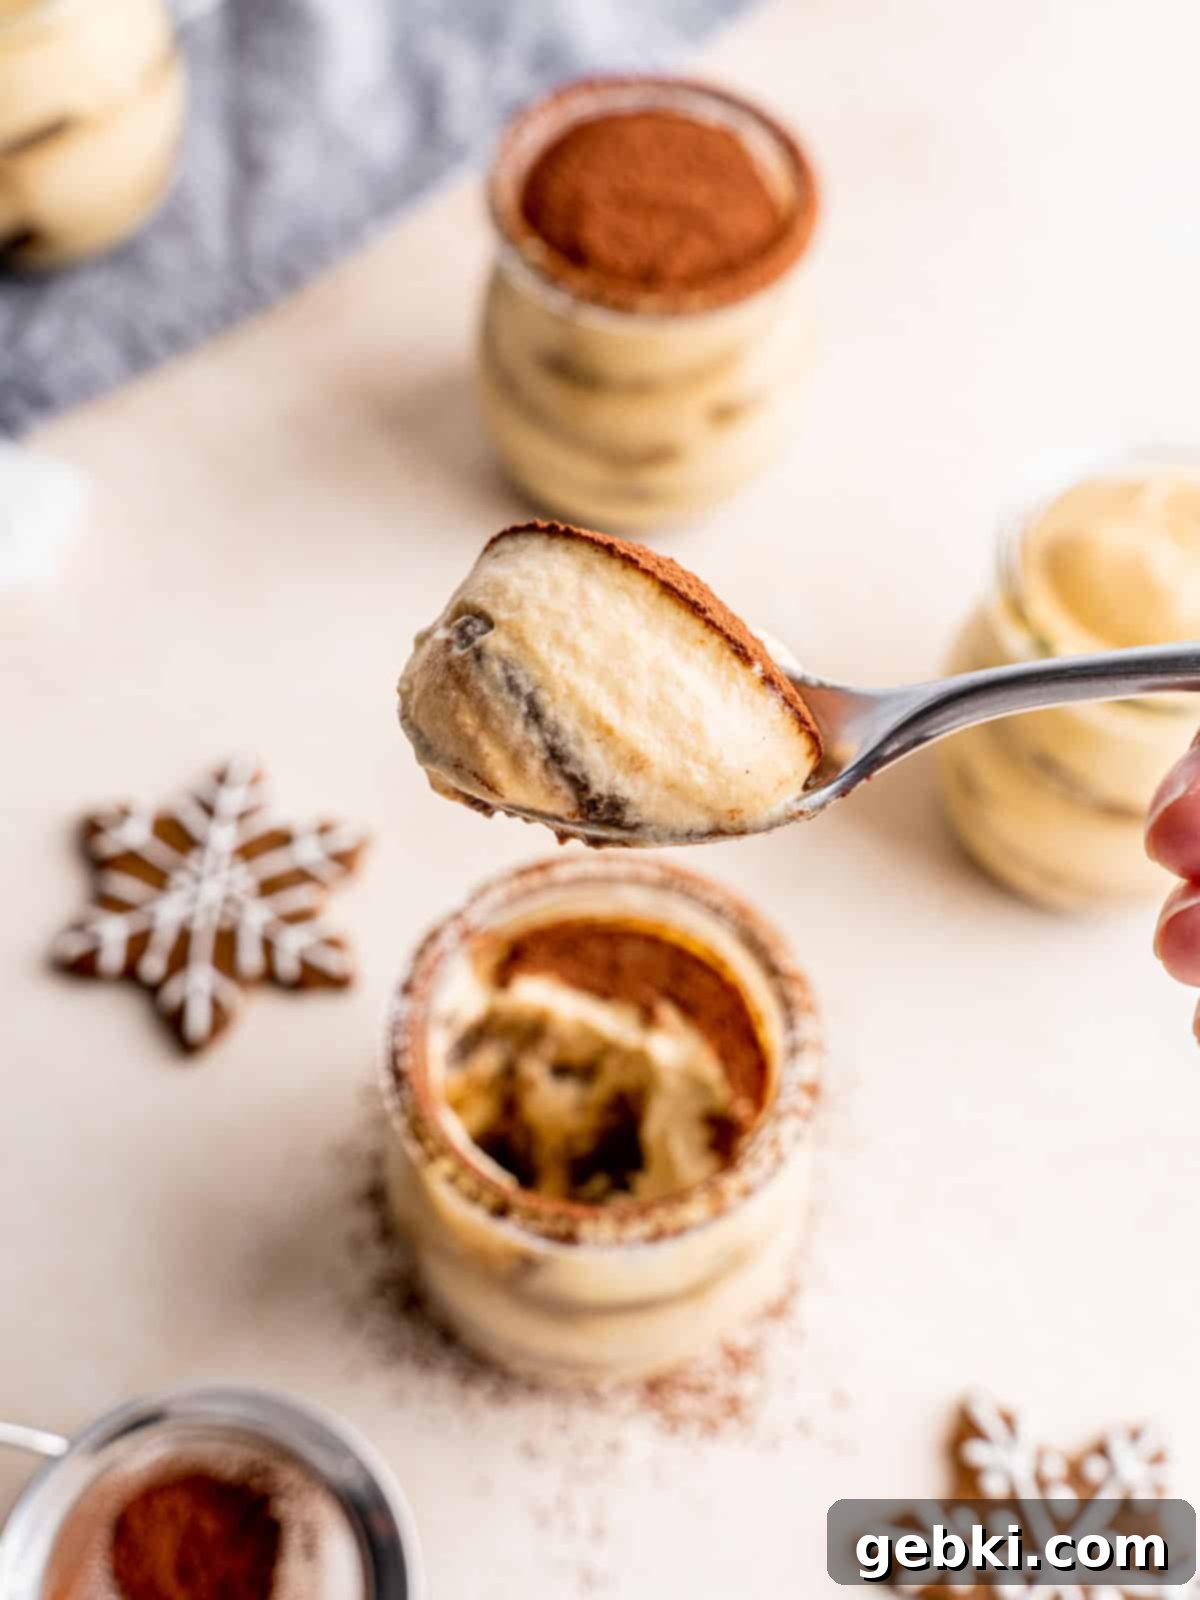
Assemble Your Gingerbread Tiramisu Jars: This is where the magic happens! In a small bowl, combine your cocoa powder with a little cinnamon and ginger if you wish, for an extra aromatic kick. Sprinkle a thin, even layer of this spiced cocoa powder at the very bottom of each jar. Next, take a gingerbread or gingersnap cookie and quickly dip it into the room-temperature espresso. Do not soak it! Just a swift dunk on each side is enough to moisten it without making it soggy. Place the espresso-dipped cookie firmly at the bottom of the jar, pressing it down if needed. Follow this with 1-2 generous spoonfuls of your prepared molasses pudding filling, spreading it evenly over the cookie layer. Repeat this layering process: espresso-dipped cookie, then molasses pudding. Continue until your jar is nearly full. I personally love to finish with a smooth layer of the creamy filling at the top. Cover your jars and refrigerate for at least 2 hours, or ideally overnight, to allow the flavors to meld and the cookies to soften perfectly. Right before serving, give each jar a final, beautiful dusting of cocoa powder for that classic tiramisu presentation and an extra burst of flavor!
PRO TIP: For the best results, use gingerbread or gingersnap cookies that are on the crunchier and drier side. These types of cookies will absorb the espresso more effectively without dissolving or becoming too soft. Remember, it’s a quick dunk, not a soak, to get just the right amount of coffee flavor and moisture.
Substitutions & Creative Variations
This Gingerbread Tiramisu recipe is designed to deliver a specific, delightful flavor profile, and as such, it has not been extensively tested with many ingredient substitutions. If you do experiment with replacing any ingredients, please be adventurous and let us know how they turned out in the comments below! Your insights are valuable to the community!
When it comes to cookies, you have a choice between classic gingerbread cookies or crisp gingersnaps. While both work wonderfully to infuse that essential ginger flavor, I highly recommend using gingersnaps. Their generally drier and crunchier texture makes them superior for absorbing the espresso without becoming overly soggy. This ensures your tiramisu maintains a delightful texture balance.
For those who enjoy a hint of alcohol in their tiramisu (though this recipe is strictly alcohol-free, as noted in the FAQ!), you could consider adding a very small splash of a complementary liqueur, such as a coffee liqueur (like Kahlúa), dark rum, or even a ginger-flavored liqueur, to your espresso. However, if you add alcohol, be mindful that it will alter the original recipe’s alcohol-free status.
You can also experiment with the spices in your dusting powder. Besides cinnamon and ginger, a tiny pinch of nutmeg or allspice could enhance the holiday feel. For a different texture, consider adding a sprinkle of finely crushed candied ginger or chopped pecans on top just before serving, for a lovely crunch.
Storage Best Practices
These delightful Gingerbread Tiramisu Jars are best enjoyed fresh, but they can be prepared ahead of time for convenience. Store the covered jars in the refrigerator for up to 2 days. For optimal taste and texture, with the cookies perfectly softened and the flavors fully melded, I highly recommend enjoying them within 24 hours of preparation. Beyond this timeframe, the cookies might become a bit too soft, and the overall texture could change slightly. Always ensure the jars are tightly sealed to prevent them from absorbing any unwanted refrigerator odors and to keep the dessert fresh and moist.
Frequently Asked Questions About Gingerbread Tiramisu
No, this particular Gingerbread Tiramisu recipe is a delightful, family-friendly twist on the classic. It’s 100% alcohol-free, making it suitable for everyone to enjoy during the holidays!
Absolutely! In fact, these jars are even better when made in advance. The flavors deepen and the cookies soften beautifully as they chill. You can prepare them up to 2 days ahead, but for the best texture and freshest taste, I recommend enjoying them within 24 hours.
While espresso is a traditional tiramisu component and pairs wonderfully with gingerbread and molasses, you can certainly substitute it. Strong black tea (like Earl Grey or chai for extra spice) or even a warm spiced apple cider could be interesting alternatives. Just ensure whatever liquid you choose is cooled to room temperature before dipping the cookies.
The number of cookies per jar can vary based on the size and shape of your jars and the cookies themselves. Generally, 3-4 cookies per jar, arranged in layers, works well for a standard small dessert jar, resulting in about 2-3 cookie layers and 2-3 pudding layers. The recipe card provides an estimated total, but adjust as needed for your chosen jars.
More Delicious Recipes You’ll Love
-
Apple Pie Ice Cream (Ninja Creami Recipe)
-
Chewy Salted Caramel Oatmeal Cookies
-
Strawberry Matcha Ice Cream (Ninja Creami Recipe)
-
Soft Lemon Sugar Cookies (That Actually Taste Like Lemon!)
Did you try this recipe?
Tag @brokenovenbaking on Instagram and leave a ⭐️ review below!
📖 Recipe
Gingerbread Tiramisu Jars
Kayla Burton
Pin Recipe
Equipment
-
Hand mixer
-
Double boiler
-
Mixing bowls
-
Measuring spoons
-
Scale/measuring cups
-
Whisk
-
Spatula
-
Thermometer
-
Small jars or cups
Ingredients
- 4 large egg yolks
- ½ cup (100 g) granulated sugar
- 8 ounces mascarpone room temperature
- 1 tablespoon unsulphured molasses
- 1¼ cup (295.74 ml) heavy whipping cream cold
- ¼ cup (21.5 g) cocoa powder
- ¼ teaspoon cinnamon optional
- ⅛ teaspoon ginger optional
- 1½ cups (354.88 ml) espresso or strong coffee room temperature
- 48* gingerbread or gingersnap cookies
Instructions
-
Heat the egg yolks and sugar in a double boiler while stirring constantly with a whisk until it reaches 160°F. Remove from heat and let cool.
If you don’t have a double boiler, place the ingredients into a heatproof bowl on top of a shallow pot of simmering water.
-
In a separate bowl, mix together the molasses and the mascarpone.
-
Whisk the heavy whipping cream until it reaches soft peaks (holds its shape but is very slightly droopy when the whisk is lifted). I recommend using a hand mixer for this.
-
Once the yolk mixture is completely cool, slowly whisk in the mascarpone mixture. Then, gently fold in the whipped cream.
-
Combine the cocoa powder with cinnamon and ginger (optional). Sprinkle a fine layer of cocoa powder in the bottom of the jars.
-
Dip a cookie in espresso and place it in the bottom of the jar.
Add 1-2 spoonfuls of the mascarpone filling on top of the cookie.
Repeat layers of dipped cookies and filling until the jar is full, ending with the filling.
-
Cover and place the jars in the refrigerator to chill for at least 2 hours. Sprinkle cocoa powder on top right before serving.
Save This Recipe! 💌
We’ll email this post to you, so you can come back to it later!
Notes
Store covered in the refrigerator for up to 2 days. For best results, enjoy within a day of preparing to ensure optimal texture and flavor.
The provided nutrition information is an estimate, the calorie accuracy is not guaranteed. It’s calculated based on the ingredients listed and may vary depending on brands and precise measurements used.
The provided nutritional information is an estimate per serving. Accuracy is not guaranteed.
