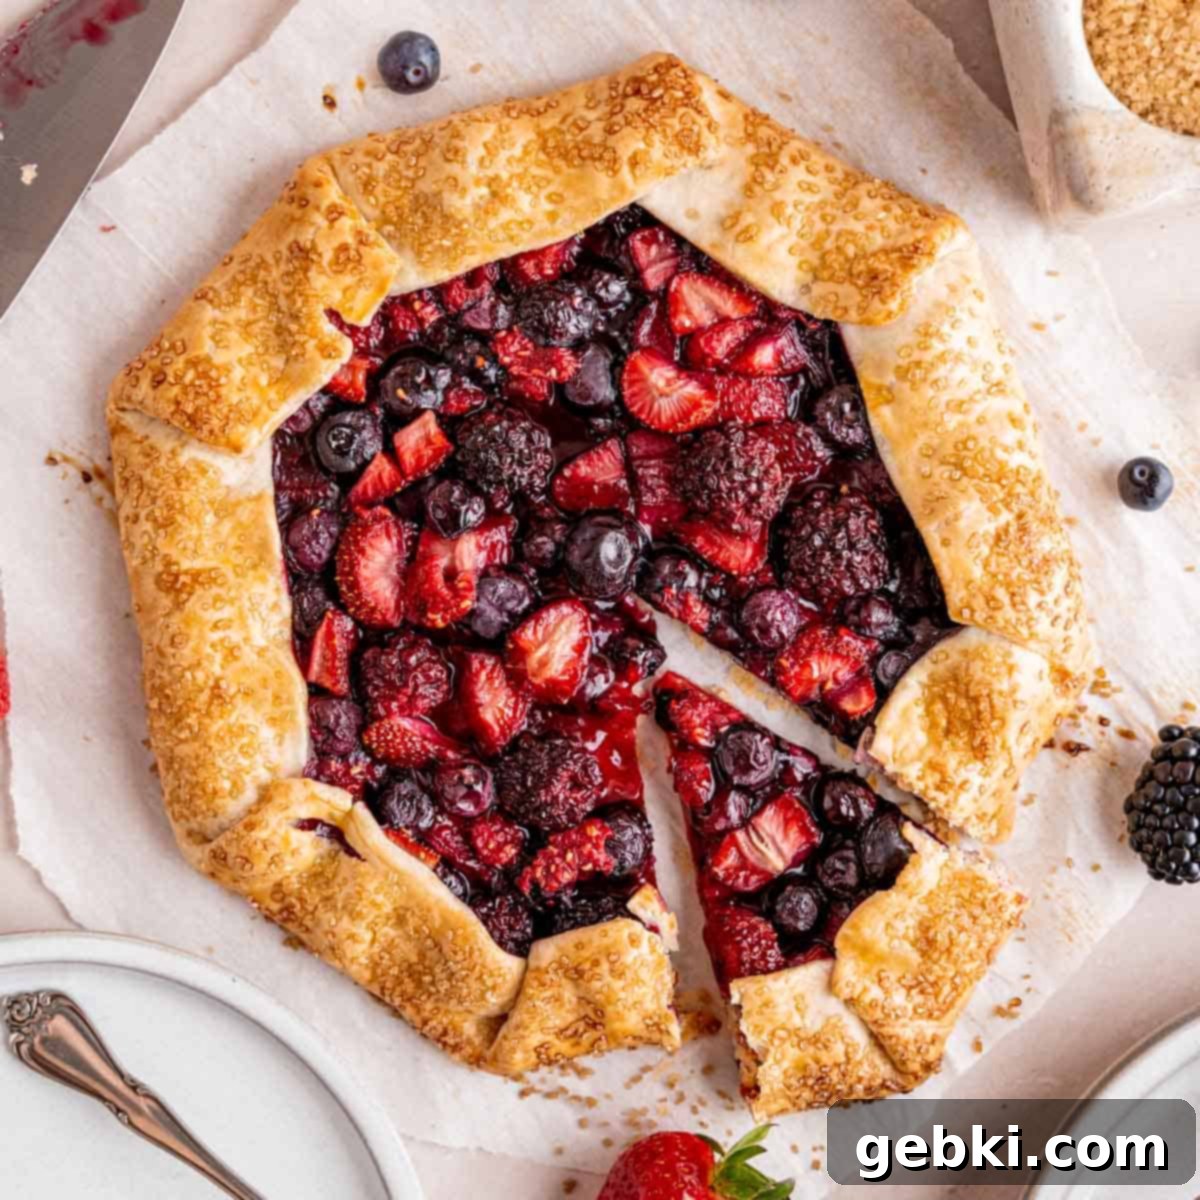
Easy Mixed Berry Galette Recipe: A Simple Rustic Pie for Any Occasion
Embrace the effortless charm of summer baking with this incredible Mixed Berry Galette. Often described as a rustic, free-form pie, a galette simplifies dessert-making without sacrificing flavor or visual appeal. This delightful recipe champions ease and flavor, using a convenient store-bought pie crust as its base. It’s generously topped with a vibrant medley of fresh summer berries, then baked until the crust is golden brown and the fruit filling is beautifully bubbly and fragrant. The best part? You can have this impressive dessert prepped in under 20 minutes, making it perfect for last-minute gatherings or a spontaneous sweet treat. Forget the fuss of traditional pies; this berry galette delivers all the deliciousness with minimal effort!
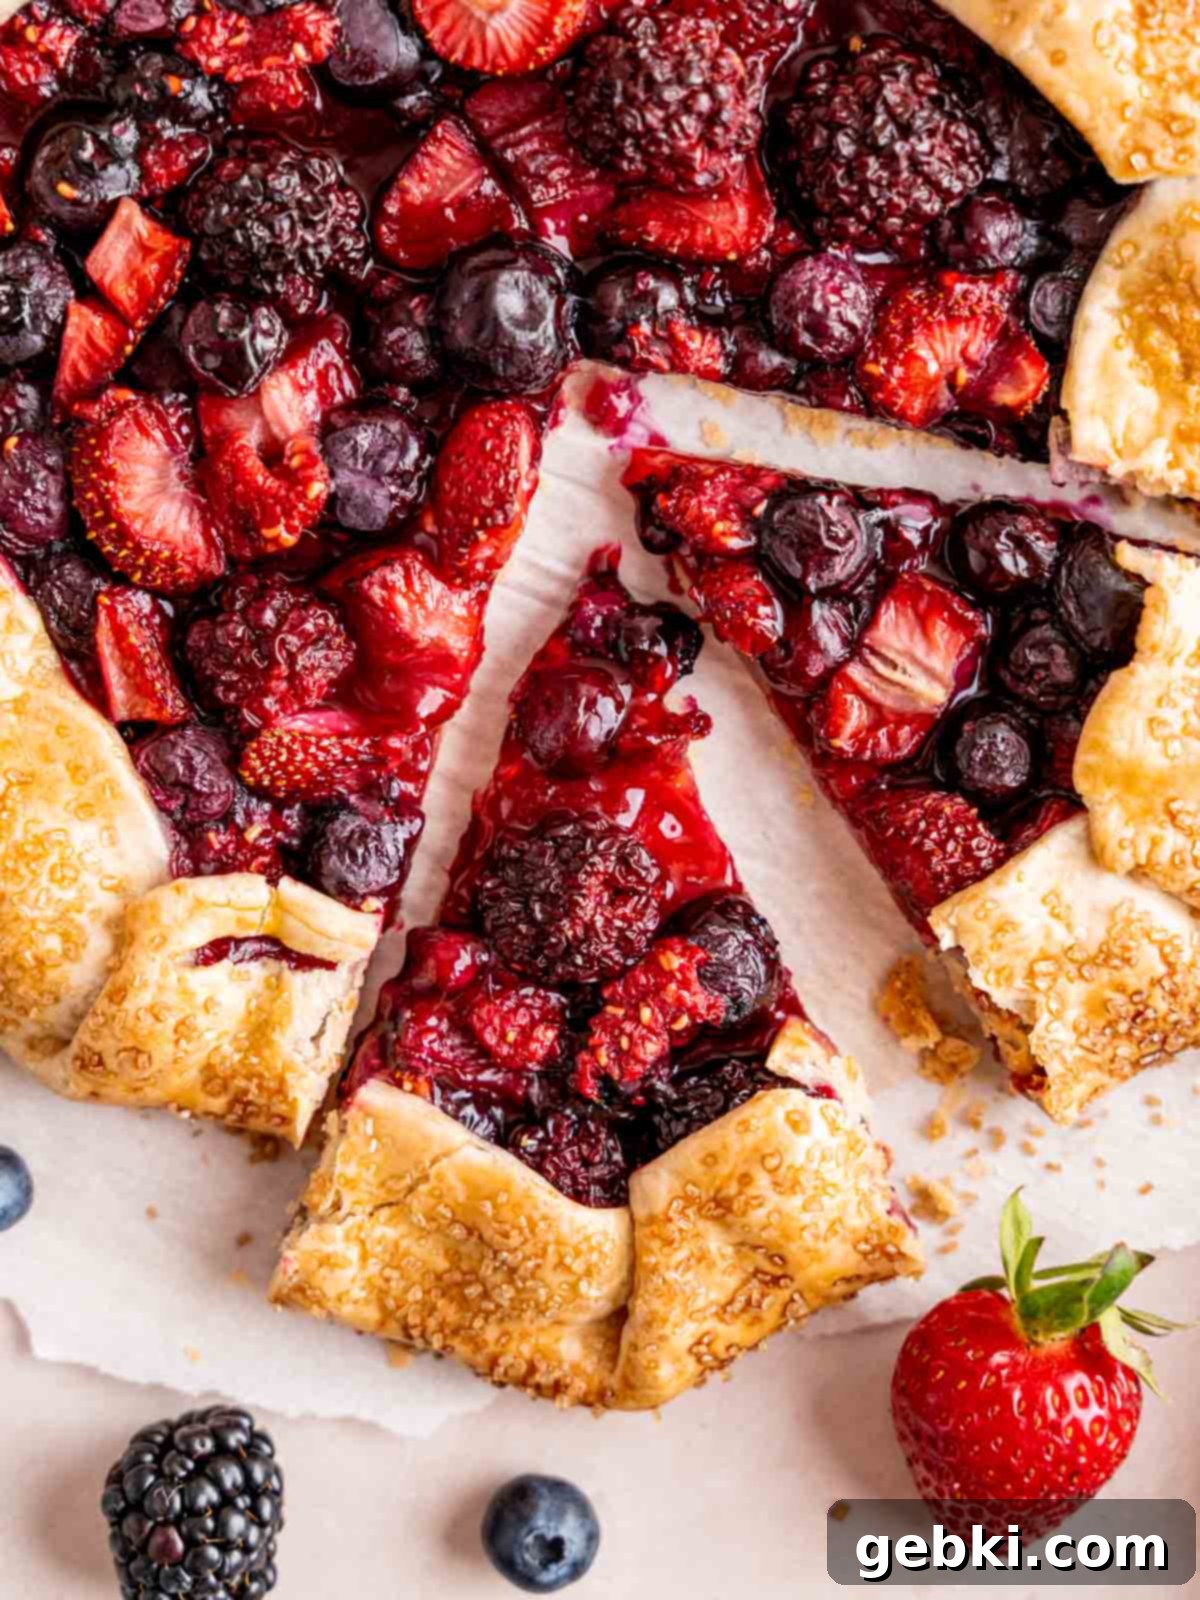
This simple berry galette recipe has quickly become a household favorite. It’s my go-to for a quick dessert that always impresses, and I absolutely love how easy it is to make, enjoy, and even photograph! Unlike traditional pies where you meticulously worry about the top crust, a galette embraces a beautifully imperfect, rustic aesthetic. There’s no need for fancy crimping or elaborate lattice work here; the charm lies in its simplicity. Plus, I’m a huge fan of the generous crust-to-filling ratio, which means every bite offers the perfect balance of flaky pastry and juicy fruit.
Building on the success of my Strawberry Rhubarb Galettes, this mixed berry version takes simplicity to another level. I’ve taken full advantage of the abundance of summer berries, combining the delightful flavors of blackberries, blueberries, raspberries, and strawberries to create a truly spectacular dessert. If you’re a fan of fruit crisps, you might also enjoy my Peach Blueberry Crisp recipe – another fantastic way to enjoy seasonal fruits. This Mixed Berry Galette is the epitome of summer in a dessert, but its versatility means you can enjoy it year-round!
[feast_advanced_jump_to]
Why You’ll Love This Easy Berry Galette Recipe
- Less than 30 Minutes of Prep! The ultimate time-saver! By utilizing a high-quality store-bought pie crust, you can bypass the tedious process of making dough from scratch. This allows for an incredibly quick and simple preparation, yet the resulting galette looks and tastes impressively gourmet, perfect for entertaining or a casual weeknight treat.
- Easier Than Pie! Forget the stress of achieving a perfectly symmetrical pie. With a galette, there’s no need to meticulously fit a top crust or intricately weave a lattice. You simply fold the edges over the fruit filling, creating a beautiful, naturally rustic look that is both elegant and forgiving. It’s all the deliciousness of a fruit pie, with none of the typical baking anxiety.
- Mixed Summer Berries are Extra Delicious! Summer is when berries are at their peak sweetness and flavor. This galette recipe is an ideal way to celebrate and showcase these seasonal gems. The combination of different berries creates a complex and delightful flavor profile. Even better, you can easily adapt this recipe with whatever fruit is in season, or enjoy it in the colder months by freezing fresh-picked berries during the summer to savor later!
- Just 4 Simple Steps for an Impressive Dessert! From mixing the fruit to baking, this recipe is designed for straightforward execution. In just four easy steps, you’ll transform basic ingredients into a stunning fruit galette, ready to share with friends and family, or to indulge in as a well-deserved personal treat.
- It’s Sweet, Tart, and Wonderfully Fruity, much like my popular Strawberry and Rhubarb Crisp! The blend of different berries ensures a balanced flavor that hits all the right notes – sweet, with just enough tang to keep it exciting, and bursting with fresh fruit essence.
Essential Ingredients for Your Mixed Berry Galette
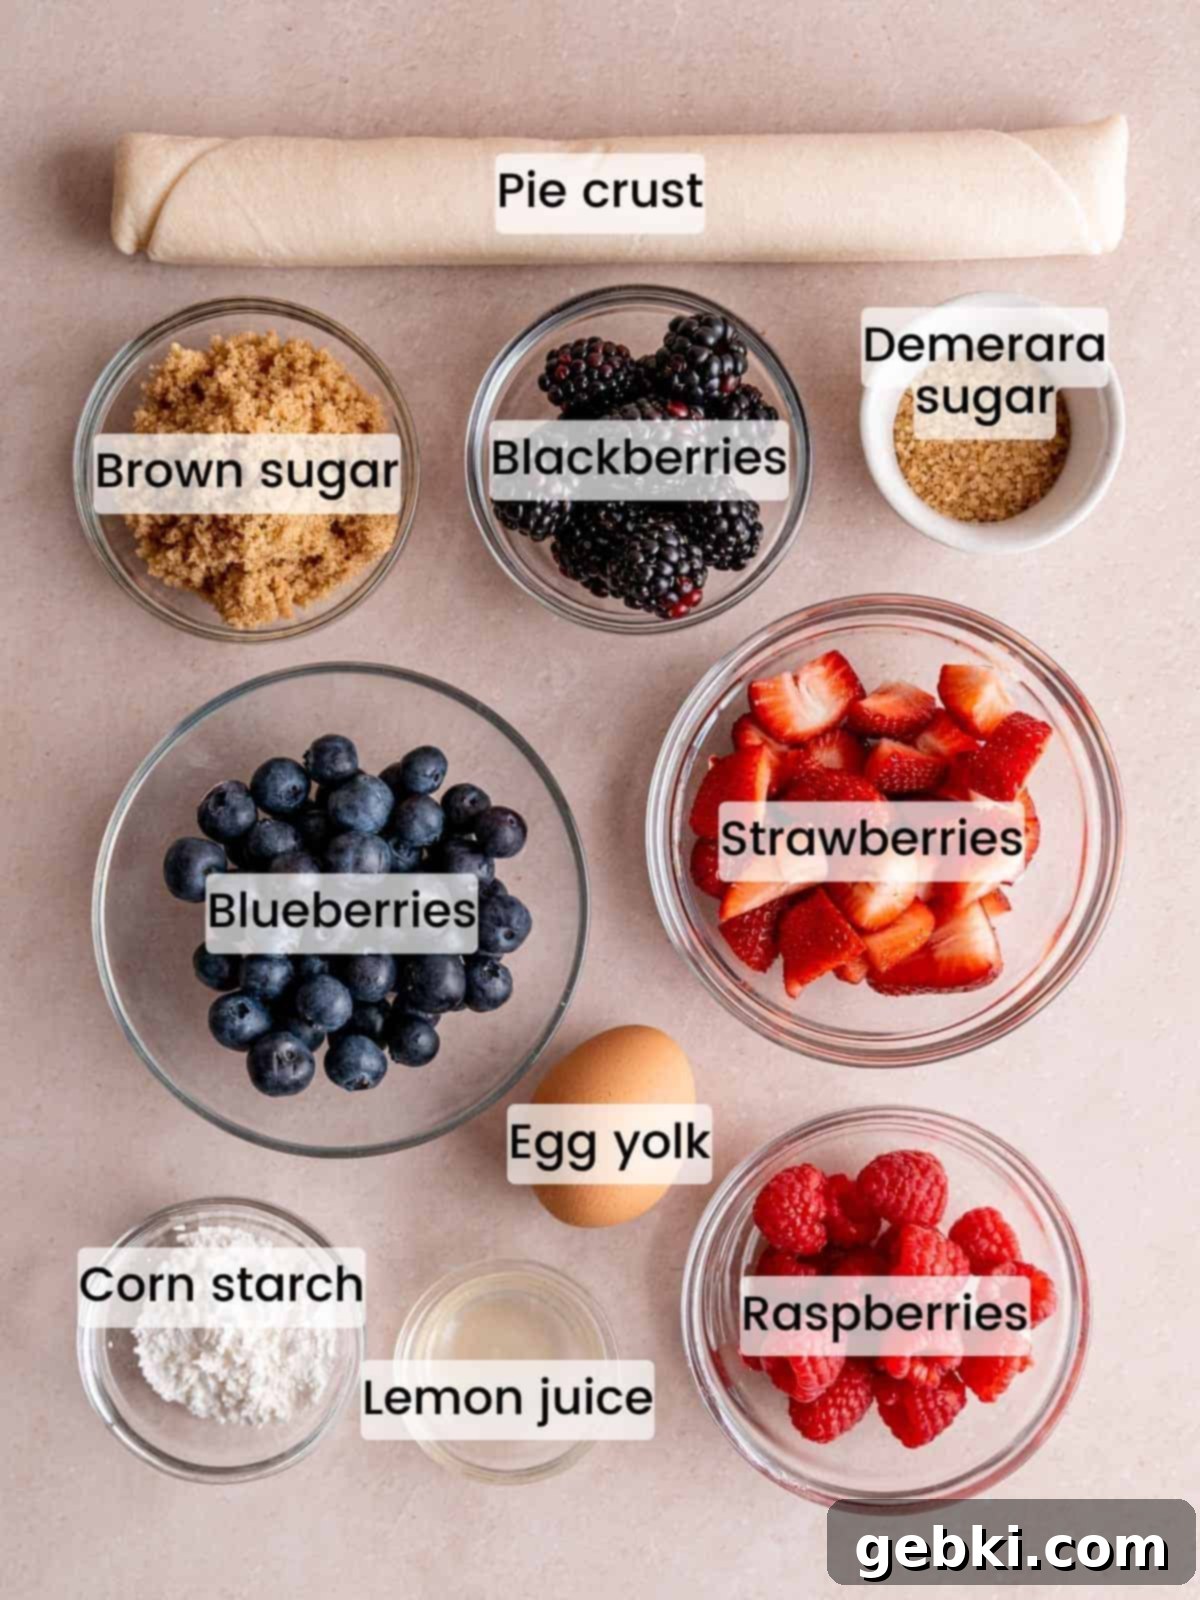
To create this incredibly delicious Mixed Berry Galette, you’ll need just a few key ingredients. Each component plays a crucial role in achieving the perfect balance of flaky crust and juicy, flavorful filling:
Ingredient Notes:
- Store-bought pie crust: This is your secret weapon for an incredibly easy and quick mixed berry galette. You’ll typically find pre-made pie crusts in the frozen or refrigerated section of your local grocery store. Opt for an all-butter crust if available for the best flavor and flakiness, but any good quality crust will work beautifully.
- This recipe features a vibrant mix of blackberries, strawberries, blueberries, and raspberries. This combination offers a delightful range of sweetness and tartness, along with varied textures. Feel free to customize your mixed berry tart with any combination of your favorite seasonal fruits, ensuring the total amount remains around 2.5 cups. Both fresh and frozen berries work wonderfully; if using frozen, there’s no need to thaw them beforehand.
- Corn starch: This essential ingredient acts as a thickening agent, preventing the juices from the berries from becoming too runny and creating a perfectly set, delicious filling that holds its shape. If you don’t have corn starch, you can substitute with all-purpose flour or tapioca starch, using slightly different quantities.
- Demerara or turbinado sugar: This coarse sugar is sprinkled generously on the crust edges before baking. It melts slightly to create a beautiful, caramelized, crunchy texture and adds an extra layer of sweetness that perfectly complements the tart berries. It also gives the galette a lovely glistening finish.
See recipe card below for a full list of ingredients and precise measurements to ensure your galette turns out perfectly!
Creative Substitutions & Flavorful Variations
- Experiment with Different Fruits: The beauty of a galette lies in its adaptability! While mixed berries are fantastic, don’t hesitate to swap them out for other seasonal favorites. Consider sliced peaches, plums, nectarines, cherries (pitted!), or even a single-fruit galette like apple or pear. Just ensure the total amount of fruit remains around 2.5 cups to maintain the ideal filling-to-crust ratio. Fresh or frozen fruit will both work, offering flexibility year-round.
- Homemade vs. Store-Bought Crust: While this recipe champions the ease of a store-bought crust, if you have extra time and love baking from scratch, a flaky all-butter pie crust will elevate this galette even further with its rich, homemade flavor. Either choice will yield a delicious result!
- Get Creative with Designs: Unleash your inner artist! You can arrange the fruits to create beautiful patterns. For patriotic holidays like the 4th of July, try separating blueberries and blackberries from strawberries and raspberries to mimic the colors of an American flag. Another fun idea is to create an ombre effect by layering berries from dark to light, or arranging them in concentric circles for a striking visual.
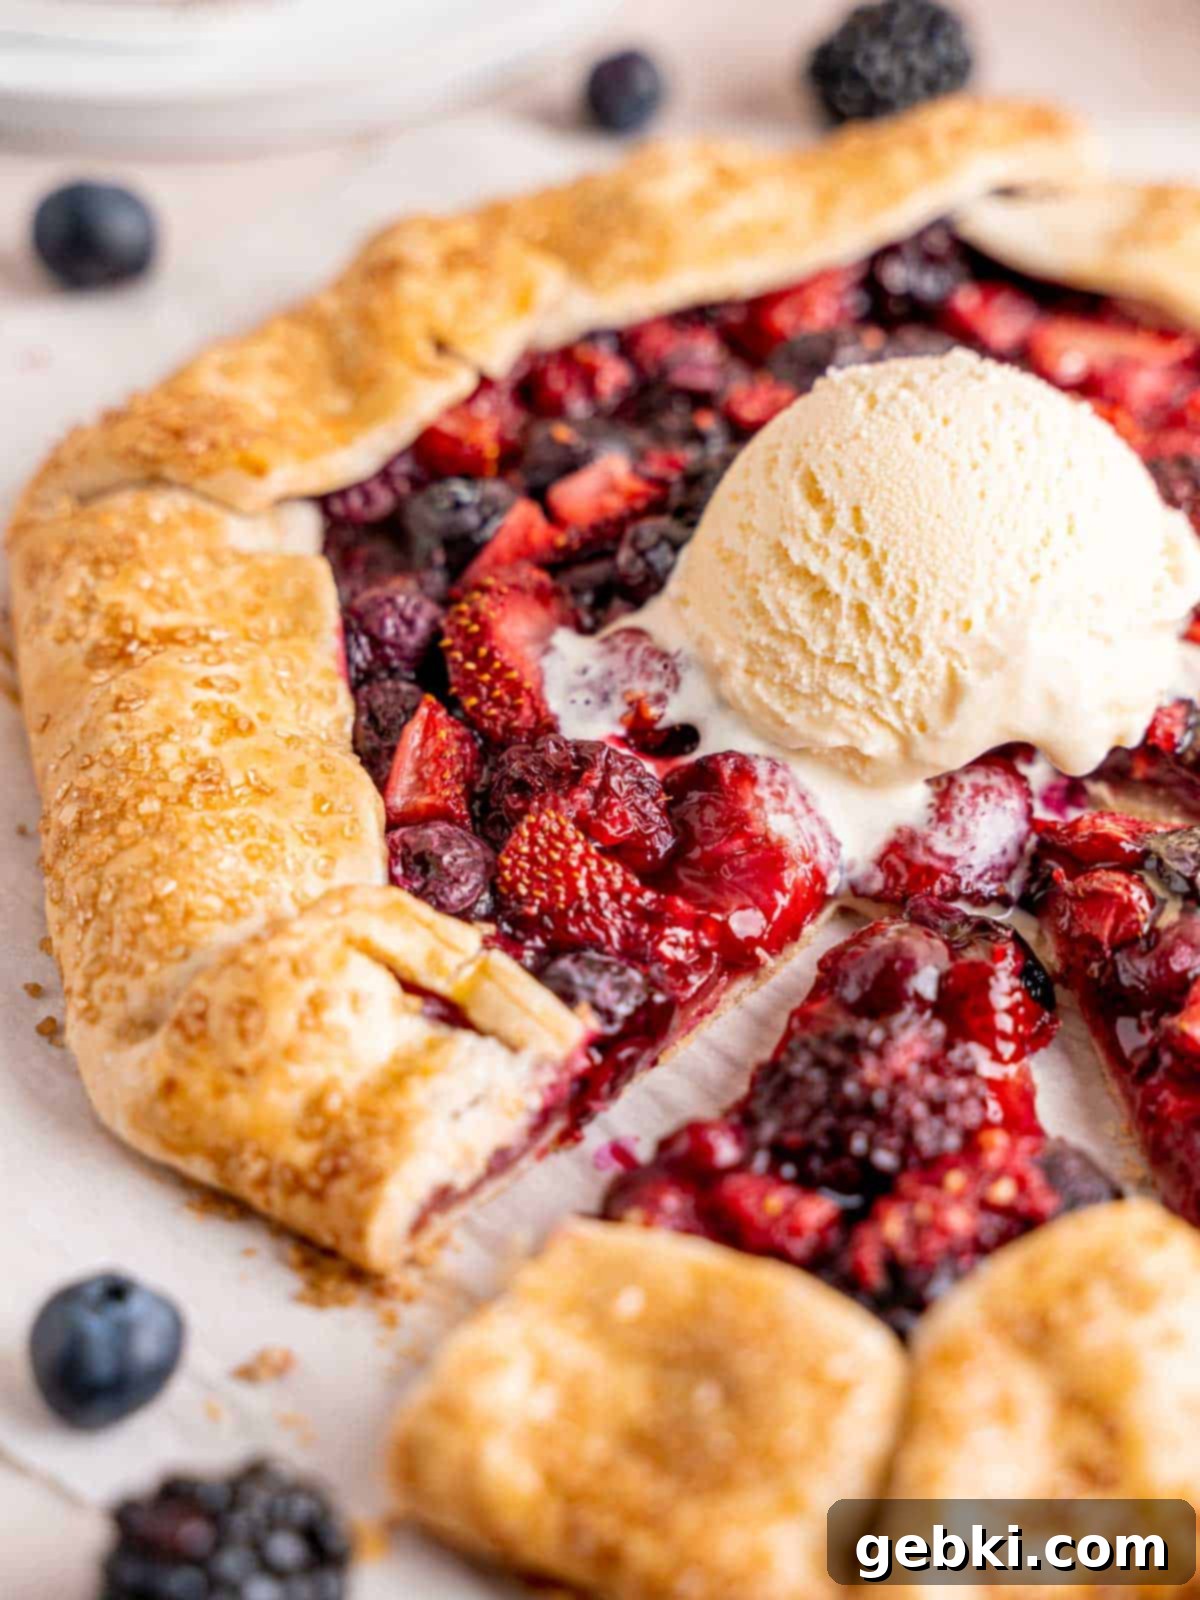
- Enhance Your Serving: A warm galette is a treat on its own, but it truly shines with accompaniments. Serve it à la mode with a scoop of vanilla bean ice cream, a drizzle of warm caramel or rich chocolate sauce, a dollop of freshly whipped cream, or even a sprinkle of toasted almonds for added crunch. A sprig of fresh mint can add a refreshing touch and a pop of color.
This recipe has been thoroughly tested with the ingredients listed above. If you decide to replace or add any ingredients, please let us know how it turned out in the comments below! Your feedback helps us and other bakers explore new possibilities.
How to Bake Your Perfect Mixed Berry Galette: A Step-by-Step Guide
Creating this stunning Mixed Berry Galette is simpler than you might imagine, thanks to its rustic nature and the convenience of a store-bought crust. Follow these easy steps for a delicious dessert that looks as good as it tastes!
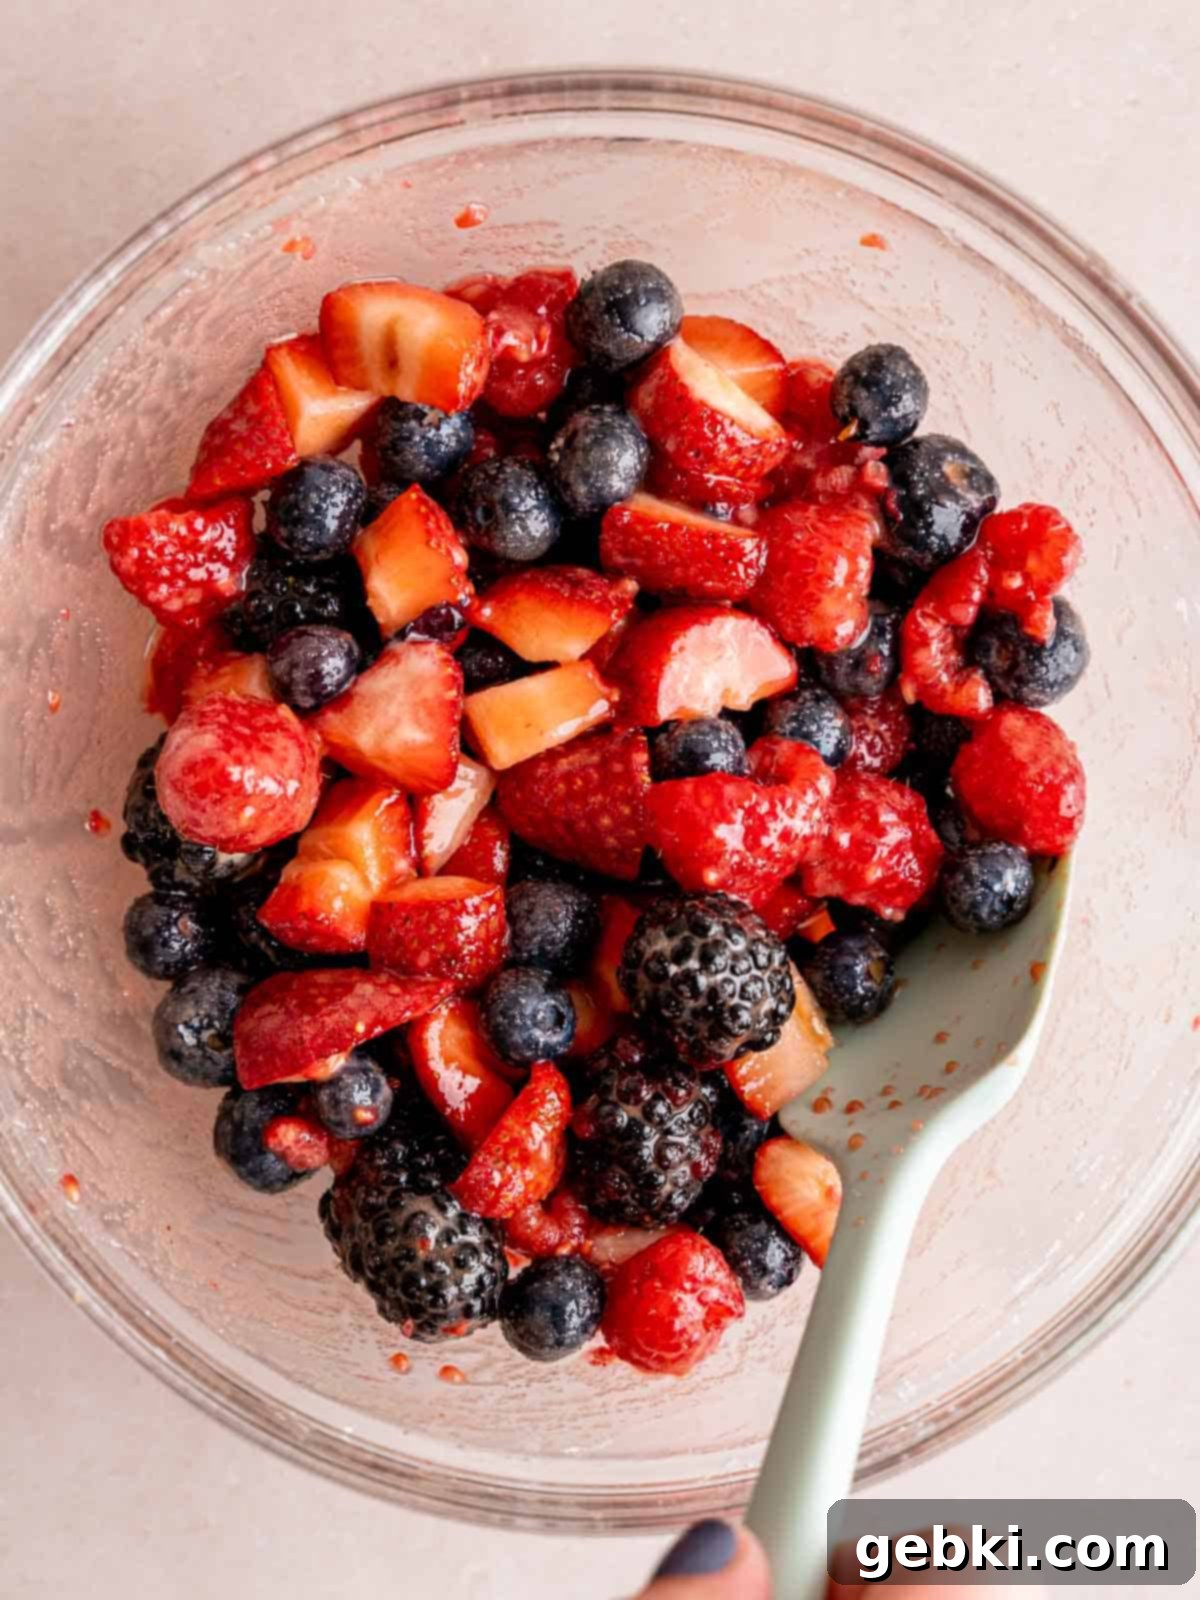
Step 1: Prepare the Berry Filling. In a medium-sized mixing bowl, combine your chosen mixed berries (blackberries, blueberries, raspberries, and strawberries), light brown sugar, fresh lemon juice, and corn starch. Stir gently but thoroughly until all the berries are evenly coated and there are no dry pockets of corn starch or sugar. This ensures even thickening and flavor distribution in your galette.
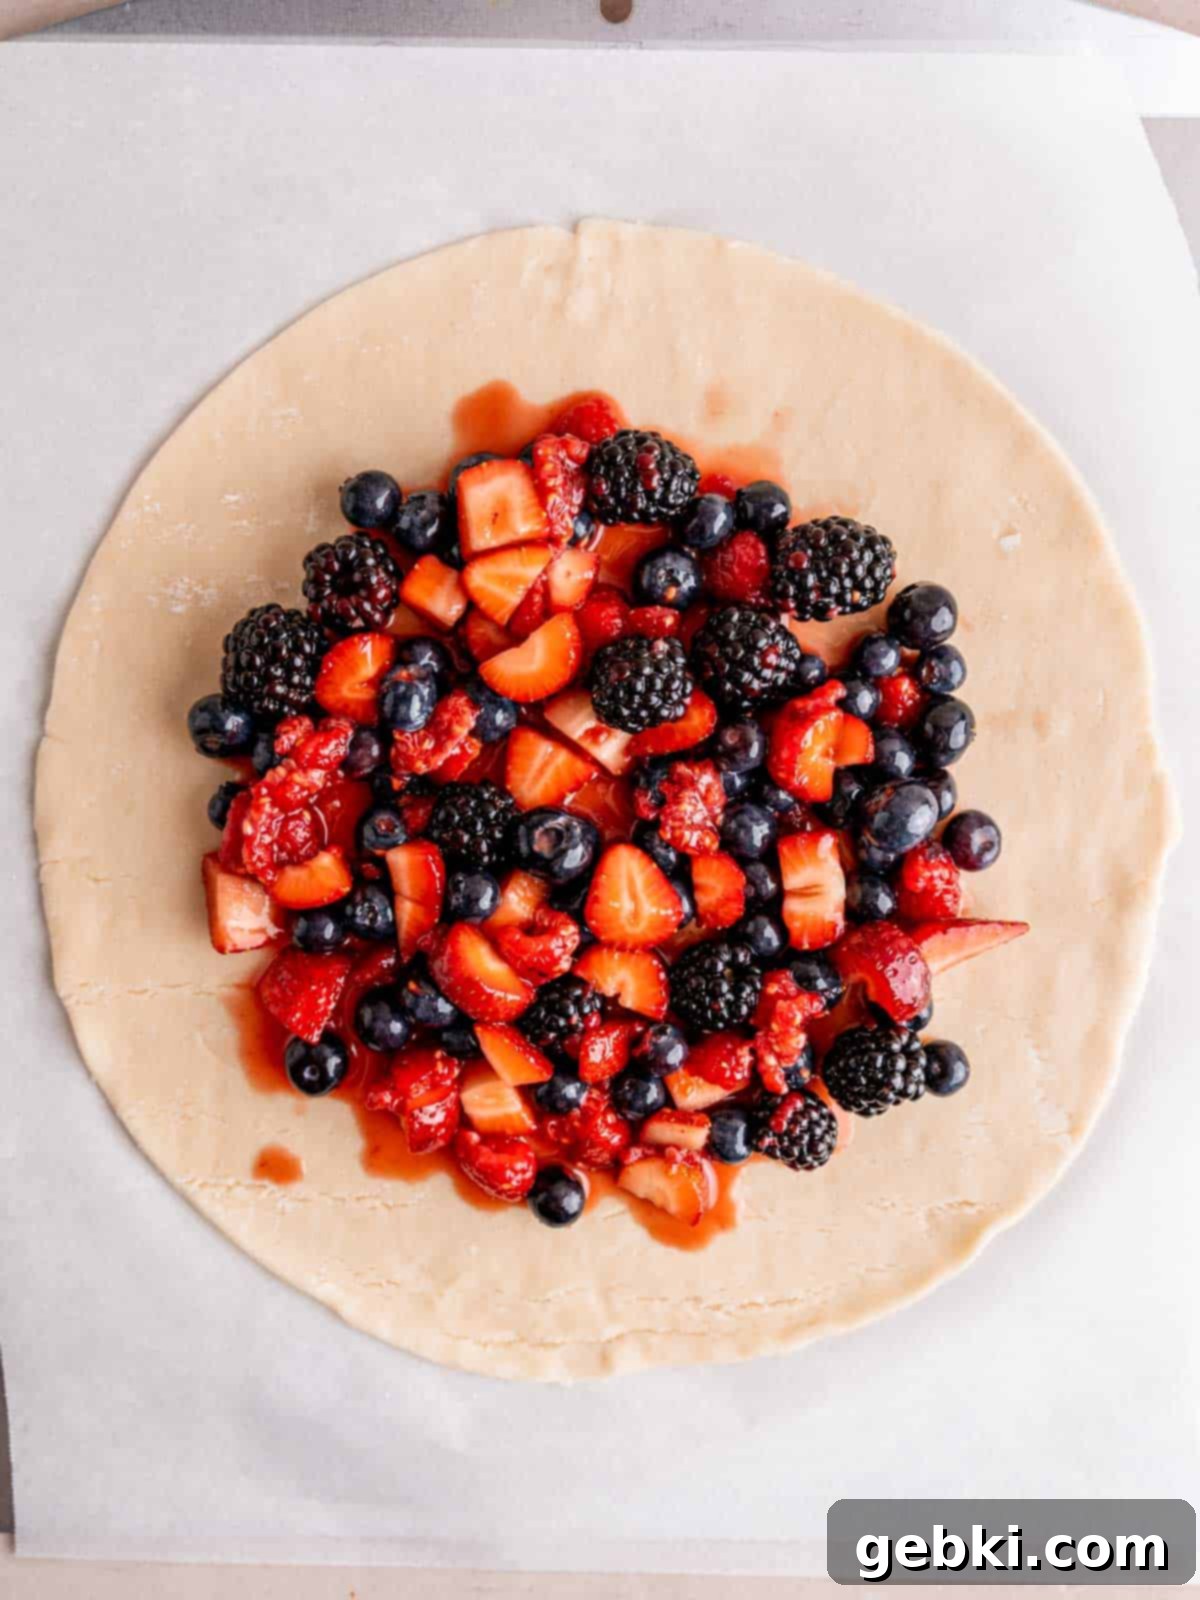
Step 2: Assemble the Galette. Lay your store-bought pie crust flat on a baking sheet lined with parchment paper. Carefully spoon the prepared berry mixture over the center of the pie crust, taking care to leave a generous 1 to 1.5-inch border of dough around the entire edge. This border is essential for folding and creating the galette’s signature rustic look.
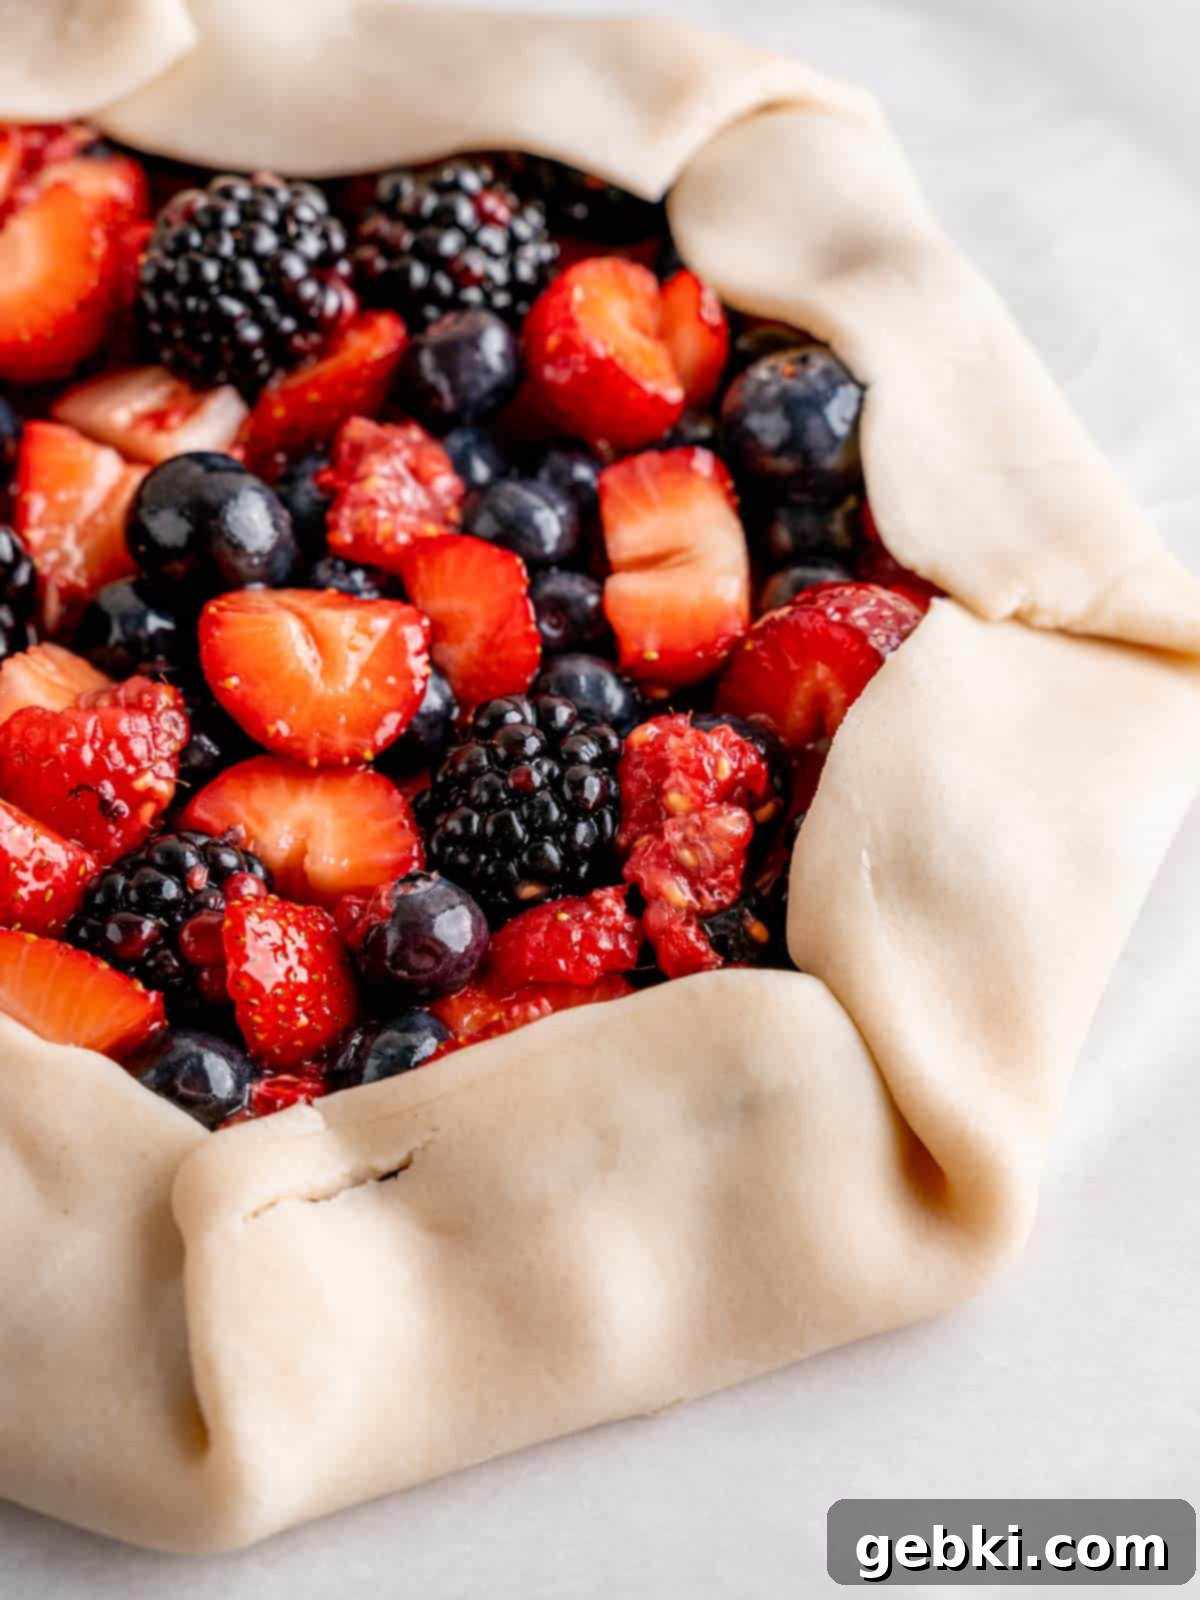
Step 3: Fold and Chill. Gently but firmly, fold the outer edges of the pie crust over the berry filling. You don’t need to be precise; the beauty of a galette is its rustic charm. Overlap the dough as needed to create a contained border. Once folded, place the galette (still on the parchment-lined baking sheet and unwrapped) into the freezer while your oven preheats. This crucial step helps the crust hold its shape during baking.
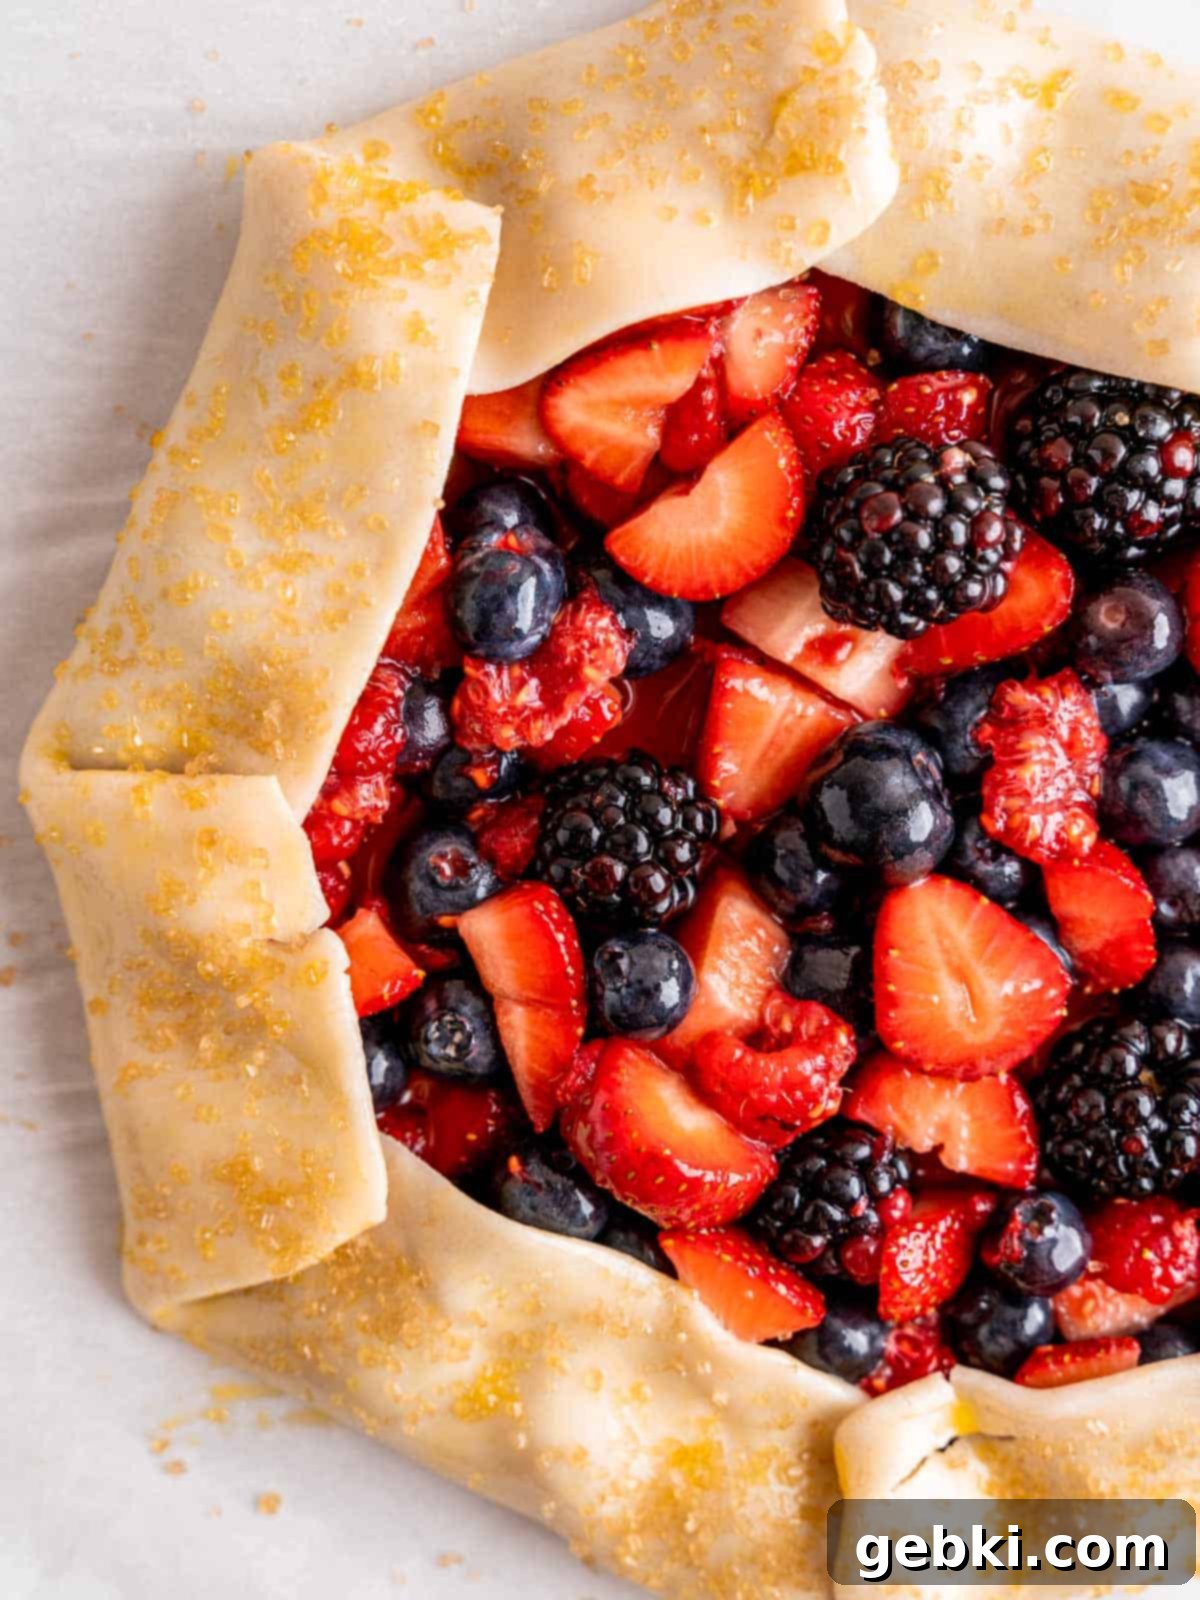
Step 4: Egg Wash, Sugar, and Bake. Once the galette is firm from chilling and your oven has reached 375°F, whisk together the egg yolk and a teaspoon of water to create an egg wash. Lightly brush this mixture over the folded edges of the dough. Immediately sprinkle generously with demerara or turbinado sugar for a beautiful crunch and shine. Bake in the preheated oven until the crust is a rich golden brown and the berry filling is bubbling invitingly. Allow to cool slightly before slicing and serving.
Convenient Make-Ahead Option for Your Galette
One of the fantastic aspects of this mixed berry galette is its make-ahead potential, making it ideal for entertaining or when you want a freshly baked dessert with minimal fuss on the day of serving. You can fully assemble this galette and store it in the freezer for up to one week before baking.
To do this, follow all the assembly steps, including mixing the berries and folding the crust edges. Once assembled, place the galette on its parchment-lined baking sheet into a freezer-safe container or wrap it tightly in plastic wrap, then aluminum foil. When you’re ready to bake, simply preheat your oven to 375°F. There’s no need to thaw it! Just remove it from the freezer, apply the egg wash and coarse sugar to its edges, and bake directly from frozen. Keep in mind that baking a frozen galette might require a few extra minutes in the oven compared to a freshly assembled one to achieve that perfect golden crust and bubbly filling.
Expert Tips for a Flawless Berry Galette
- Thoroughly Mix the Berry Filling: It’s crucial to stir the berry mixture really well. This ensures that the brown sugar dissolves properly and the corn starch is evenly distributed, preventing any dry spots and ensuring your filling thickens uniformly as it bakes. Don’t rush this step!
- Keep Your Crust Chilled: For the best results, ensure your pie crust is very cold and firm before you apply the egg wash and transfer it to the oven. Chilling the dough helps the butter (or shortening) in the crust remain solid, creating flaky layers and preventing the edges from slumping or unfolding during baking.
- Do Not Thaw Frozen Fruit: If you opt to use frozen mixed berries, add them directly to your mixture without thawing. Thawing can release too much liquid, which could make your filling watery and potentially lead to a soggy bottom crust. The corn starch is there to handle the extra moisture from frozen berries during baking.
- Adjust Baking Time for Frozen Fruit: When using frozen fruit, your galette may require an additional 5-10 minutes (or more) of baking time. Keep an eye on it! The galette is done when the crust is deeply golden brown and the fruit filling is actively bubbling in the center.
- Prevent a Soggy Bottom: To further safeguard against a soggy bottom crust, consider sprinkling a thin layer of fine breadcrumbs or ground almonds on the crust before adding the berry filling. These absorb excess moisture from the fruit.
- Cooling is Key: While it’s tempting to cut into a warm galette right out of the oven, allowing it to cool for at least 10-20 minutes is essential. This time allows the filling to set properly, preventing it from oozing out when sliced and ensuring a cleaner, more enjoyable serving experience.
Frequently Asked Questions About Mixed Berry Galette
Absolutely! This recipe is incredibly versatile. Feel free to mix and match your favorite berries, or even use a single type of berry, for the filling. The key is to maintain roughly 2.5 cups of fruit in total to ensure the filling is proportionate to the crust. Blackberries, blueberries, raspberries, and strawberries are classic, but you could also add huckleberries, cranberries, or even thinly sliced stone fruit like peaches or plums for a delightful twist.
No, not at all! This recipe works beautifully with both fresh and frozen berries, or a combination of the two. If you’re using frozen berries, there’s no need to thaw them beforehand; simply add them to the mixture as they are. The corn starch in the recipe is designed to handle the extra moisture released by frozen fruit during baking, ensuring your filling thickens perfectly.
While not strictly mandatory, I highly recommend against skipping this step! The egg wash serves multiple purposes: it helps the crust achieve a beautiful, rich golden-brown color and a lovely sheen. The coarse turbinado or demerara sugar, when sprinkled over the egg wash, adds an irresistible sweet crunch and sparkle to the crust, enhancing both the flavor and texture of your galette. It truly elevates the dessert!
Yes, this step is quite important for optimal results! Chilling or briefly freezing the galette after assembly ensures that the pie dough is very cold and firm when it goes into the hot oven. This sudden temperature change helps prevent the dough from slumping or the folded edges from unfolding as it bakes, maintaining the galette’s beautiful rustic shape and contributing to a flakier crust.
Your galette is perfectly baked when the crust has turned a deep golden brown, and the fruit filling in the center is visibly bubbling. The bubbling indicates that the corn starch has activated and the fruit juices have thickened. If the crust is browning too quickly, you can loosely cover the edges with aluminum foil to prevent burning while the fruit finishes cooking.
Storing Your Delicious Mixed Berry Galette
Proper storage is key to enjoying your Mixed Berry Galette for as long as possible. Whether you have leftovers or are making it ahead, here’s how to keep it fresh and delicious:
Refrigerator Storage
Once your galette has completely cooled to room temperature, place it in an airtight container. It will stay fresh and delicious in the refrigerator for about 1 week. Placing individual slices in separate containers or wrapping them tightly can help preserve their texture and prevent them from drying out.
Freezer Storage
This easy fruity dessert can also be stored in the freezer for longer enjoyment. After it has cooled completely, wrap the entire galette or individual slices tightly in plastic wrap, then an additional layer of aluminum foil to prevent freezer burn. It will maintain its quality in the freezer for up to 1 month. Thaw in the refrigerator overnight before reheating.
Reheating Instructions
To reheat, you have a couple of options for restoring that fresh-baked warmth and flavor:
- Microwave: For individual slices, place them on a microwave-safe plate and reheat in 30-second intervals until warmed through. Be careful not to overheat, as this can make the crust soggy.
- Oven: For a crispier crust, reheat slices or a whole galette on a parchment-lined baking sheet in an oven preheated to 350°F (175°C). Bake for 10-20 minutes, or until warm and the crust is revitalized. This method is excellent for bringing back that fresh-baked texture.
More Fruity Recipes You’ll Love
-
Spiced Blueberry Pie
-
Strawberry Cream Cheese Pie
-
Easy Raspberry Cream Cheese Danish Recipe
-
Mini Strawberry Rhubarb Galettes
Did you try this recipe? Leave a ⭐️ rating below and share it on Instagram, Facebook, and Pinterest!
📖 Recipe

Mixed Berry Galette
Kayla Burton
Pin Recipe
Equipment
-
Baking sheet with parchment paper
-
Measuring spoons
-
Scale/measuring cups
-
Mixing bowls
-
Spatula
-
Pastry brush
Ingredients
Crust
- 1 9-inch pie crust store-bought or homemade
Fruit Filling
- ½ cup (½ cup) blackberries fresh or frozen
- ¾ cup (¾ cup) blueberries fresh or frozen
- ¾ cup (¾ cup) strawberries chopped, fresh or frozen
- ½ cup (½ cup) raspberries fresh or frozen
- ¼ cup (50 g) light brown sugar
- 2 teaspoons (2 teaspoons) lemon juice
- 5 teaspoons (10 g) corn starch
Egg Wash
- 1 large egg yolk
- 1 teaspoon (1 teaspoon) water
- 2 tablespoons (24 g) turbinado or demerara sugar
Instructions
Mixed Berry Filling
-
In a medium-large bowl, combine the blackberries, blueberries, strawberries, raspberries, light brown sugar, fresh lemon juice, and corn starch. Stir gently but thoroughly until all the berries are evenly coated and there are no dry pockets of corn starch or sugar. This ensures both optimal flavor and proper thickening of your galette filling.
Assembling the Galette
-
Carefully unroll your pie crust and place it flat onto a baking sheet that has been lined with parchment paper. This liner is crucial for easy removal and cleanup.
Note: If you are using a frozen store-bought crust, always follow the package’s specific instructions for thawing it to the right consistency before attempting to unroll it onto your baking sheet.
-
Spoon the vibrant berry filling onto the exact center of the dough. As you do this, try your best to leave any excess liquid or juice behind in the bowl. Ensure you leave a generous, unfilled border of about 1½ inches of dough around the entire edge of the crust. This border is essential for folding.
-
With gentle but firm hands, begin to fold the unfilled dough edge over the fruit filling. Overlap the sections as needed to create a contained, rustic border. Once completed, your galette should measure approximately 8 inches in diameter.
-
Place the entire baking sheet with the assembled galette into the freezer. While it chills, preheat your oven to 375°F (190°C). This chilling step is vital for preventing the crust from slumping during baking.
-
Once your oven is fully pre-heated and the galette crust is thoroughly cold and firm, prepare the egg wash. Whisk the egg yolk with 1 teaspoon of water. Use a pastry brush to lightly coat the folded edges of the dough with this mixture. Immediately sprinkle the turbinado or demerara sugar evenly over the egg wash for a beautiful crunch and glistening finish.
-
Carefully transfer the baking sheet to the middle rack of your preheated oven. Bake for approximately 25-35 minutes, or until the crust is a rich golden brown and the berry filling is actively bubbling in the center, indicating it’s thoroughly cooked and thickened. If the crust begins to brown too quickly, you can loosely tent it with aluminum foil.
-
Remove the galette from the oven and allow it to cool on the baking sheet for 10-20 minutes before attempting to slice and serve. This resting period is crucial for the fruit filling to set properly. Top with a scoop of vanilla ice cream, a drizzle of chocolate sauce, a dollop of whipped cream, or any of your favorite toppings, and enjoy!
Save This Recipe! 💌
We’ll email this post to you, so you can come back to it later!
Notes
Storage: To keep your delicious galette fresh, store any cooled leftovers in an airtight container. It will remain tasty in the refrigerator for up to 1 week, or you can freeze it for up to 1 month for longer enjoyment.
The provided nutritional information is an estimate per serving. Accuracy is not guaranteed.
