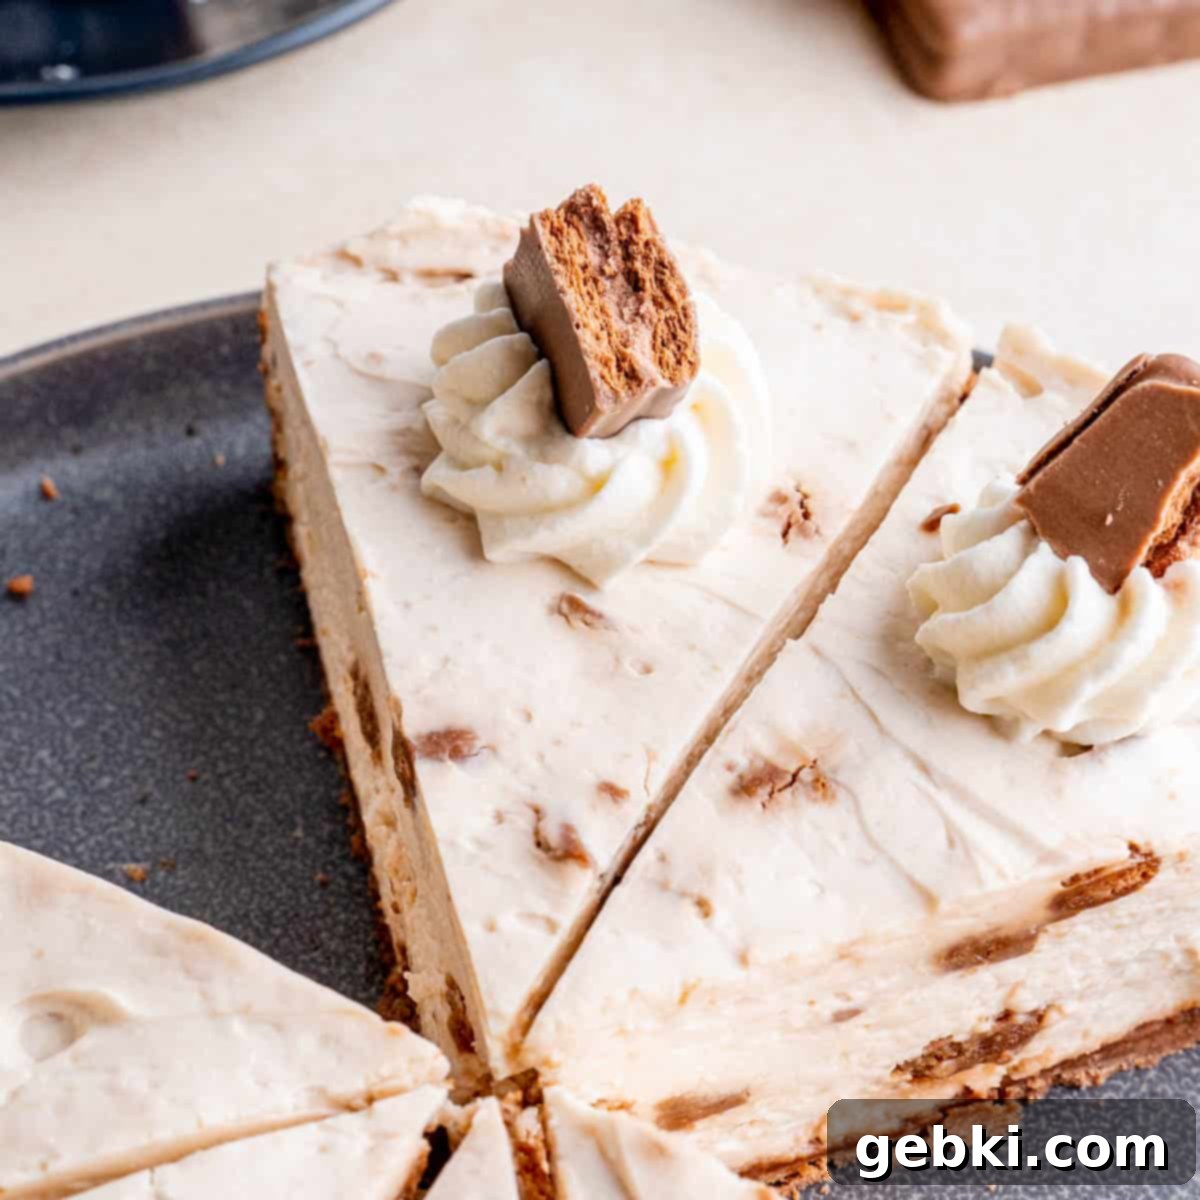
Irresistible No-Bake Tim Tam Cheesecake: Your New Favorite Easy Dessert
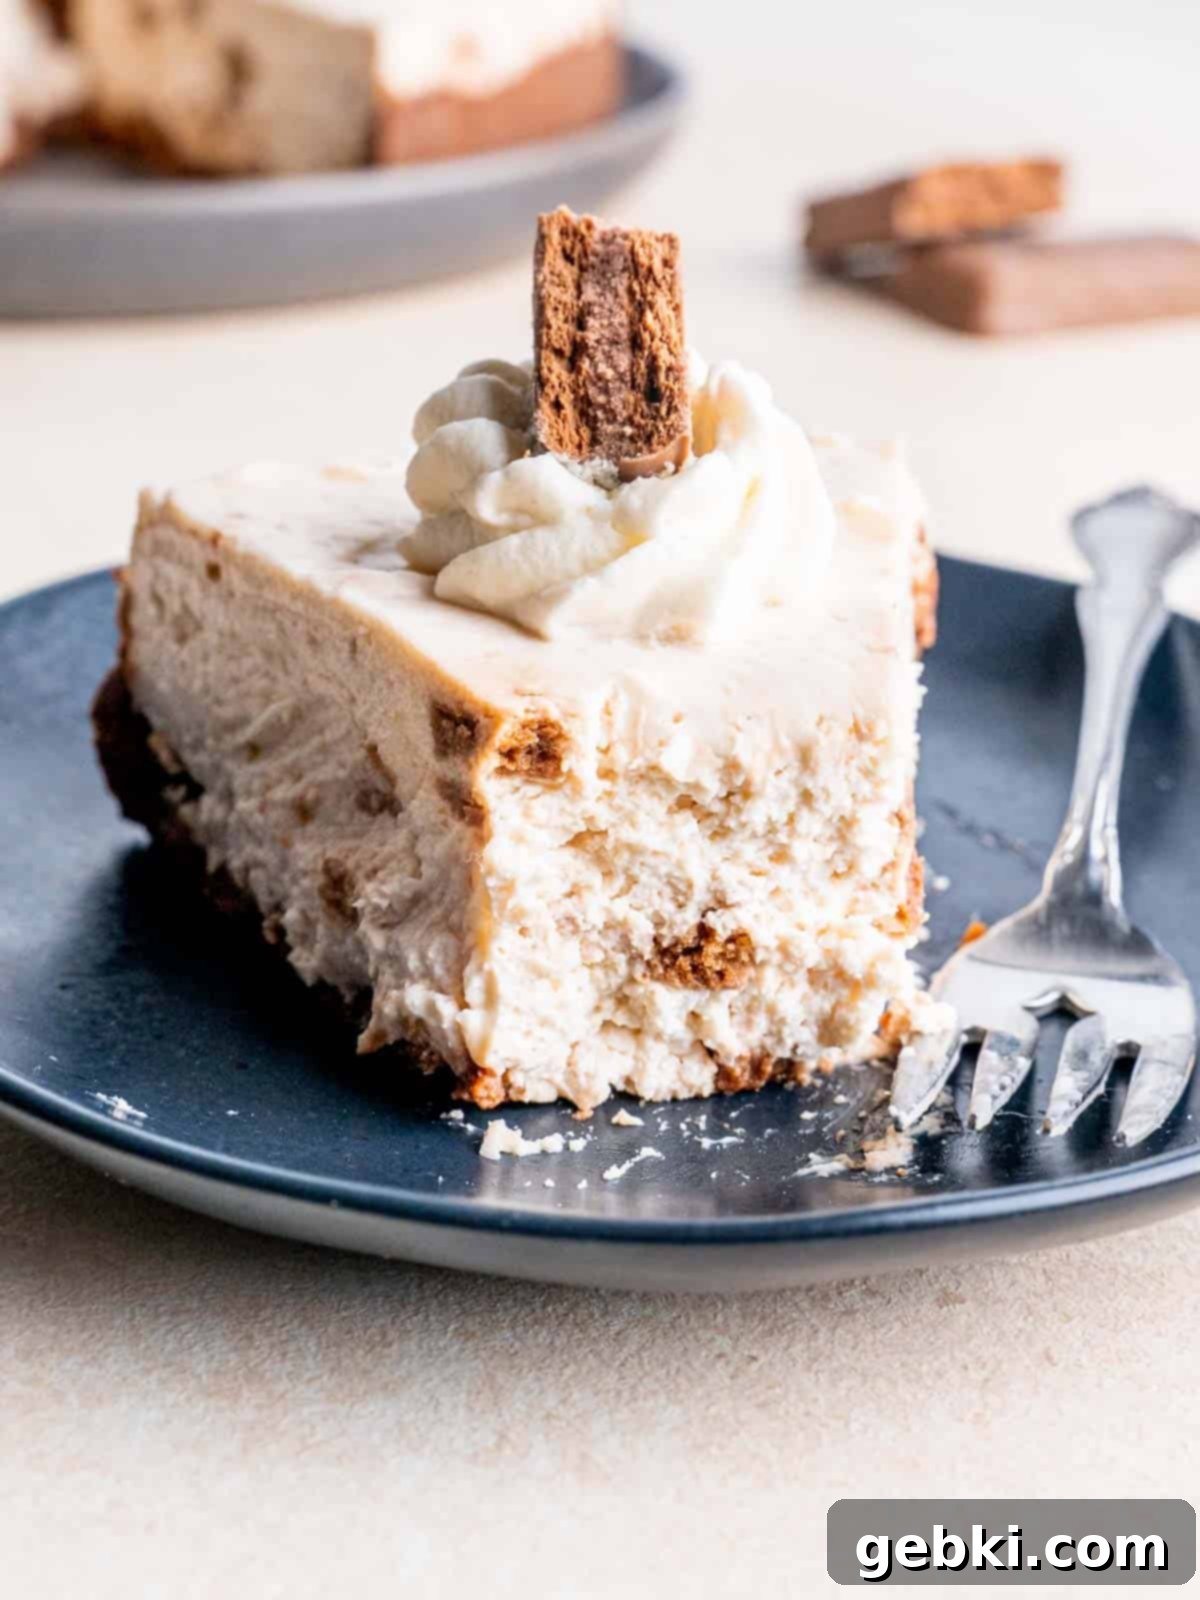
Get ready to indulge in the ultimate no-bake dessert experience with this incredibly simple yet utterly luxurious Tim Tam Cheesecake! Creamy, dreamy, and bursting with the iconic flavor of Australia’s favorite chocolate biscuit, this cheesecake features a delightful Tim Tam crust and generous crushed Tim Tams folded into its smooth filling. If you’re new to the magic of Tim Tams, prepare to be introduced to an Australian chocolate biscuit by Arnott’s that’s truly in a league of its own. I first discovered them during a five-month adventure in Sydney years ago, and let me tell you, I practically lived on them! I even made sure to pack my suitcases full of them on my journey back home, much to the amusement (and later, delight) of my friends and family. Imagine a Kit Kat, but bigger, bolder, and undeniably tastier, available in an exciting array of flavors like caramel, double-stuffed, dark chocolate, and white chocolate. Every single friend who tasted this cheesecake raved about it, especially praising the unique and delicious Tim Tam crust – it’s a real showstopper!
This post contains affiliate links, meaning that I could earn from purchases made through them. It doesn’t add any extra cost to you, but it does help support this blog!
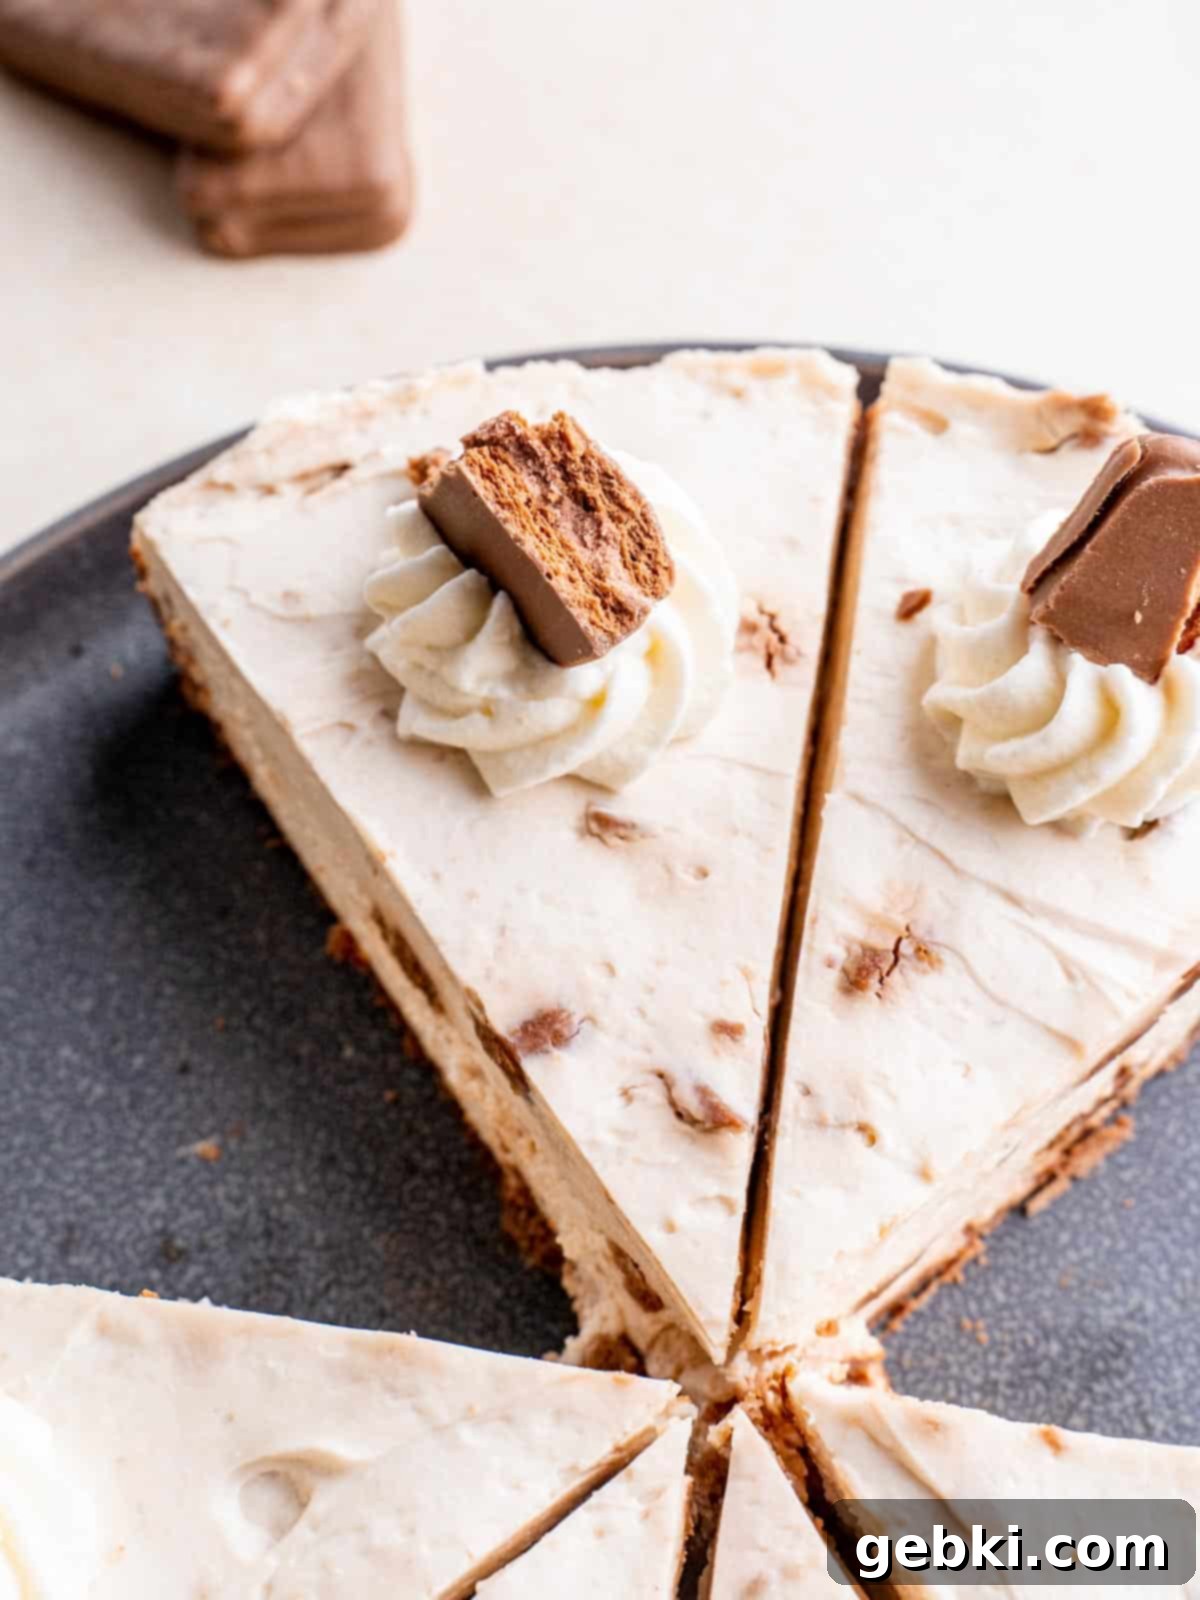
One of the best things about this cheesecake is that it doesn’t require an oven, making it absolutely perfect for those scorching summer days when turning on the oven is simply out of the question. Plus, serving it chilled means it offers a wonderfully refreshing escape from the heat. But don’t let its summer-friendly nature fool you – this dessert is a year-round delight! It’s fantastic for special occasions like Halloween, as you can easily substitute Tim Tams with your favorite chocolatey candies, making it a versatile treat for any holiday. Truly, I find myself craving and enjoying this decadent cheesecake no matter the season.
This recipe was born from my deep affection for both classic cheesecake and the vibrant spirit of Australia. If you share my passion for delicious no-bake cheesecakes, you’ll definitely want to explore my other popular creations like the convenient No Bake Cheesecake Bites and the rich, indulgent Chocolate Cherry Cheesecake! They’re all designed to bring maximum flavor with minimal effort.
Ready to create this show-stopping dessert? Let’s dive into the details!
[feast_advanced_jump_to]
Essential Ingredients for Your Tim Tam Cheesecake
Crafting this luscious Tim Tam Cheesecake requires a simple list of ingredients that come together to create a symphony of flavors and textures. Each component plays a crucial role in achieving that perfect creamy consistency and irresistible taste. Here’s what you’ll need:
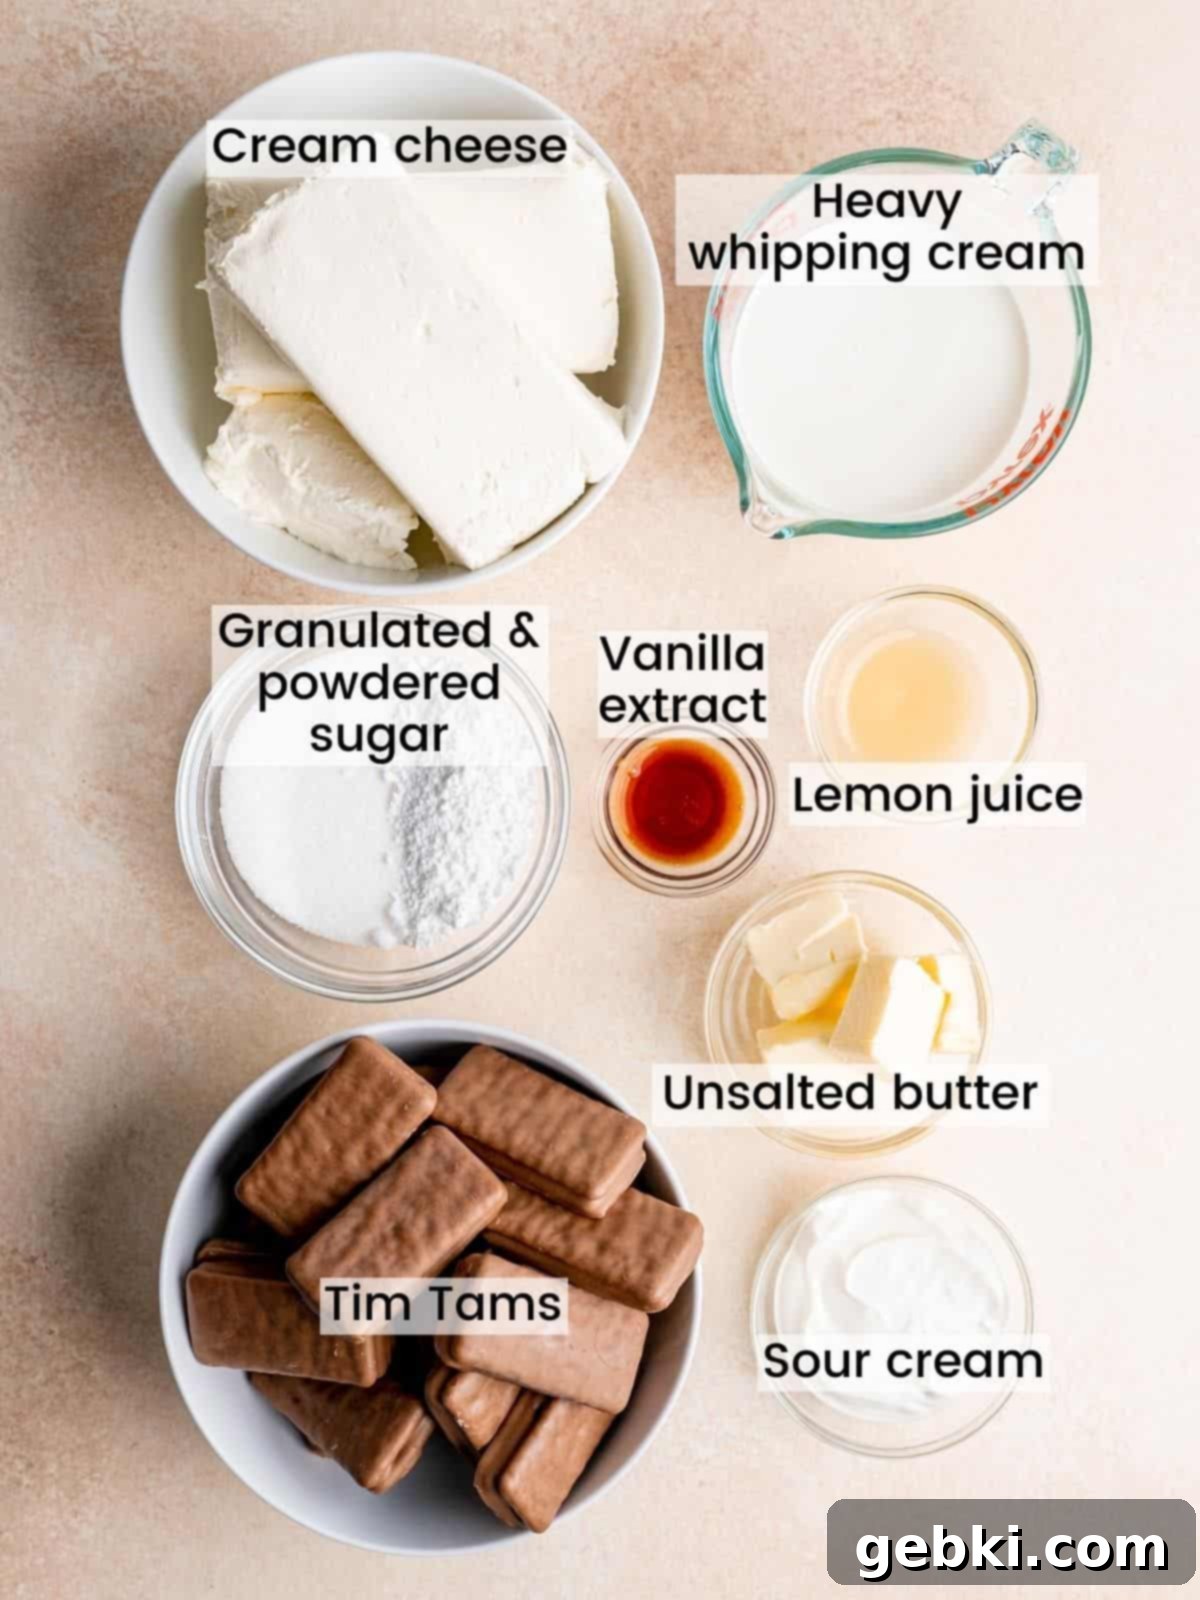
- Original Tim Tam biscuits: These are the star of the show, forming both the crust and the delightful chunks within the filling. Their unique chocolatey crunch and creamy filling are essential.
- Cream cheese: The foundation of any great cheesecake! Opt for full-fat cream cheese, brought to room temperature, for the smoothest and richest filling.
- Heavy whipping cream: Whipped to stiff peaks, this provides the light and airy texture that makes this cheesecake so irresistibly fluffy. Ensure it’s very cold for best results.
- Granulated sugar: For sweetness in the filling.
- Powdered sugar: Also for sweetness, it dissolves easily into the filling, ensuring a silky-smooth texture without graininess.
- Vanilla extract: A touch of vanilla enhances all the other flavors, adding warmth and depth.
- Lemon juice: This might surprise you, but it’s a secret ingredient that provides a crucial acidic component, helping the cheesecake firm up as it chills without imparting a strong lemon flavor. Don’t skip it!
- Unsalted butter: Essential for binding the Tim Tam crumbs into a firm, flavorful crust.
- Sour cream: Adds a subtle tang and contributes to the cheesecake’s incredibly smooth and creamy consistency, balancing the sweetness.
For precise measurements, please refer to the detailed recipe card provided further down below. Using a kitchen scale for dry ingredients like sugar and butter will ensure the most accurate results for a perfect cheesecake every time!
Easy Step-by-Step Instructions to Make Your Tim Tam Cheesecake
Creating this no-bake Tim Tam Cheesecake is a breeze, even for beginner bakers. Just follow these simple steps, and you’ll have a show-stopping dessert chilling in your fridge in no time! Each step is designed to be straightforward, ensuring a perfect outcome.
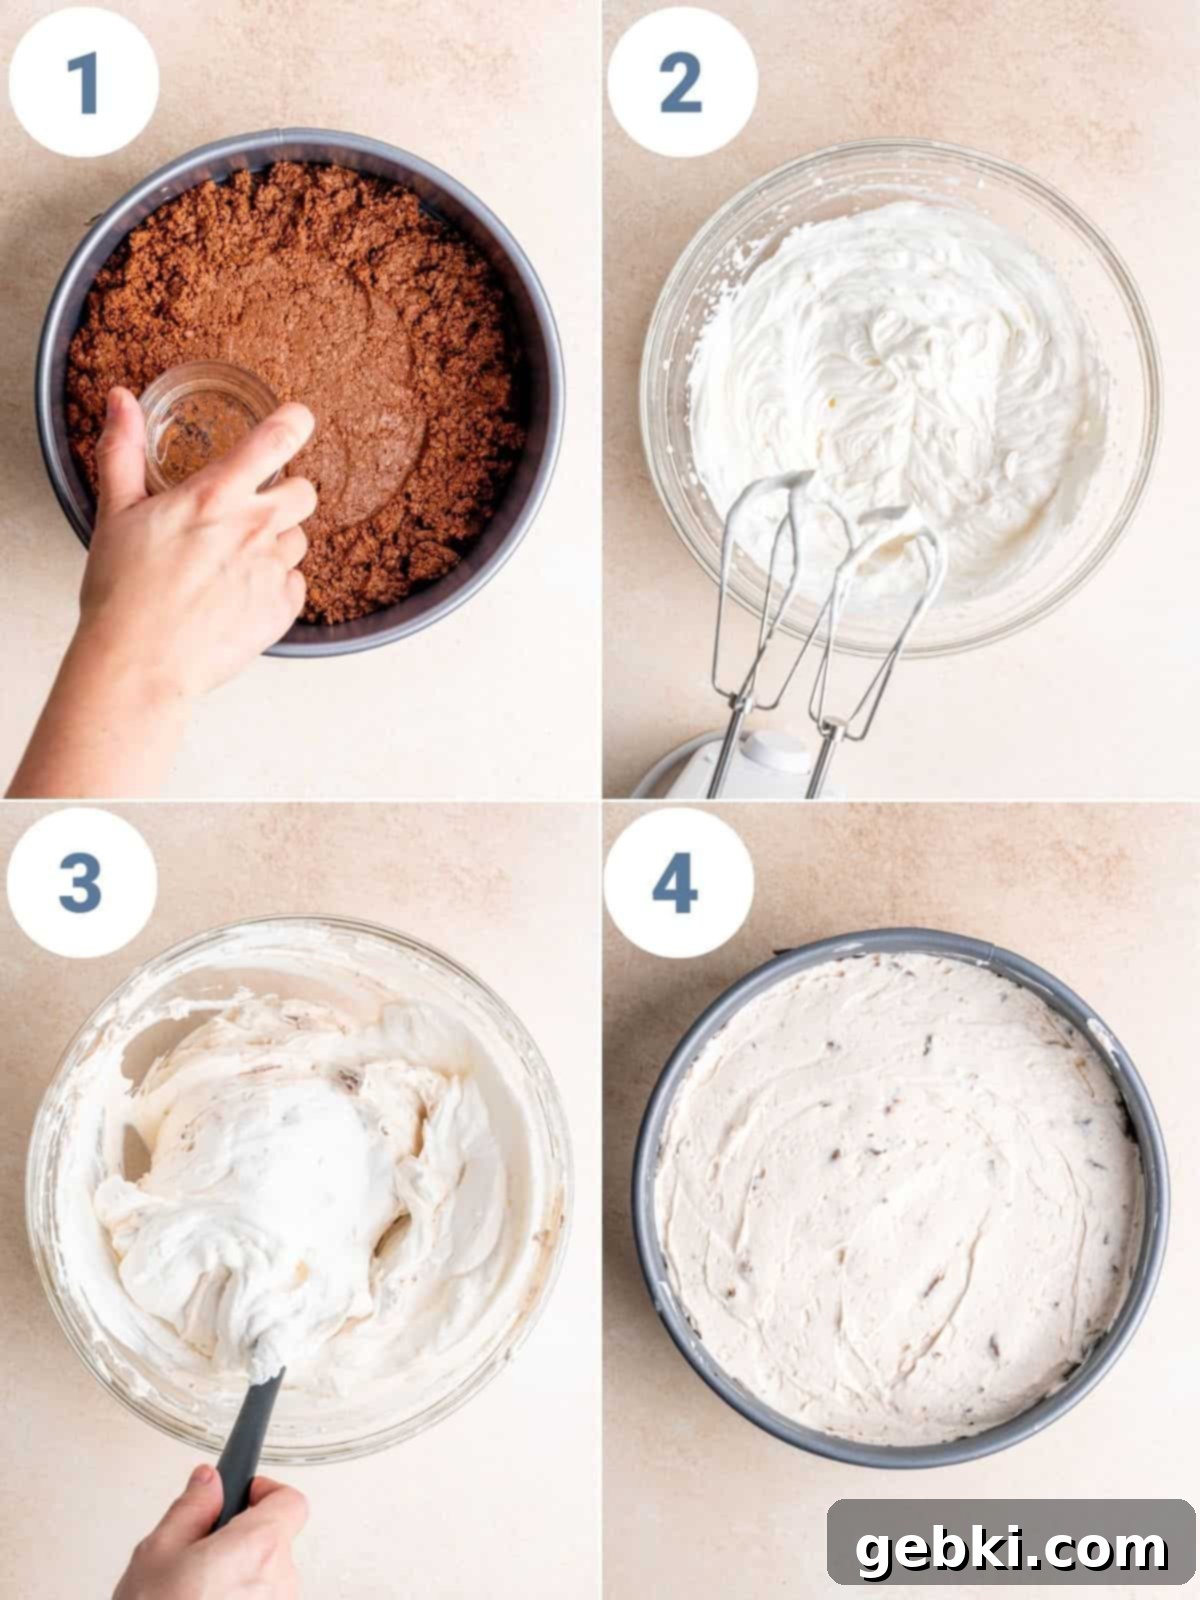
STEP ONE (Picture 1 above) – Prepare the Irresistible Tim Tam Crust.
First, melt your unsalted butter in the microwave and set it aside to cool slightly – you don’t want it piping hot when you add it to the biscuits. While the butter cools, take your Tim Tams and break them into smaller pieces before adding them to a food chopper or food processor. Pulse the biscuits until they form fine, even crumbs, with no large chunks remaining. Next, pour the cooled melted butter into the food chopper with the crumbs and pulse again for just a few seconds until the mixture resembles wet sand. This ensures every crumb is coated. Transfer these delicious crumbs into a 9-inch (23 cm) springform pan. Use the bottom of a flat cup or a measuring cup to firmly press the crumbs evenly across the bottom of the pan. Then, use your hands to press some of the excess crumbs up along the inner edge of the pan, creating a slight rim. This will give your cheesecake a beautifully defined edge. Place the assembled crust in the freezer to chill and firm up while you prepare the creamy filling.
STEP TWO (Picture 2 above) – Achieve Perfectly Whipped Cream.
In a large, clean mixing bowl, pour your very cold heavy whipping cream. Using a hand mixer (or the whisk attachment on a stand mixer), whisk the cream on medium-high speed until it reaches stiff peaks. This means the cream should be firm enough to hold its shape when you lift the whisk out of the mixture, creating distinct peaks that stand up straight. Over-whipping can turn it grainy, so watch it closely! Once whipped, gently place the bowl of whipped cream into the fridge to keep it cold and stable while you prepare the decadent cream cheese mixture.
STEP THREE (Picture 3 above) – Create the Silky Cheesecake Filling.
In another large bowl, combine your room-temperature cream cheese. Using a hand mixer or a stand mixer fitted with the paddle attachment, beat the cream cheese until it’s completely smooth and free of any lumps. This step is crucial for a lump-free cheesecake. Next, thoroughly mix in the sour cream, lemon juice, both granulated and powdered sugars, and vanilla extract until everything is well combined and creamy. Make sure to scrape down the sides of the bowl occasionally to ensure all ingredients are incorporated. Finally, gently fold in the crushed Tim Tams (reserved for the filling) and the cold whipped cream into the cream cheese mixture using a spatula. Be careful not to deflate the whipped cream; fold until just combined to maintain the light and airy texture.
STEP FOUR (Picture 4 above) – Assemble and Chill Your Masterpiece.
Retrieve your Tim Tam crust from the freezer – it should now be cold and firm. Carefully pour the prepared cheesecake filling over the crust in the springform pan. Use a spatula to spread the mixture around evenly, ensuring a smooth top. Once assembled, cover the springform pan loosely with plastic wrap or foil and refrigerate the cheesecake overnight. This crucial chilling period allows the cheesecake to firm up properly and for the flavors to meld beautifully, ensuring every slice is perfect.
PRO TIP: Don’t leave out the lemon juice! This ingredient is not for flavor in this recipe. Instead, it acts as an acid that helps the cream cheese mixture firm up and set properly as it chills. It’s a crucial component for achieving that perfect no-bake cheesecake texture without adding a noticeable lemony taste to your final dessert. Trust the process!
Substitutions & Creative Variations for Your Cheesecake
While this Tim Tam Cheesecake recipe is truly perfect as is, it also offers fantastic flexibility for customization and dietary adaptations. I encourage you to experiment and make it your own! Please note that this specific recipe has been meticulously tested with the ingredients listed. If you do try substituting any of the core ingredients, I’d love for you to leave a comment below letting us know how it worked out – your feedback helps everyone in our baking community!
Biscuit Alternatives for the Crust & Filling: If Tim Tams aren’t available in your region, or if you simply want to try something different, feel free to substitute them!
- Kit Kats: These chocolate bars would work wonderfully, especially for the crust, as they have a similar biscuit structure. You might need a slightly greater number of Kit Kats to achieve the same volume of crumbs for a substantial crust.
- Oreos: A classic choice for cheesecake crusts! Oreos would provide a rich, dark chocolate flavor and a fantastic texture.
- Graham Crackers: For a more traditional cheesecake base, a graham cracker crust is always a winner. Combine them with melted butter and a touch of sugar.
- Other Chocolate Biscuits: Any chocolate-coated biscuit with a good crunch would be suitable. Look for something that holds its shape when crushed but still provides flavor.
- For the filling: You can crush up virtually any chocolatey candy you love for the filling! This recipe is an absolute dream for using up leftover Halloween candy, like Snickers, Milky Way, or your favorite chocolate bars. Just chop them into small pieces or pulse them lightly in a food processor.
Flavor Enhancements & Toppings:
- Extra Chocolate: Drizzle melted chocolate (dark, milk, or white) over the top before serving for an extra layer of decadence.
- Caramel Drizzle: A swirl of salted caramel sauce would beautifully complement the chocolate and biscuit flavors.
- Fruit Topping: Fresh berries like raspberries or strawberries can add a touch of tartness and color, balancing the richness of the cheesecake.
- Coffee Infusion: Add a teaspoon of instant espresso powder to the cream cheese mixture to deepen the chocolate notes.
- Nutty Crunch: Sprinkle chopped toasted nuts (like pecans or almonds) on top for added texture.
This flexibility ensures that you can enjoy a delicious no-bake cheesecake tailored exactly to your preferences, making it a truly versatile recipe for any occasion or craving!
Recommended Equipment for a Smooth Cheesecake Process
Having the right tools can make all the difference in ensuring your Tim Tam Cheesecake comes out perfectly smooth and beautifully presented. Here’s a breakdown of the essential equipment, along with some helpful tips for each:
- 9-inch Springform Pan: This recipe is designed for a 9-inch springform pan. A springform pan is highly recommended because its removable sides make it incredibly easy to release the delicate cheesecake without damaging it. If you don’t have one, you can use a regular 9-inch round or square pan. In this case, I suggest lining the pan with parchment paper or foil, leaving an overhang on all sides. Once the cheesecake is chilled, you can use these overhangs to lift it out of the pan.
- Hand Mixer or Stand Mixer: You’ll definitely want a hand mixer or stand mixer for this recipe. Whipping heavy cream to stiff peaks by hand is a serious arm workout, and getting the cream cheese perfectly smooth can also be challenging without mechanical assistance. If using a stand mixer, use the whisk attachment for the whipped cream and the paddle attachment for the cream cheese mixture to achieve the best consistency.
- Food Chopper (Food Processor): For the crust, a food chopper (also known as a food processor) is essential for quickly and efficiently crushing the Tim Tam biscuits into fine crumbs. A small blender could also work if you don’t have a food chopper, but you might need to process the biscuits in smaller batches to avoid overloading it.
- Mixing Bowls: You’ll need at least two medium to large mixing bowls – one for whipping the cream and another for preparing the cream cheese filling.
- Measuring Cups and Spoons: Standard kitchen measuring tools are necessary for accurate ingredient proportions.
- Rubber Spatula: A good rubber spatula is indispensable for scraping down the sides of your mixing bowls and gently folding in the whipped cream, ensuring all ingredients are fully incorporated without deflating the airy mixture.
With these tools at hand, your Tim Tam Cheesecake creation will be a smooth and enjoyable process from start to finish!
Storage Recommendations for Your Tim Tam Cheesecake
To keep your delicious Tim Tam Cheesecake fresh and maintain its perfect texture, proper storage is key. Here’s how to store it for maximum enjoyment:
- Refrigeration: This cheesecake can be stored in an airtight container in the refrigerator for up to 1 week. Make sure it’s well covered to prevent it from absorbing any odors from other foods in your fridge and to keep it from drying out.
- Freezing: For longer storage, you can freeze individual slices or the entire cheesecake (if uncut). Wrap the cheesecake tightly in several layers of plastic wrap, followed by a layer of aluminum foil. It can be stored in the freezer for up to 1 month. When you’re ready to enjoy it, simply transfer the frozen cheesecake to the refrigerator and let it thaw for a few hours (or overnight for a whole cheesecake) before serving. This gradual thawing helps maintain its creamy texture.
Always ensure the cheesecake is covered to prevent freezer burn or ice crystal formation, which can affect its quality and taste.
Frequently Asked Questions About Tim Tam Cheesecake
If you’re not in Australia, where Tim Tams are a staple in most grocery stores, you might need to do a little searching. I highly recommend checking online retailers like Amazon, as they often stock international treats. Specialty food stores like World Market or larger grocery chains such as Target in the US sometimes carry them in their international aisles. Don’t give up – they’re worth the hunt!
Yes, absolutely! While it might be tempting to dive in sooner, I highly recommend letting your cheesecake chill, covered, in the refrigerator for at least 6 hours, but ideally overnight (12+ hours). This extended chilling period is crucial for the cheesecake to fully firm up, allowing the flavors to meld and develop properly. It ensures you get perfectly clean, beautiful slices every time.
For the absolute best results, serve the cheesecake immediately after taking it out of the refrigerator and slicing it into pieces. The cold temperature ensures its optimal texture. For an extra touch of elegance and flavor, I love to decorate the top with a generous dollop of freshly whipped cream and a few extra Tim Tam biscuits (whole or crushed). This step is entirely optional but adds a lovely visual appeal and another layer of deliciousness!
When prepared in a 9-inch springform pan, I typically cut this cheesecake into 8 equal triangular slices, which are a generous size. However, you can easily adjust the number of slices to be smaller for more servings (e.g., 10 or 12 slices) or larger for a more decadent portion (e.g., 6 slices), depending on your preference and the occasion.
Absolutely! This no-bake Tim Tam Cheesecake is an excellent make-ahead dessert. Since it requires overnight chilling, it’s perfect for preparing a day or two in advance of your event. Just ensure it’s well-covered in the refrigerator. This allows you to focus on other party preparations without last-minute dessert stress.
For perfectly clean slices, dip a sharp knife into hot water, wipe it clean, and then make your cut. Repeat this process for each slice. This warms the blade slightly, allowing it to glide through the creamy cheesecake without dragging or sticking, resulting in beautifully neat portions.
Did you try this recipe?
Tag @brokenovenbaking on Instagram and leave a star review below!
📖 Recipe
Tim Tam Cheesecake
Kayla Burton
Pin Recipe
Equipment
-
9 inch springform pan -
Mixing bowls -
Measuring spoons -
Scale/measuring cups -
Hand mixer or stand mixer -
Food chopper
Kayla’s Top Tip
Weigh dry ingredients in grams (g) with a food scale for best results!
Toggle on to prevent your screen from going dark
Ingredients
Crust
-
14 original (252 g) Tim Tam biscuits -
3 tablespoons (42 g) unsalted butter melted & cooled
Cheesecake
-
1 cup (236.59 ml) heavy whipping cream cold -
24 ounces (3 blocks) (678 g) cream cheese room temperature -
¼ cup (57.5 g) sour cream -
2 teaspoons lemon juice -
¼ cup (30 g) powdered sugar -
⅓ cup (66.67 g) granulated sugar -
1½ teaspoons vanilla extract -
5 original (90 g) Tim Tam biscuits crushed
Topping (optional)
-
3 original (54 g) Tim Tam biscuits -
Whipped cream
Instructions
Crust
-
Melt the butter in the microwave and let it cool.
-
Process Tim Tams in a food chopper. Add the melted butter and continue chopping until no large biscuit pieces are left.
-
Spread the Tim Tam & butter mixture evenly across the bottom of a 9 inch springform pan. Press down on the crust with the bottom of a flat glass and then pat down along the edge so that the mixture is pressed about ½ inch up the side of the pan.
-
Place the crust in the freezer while preparing the cheesecake filling.
Cheesecake
-
In a medium/large bowl, whisk the heavy whipping cream to stiff peaks (this is when the whipped cream holds its shape when you lift the whisk from the bowl). I recommend using a hand mixer for this step.
Place the whipped cream in the refrigerator while preparing the rest.
-
In a large bowl, mix the cream cheese with a hand mixer (or stand mixer with paddle attachment) until it’s smooth. Stir in the sour cream and lemon juice. Add the sugars and vanilla extract and mix well.
Scrape the sides of the bowl with a spatula as necessary.
-
Gently mix the Tim Tam crumbs into the cream cheese mixture. Then, carefully fold the whipped cream into it until everything is combined.
-
Spread the cheesecake filling evenly over the crust. Cover and refrigerate overnight before removing the pan and slicing into it.
The springform pan edge should remove easily, but you may want to run a knife along the edge before taking it off.
-
Feel free to decorate the top with whipped cream and Tim Tams, enjoy!
Save This Recipe! 💌
We’ll email this post to you, so you can come back to it later!
Notes
If you don’t have a springform pan, a 9 inch round or square pan should work as well. In this case, I’d recommend covering the pan with parchment or foil and letting it hang over the edge so that you can easily lift the cheesecake out after its set.
The provided nutrition information is an estimate, the calorie accuracy is not guaranteed.
Carbohydrates: 17g
Protein: 6g
Fat: 46g
Saturated Fat: 27g
Polyunsaturated Fat: 2g
Monounsaturated Fat: 12g
Trans Fat: 1g
Cholesterol: 149mg
Sodium: 291mg
Potassium: 154mg
Fiber: 1g
Sugar: 15g
Vitamin A: 1756IU
Vitamin C: 1mg
Calcium: 112mg
Iron: 1mg
The provided nutritional information is an estimate per serving. Accuracy is not guaranteed.
Tried this recipe?
Leave a comment below & tag @brokenovenbaking on social!
Discover More Effortless No-Bake Dessert Recipes
If you’re anything like me, the allure of a delicious dessert that doesn’t require turning on the oven is simply irresistible. This Tim Tam Cheesecake is just the beginning! Our collection of no-bake recipes is perfect for anyone looking to whip up impressive treats with minimal fuss, whether it’s scorching hot outside or you simply prefer a quicker, easier method. Explore these other fantastic no-bake options that promise big flavor with little effort:
- Apple Pie Ice Cream (Ninja Creami Recipe)
- Strawberry Matcha Ice Cream (Ninja Creami Recipe)
- 5-Ingredient Blueberry Lemon Cheesecake Ice Cream (Ninja Creami Recipe)
- 5-Minute Banana Bread Mug Cake (No Eggs!)
- 5 Ingredient No-Bake Mini Chocolate Cheesecakes
- Easy Homemade Peach Kefir Ice Cream (3 Ingredients)
- S’mores Edible Cookie Dough Recipe
- Chocolate Cherry Cheesecake (No Bake)
