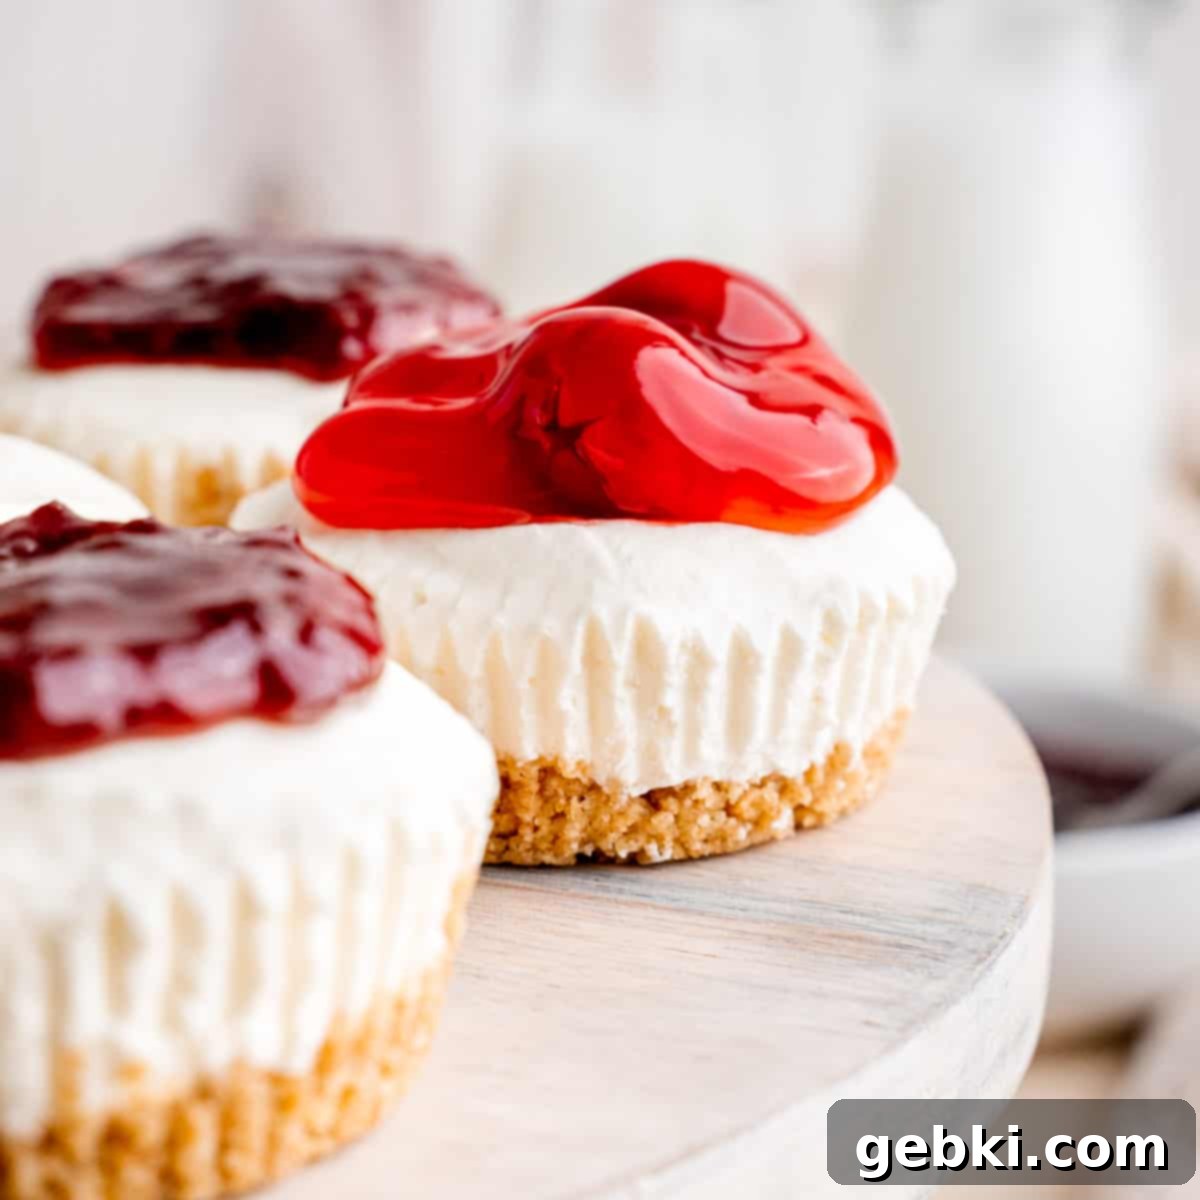
Decadent No-Bake Cheesecake Bites: Your Go-To Recipe for Easy, Creamy, Mini Treats
Prepare to fall in love with these utterly **No-Bake Cheesecake Bites** – a dream come true for anyone craving an easy, incredibly creamy, and undeniably delicious dessert! Imagine whipping up a batch of these delightful treats in under 20 minutes, with the freedom to adorn them with an endless array of your favorite toppings. The classic, buttery graham cracker crust forms the perfect foundation, providing a delightful textural contrast to the smooth, sweet, and tangy cream cheese filling. These aren’t just any desserts; they’re the quintessential mini bite-size delights, making them ideal for sharing at parties, packing for a special lunch, or simply indulging in a moment of pure bliss.
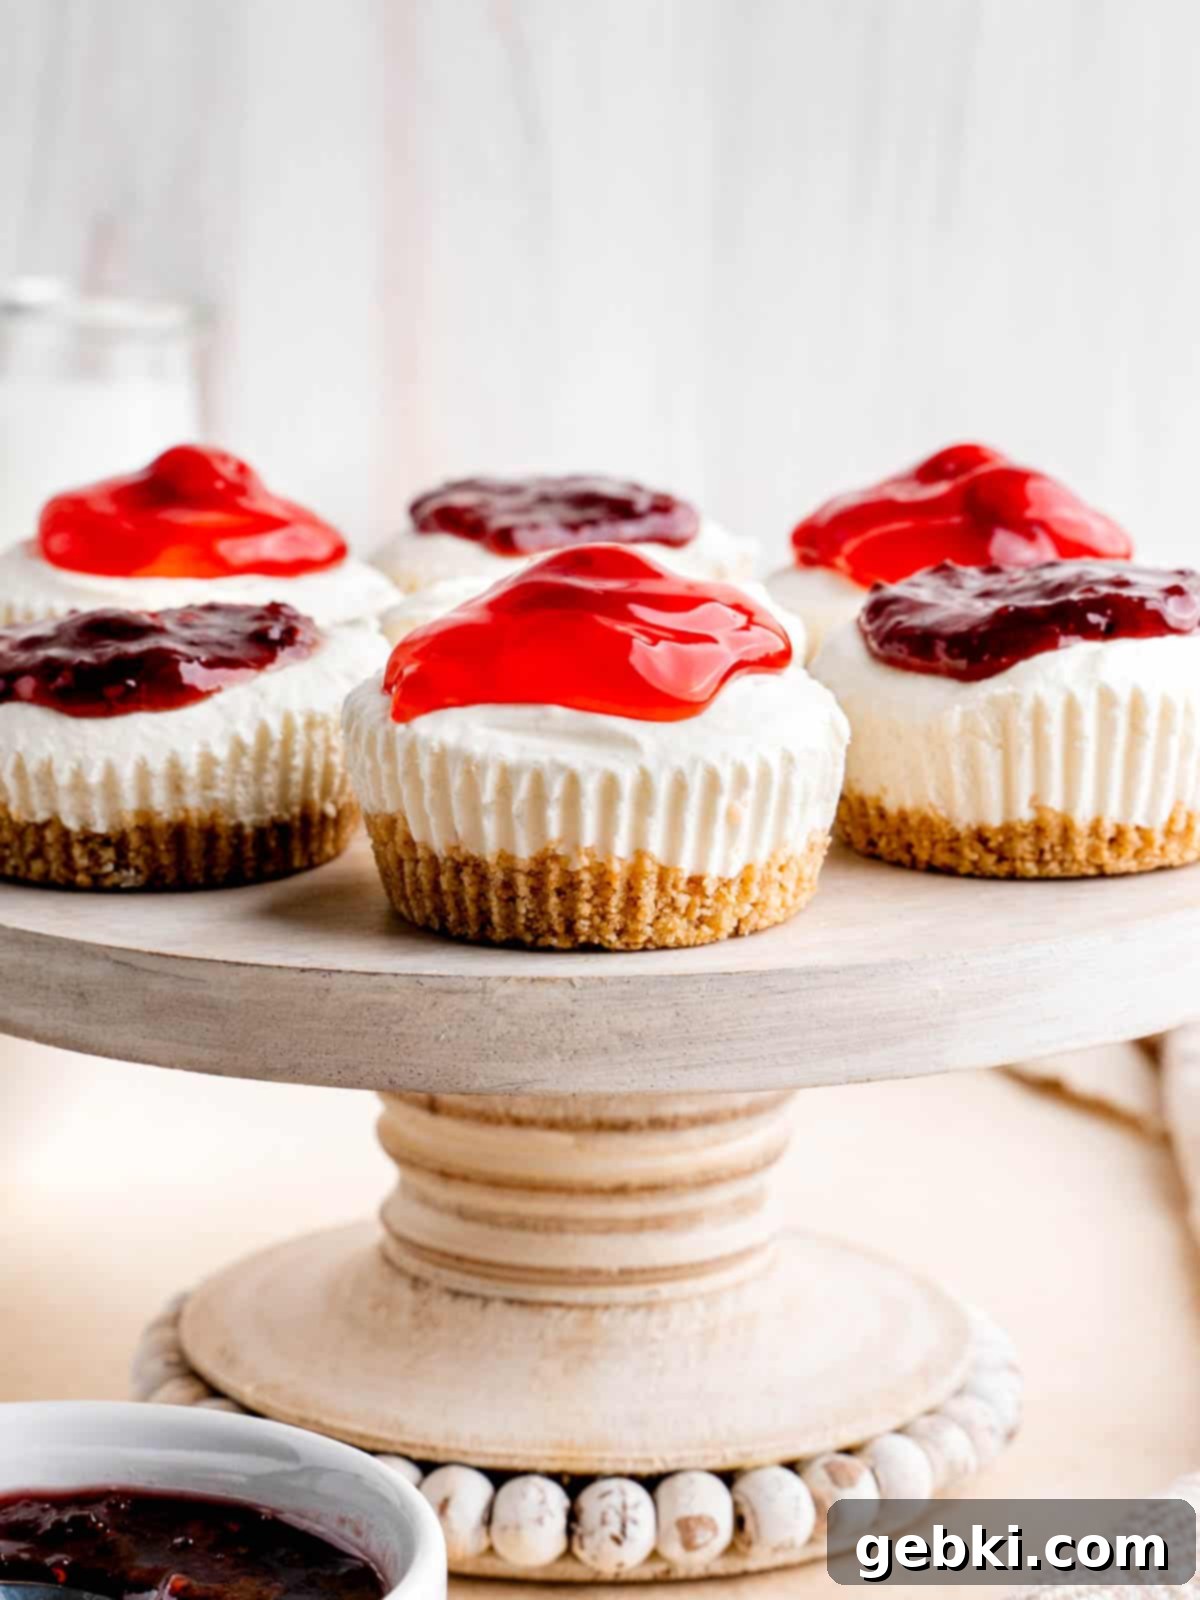
Cheesecake holds a special place in my heart as an absolute favorite dessert. But let’s be honest, traditional cheesecakes can be a bit intimidating with their precise baking times, water baths, and the dreaded risk of cracks. That’s where the magic of no-bake cheesecake truly shines! By skipping the oven and eliminating flour and eggs, we unlock an unparalleled level of creaminess and a refreshingly light texture that’s perfect for any time of year.
These individual mini cheesecakes are incredibly versatile, ready to be customized and decorated to suit any occasion or season. For a cozy autumn twist, you might explore my No Bake Mini Pumpkin Cheesecakes. Or, for a festive touch during the holidays, my No Bake Peppermint Cheesecake offers a cool and minty delight. No matter the season, these easy no-bake cheesecake bites are guaranteed to be a crowd-pleaser and a personal favorite.
What Exactly Are No-Bake Mini Cheesecakes?
No-bake cheesecake is a delightful variation of the classic dessert that, as its name suggests, doesn’t require an oven. The filling is crafted without eggs, flour, or other raw ingredients that typically need cooking. Instead, its luscious, airy texture is achieved through a base of heavy cream, which is whipped to perfection and then combined with cream cheese, sugar, and flavorings. This mixture is poured into a prepared crust – often graham cracker based – and then chilled in the refrigerator until it sets firm.
These particular bites take the convenience a step further by being divided into individual portions using a cupcake pan. This creates perfectly sized, single-serving treats that are incredibly easy to serve and enjoy. The result is a wonderfully creamy, refreshing dessert with a mousse-like consistency that melts in your mouth. For those moments when a chocolate craving strikes, you might also love my no-bake mini chocolate cheesecakes, which offer a rich, indulgent twist on this easy concept.
Why You’ll Adore This No-Bake Cheesecake Bites Recipe
There are countless reasons why these no-bake cheesecake bites are destined to become your new favorite dessert. Here’s why you’ll absolutely love making and devouring them:
- Effortless Preparation, No Oven Needed: This recipe is a true game-changer, requiring no advanced baking skills, no oven, and no dealing with messy flour or eggs. It’s perfect for novice bakers and seasoned pros alike, promising a stress-free dessert experience. Say goodbye to complicated baking steps and hello to simplicity!
- Say Goodbye to Baking Worries: Forget the anxieties of a water bath, trying to prevent your cheesecake from cracking, or worrying about over-baking. With this no-bake method, those common cheesecake challenges simply vanish, leaving you with a perfectly smooth, creamy dessert every time.
- Endless Customization for Any Craving: This easy cheesecake cupcake recipe is incredibly versatile. It serves as a fantastic base that can be transformed into a rich chocolate, vibrant fruit, or any other flavor profile you desire! The possibilities are truly limitless, allowing you to tailor these treats to your exact preferences or whatever ingredients you have on hand.
- Perfect for Sharing and On-the-Go: These bite-sized wonders are ideal for any gathering. They’re easy to transport, making them perfect for potlucks, parties, or family get-togethers. You can even pack them in a school or work lunch for a delightful and quick little treat that brightens any day. Their individual portions mean no slicing and no mess, making them truly convenient.
- Refreshing & Light: Unlike heavy baked cheesecakes, the no-bake version is exceptionally light and refreshing, making it an ideal dessert for warmer months or when you simply want something less dense. The creamy, cool texture is incredibly satisfying.
Essential Recipe Ingredients for Creamy Bliss
To create these delectable **no-bake cheesecakes**, you’ll need a handful of readily available ingredients:
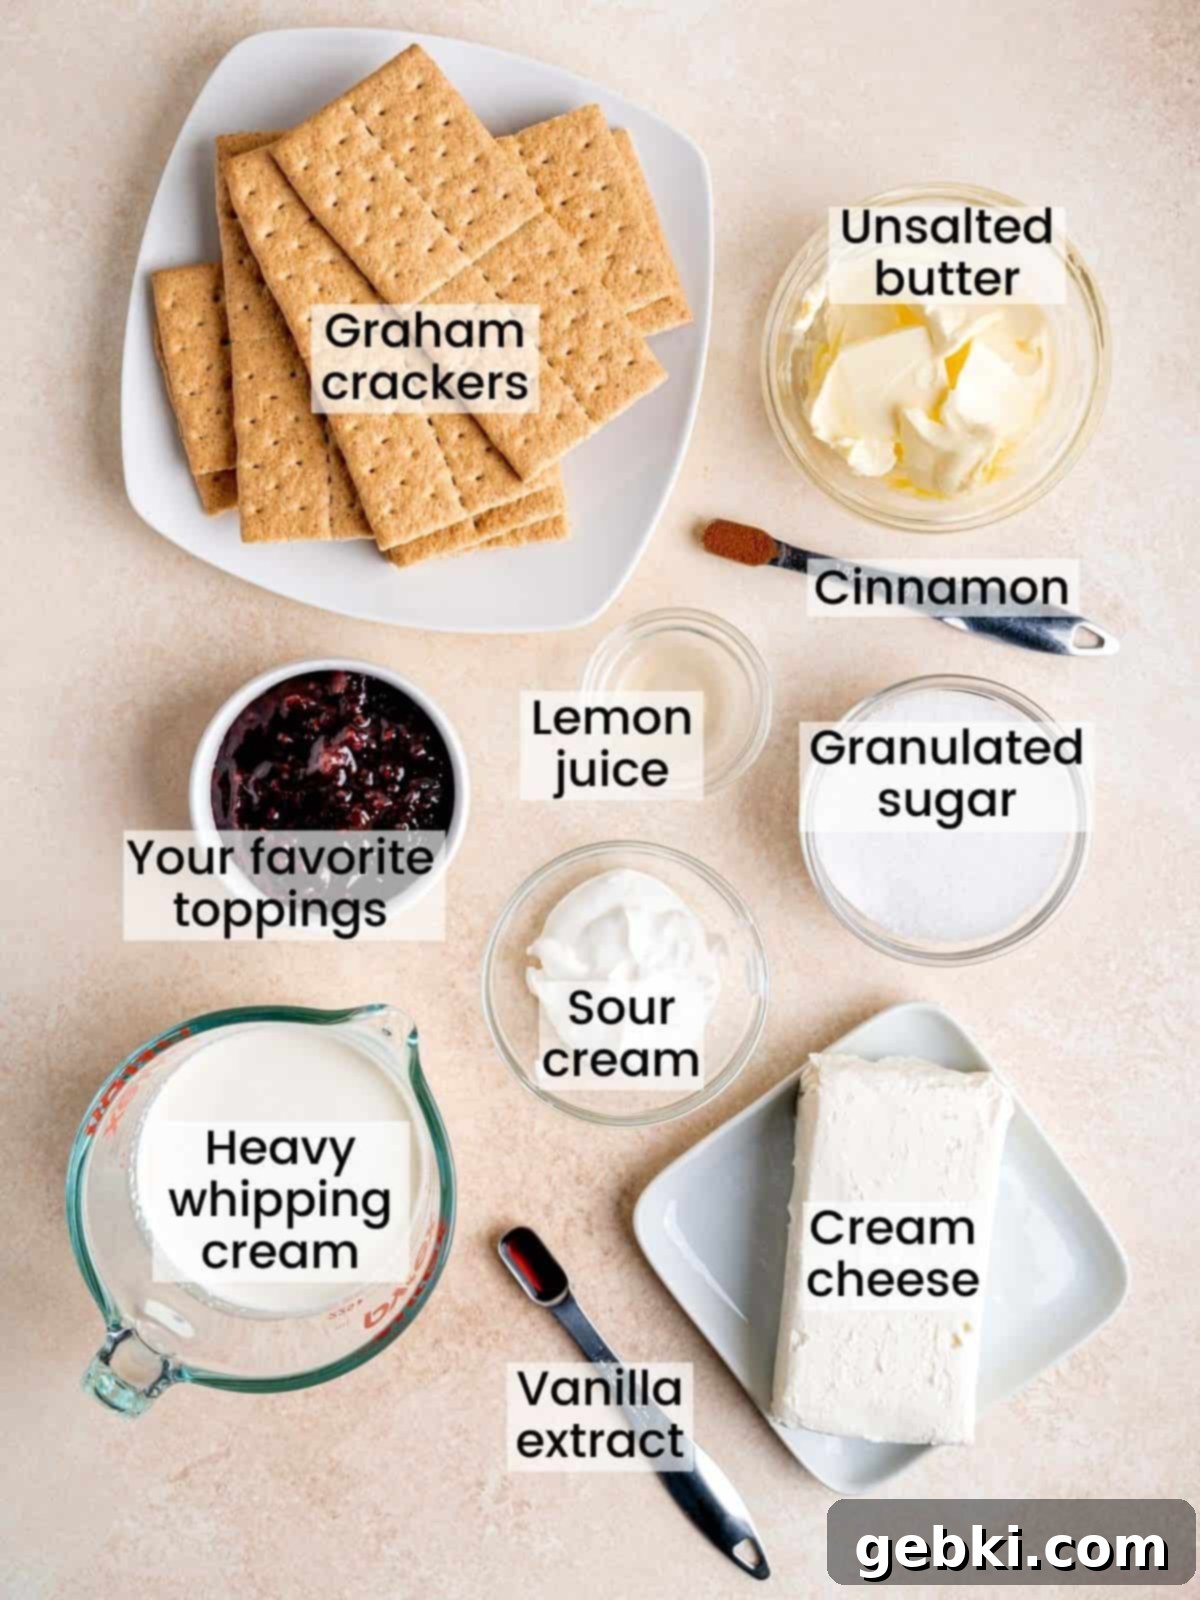
Detailed Ingredient Notes for Perfect Results:
- Graham Crackers: Approximately 8 graham crackers are needed for the classic, buttery graham cracker crust. This recipe cleverly utilizes a frozen crust instead of a baked one, ensuring the entire dessert remains truly no-bake. While honey graham crackers are my go-to for their delicate sweetness, feel free to experiment with cinnamon graham crackers or any other variety you prefer for a unique flavor twist. The key is finely crushing them to create a perfect base.
- Sour Cream: A touch of sour cream is a secret weapon in this recipe. It doesn’t just add extra creaminess and a wonderfully smooth texture; it also introduces a subtle, balancing tang that prevents the sweet cream cheese filling from being overly rich. It truly elevates the flavor profile.
- Cream Cheese: You’ll need one 8-ounce block of full-fat cream cheese, softened to room temperature. This is crucial! Room temperature cream cheese mixes much more smoothly, preventing any unsightly lumps in your filling. Always opt for full-fat cream cheese, as it yields the richest flavor and the most desirable, firm texture for a no-bake cheesecake.
- Heavy Whipping Cream: This is the star ingredient for achieving that light, airy, mousse-like consistency. The heavy whipping cream is beaten until it forms stiff peaks, incorporating air that gives these mini cheesecakes their signature delicate structure. When gently folded into the cream cheese mixture, it transforms the filling into a cloud of deliciousness.
- Vanilla Extract: A splash of good quality vanilla extract is essential. It imbues the cream cheese filling with that beloved, warm, and sweet flavor that makes cheesecake so irresistible. Don’t skip it, as it rounds out all the other flavors beautifully.
- Lemon Juice: Often underestimated in no-bake recipes, lemon juice is a key ingredient here for two significant reasons. Firstly, its acidity helps to cut through the richness of the cream cheese, balancing the sweetness and adding a pleasant brightness to the flavor. Secondly, and critically, the lemon juice reacts with the proteins in the cream cheese, playing a vital role in helping the filling to firm up and set properly without baking. Freshly squeezed is always best!
See the comprehensive recipe card below for a full list of ingredients and precise measurements.
Creative Substitutions & Delicious Variations
Substitutions: This specific recipe has been carefully developed and tested to ensure optimal results. While we encourage creativity, please note that it has not been extensively tested with ingredient substitutions. If you do decide to replace any ingredients, we’d love to hear about your experience in the comments below! Your feedback helps the entire community of home bakers.
Variations: The beauty of this no-bake cheesecake bites recipe lies in its adaptability. It can be effortlessly adjusted to suit any taste preference or special occasion, offering a blank canvas for your culinary imagination. The topping choices alone are vast and incredibly tasty! Here are some fantastic ideas to spark your creativity and get you started:
- Fruit Fillings: Classic cherry pie filling is always a winner, but feel free to explore other fruit pie fillings like blueberry, strawberry, or even apple for a different vibe.
- Fruit Preserves & Jams: Elevate your bites with a dollop of high-quality fruit preserves. Raspberry is a personal favorite, offering a lovely tartness that beautifully complements the creamy cheesecake. Apricot, peach, or mixed berry jams also work wonderfully.
- Chocolate Lovers’ Dream: Melted chocolate ganache, chocolate syrup, or even finely shaved chocolate can create a rich, indulgent topping.
- Peanut Butter Bliss: A swirl of smooth peanut butter or a drizzle of melted peanut butter creates a comforting and irresistible combination.
- Crushed Cookies: Transform the texture and flavor with crushed cookies. Oreos are a classic choice, but consider other favorites like shortbread, snickerdoodles, or even ginger snaps for a seasonal touch.
- Biscoff/Speculoos: For a uniquely spiced flavor, try crushed Speculoos or Biscoff cookies. Their caramelized notes are simply divine.
- Nutella Swirl: A generous swirl of Nutella adds a delightful hazelnut-chocolate dimension that’s hard to resist.
- Caramel & Dulce de Leche: Drizzle with rich caramel sauce or luscious dulce de leche for an extra layer of sweet indulgence.
- Fresh Fruit Medley: Keep it light and vibrant with an assortment of fresh berries (strawberries, blueberries, raspberries), sliced kiwi, or mango.
- Whipped Cream Dollops: A simple dollop of freshly whipped cream can add an elegant finish and an extra layer of lightness.
Beyond toppings, you can even switch up the crust! Consider using a Biscoff cookie crust, similar to the one featured in my delightful no-bake mini lemon cheesecakes recipe, for an entirely different flavor experience. Don’t be afraid to experiment and discover your own perfect combination!
Essential Equipment for Your No-Bake Creation
Gathering the right tools beforehand makes the entire process smoother and more enjoyable. Here’s the essential equipment you’ll need to create these perfect mini cheesecakes:
- Your mini cheesecakes will be neatly formed and chilled in a standard cupcake pan. For easy removal and serving, make sure to line each cup with good quality parchment liners or paper cupcake liners.
- If you’re starting with whole graham crackers (which I recommend for freshness and control), a food processor is invaluable for quickly and efficiently grinding them into fine crumbs for your crust. If you have pre-crushed graham cracker crumbs, you can skip this.
- For achieving that perfectly smooth cream cheese mixture and whipping the heavy cream to stiff peaks, I highly recommend using an electric hand mixer. A stand mixer will also work beautifully – simply use the whisk attachment for the heavy whipping cream and the paddle attachment for the cream cheese mixture. This tool will save you a lot of arm work!
- You’ll also need a couple of mixing bowls (medium to large size), measuring cups and spoons for precise ingredient amounts, and a rubber spatula for gently folding.
How to Make Easy Mini No-Bake Cheesecakes: A Step-by-Step Guide
Creating these delightful no-bake cheesecake bites is simpler than you might imagine. Follow these clear instructions to achieve perfect, creamy results every time.
Quick Recipe Video Tutorial
For a visual guide and to see just how easy these are to make, watch our quick recipe video:
Detailed Step-by-Step Instructions
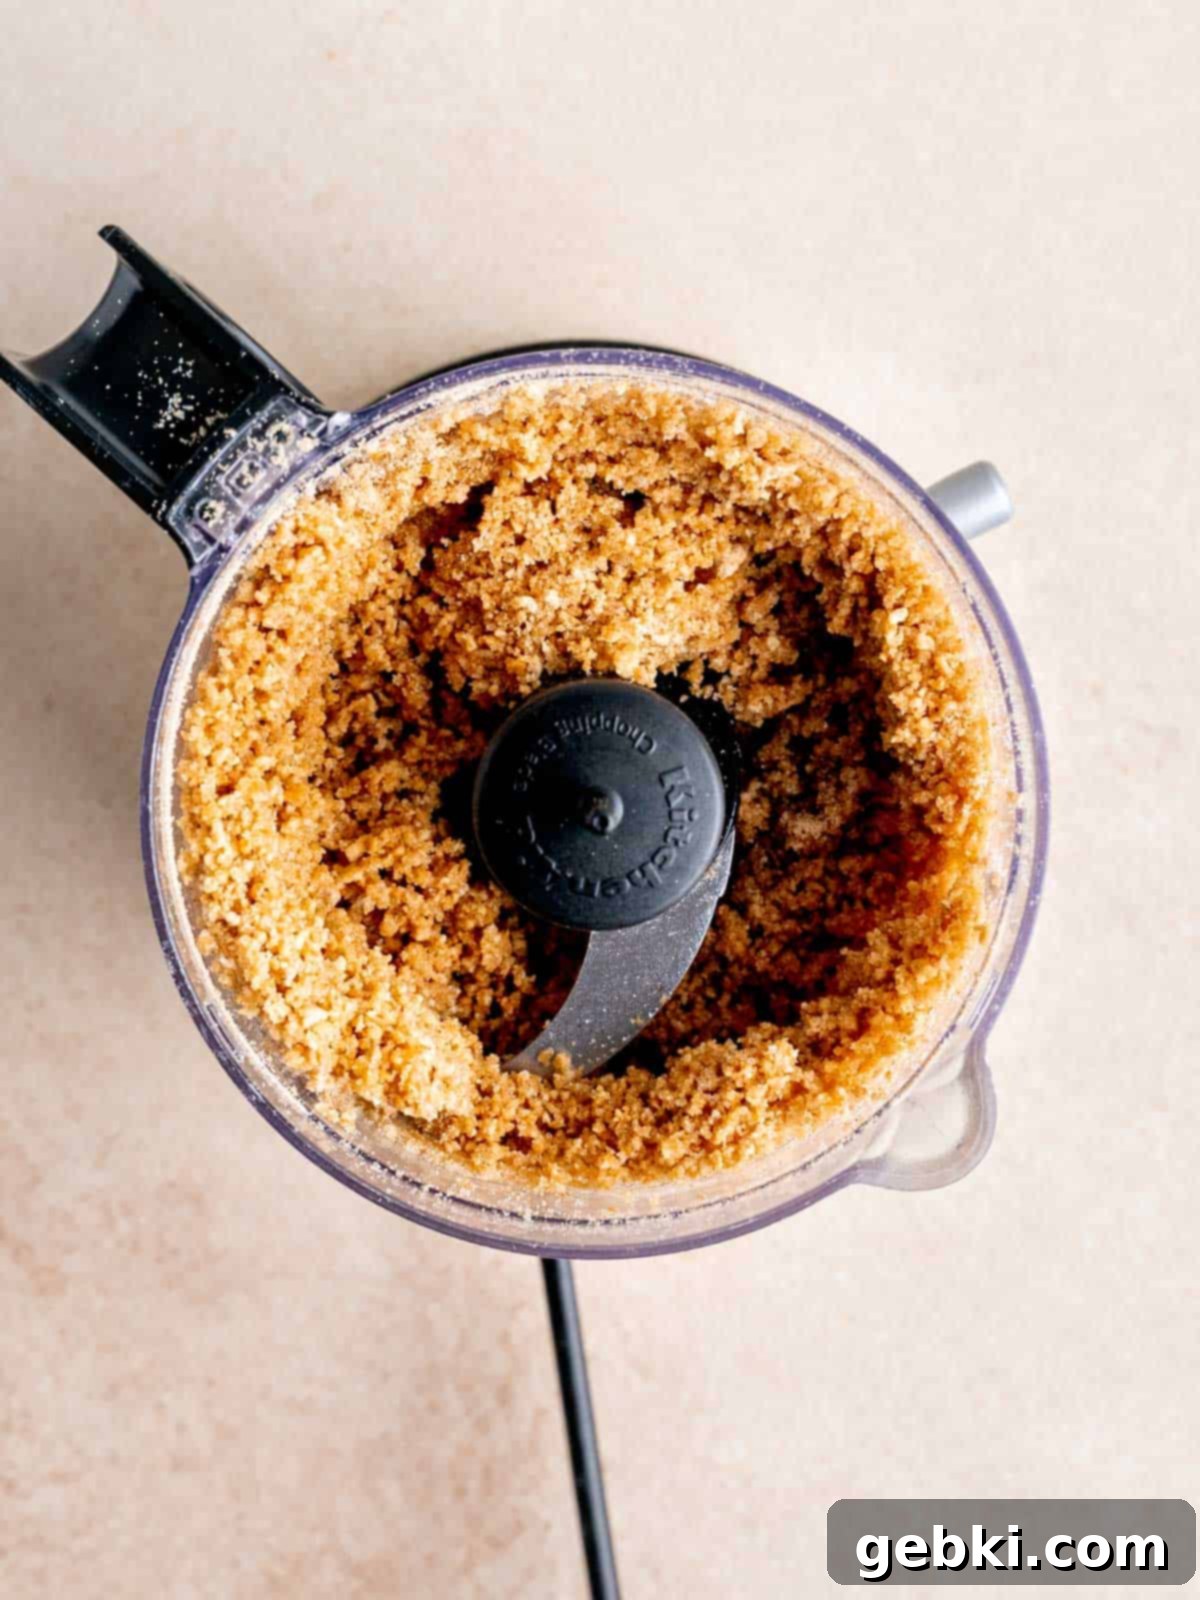
Step 1: Prepare the Graham Cracker Crust Mixture. Begin by placing your graham crackers into a food processor and pulse until they are finely ground into crumbs. Add the granulated sugar, a pinch of ground cinnamon (if using for extra warmth), and the cooled melted butter. Continue to pulse until all ingredients are thoroughly combined and the mixture has the consistency of wet sand.
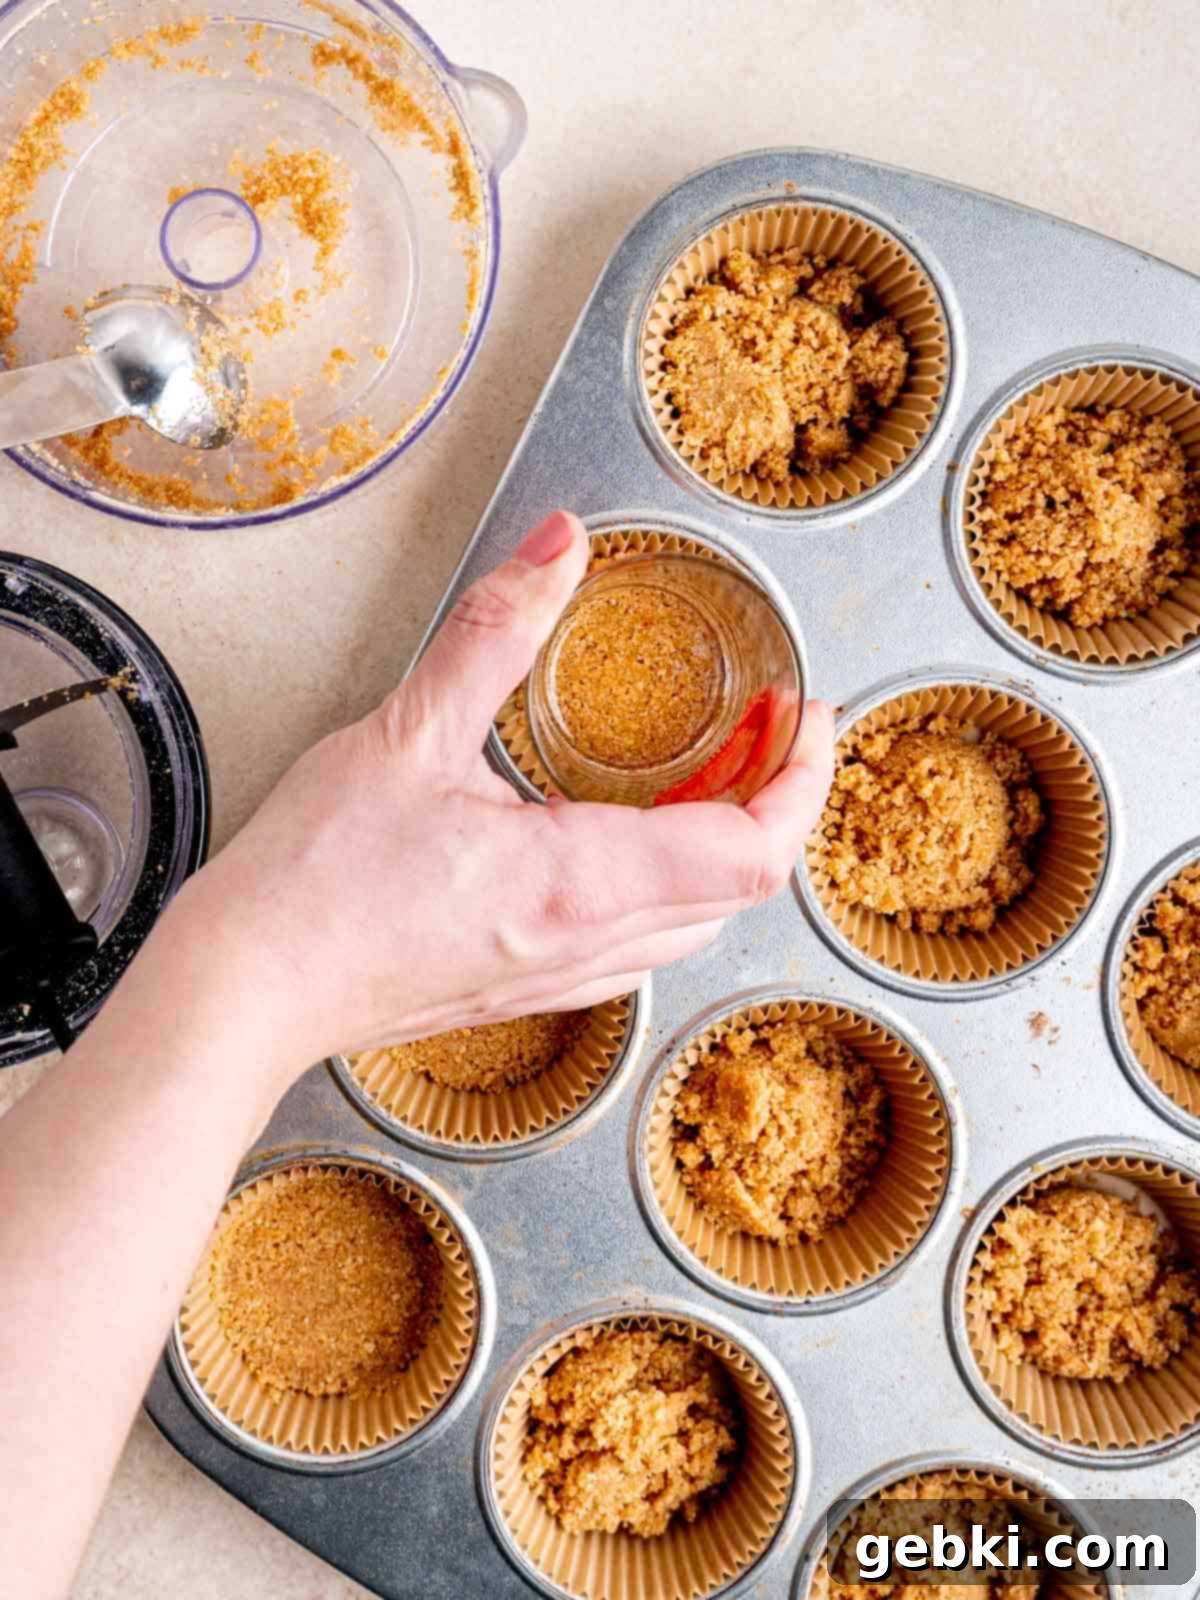
Step 2: Form and Freeze the Crusts. Line a 12-cup cupcake pan with paper liners. Evenly distribute the graham cracker mixture among the lined cups, using approximately one tablespoon per cup. Use the back of a spoon or the bottom of a small glass to firmly press the mixture into a compact, even layer at the bottom of each liner. Once all crusts are formed, transfer the pan to the freezer while you prepare the creamy filling. This step helps the crust set quickly and prevents it from becoming soggy.
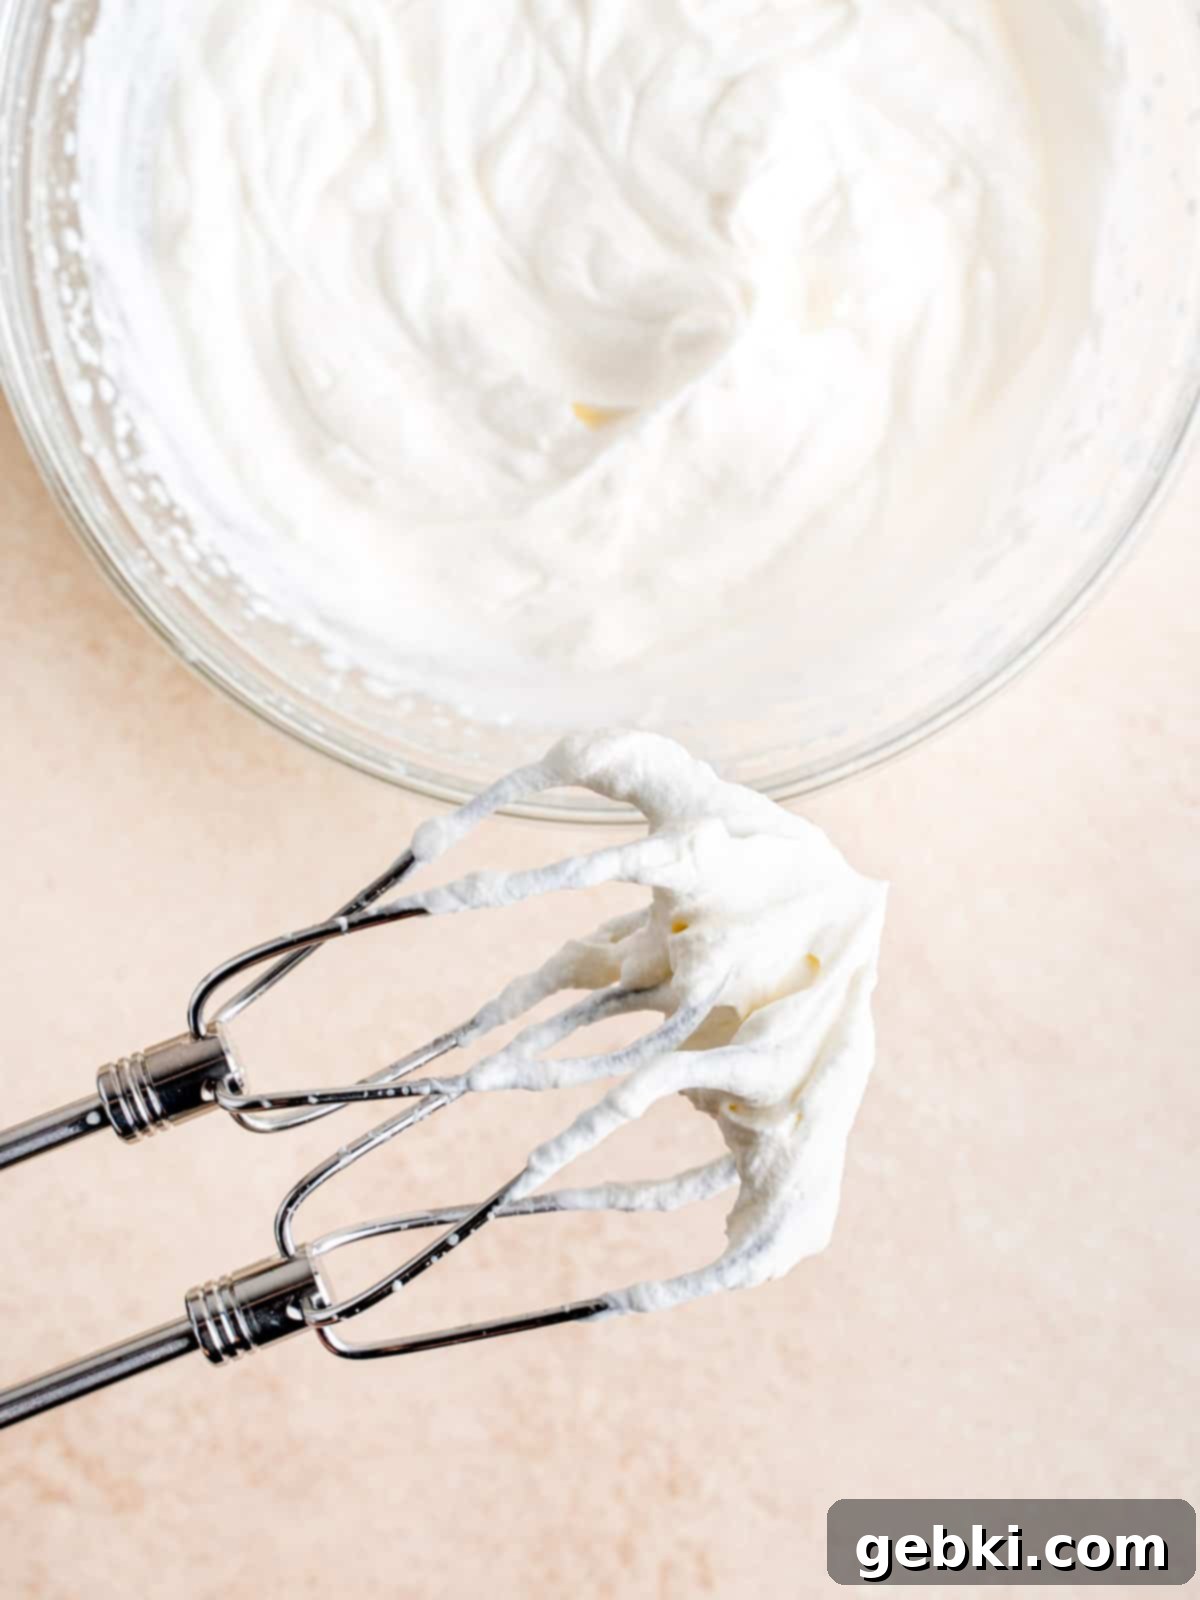
Step 3: Whip the Heavy Cream. In a clean, medium-large mixing bowl, pour the very cold heavy whipping cream. Using an electric hand mixer (or the whisk attachment of a stand mixer), whip the cream on medium-high speed until it forms stiff peaks. You’ll know it’s ready when the cream holds its shape firmly when you lift the beaters out of the bowl. Be careful not to over-whip, or it can turn granular.
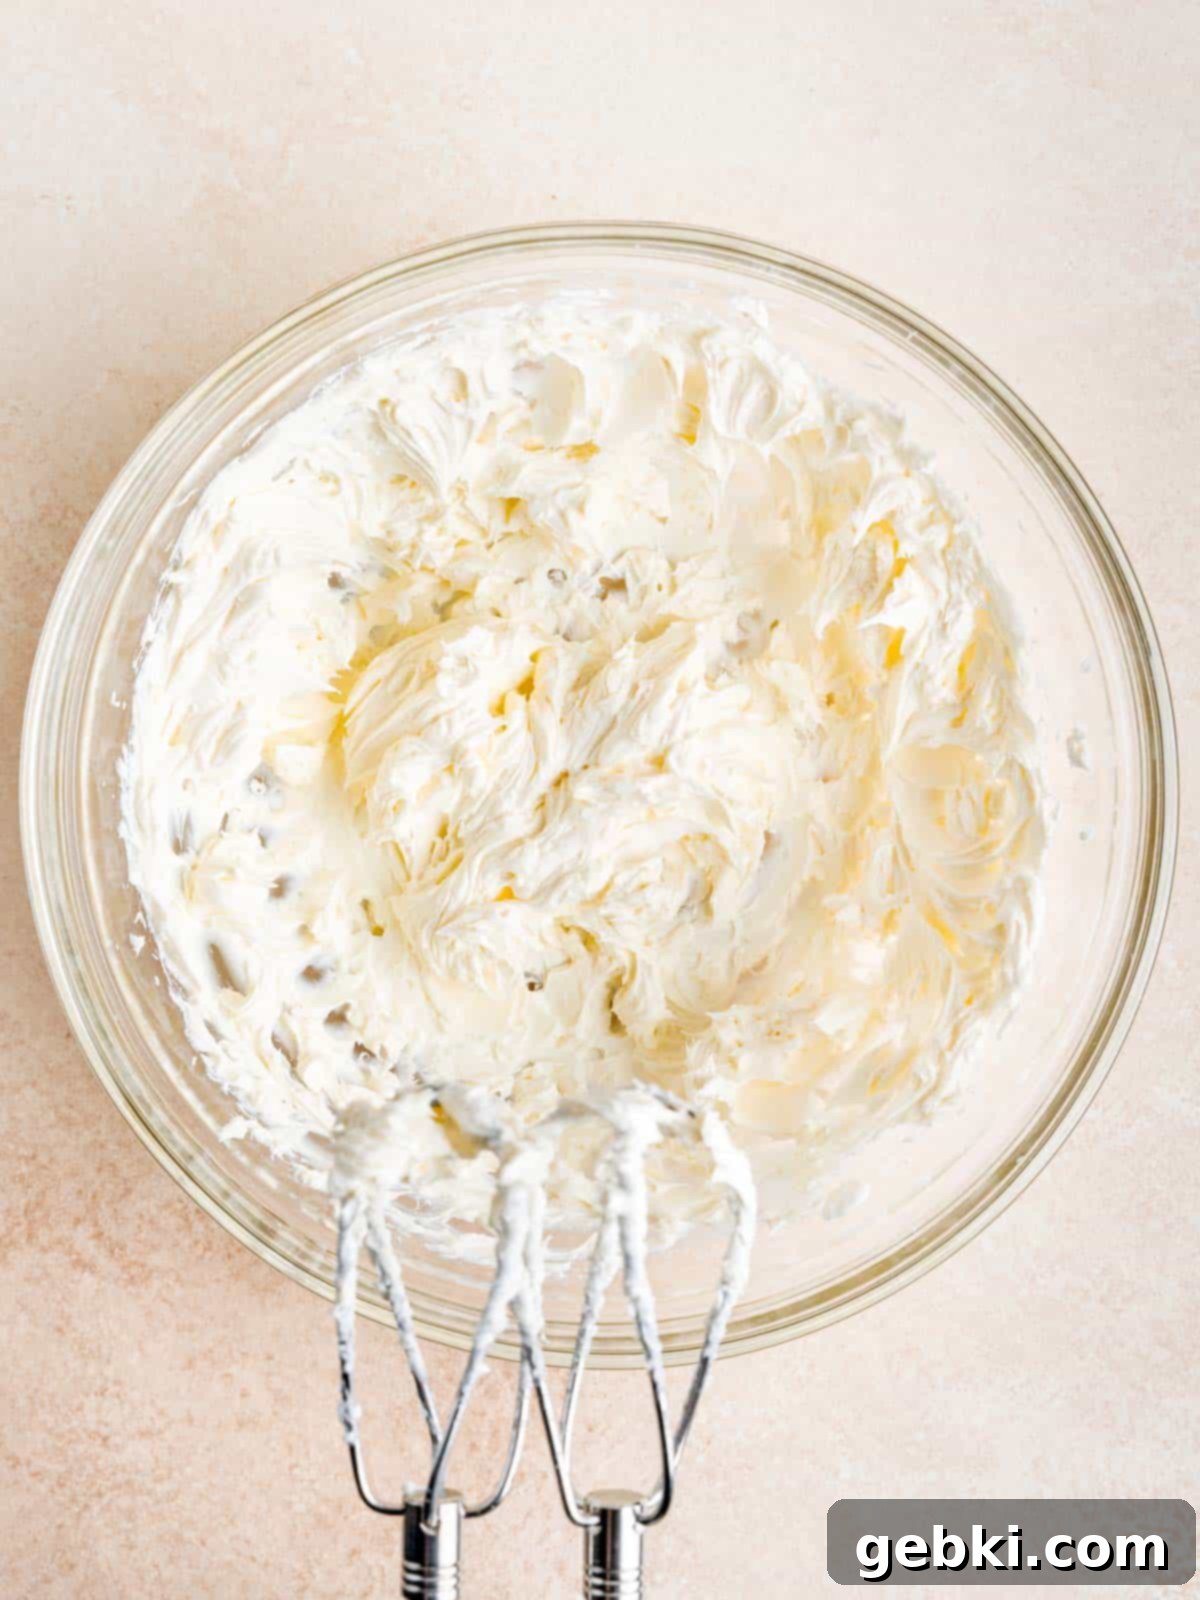
Step 4: Beat the Cream Cheese. In a separate medium-large bowl, place the softened cream cheese. Using your hand mixer (or paddle attachment on a stand mixer), beat the cream cheese on medium speed until it is completely smooth and free of any lumps. This is a crucial step to ensure a silky-smooth cheesecake filling, so take your time here!
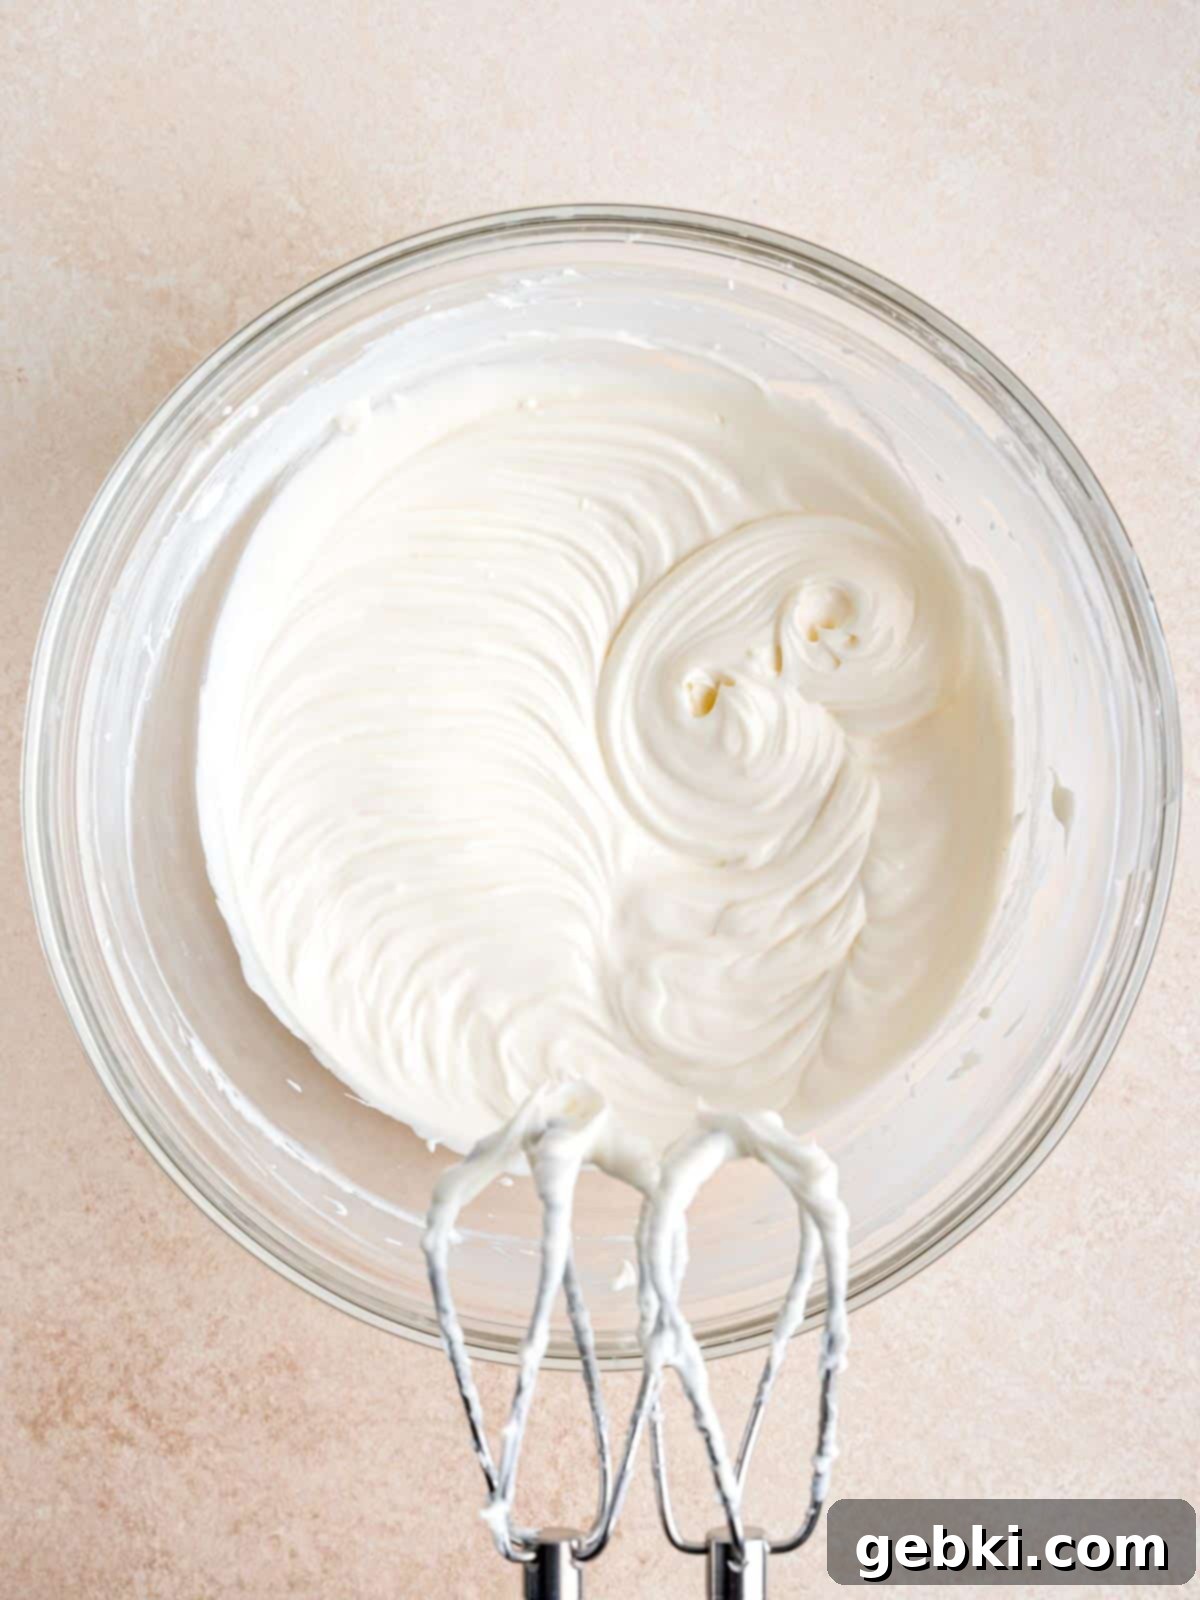
Step 5: Combine Wet Ingredients with Cream Cheese. To the bowl with the smooth cream cheese, add the sour cream, granulated sugar, vanilla extract, and fresh lemon juice. Continue beating with the hand mixer until all ingredients are thoroughly combined and the mixture is consistently smooth and creamy. Scrape down the sides of the bowl as needed to ensure everything is fully incorporated.
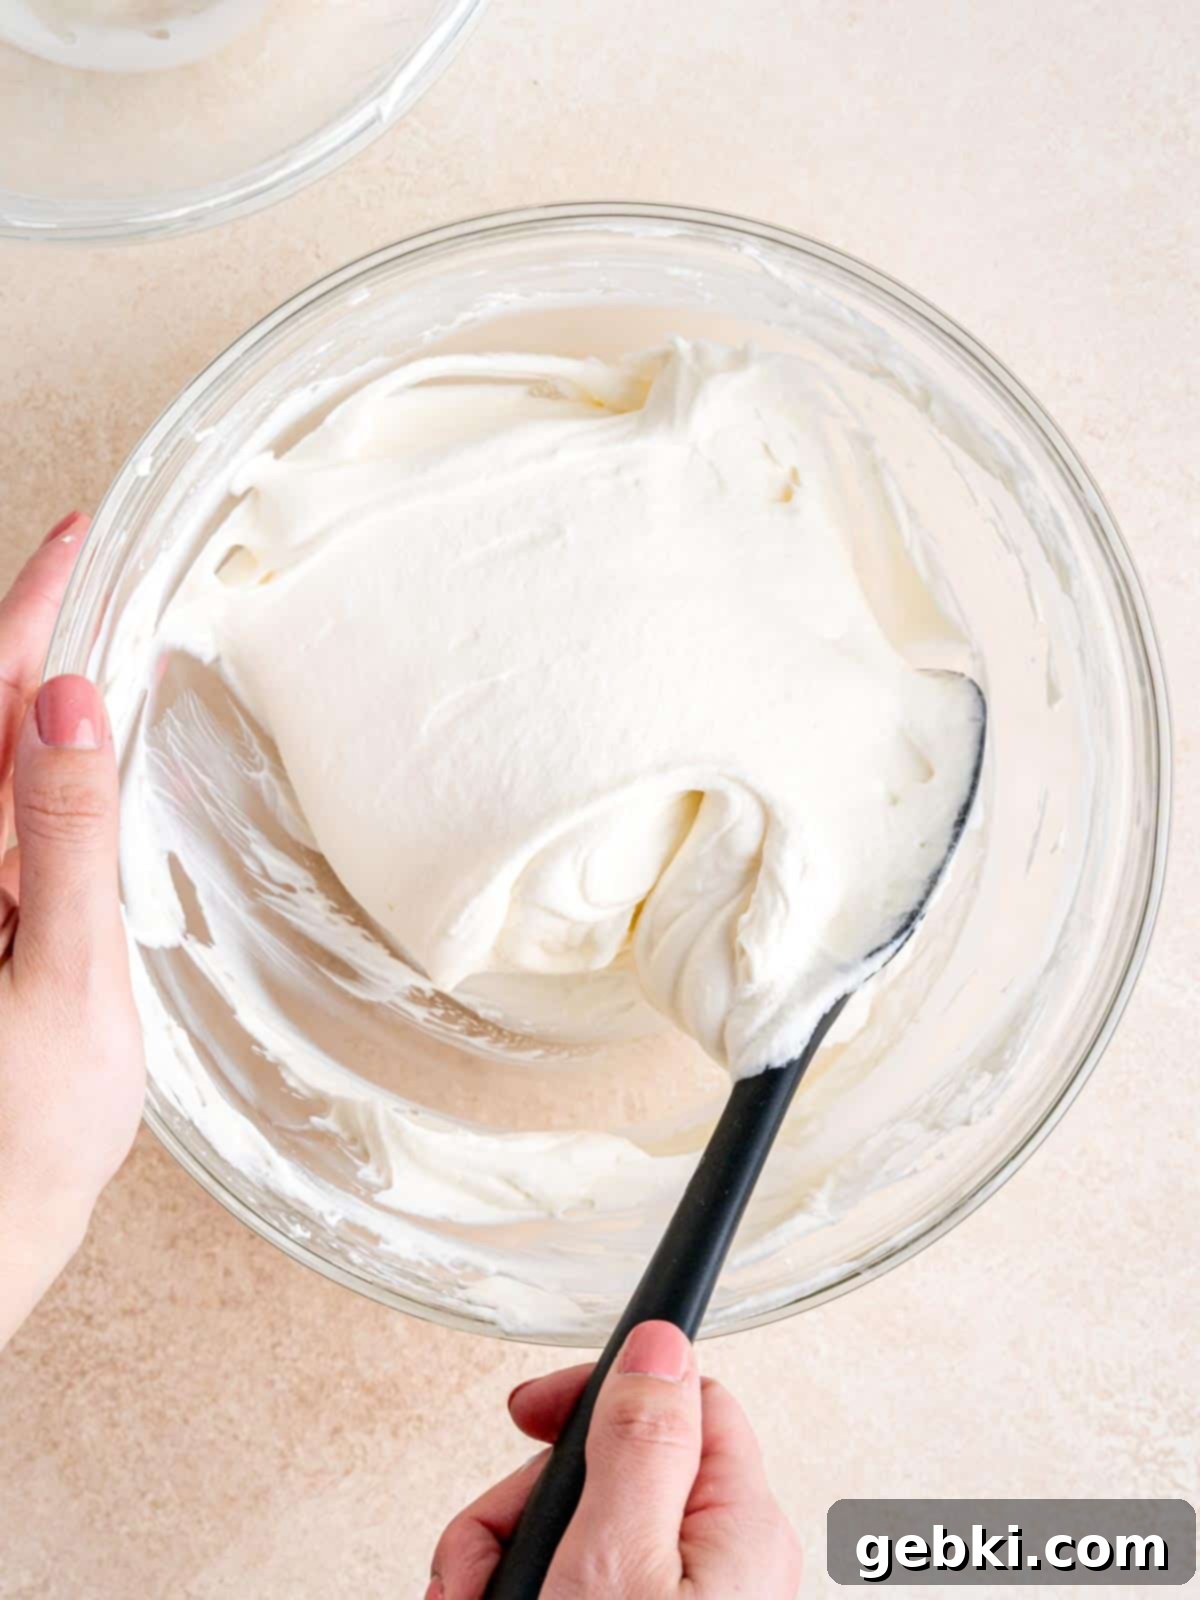
Step 6: Gently Fold in Whipped Cream. With a rubber spatula, very gently fold the whipped heavy cream into the cream cheese mixture. Use a light hand and fold just until no streaks of white cream remain and the mixture is uniformly combined. Be careful not to over-mix, as this will deflate the air from the whipped cream, causing your cheesecake filling to lose its light texture and ability to hold its shape.
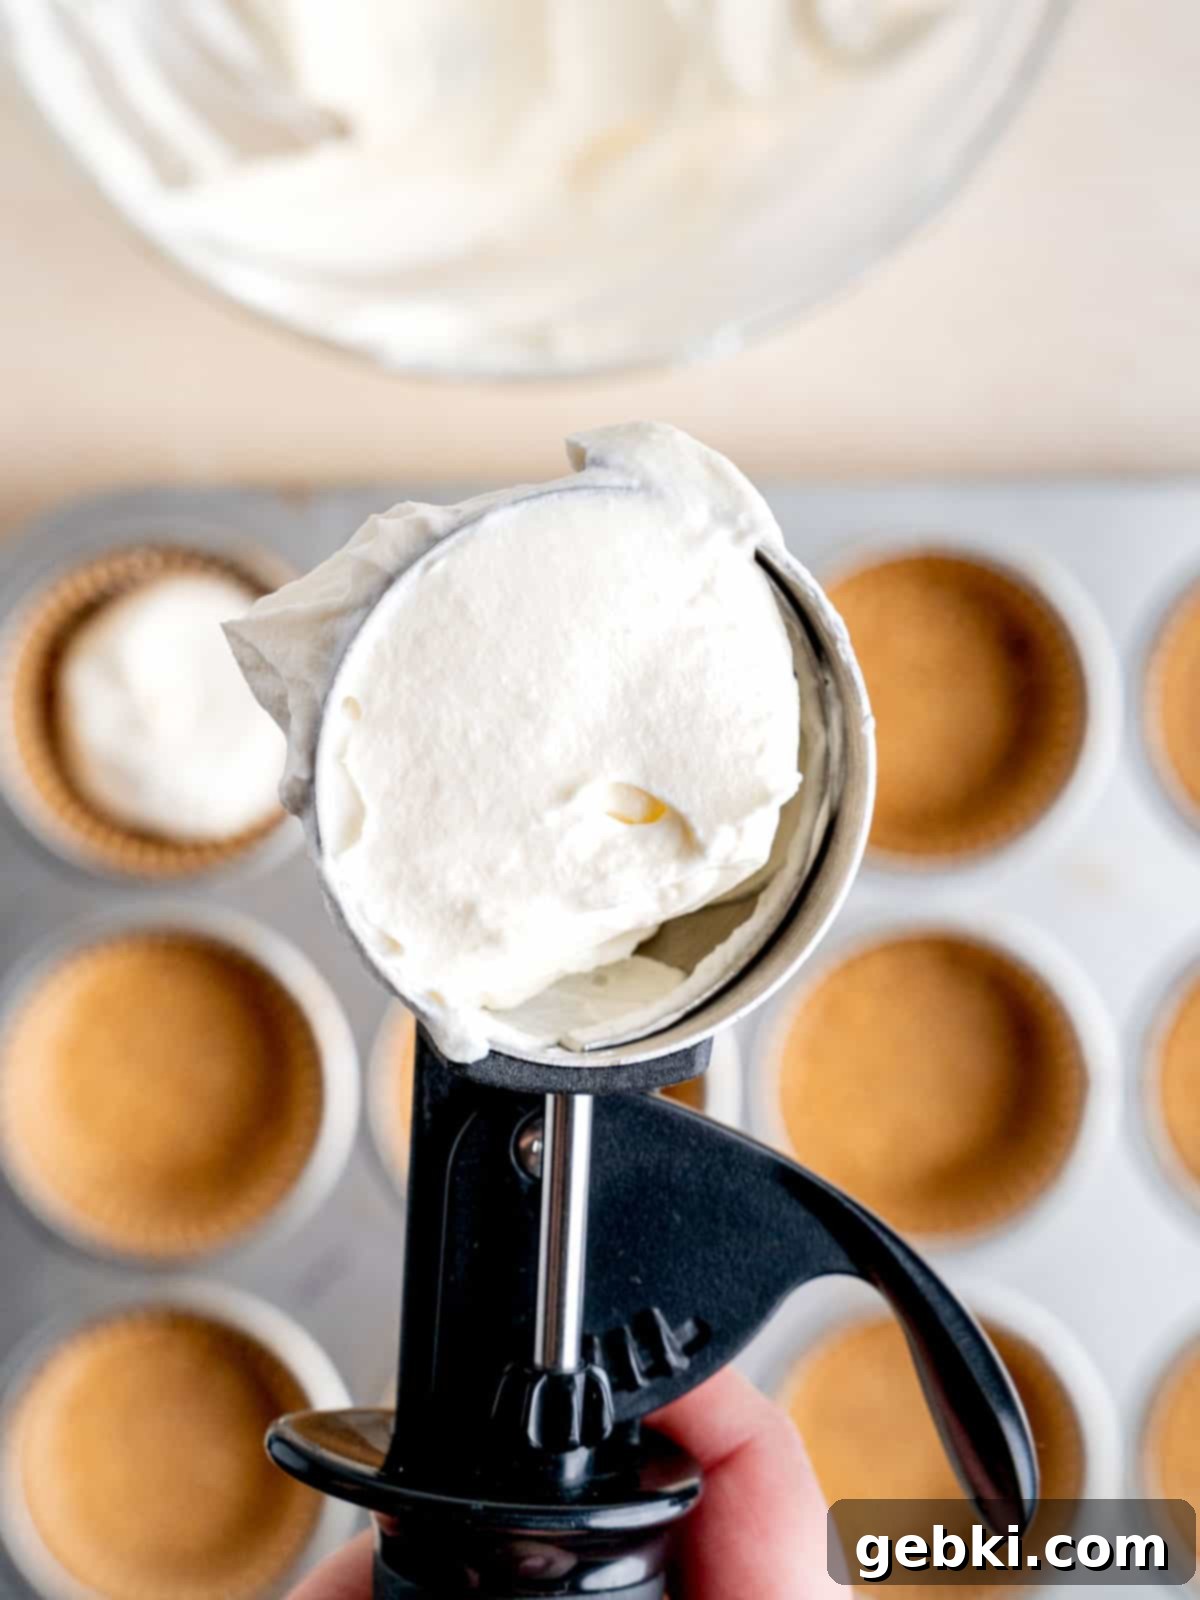
Step 7: Fill and Chill the Cheesecakes. Retrieve your cupcake pan with the frozen graham cracker crusts. Carefully scoop the no-bake cheesecake batter into each cupcake liner, filling them approximately three-quarters full. Use the back of a spoon to gently smooth the tops. Once filled, cover the entire pan loosely with plastic wrap and transfer it to the refrigerator. For best results and optimal setting, chill the cheesecakes overnight, or for a minimum of 2-4 hours if you’re in a hurry (though they will be softer). The longer they chill, the firmer and more stable they will become.
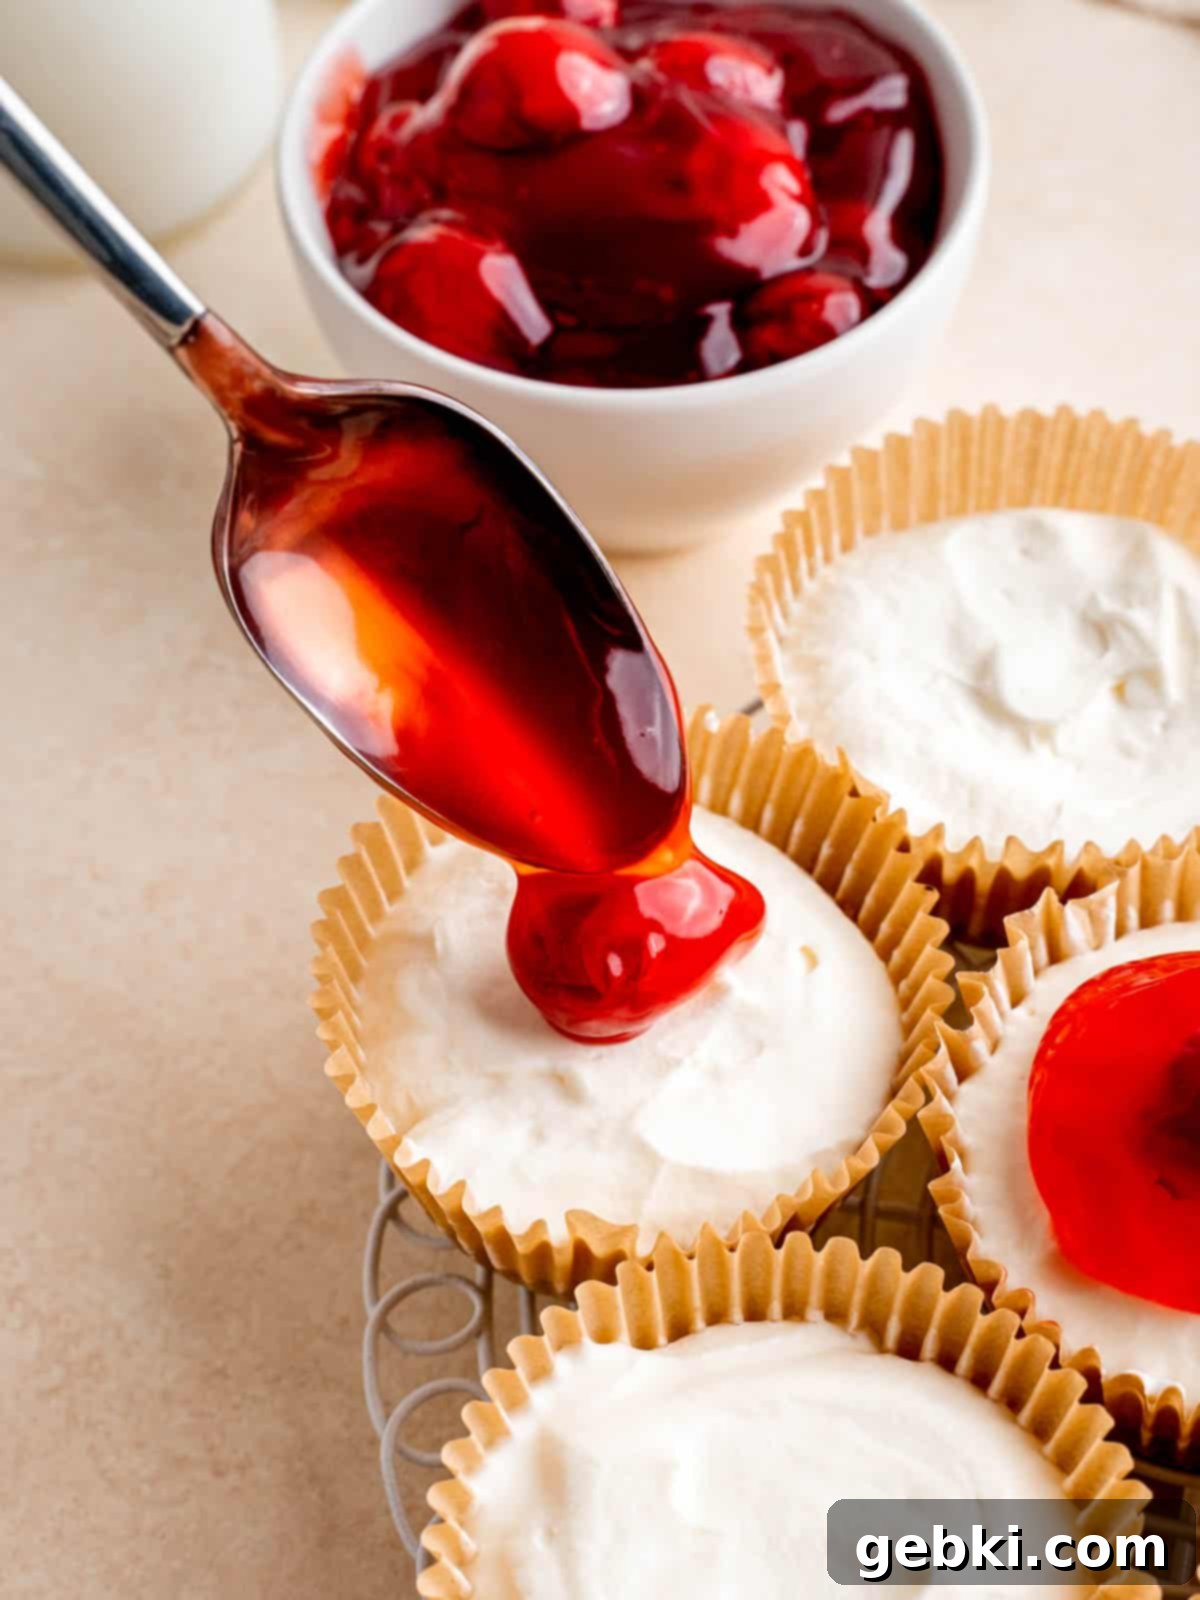
Step 8: Top and Enjoy! Once the cheesecakes are fully set and beautifully firm, it’s time for the best part: adding your favorite toppings! A spoonful of cherry pie filling, fresh berries, chocolate ganache, or any of the variations mentioned earlier will complete these delightful treats. Carefully remove each cheesecake bite from its liner and serve immediately. Enjoy your homemade, easy, and incredibly satisfying no-bake cheesecake bites!
Chef’s Top Tips for Flawless No-Bake Cheesecake Bites
Achieving perfectly creamy and set no-bake cheesecake bites is easy when you keep these expert tips in mind:
- Always Use Cold Heavy Cream: This is arguably the most crucial tip for the filling. The colder your heavy cream is when you begin to whisk it, the easier, faster, and more effectively it will whip up into stiff peaks. Cold cream holds its structure much better, which translates to a lighter, airier, and more stable cheesecake filling. Consider chilling your mixing bowl and whisk attachment for 10-15 minutes before whipping for an even better result.
- Do Not Over-Mix the Filling: The whipped cream is what introduces all the lovely air and light texture into your cheesecake, helping it to set without baking. When you fold the whipped cream into the cream cheese mixture, do so gently and only until just combined. Over-mixing will cause the delicate air bubbles in the whipped cream to deflate, resulting in a dense, less firm, and potentially rubbery filling. Stop folding as soon as no white streaks remain.
- Chill Overnight for Optimal Setting: While the cheesecakes can firm up enough to eat after a few hours, for the absolute best texture and stability, chilling them overnight (ideally for 8-12 hours) is highly recommended. This allows all the ingredients, particularly the lemon juice and cream cheese, ample time to interact and set completely. If you need them extra firm or are making them far in advance, you can place them in the freezer for about an hour before serving (but remember to let them thaw slightly before enjoying for the best eating experience).
- Room Temperature Cream Cheese is a Must: While the heavy cream needs to be cold, your block of cream cheese should be at room temperature. This ensures it beats smoothly without lumps and incorporates easily with the other ingredients, creating a consistently creamy filling.
- Measure Precisely: Especially for no-bake desserts where ratios are critical for setting, precise measurements are important. Using a kitchen scale for dry ingredients like sugar and crushed graham crackers can yield more consistent results.
Common Questions About No-Bake Cheesecake Bites
Yes, absolutely! No-bake cheesecakes are entirely safe to eat because they do not contain any raw eggs, flour, or other ingredients that require cooking to be consumed safely. The filling is made from dairy products like cream cheese, heavy cream, and sour cream, along with sugar and flavorings, all of which are safe to eat raw. The dessert simply relies on chilling to achieve its final firm and creamy texture.
Unlike traditional cheesecakes that set through baking, no-bake cheesecakes achieve their firm texture through a combination of several factors. Firstly, the acidity from the lemon juice plays a crucial role; it reacts with the proteins in the cream cheese, causing it to thicken and stabilize. Secondly, whipping the heavy cream to stiff peaks incorporates a significant amount of air, which helps to create a stable, mousse-like structure that firms up when chilled. The fat content in the cream cheese and heavy cream also contributes to the overall stability. Lastly, sufficient refrigeration time, ideally overnight, allows all these components to fully meld and solidify into a delicious, set dessert.
Several factors can prevent your no-bake cheesecakes from setting properly. The most common reasons include: 1) **Forgetting or reducing the lemon juice:** The acidity is key for setting the cream cheese. 2) **Not whipping the heavy cream enough:** The cream needs to reach stiff peaks to provide the necessary structure. 3) **Over-mixing the whipped cream into the batter:** Vigorous stirring can deflate the air from the whipped cream, making the filling too soft. 4) **Insufficient chilling time:** No-bake cheesecakes need a minimum of 2-4 hours, but ideally overnight, to fully firm up in the refrigerator. Ensure your cream cheese was full-fat, as low-fat versions may not set as well.
By default, the graham cracker crust contains gluten. However, these no-bake cheesecake bites can be easily made gluten-free by simply substituting traditional graham crackers with your favorite brand of gluten-free graham crackers. The rest of the filling ingredients are naturally gluten-free, but always double-check labels to ensure no hidden gluten in any packaged components like vanilla extract or pie fillings.
While it’s technically possible, microwaving cream cheese to soften it requires extreme caution and is generally not recommended unless you are truly in a hurry. If you choose to do so, microwave it in very short 5-second intervals, stirring thoroughly after each burst. Overheating cream cheese, even slightly, can cause it to curdle, become oily, or separate, which will negatively impact the texture and smoothness of your cheesecake filling. For the best and most consistent results, I highly recommend planning ahead and allowing your cream cheese to soften naturally at room temperature for about 30-60 minutes before you begin the recipe.
Storage & Freezing Instructions
Proper storage is key to keeping your no-bake cheesecake bites fresh and delicious for as long as possible:
Store these no-bake cheesecakes in an airtight container in the **refrigerator** for up to 3-4 days. While they will remain delicious, they are at their absolute best within the first 1-2 days. After that, the graham cracker crust might start to absorb moisture from the filling and become a bit softer, though still enjoyable.
Freezing for Longer Enjoyment
For longer storage, these mini cheesecakes are excellent for freezing! You can store them in the **freezer** for up to 1 month. To freeze, arrange the fully set cheesecake bites in a single layer on a baking sheet and freeze until solid. Once solid, transfer them to an airtight freezer-safe container or a heavy-duty freezer bag, separating layers with parchment paper to prevent sticking. When you’re ready to enjoy them, simply let them thaw in the refrigerator for several hours or overnight before adding your favorite toppings and serving. This is a fantastic make-ahead option!
More Delicious No-Bake Recipes You’ll Love
If you enjoyed these easy no-bake cheesecake bites, be sure to explore more delightful recipes from our collection:
-
5 Ingredient No-Bake Mini Chocolate Cheesecakes
-
No Bake Key Lime Cheesecake Bars
-
Strawberry Cream Cheese Pie
-
No Bake Mini Lemon Cheesecakes
Did you try this recipe? Leave a ⭐️⭐️⭐️⭐️⭐️ rating + review below and share it on Instagram, Facebook, and Pinterest!
📖 Recipe
Easy Mini No Bake Cheesecake Bites
Kayla Burton
Pin Recipe
20 minutes
0 minutes
2 hours
2 hours 20 minutes
Dessert, Snack
American
12 cheesecakes
166 kcal
Equipment
-
Cupcake pan
-
Cupcake liners
-
Mixing bowls
-
Electric mixer (stand with paddle attachment or hand mixer)
-
Food Processor
-
Scale/measuring cups
-
Measuring spoons
Ingredients
Graham Cracker Crust
- 8 (120 g) graham crackers (crushed in food chopper) ~1¼ cup graham cracker crumbs
- 2 tablespoons (24 g) granulated sugar
- ⅛ teaspoon (⅛ teaspoon) ground cinnamon optional
- 5 tablespoons (70 g) unsalted butter melted
Cheesecake Filling
- ¾ cup (177.44 ml) heavy cream
- 1 block (8 oz) (226 g) cream cheese room temperature
- 3 tablespoons (36 g) sour cream
- 5 tablespoons (63 g) granulated sugar
- 1 teaspoon (1 teaspoon) lemon juice
- ¼ teaspoon (¼ teaspoon) vanilla extract
- 1 can (12 oz) (1 can (12 oz)) pie filling or other toppings
Instructions
Graham Cracker Crust
-
Line a 12-cup cupcake pan with paper liners to ensure easy removal of your cheesecake bites later.
-
In a food processor, combine the graham crackers, granulated sugar, ground cinnamon (if desired), and cooled melted butter. Pulse until the mixture is finely pureed and resembles wet sand, ensuring all ingredients are fully incorporated.
-
Evenly distribute the graham cracker mixture into the prepared cupcake liners, using approximately 1 tablespoon per cup. Press the mixture firmly into the bottom of each liner using the back of a spoon or the flat bottom of a small glass. Once all 12 crusts are flattened and packed, place the entire pan into the freezer while you prepare the cheesecake filling. This chilling step is essential for a firm crust.
No-Bake Cheesecake Filling
-
In a medium-large bowl, pour the very cold heavy cream. Using an electric mixer, whisk vigorously on medium-high speed until the cream is thick and holds stiff peaks. This usually takes a few minutes, so be patient and ensure it’s firm before moving on.
-
In a separate medium-large bowl, beat the softened cream cheese with a hand mixer until it is completely smooth and lump-free. Then, add the sour cream, granulated sugar, fresh lemon juice, and vanilla extract. Mix everything together until the mixture is fully combined and wonderfully smooth. Scrape down the sides of the bowl as needed to ensure even mixing.
-
With a rubber spatula, very gently fold the whipped cream into the cream cheese mixture. Be careful not to stir too much, as the goal is to keep the air incorporated into the whipped cream. Fold just until no white streaks of cream remain and the mixture is uniformly combined and light.
-
Scoop the delicate cheesecake filling onto the frozen graham cracker crusts, filling each liner about three-quarters full. Gently smooth the tops with the back of your spoon or spatula. Cover the pan loosely with plastic wrap and refrigerate for at least 2 hours. For truly firm and perfectly set cheesecake bites, it is highly recommended to chill them overnight (8-12 hours).
-
When you’re ready to serve and enjoy these delightful cheesecakes, remove them from the liners and add a generous spoonful of your favorite pie filling or any other desired toppings!
Save This Recipe! 💌
We’ll email this post to you, so you can come back to it later!
Video
Notes
Toppings: Get creative and add whatever your heart desires! I particularly love using fruit preserves/jam, tangy lemon curd, or various fruit pie fillings. Other fantastic options include chocolate syrup, Nutella, or you can simply leave them plain for a classic taste.
The provided nutritional information is an estimate per serving. Accuracy is not guaranteed.
