Decadent Caramel Apple Crepe Cake: Your Ultimate No-Bake Fall Dessert
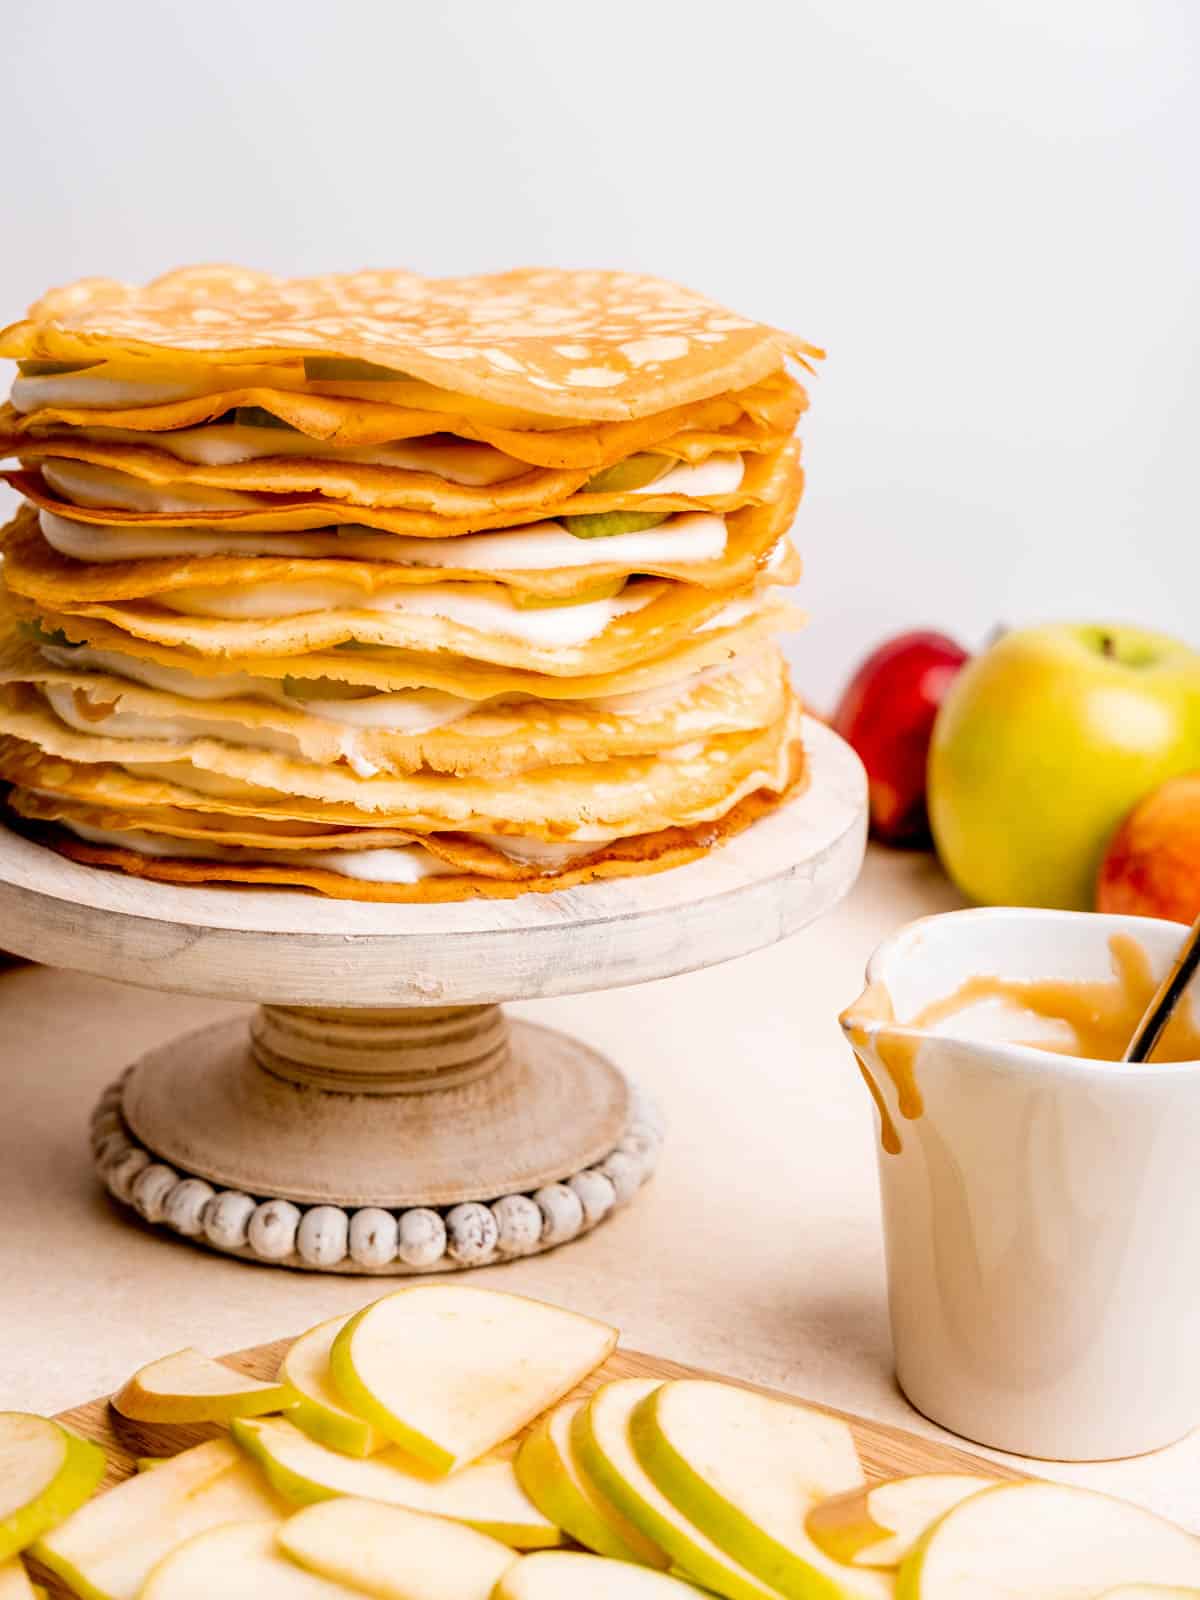
As the leaves begin to change and a crisp coolness fills the air, our thoughts often drift to classic fall treats. Caramel apples are undoubtedly a beloved autumn staple, but what if you could enjoy those familiar, comforting flavors in a delightful new way? Allow me to introduce you to the Caramel Apple Crepe Cake – a truly innovative and spectacular dessert that reimagines the traditional caramel apple experience. This stunning cake features delicate, tender crepes, each lovingly layered with rich, homemade whipped cream, a luscious salted caramel sauce, and crisp, thinly sliced fresh apples. It’s the perfect, elegant transition from the bright, light flavors of summer into the cozy embrace of autumn, making excellent use of all those delicious apples from your recent picking adventures!
What makes these crepes particularly special? They are infused with the delightful tang and smooth texture of Lifeway Organic Vanilla Whole Milk Kefir. This secret ingredient not only adds a subtle, creamy vanilla flavor but also contributes to the incredible tenderness and slight tang of the crepes, making them truly stand out. The kefir also adds beneficial probiotics, turning this indulgent dessert into a treat that feels a little bit better for you. Get ready to impress your family and friends with this beautiful, flavorful, and surprisingly easy-to-assemble no-bake cake that perfectly captures the essence of fall.
This post is sponsored by Lifeway. It contains affiliate links, meaning that I could earn from purchases made through them. It doesn’t add any extra cost to you, but it does help support this blog!
[feast_advanced_jump_to]
What You Need to Make This Caramel Apple Crepe Cake
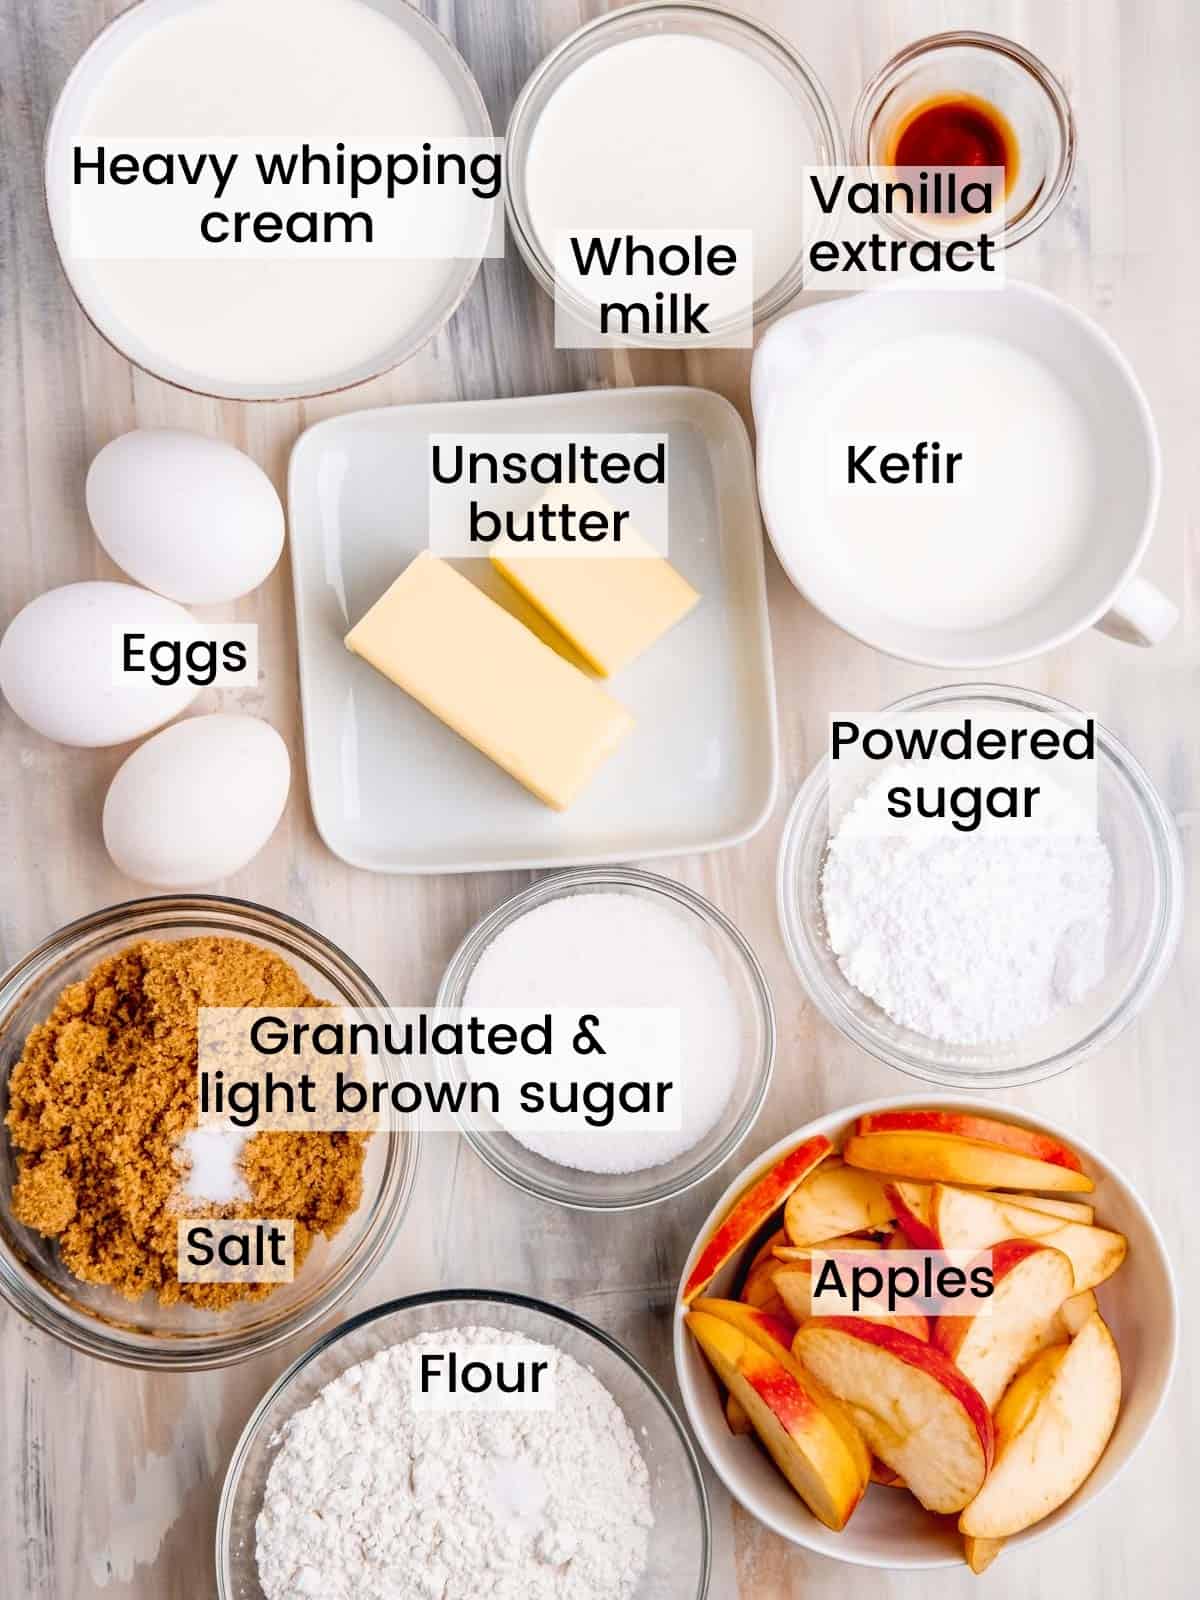
Crafting this Caramel Apple Crepe Cake is a delightful culinary journey, requiring a specific set of ingredients and a few key pieces of kitchen equipment to ensure a perfect outcome. Below, you’ll find everything you need to bring this layered masterpiece to life. Pay close attention to the quality of your ingredients, as they truly make a difference in the final taste and texture.
Ingredients:
The beauty of this recipe lies in its relatively simple yet impactful ingredients. Each component plays a crucial role in creating the harmonious flavors and textures of the crepe cake.
- Whole milk: Provides richness and essential liquid for the crepe batter, contributing to its smooth consistency.
- Lifeway Organic Vanilla Whole Milk Kefir: This is our star ingredient for the crepes! It imparts a wonderful vanilla flavor and a subtle tang, while also tenderizing the batter for exceptionally delicate crepes. Don’t skip this for the best flavor and texture!
- Unsalted butter: Used in both the crepe batter for richness and the caramel sauce for its creamy, luxurious texture. Using unsalted butter allows you to control the salt content precisely.
- Eggs: Essential binders for the crepes, giving them structure and helping them achieve that perfect, pliable texture.
- All-purpose flour: The foundation of our crepes, providing the necessary structure without making them too heavy.
- Granulated sugar: Adds sweetness to the crepes, balancing the slight tartness from the kefir and pairing beautifully with the caramel.
- Light brown sugar: The base for our homemade salted caramel sauce, offering a deeper, more complex sweetness than granulated sugar.
- Salt: Crucial for enhancing flavors in both the crepes and, especially, the salted caramel sauce, where it cuts through the sweetness and adds depth.
- Heavy whipping cream: The key to creating our fluffy, stable homemade whipped cream and also provides richness to the caramel sauce. Ensure it’s very cold for optimal whipping.
- Vanilla extract: A flavor enhancer for both the whipped cream and crepes, bringing warmth and aromatic notes.
- Powdered sugar: Sweetens and stabilizes the whipped cream, dissolving easily for a smooth finish.
- Apples: Fresh, crisp apples are the heart of this “caramel apple” cake. Varieties like Granny Smith offer a tart counterpoint to the sweet caramel, while Honeycrisp or Gala provide a sweeter crunch.
Equipment:
Having the right tools on hand will make the crepe-making and cake assembly process much smoother and more enjoyable.
- 8-inch nonstick skillet: Absolutely essential for cooking perfectly thin and even crepes without sticking. The size is ideal for managing and flipping.
- Small saucepan: Perfect for preparing the salted caramel sauce, allowing for even heating and stirring.
- Spatula: A thin, flexible spatula is invaluable for carefully lifting and flipping the delicate crepes.
- Mixing bowls: You’ll need several for preparing the whipped cream, caramel, and for any general ingredient prep.
- Measuring spoons: For accurate measurement of smaller ingredients like salt and vanilla extract.
- Scale or measuring cups: A kitchen scale is highly recommended for precision, especially with flour and sugars, ensuring consistent results. If you don’t have one, dry measuring cups will work.
- Hand mixer: While a stand mixer can also be used, a hand mixer is perfect for quickly and efficiently whipping the heavy cream to stiff peaks.
- Blender: For achieving a super smooth, lump-free crepe batter effortlessly.
Do you love kefir? Try these Blueberry Cream Pie Jars for another delicious treat!
Step by Step Instructions for Your Caramel Apple Crepe Cake
This Caramel Apple Crepe Cake recipe is truly the best of both worlds, offering a refreshing, no-bake dessert that’s ideal for the transition from warm summer days to crisp autumn evenings, all while embracing the rich flavors of fall. The process is broken down into manageable steps, ensuring a smooth and enjoyable baking experience. For a visual guide, I’ve shared a short video on TikTok demonstrating how I made this cake!
Step 1 (Picture 1 below) – Prepare the Silky Crepe Batter.
Creating the perfect crepe batter is the foundation of this cake. For a truly smooth, lump-free batter, a blender is your best friend. Start by adding the wet ingredients: eggs, Lifeway Organic Vanilla Whole Milk Kefir, whole milk, and melted (and cooled!) unsalted butter. Then, carefully add the dry ingredients: all-purpose flour, granulated sugar, and a pinch of salt. The order of ingredients can help prevent lumps. Pulse the blender blade just a couple of times, for about 15 seconds each, until the mixture is thoroughly combined and silky smooth. Avoid overmixing, which can develop the gluten too much and result in tough crepes. Once blended, transfer the batter (still in the blender or into a bowl with a lid) to the refrigerator for at least an hour. This crucial chilling period allows the flour to fully hydrate, resulting in incredibly tender, delicate crepes and helps prevent them from tearing during cooking. While it rests, you can get a head start on the other delicious components!
Step 2 – Craft Your Easy Salted Caramel Sauce.
No caramel apple dessert is complete without a rich caramel sauce, and this homemade version is not only super simple but virtually foolproof! In a small saucepan, combine the light brown sugar, softened unsalted butter, and a hint of salt. Place the saucepan over medium-low heat and stir constantly as the ingredients melt together. Continue stirring until the mixture comes to a gentle simmer. Once simmering, stop stirring and let it bubble for just 1-2 minutes. This brief period allows the flavors to deepen. After simmering, stir in the heavy whipping cream. Be careful as the mixture might bubble up vigorously at first. Bring it back to a gentle simmer and let it cook for another 2-3 minutes without stirring, allowing it to thicken slightly. Remove from the heat and let it cool, whisking every 5-10 minutes as it cools to prevent a skin from forming and to maintain a smooth consistency. Remember, the sauce will thicken considerably as it cools, so don’t let it simmer for too long initially.
Step 3 (Picture 2 below) – Whip the Light and Fluffy Cream.
Homemade whipped cream is an absolute game-changer for this cake – it’s incredibly easy to make and tastes infinitely better than anything from a can. For the best results, ensure your heavy whipping cream is very cold. You can even chill your mixing bowl and whisk attachment in the refrigerator or freezer for 10-15 minutes beforehand; this helps the cream whip up faster and hold its shape better. Pour the cold heavy whipping cream into your chilled bowl. Using a hand mixer (or a stand mixer with the whisk attachment), start whisking on low speed, gradually increasing to medium. Continue whisking until the cream starts to thicken and soft peaks form. At this point, add the powdered sugar and vanilla extract. Add the powdered sugar a little at a time to prevent a cloud of sugar from flying everywhere! Increase the speed to medium-high and continue whisking until the cream reaches stiff peaks. You’ll know it’s ready when you lift the whisk and a peak of cream holds its shape firmly both on the whisk and in the bowl. Refrigerate the whipped cream until you’re ready to assemble the cake to maintain its fluffy texture.
Step 4 (Picture 3 below) – Perfectly Cook the Delicate Crepes.
Cooking crepes requires a little practice, but once you get the hang of it, it’s very rewarding! The key is finding the perfect pan temperature to ensure they cook evenly and can be easily flipped without tearing. Heat an 8-inch nonstick skillet over medium-low heat. Lightly grease the pan with a tiny bit of butter – just enough to coat the surface – using a paper towel or pastry brush. My stove often works best between settings 2-3, but adjust yours as needed. Pour about ¼ cup of the chilled crepe batter into the hot pan. Immediately lift the pan by the handle and gently swirl the batter around until it forms a thin, even layer that completely covers the bottom of the skillet. Let the crepe cook for approximately 45-60 seconds, or until the edges begin to turn a light golden brown and lift slightly from the pan. Use a thin, flexible spatula to carefully loosen the edges, then slide it completely underneath the crepe and confidently flip it over. Cook the second side for another 45-60 seconds. Transfer the cooked crepe to a plate and repeat the process with the remaining batter, stacking the crepes as you go. Don’t worry if the first couple of crepes aren’t perfect – consider them practice runs!
Step 5 – Prepare Your Fresh Apple Slices.
This step is straightforward but important for the overall texture and presentation of your cake. Select about 2 medium-sized apples of your preferred variety. While Granny Smiths are a popular choice due to their delightful tartness, which beautifully contrasts with the sweet caramel, you could also opt for sweeter, crisper apples like Honeycrisp, Gala, or Fuji. Wash and core the apples, then slice them as thinly as possible. A mandoline slicer can achieve uniform, paper-thin slices, which are ideal for layering. If slicing by hand, take your time to ensure consistency. To prevent the apple slices from browning, you can toss them lightly with a small amount of lemon juice (about ½ teaspoon) or prepare them just before you begin assembling the cake. Thin slices ensure that each bite of crepe cake is tender and easy to enjoy without encountering large, crunchy apple chunks.
Step 6 (Picture 4 below) – Artfully Assemble Your Crepe Cake.
Now for the most satisfying part – assembling your beautiful Caramel Apple Crepe Cake! Choose a flat serving plate or a cake stand for your presentation. Place your first crepe flat on the chosen surface. Using an offset spatula or the back of a spoon, spread a thin, even layer of your homemade whipped cream over the entire surface of the crepe, almost to the edges. Next, arrange a layer of your thinly sliced apples over the whipped cream. Drizzle a generous amount of your luscious salted caramel sauce over the apples. Place another crepe directly on top, gently pressing down to create a stable layer, and repeat the process: whipped cream, apple slices, and caramel drizzle. Continue this layering until you have used up all your crepes. The number of layers will depend on how many crepes you made. For the top layer, you can create a beautiful swirl of whipped cream, artfully arrange a few apple slices, and finish with a final decadent drizzle of caramel sauce. This layered masterpiece is not only a feast for the eyes but also a delightful treat for the palate!



Tips for a Perfectly Layered Caramel Apple Crepe Cake
Achieving a show-stopping and delicious Caramel Apple Crepe Cake is easier with a few expert tips. These insights will help you navigate the process, ensure the best textures, and prevent common pitfalls, guaranteeing a truly impressive dessert.
Don’t skip chilling the crepe batter!
This isn’t just a suggestion; it’s a crucial step for truly tender crepes. Allowing the batter to rest in the refrigerator for at least 45-60 minutes (or even overnight) gives the flour ample time to fully absorb the liquid ingredients. This hydration process results in a more relaxed gluten structure, making your crepes incredibly tender, pliable, and less prone to tearing when you cook and flip them. A well-rested batter also yields a smoother, more even consistency. Before cooking, give the blender jar or bowl a gentle, inverted shake to re-incorporate any settled ingredients without overmixing.
Carefully monitor your caramel simmering time.
The consistency of your homemade salted caramel sauce is directly affected by how long it simmers. The longer it cooks, the thicker it will become once it cools. For a pourable, yet rich sauce that drizzles beautifully over the apples, I highly recommend not letting it simmer for more than 2-3 minutes after adding the cream. If, after cooling, your caramel sauce turns out too thick to drizzle, don’t despair! A quick zap in the microwave for 10-15 seconds, followed by a stir, can loosen it right up to the perfect consistency. Conversely, if it’s too thin, you can return it to low heat and simmer gently for a minute or two longer, stirring occasionally, to evaporate some moisture.
Always use very cold heavy whipping cream!
This is perhaps the most important secret to achieving perfectly voluminous and stable whipped cream. Cold cream whips faster and holds its stiff peaks much better than warmer cream. For an extra boost, consider placing your mixing bowl and whisk attachments in the refrigerator or even the freezer for about 10-15 minutes before you start whipping. This pre-chilling creates an optimal environment for the fat molecules in the cream to emulsify and incorporate air efficiently, resulting in a light, airy, and firm whipped cream that won’t deflate easily, ensuring your crepe cake layers stay beautifully fluffy.
Slice the apples just before assembling the cake!
As we all know, once cut, apples are prone to oxidation, which causes them to turn an unappetizing brown. To keep your apple slices looking fresh, vibrant, and appealing within your crepe cake, plan to slice them at the very last minute, right before you start layering. If you need to slice them a little ahead of time, a quick trick is to toss them in a small amount of lemon juice (about ½ teaspoon for 2 apples). The acid in the lemon juice acts as an antioxidant, significantly slowing down the browning process. You can also lightly brush them with fruit protector powder (like citric acid) mixed with a little water for longer-lasting freshness, although simple lemon juice is usually sufficient for this recipe.
FAQ & Storage for Your Caramel Apple Crepe Cake
Here are some frequently asked questions and important storage tips to help you enjoy your Caramel Apple Crepe Cake to the fullest!
Lifeway Organic Vanilla Whole Milk Kefir is a popular and widely available product. You can typically find it in the dairy or refrigerated beverage section of most major grocery stores. To easily locate a store near you that carries Lifeway products, I recommend using their convenient store locator tool on their website!
No, as written, this recipe uses all-purpose flour, which contains gluten. However, if you are looking for a gluten-free option, you might be able to substitute with a good quality gluten-free all-purpose flour blend (one that is specifically designed for baking and typically contains xanthan gum). I haven’t personally tested it with gluten-free flour, so I cannot guarantee the exact results, but I would love to hear how it turns out if you give it a try!
Absolutely! While homemade caramel and whipped cream elevate the flavor significantly, this recipe is designed to be adaptable. If you’re short on time or prefer the convenience, feel free to use your favorite store-bought caramel sauce and canned or tub whipped topping. Just ensure your caramel sauce is a good quality one that will complement the fresh apples. Using pre-made components will definitely speed up the assembly process without compromising too much on taste.
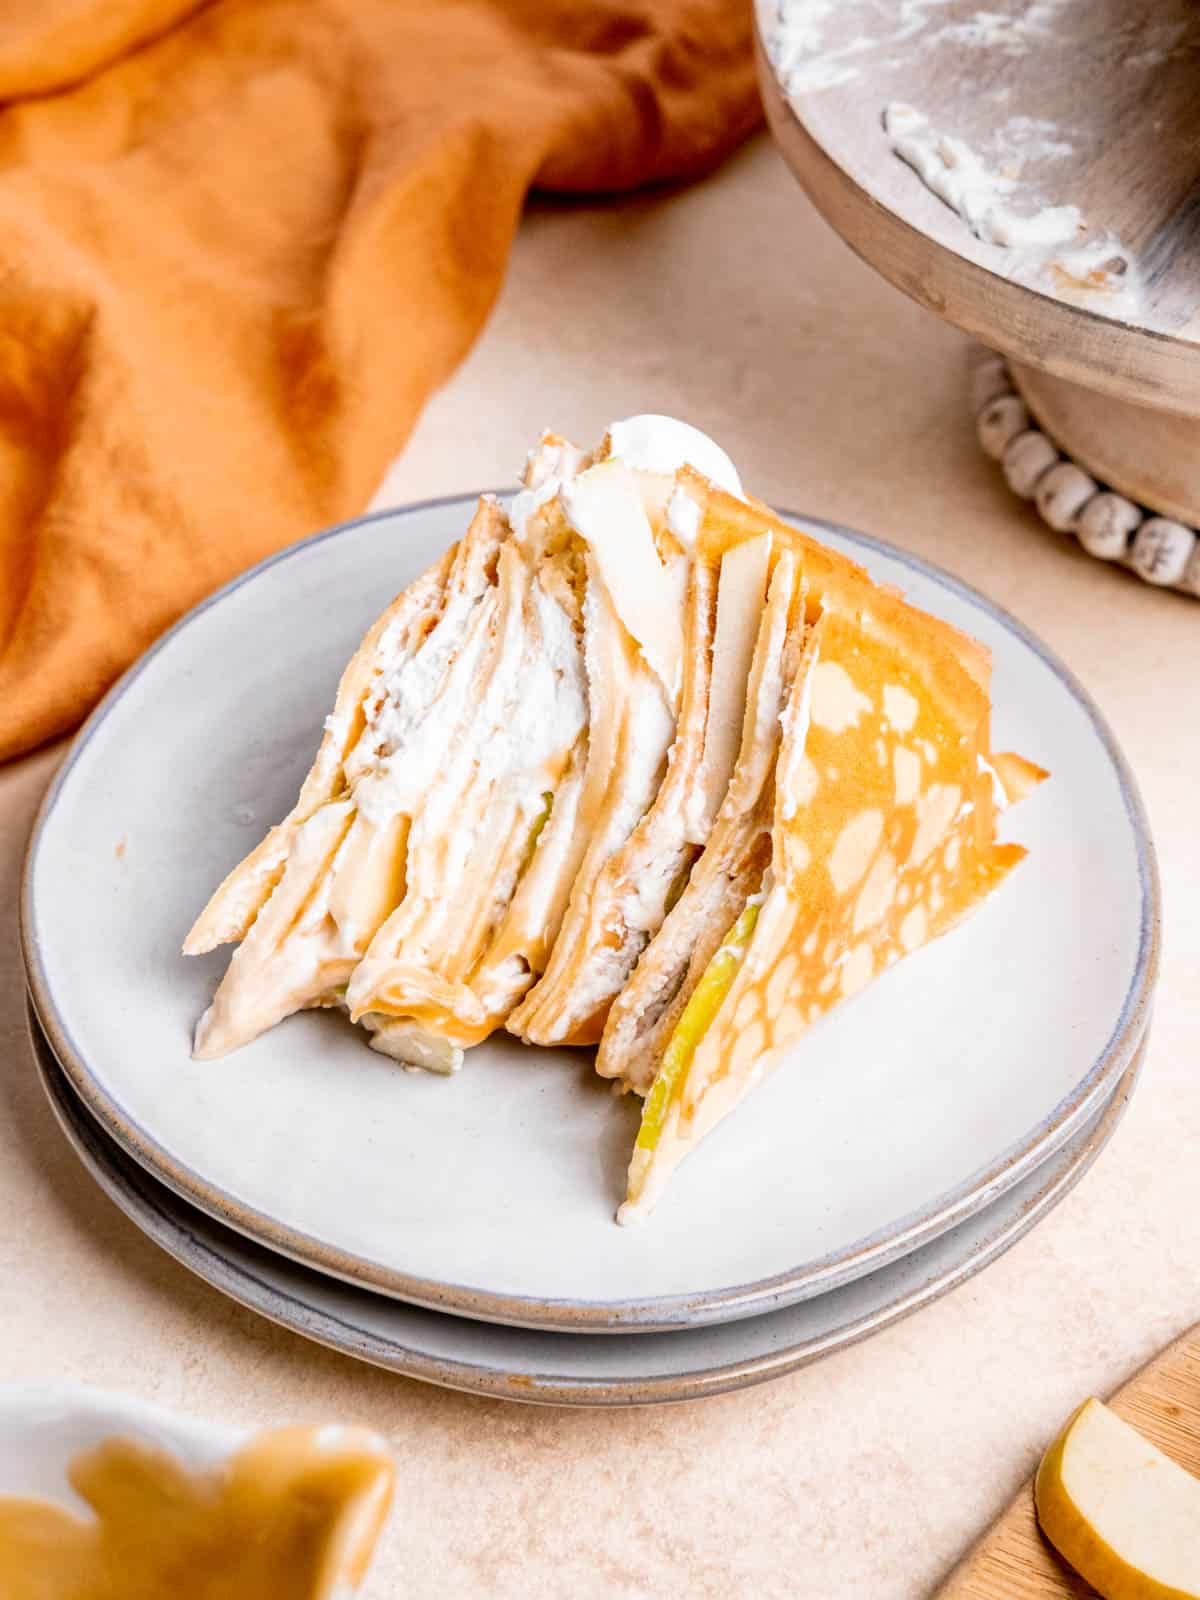
To keep your crepe cake fresh and delicious, any leftovers should be stored in an airtight container in the refrigerator. The cake is best enjoyed within 2 to 3 days. Beyond that, the crepes might start to dry out slightly, and the apples could soften more than desired. For the best flavor and texture, I recommend bringing a slice to room temperature for about 10-15 minutes before serving, as this allows the flavors to truly shine and the cream to soften just enough.

Did you try this recipe?
Tag @brokenovenbaking & @lifewaykefir on Instagram and leave a star review below! We’d love to see your beautiful creations!
📖 Recipe

Caramel Apple Crepe Cake
Kayla Burton
Pin Recipe
Equipment
-
8 inch nonstick skillet
-
Small saucepan
-
Spatula
-
Measuring spoons
-
Scale or measuring cups
-
Hand mixer
-
Mixing bowls
-
Blender
Ingredients
- 2 medium apples sliced thin (Granny Smith, Honeycrisp, or Gala recommended)
Crepes
- 3 large eggs
- ½ cup (118.29 ml) Lifeway Organic Vanilla Whole Milk Kefir
- ½ cup (118.29 ml) whole milk
- 5 tablespoons (70 g) unsalted butter melted & cooled
- ¾ cup (93.75 g) all-purpose flour
- ¼ cup (50 g) granulated sugar
- ⅛ teaspoon salt
Whipped Cream
- 1½ cups (354.88 ml) heavy whipping cream very cold
- ⅓ cup (40 g) powdered sugar
- ½ teaspoon vanilla extract
Caramel Sauce
- ½ cup (100 g) light brown sugar packed
- 3 tablespoons (42 g) unsalted butter softened
- ¼ cup (59.15 ml) heavy whipping cream
- ¼ teaspoon salt
Instructions
Crepes
-
Add the eggs, kefir, milk, melted butter, flour, sugar and salt to a blender and pulse twice for 15 seconds each until completely smooth. Do not overmix.
-
Place the covered blender (or batter in a separate lidded container) in the refrigerator to chill for at least 45-60 minutes. This step is crucial for tender crepes.
While the crepe batter chills, proceed to slice your apples and prepare both the homemade whipped cream and the salted caramel sauce.
-
After chilling, lightly grease an 8-inch nonstick skillet with a small amount of butter and heat it over medium-low heat. Once hot, pour approximately ¼ cup of batter into the pan. Quickly tilt and swirl the pan to ensure the batter spreads into a thin, even layer covering the entire bottom. Cook for 45-60 seconds, or until the edges are golden and lift easily. Flip the crepe with a thin spatula and cook the other side for another 45-60 seconds. Carefully transfer the cooked crepe to a plate and continue with the remaining batter, stacking the finished crepes.
Caramel Sauce
-
In a small to medium saucepan, combine the light brown sugar, softened butter, and salt. Stir these ingredients constantly over medium-low heat until the mixture melts and begins to simmer. Once simmering, stop stirring and allow it to bubble gently for 1-2 minutes to develop flavor.
-
While continuously stirring, slowly add the heavy cream to the simmering mixture. Be cautious as it may bubble up. Bring the sauce back to a gentle simmer and let it cook without stirring for an additional 2-3 minutes, allowing it to thicken slightly. Remove the saucepan from the heat and allow the caramel to cool. Whisk the sauce every 5-10 minutes as it cools to prevent a skin from forming and ensure a smooth, drizzly consistency.
Whipped Cream
-
Pour the very cold heavy whipping cream into a large, chilled mixing bowl. Using a hand mixer, begin whisking on low speed and gradually increase to medium until the cream starts to thicken. Add the vanilla extract and powdered sugar (add gradually to avoid a mess!) and continue mixing from medium to high speed until stiff peaks form. This means the cream will hold its shape when the whisk is lifted.
Refrigerate the whipped cream immediately until you are ready to assemble your cake to maintain its fluffy texture.
Assemble the Crepe Cake
-
Place one cooked crepe on your chosen serving plate or cake stand. Spread an even layer of whipped cream over the crepe. Arrange a single layer of thinly sliced apples on top of the whipped cream, then generously drizzle with the salted caramel sauce. Carefully place another crepe on top and gently press down. Repeat this layering process – crepe, whipped cream, apples, caramel – until all your crepes are used. For the final layer, you can decorate with extra whipped cream, a fanned arrangement of apple slices, and a final flourish of caramel drizzle. Serve immediately or chill for flavors to meld!
Save This Recipe! 💌
We’ll email this post to you, so you can come back to it later!
Notes
The provided nutrition information is an estimate for the entire cake, and the calorie accuracy is not guaranteed. It serves as a general guide.
The provided nutritional information is an estimate per serving. Accuracy is not guaranteed.
More Fruity Treats for You to Enjoy
If you’re a fan of fresh, fruity desserts and treats, you’ll love these other recipes from our collection. Perfect for any season, these recipes bring vibrant flavors and delightful textures to your table.
- Apple Pie Ice Cream (Ninja Creami Recipe)
- Strawberry Matcha Ice Cream (Ninja Creami Recipe)
- Soft Lemon Sugar Cookies (That Actually Taste Like Lemon!)
- 5-Ingredient Blueberry Lemon Cheesecake Ice Cream (Ninja Creami Recipe)
- 5-Minute Banana Bread Mug Cake (No Eggs!)
- Honey Orange Shortbread Cut-Out Cookies (No-Chill)
- Easy Cranberry Coffee Cake Recipe
- Banana Berry Protein Smoothie Recipe
