Decadent Chocolate Chip Peanut Butter Muffins: A Reese’s-Inspired Breakfast Treat
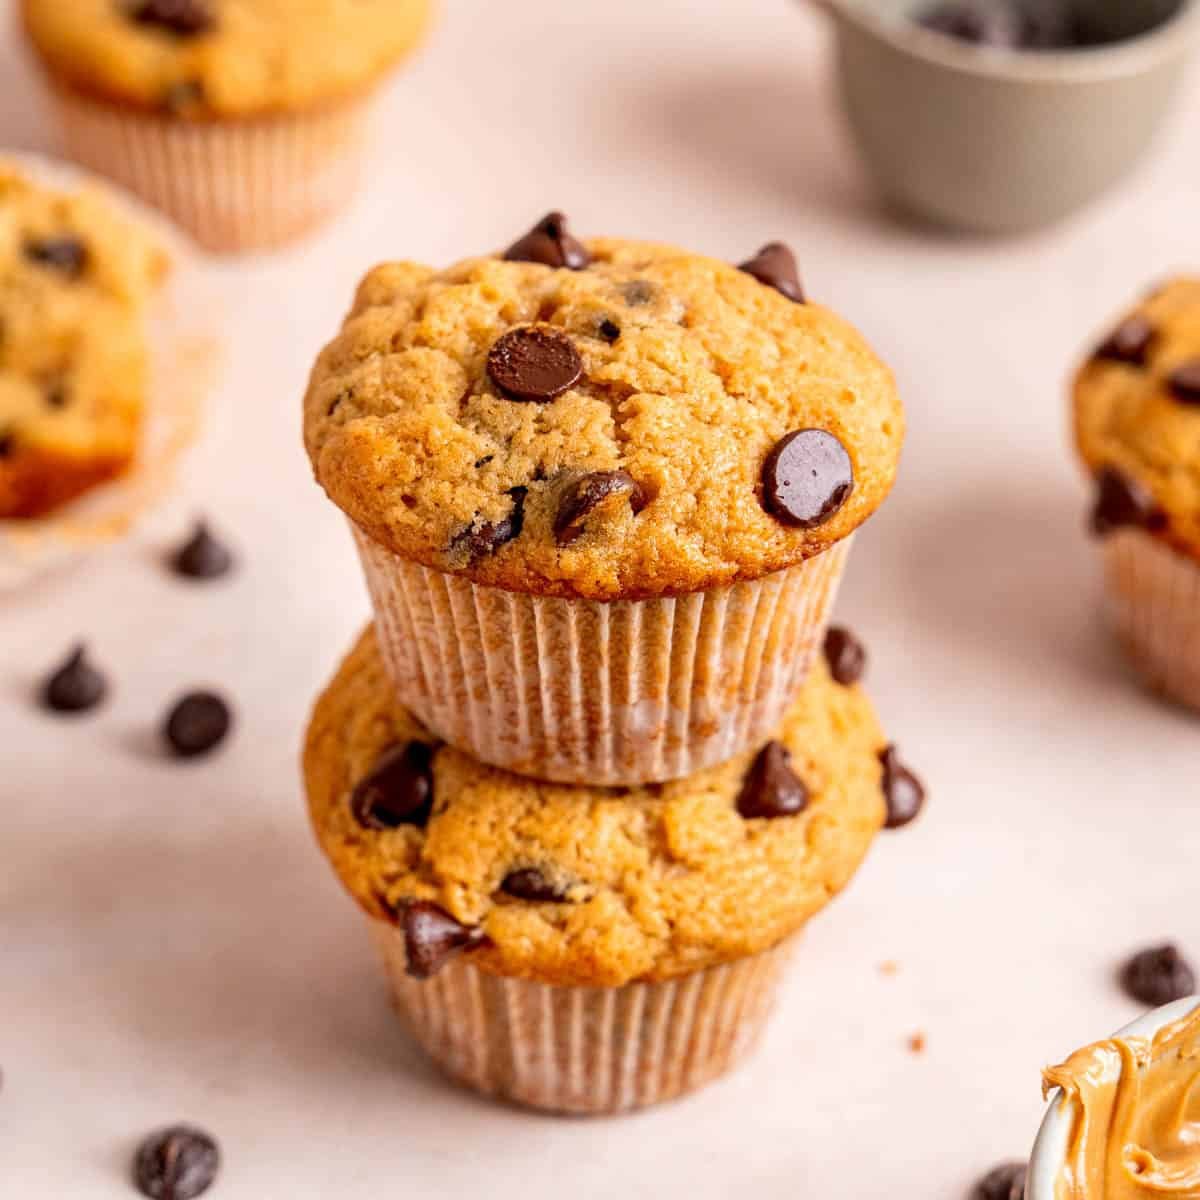
Imagine sinking your teeth into a warm, incredibly fluffy muffin that perfectly captures the irresistible flavor of a Reese’s Peanut Butter Cup. That dream can become a delicious reality in less than an hour! These Chocolate Chip Peanut Butter Muffins are not just a treat; they’re an experience, ready to elevate your mornings or satisfy your afternoon cravings. Prepare to fall in love with this harmonious blend of creamy peanut butter and rich chocolate, baked into a tender, moist, and utterly delightful muffin. 😋

While I’ve never been a huge fan of peanut butter on its own, its magical pairing with chocolate has always been a top favorite! Reese’s peanut butter cups were my go-to candy as a kid, and now, I’ve channeled that beloved flavor combination into a magnificent muffin. This recipe is more than just a sweet treat; it’s a nostalgic nod to classic flavors, reimagined into a perfect baked good that’s ideal for breakfast, brunch, or a satisfying snack.
What truly elevates these muffins and sets them apart is a surprising secret ingredient: kefir! I’ve proudly partnered with my friends at Lifeway to bring you this incredibly delicious breakfast dessert. Their tangy, fermented milk drink works wonders, infusing the muffins with an unparalleled moisture and creating an incredibly tender, delicate crumb. This is the very same secret weapon that makes my triple chocolate muffins and chocolate chip mini muffins so exceptionally special and moist!
Why You’ll Love These Peanut Butter Chocolate Chip Muffins
- Quick & Easy Perfection: You can have this tasty muffin recipe mixed and ready for the oven in about 15 minutes, with total baking time around 30 minutes! This makes them absolutely perfect for those busy weekday mornings when you crave something homemade but are short on time, or as a delightful, effortless weekend treat.
- Endless Customization Options: These muffins are a fantastic canvas for your creativity. They’re incredibly easy to customize with your favorite mix-ins or toppings. Whether you prefer extra nuts, different types of chocolate, or even a swirl of jam, this recipe adapts beautifully to your culinary whims.
- A Beloved Flavor Combination: If you’re a fan of the classic peanut butter and chocolate pairing, you’ll adore these muffins. They capture that iconic flavor profile in a soft, cake-like texture, reminiscent of a richer, more sophisticated version of my yummy cinnamon chocolate chip muffins, but with a peanut butter twist!
Essential Recipe Ingredients for Perfect Muffins
Crafting these delectable peanut butter chocolate chip muffins requires just a few simple, everyday ingredients. Let’s take a closer look at the key components that come together to create this amazing treat!

Ingredient Notes:
- All-purpose flour: This forms the essential structure of our muffins. For the most accurate and consistent results in baking, especially with flour, we highly recommend using a kitchen scale to weigh your ingredients in grams. If you’re measuring by volume using cups, remember to spoon the flour gently into the cup and level it off with a straight edge to avoid over-packing, which can lead to dense muffins.
- Baking powder and baking soda: These powerful leavening agents are crucial for giving our muffins their signature rise and wonderfully fluffy texture. Baking soda specifically reacts with acidic ingredients like kefir, creating carbon dioxide bubbles that expand during baking, resulting in a lighter, airier crumb.
- Lifeway Organic Plain Whole Milk Kefir: This is our secret ingredient! Kefir adds exceptional moisture and a subtle, delightful tang that beautifully complements the rich peanut butter. Its natural acidity is key for activating the baking soda, ensuring those perfect, lofty muffin tops. Using it at room temperature will also help it blend more smoothly into the batter.
- Large, room-temperature eggs: Eggs are vital for binding the ingredients together, providing structure, and contributing to the overall richness and moisture of the muffins. Using them at room temperature is important as they emulsify better with other ingredients, creating a smoother, more uniform batter.
- Creamy peanut butter: The star flavor of this recipe! For the best and most consistent results, we highly recommend using a commercial brand like Skippy or Jif. These brands have a stable, uniform consistency that prevents oil separation, which can sometimes occur with natural peanut butter and affect the final texture of your muffins.
- Chocolate chips: The perfect companion to the creamy peanut butter! These delightful morsels are scattered throughout the muffins, adding pockets of melted chocolate goodness in every bite. Feel free to use your favorite kind – milk chocolate chips for a sweeter, classic “Reese’s” taste, or dark chocolate chips for a richer, more intense chocolate flavor. You can also mix both!
See the comprehensive recipe card below for a full list of ingredients and precise measurements.
Substitutions & Creative Variations
While these Chocolate Chip Peanut Butter Muffins are fantastic as written, don’t hesitate to experiment! Here are some fun ways to customize your batch:
- Amp up the Texture: For an added crunch and nutty flavor, simply use crunchy peanut butter instead of creamy. Alternatively, fold ½ cup of roasted peanuts (chopped if large) into the batter along with the chocolate chips for a delightful textural contrast.
- Go All Out Reese’s: Take the Reese’s inspiration to the next level by chopping up peanut butter cups (mini or regular sized) and mixing them into the batter. You can use them instead of, or in addition to, the chocolate chips for an extra decadent experience.
- Muffin Size Matters: This recipe is versatile enough to be baked into different sizes. Follow the notes in the recipe card below for specific instructions on how to bake delicious mini or jumbo muffins. Adjusting the size is a great way to control portion sizes or cater to different occasions.
- Spice It Up: A pinch of cinnamon or a tiny dash of nutmeg could add a subtle warmth that complements the peanut butter beautifully.
- Nut-Free Option: If allergies are a concern, consider replacing peanut butter with a seed butter like sunflower seed butter and using carob chips or allergy-friendly chocolate chips. *Note: This has not been tested and results may vary.*
This recipe has been thoroughly tested and perfected with the original ingredients. If you choose to replace or add any ingredients not listed, please let us know how it turned out in the comments below! Your feedback helps other bakers!
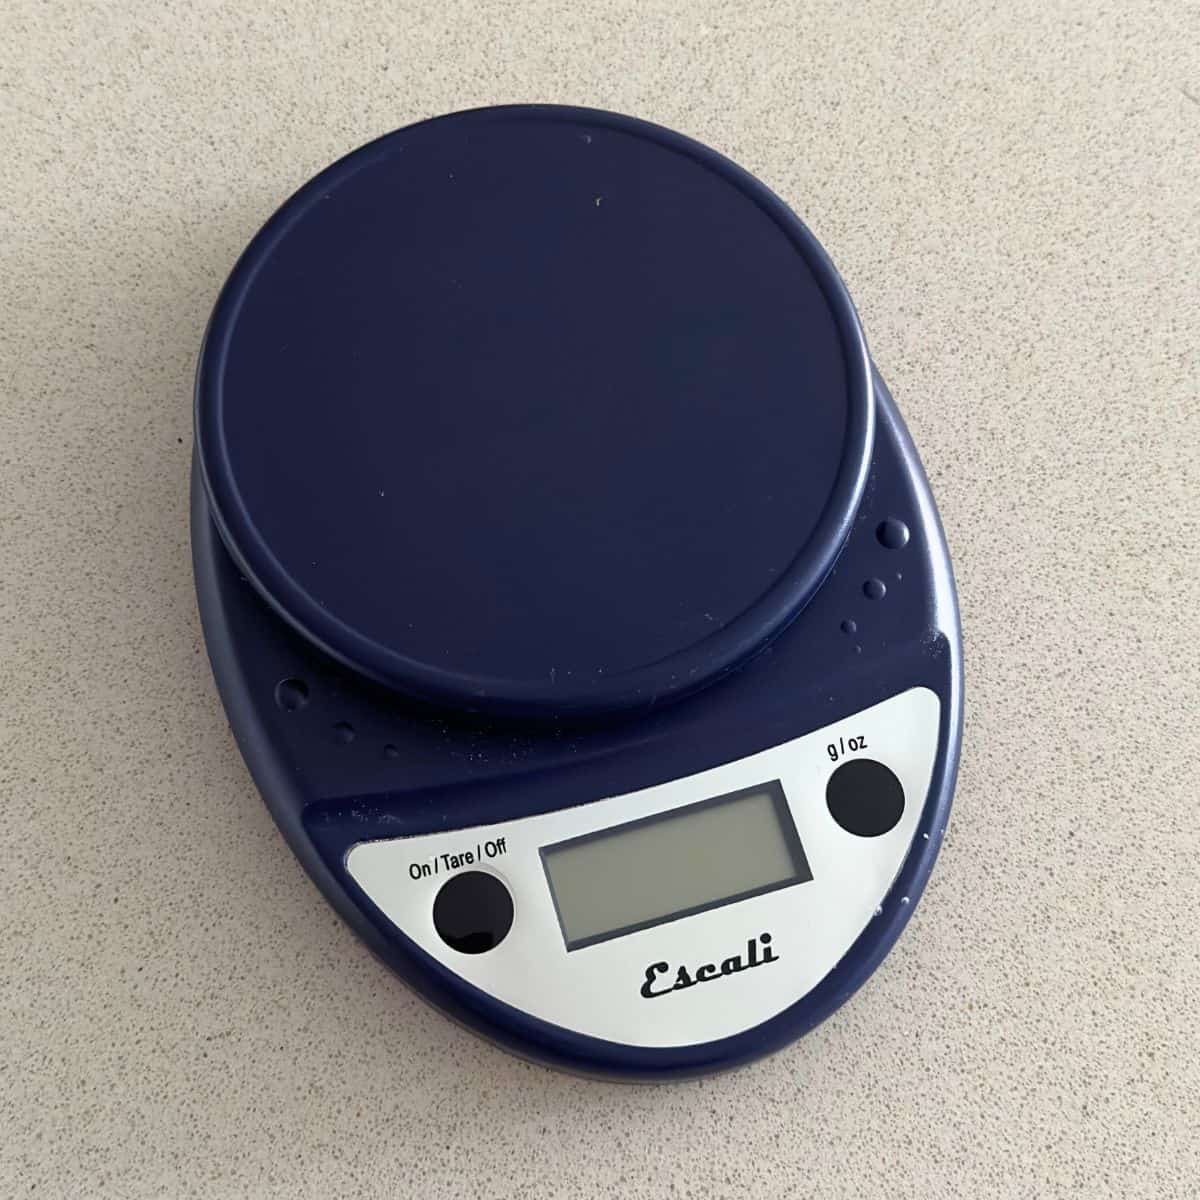
Most Valuable Tool
The Essential Food Scale
For the most accurate measurements in baking, especially with dry ingredients like flour, a food scale is an absolute game-changer. It eliminates the guesswork of cup measurements and ensures consistent results every time. Plus, it often means less mess and easier cleanup!
How to Make Delicious Chocolate Peanut Butter Muffins
Making these delightful muffins is straightforward, even for beginner bakers. Just follow these simple steps for a perfect batch every time!
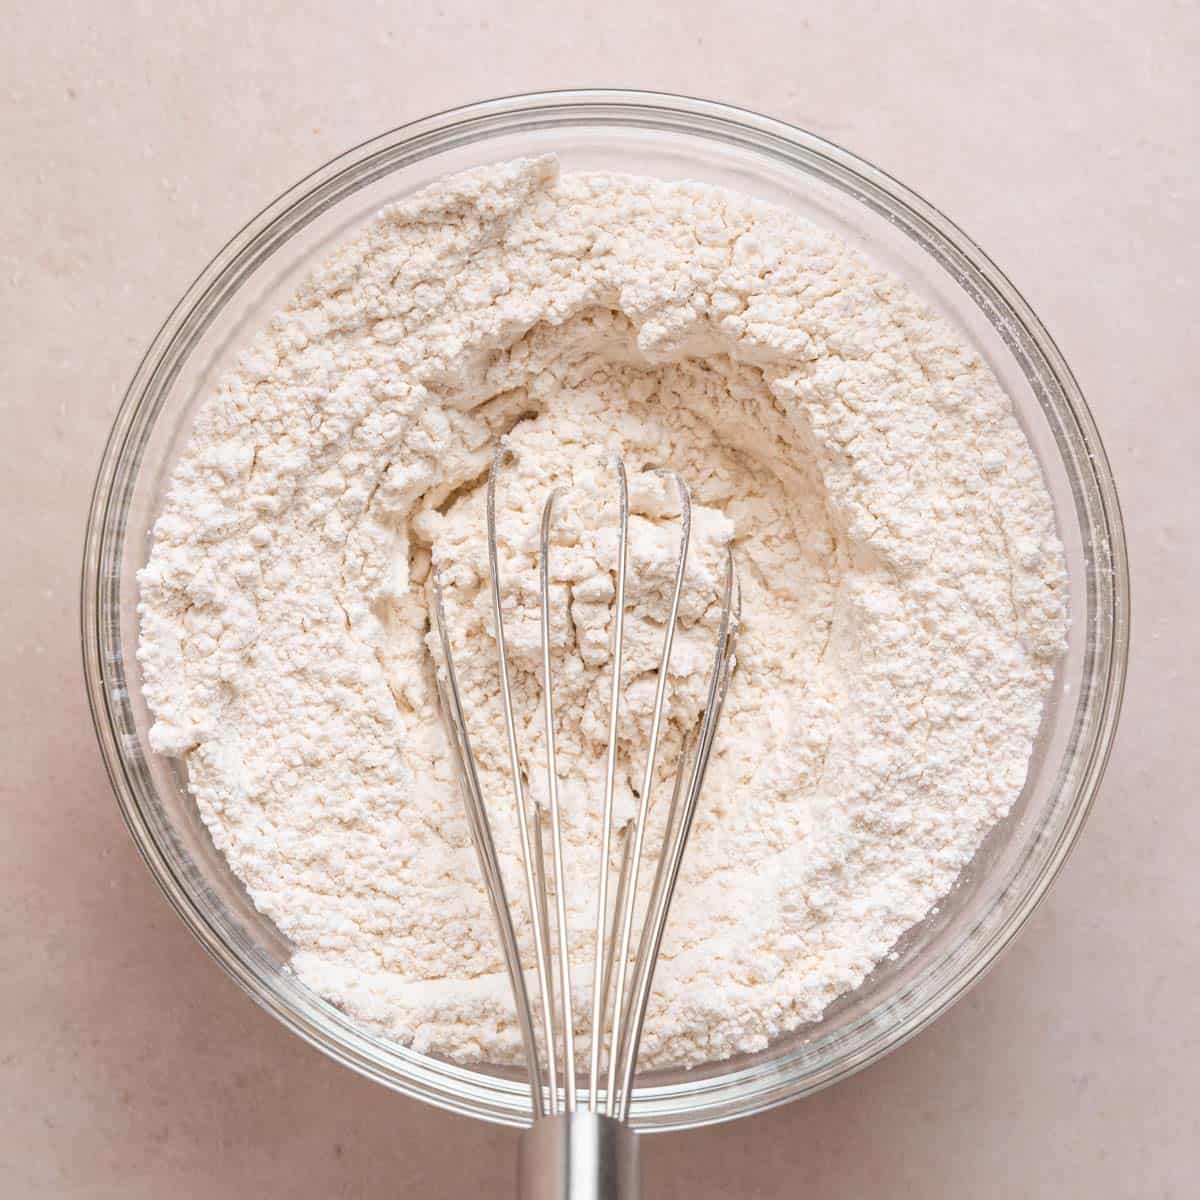
1. Prepare Dry Ingredients
In a medium-sized mixing bowl, combine the all-purpose flour, baking powder, baking soda, and salt. Whisk these ingredients together thoroughly until they are well combined and no lumps remain. This ensures even distribution of the leavening agents for a consistent rise.
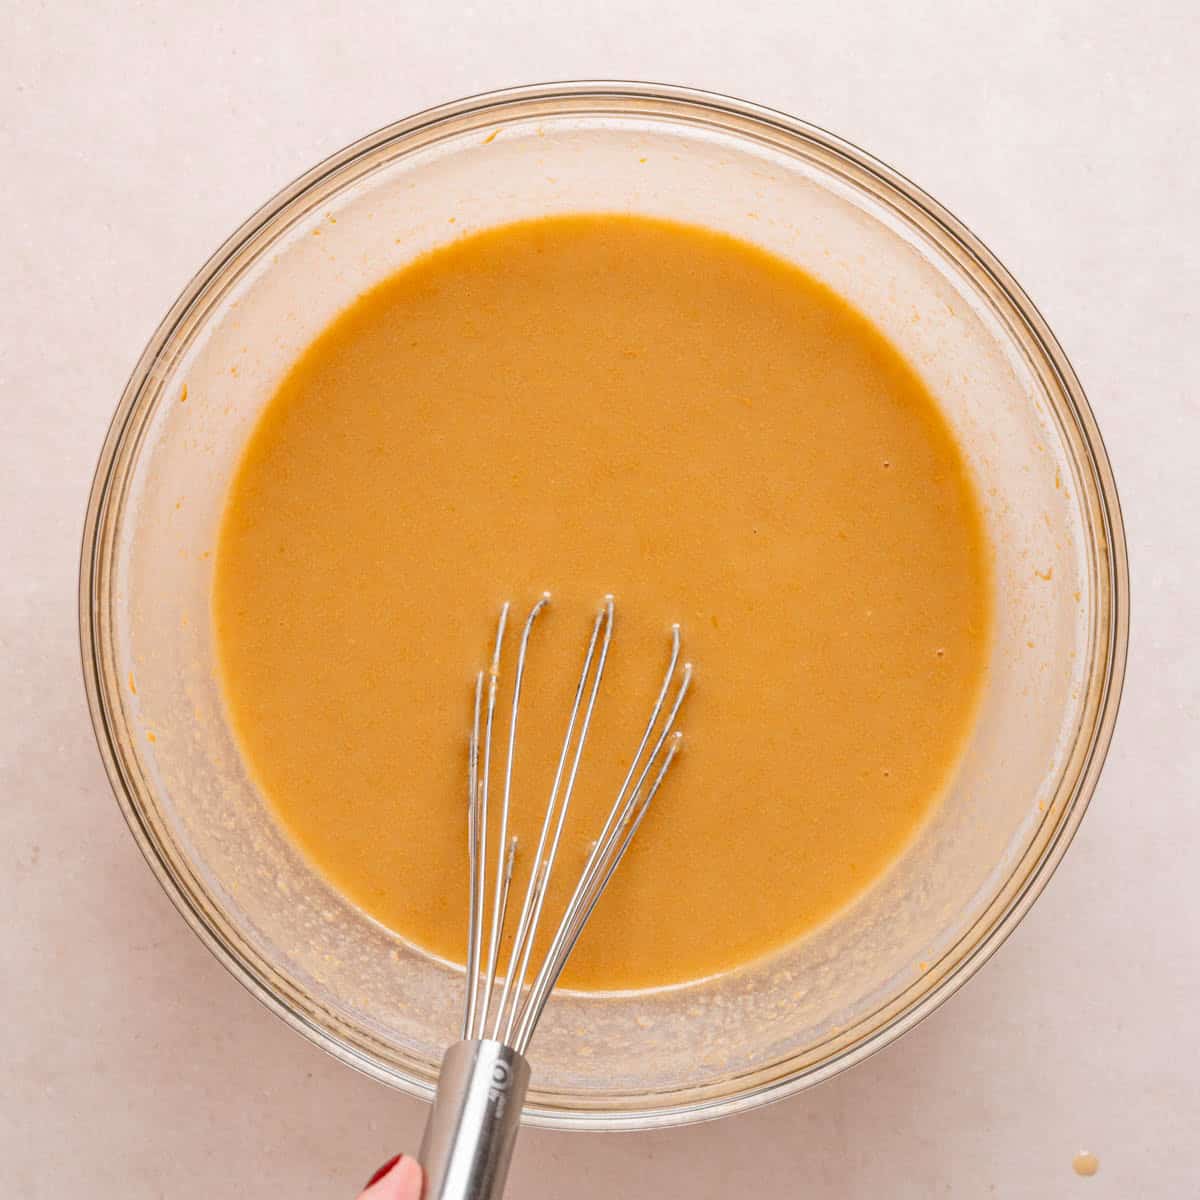
2. Mix Wet Ingredients
In a separate, larger bowl, whisk together the room temperature eggs, kefir, vegetable oil, vanilla extract, creamy peanut butter, granulated sugar, and light brown sugar. Continue mixing until all these wet ingredients are fully incorporated and the mixture is smooth and creamy. Ensure the sugars have dissolved well.
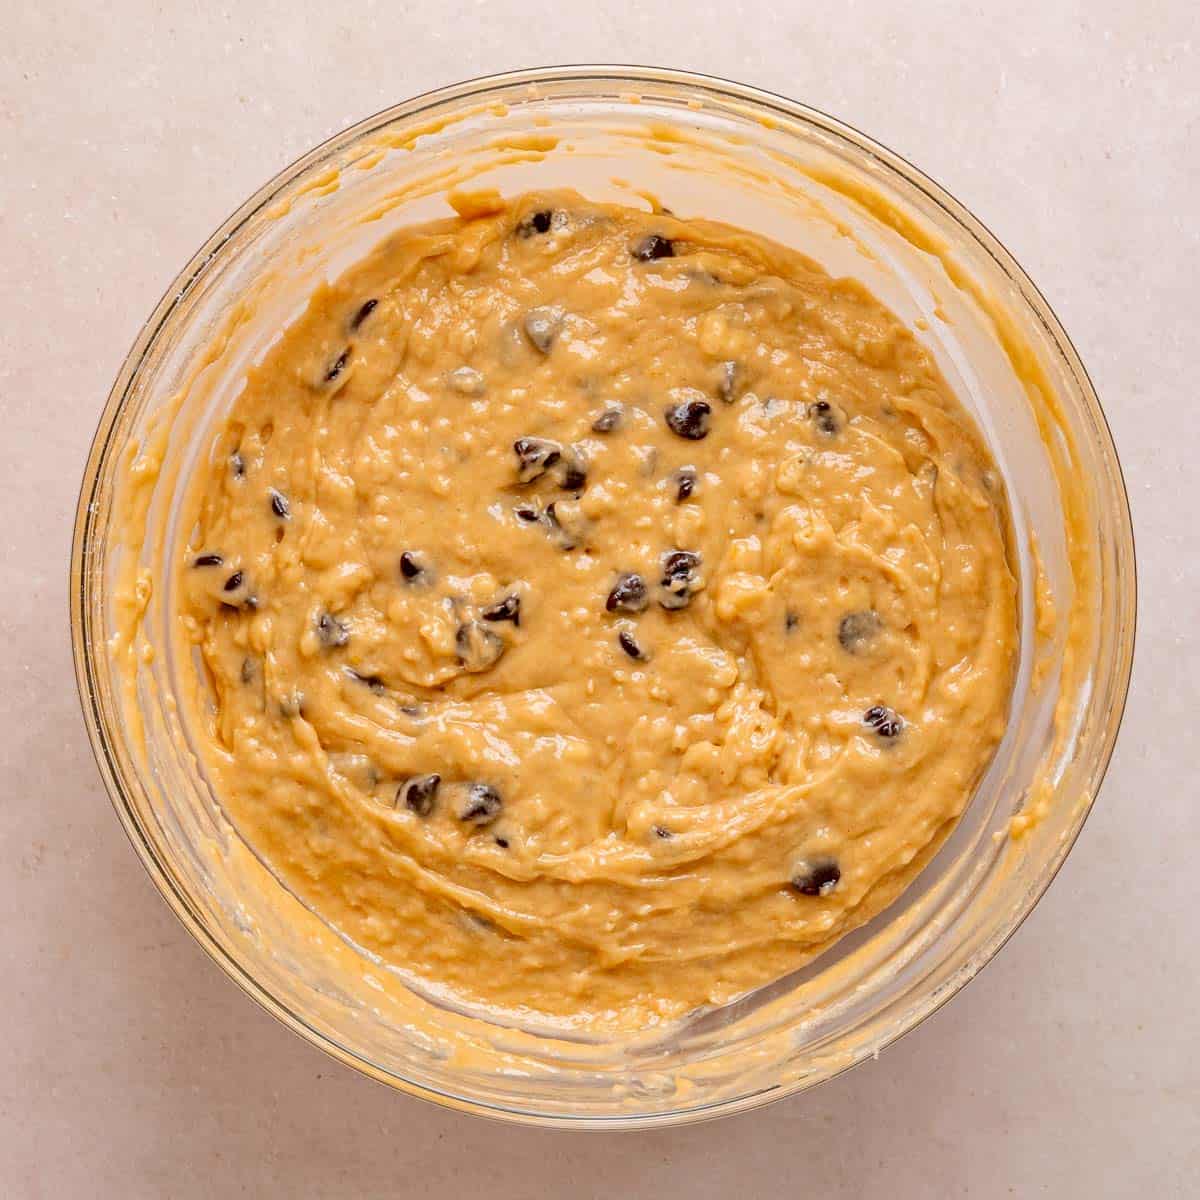
3. Combine & Add Chocolate Chips
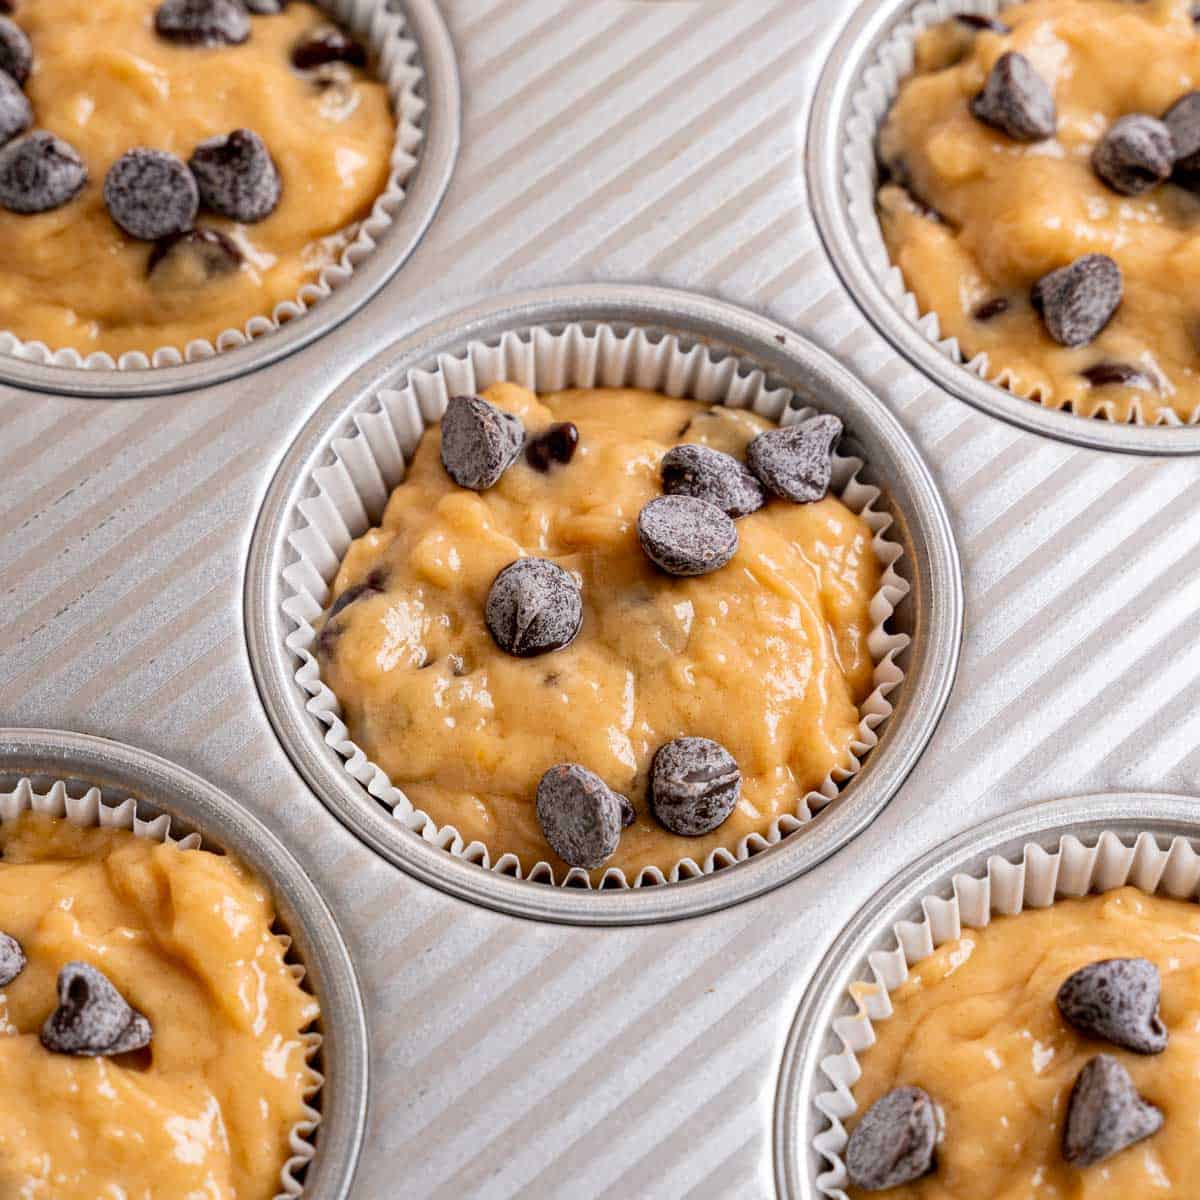
Pour the dry ingredients into the wet ingredients. Using a spatula, gently fold them together until *just* combined. It’s okay if a few streaks of flour remain – overmixing can lead to tough muffins. Finally, gently fold in the chocolate chips. You can reserve some to sprinkle on top of the muffins before baking for a more appealing finish.
4. Bake to Perfection!
Divide the batter evenly among the prepared muffin cups, filling them almost to the top for those bakery-style domed tops. Place the muffin pan in your preheated oven at 425°F for 5 minutes. This initial high heat gives the muffins a quick burst of steam, promoting a beautiful rise. Then, reduce the temperature to 350°F and continue baking for another 15-20 minutes, or until a toothpick inserted into the center of a muffin comes out clean. Allow to cool slightly before enjoying!
Expert Baking Tips for Fluffy Muffins
Achieving bakery-quality muffins at home is easier than you think with these professional insights:
- The Golden Rule: Don’t Overmix! This is perhaps the most critical tip for any muffin recipe. Stir the batter just until the dry ingredients are barely incorporated and a few streaks of flour still remain. A few lumps are perfectly fine, even desirable! Overmixing develops the gluten in the flour too much, leading to tough, chewy, and dense muffins rather than the light, fluffy texture you’re aiming for.
- Room Temperature is Key: Ensure all your cold ingredients, especially eggs and kefir, are at room temperature before you start mixing. Room temperature ingredients emulsify much better, creating a smoother, more uniform batter. This also helps the batter cook more evenly, contributing to a superior texture and rise. Plan ahead by taking them out of the refrigerator about 30 minutes to an hour before you begin baking.
- Master the High-Low Baking Method: The secret to those perfectly domed, bakery-style muffin tops lies in this technique. Starting your muffins at a higher temperature (425°F) for the first few minutes creates a burst of steam that lifts the muffin tops quickly. Then, lowering the temperature (to 350°F) allows the muffins to cook through gently without over-browning, ensuring a soft interior and a beautiful crown.
- Check Your Leavening Agents: Baking powder and baking soda are responsible for your muffins’ rise. If they’re expired or inactive, your muffins won’t get that desired fluffiness. You can quickly test their activity: for baking powder, mix a tiny bit with warm water – it should fizz vigorously. For baking soda, combine a small amount with a splash of vinegar or lemon juice – it should also bubble immediately. If there’s no reaction, it’s time to replace them!
Common Questions & Troubleshooting
Got questions about baking these delicious muffins? We’ve got answers!
While regular milk can technically be used, kefir is a game-changer for these muffins! It adds a unique tangy flavor that beautifully complements the peanut butter and, more importantly, provides an incredible moist and fluffy texture thanks to its acidity reacting with the baking soda. If you absolutely can’t find kefir, I highly recommend using buttermilk as the closest substitute. Its similar acidity will give you the best chance at replicating the desired texture.
I haven’t personally tested a gluten-free version of this specific recipe, but I imagine a high-quality 1:1 gluten-free flour blend would work well! Many such blends are formulated to behave similarly to all-purpose flour. Just ensure your blend contains xanthan gum or add a small amount (about ½ teaspoon per cup of flour) if it doesn’t. Baking times might vary slightly. Please comment below if you give it a try – we’d love to hear about your results!
Yes, you can use natural peanut butter, but be aware that the texture and sweetness of your muffins may vary. Natural peanut butter tends to separate more readily (oil on top) and can have a grittier texture than commercial creamy peanut butter. If your natural peanut butter is unsweetened or has a lot of separated oil, you might need to adjust the amount of sugar or vegetable oil slightly to achieve the desired consistency and flavor balance. For consistent results, especially with the fluffy texture, a commercial creamy brand is generally recommended.
Lifeway kefir is widely available! You can typically find it in the refrigerated dairy aisles of most major grocery stores. Look for it near the yogurts and other fermented milk products. If you’re having trouble locating it, you can also check out lifewaykefir.com to use their store locator tool and find a retailer near you.
A common baking dilemma! To keep your chocolate chips evenly distributed, try tossing them with a tablespoon of flour from the measured dry ingredients before folding them into the batter. This light coating helps them “grip” the batter and prevents them from sinking during baking.
While muffins are generally best baked fresh, you can prepare the dry ingredients and wet ingredients separately the night before. Store them in airtight containers at room temperature (dry) and in the refrigerator (wet). Combine them just before baking. Alternatively, you can mix the full batter and store it in an airtight container in the fridge for up to 12-24 hours. The leavening agents might lose a *tiny* bit of potency, but the muffins will still be delicious.

Storage & Reheating Instructions
Ensure your delicious muffins stay fresh and enjoyable for as long as possible with these simple storage tips:
Room Temperature Storage
These chocolate chip peanut butter muffins are truly best enjoyed on the day they are baked or the day after. However, you can store any leftover cooled muffins in an airtight container at room temperature for up to 4 days. To maintain their freshness and prevent them from drying out, consider placing a paper towel at the bottom of the container to absorb excess moisture.
Freezing Instructions
If you’ve made a large batch or simply want to save some for later, these muffins freeze beautifully. Once completely cooled, store them in a freezer-safe airtight container or heavy-duty freezer bag for up to 1 month. This is a great way to always have a quick breakfast or snack on hand!
Reheating Instructions
To enjoy a frozen muffin, you can simply thaw it at room temperature for a few hours. If you prefer a warm muffin (which I highly recommend for that freshly-baked taste!), reheat it in the microwave for 15-30 seconds, or until warmed through. For a slightly crispier top, you can briefly warm it in a toaster oven.
More Delicious Recipes You’ll Love
If you enjoyed these peanut butter and chocolate muffins, you’re in for a treat! Explore more of our delectable baking recipes:
-
Easy Triple Chocolate Brownie Muffins
Indulge in rich, fudgy brownie flavor in muffin form with three kinds of chocolate!
-
Mini Peanut Butter Cup Brownies
Tiny bites of rich brownie packed with miniature peanut butter cups for a delightful snack.
-
Easy Homemade Chocolate Peanut Butter Brownies
The ultimate combination of fudgy chocolate brownies swirled with creamy peanut butter.
-
Easy Chewy Peanut Butter Nutella Cookies
Chewy cookies combining the rich flavors of peanut butter and hazelnut spread.

Did you try this recipe?
We absolutely love hearing from you! Let us know what you thought of these decadent muffins by leaving a comment below. Don’t forget to share your creations on social media by tagging us on Instagram, Facebook, & Pinterest!
Thank you for baking with us!
-Kayla
📖 Recipe Card
Chocolate Chip Peanut Butter Muffins
By Kayla Burton
Pin Recipe
15
20
35
Breakfast, Brunch, Dessert, Snack
American
14
muffins
264
kcal
Equipment
-
Muffin pan lightly greased or filled with liners
-
Mixing bowls
-
Scale/measuring cups
-
Measuring spoons
-
Whisk
-
Spatula
Kayla’s Top Tip
Weigh dry ingredients in grams (g) with a food scale for best results!
Toggle on to prevent your screen from going dark
Ingredients
-
2
cups
(250 g)
all-purpose flour
weighed in grams for best results -
1½
teaspoons
baking powder -
½
teaspoon
baking soda -
½
teaspoon
salt -
2
large
eggs
room temperature -
1
cup
(236.59 ml)
Lifeway Organic Plain Whole Milk Kefir
room temperature -
2
teaspoons
vanilla extract -
½
cup
(129 g)
creamy peanut butter
natural peanut butter is not recommended due to oil separation; crunchy can be used if preferred -
½
cup
(100 g)
granulated sugar -
½
cup
(100 g)
light brown sugar
packed -
1
cup
(180 g)
chocolate chips
Instructions
-
Preheat your oven to 425°F (218°C). Lightly grease or fill a 12-cup muffin pan with paper liners.
-
In a medium bowl, whisk together the flour, baking powder, baking soda, and salt until well combined.
-
In a separate large bowl, whisk together the room temperature eggs, kefir, vegetable oil, vanilla extract, creamy peanut butter, granulated sugar, and light brown sugar until thoroughly combined and smooth.
-
Add the dry ingredients to the wet ingredients. Gently stir with a spatula just until a few flour streaks remain. Be careful not to overmix.
-
Gently fold in the chocolate chips. You may set aside some chocolate chips to sprinkle on top of the muffins before baking for a pretty finish.
-
Divide the batter evenly among the muffin liners, filling them almost full to ensure nice, domed tops. Sprinkle any reserved chocolate chips on top of each muffin.
-
Bake on the middle rack at 425°F (218°C) for 5 minutes. Then, reduce the oven temperature to 350°F (175°C) and continue baking for approximately 15-20 more minutes, or until a wooden toothpick inserted into the center of a muffin comes out clean.
Save This Recipe! 💌
We’ll email this post to you, so you can come back to it later!
Video
Notes
Storage: Store cooled muffins in an airtight container at room temperature for up to 4 days. For longer storage, freeze them in a freezer-safe container or bag for up to 1 month.
Jumbo Muffins: To make jumbo muffins, fill a jumbo muffin pan ¾ full with batter. Top with additional chocolate chips. Bake at 425°F (218°C) for 5 minutes, then reduce to 350°F (175°C) and continue baking for 20-25 minutes, or until a toothpick comes out clean.
Mini Muffins: For mini muffins, fill a mini muffin pan about ¾ full. Bake 24-28 mini muffins at a consistent 350°F (175°C) for 10-15 minutes, or until a toothpick comes out clean.
Kefir: This recipe is proudly sponsored by my friends at Lifeway Foods. Their organic whole milk plain kefir is ideal for this recipe due to its flavor and beneficial properties. If needed, plain buttermilk can be used as a substitute, but the flavor and texture might be slightly different.
Calories:
264
kcal
Carbohydrates:
40
g
Protein:
5
g
Fat:
10
g
Saturated Fat:
4
g
Polyunsaturated Fat:
1
g
Monounsaturated Fat:
3
g
Trans Fat:
0.003
g
Cholesterol:
29
mg
Sodium:
229
mg
Potassium:
129
mg
Fiber:
1
g
Sugar:
24
g
Vitamin A:
74
IU
Calcium:
74
mg
Iron:
1
mg
The provided nutritional information is an estimate per serving. Accuracy is not guaranteed.
Tried this recipe?
Leave a comment below & tag @brokenovenbaking on social!
