Irresistible Brown Butter Blondies: Chewy, Caramelized Perfection for Any Occasion
Prepare to fall in love with these incredible Brown Butter Blondies! Imagine the rich, nutty flavor of caramelized shortbread combined with a wonderfully chewy texture – that’s exactly what you get with every bite of these easy-to-make dessert bars. They come together in less than an hour and, even better, stay incredibly soft and delicious for days, making them perfect for meal prepping your sweet cravings or sharing with friends and family.
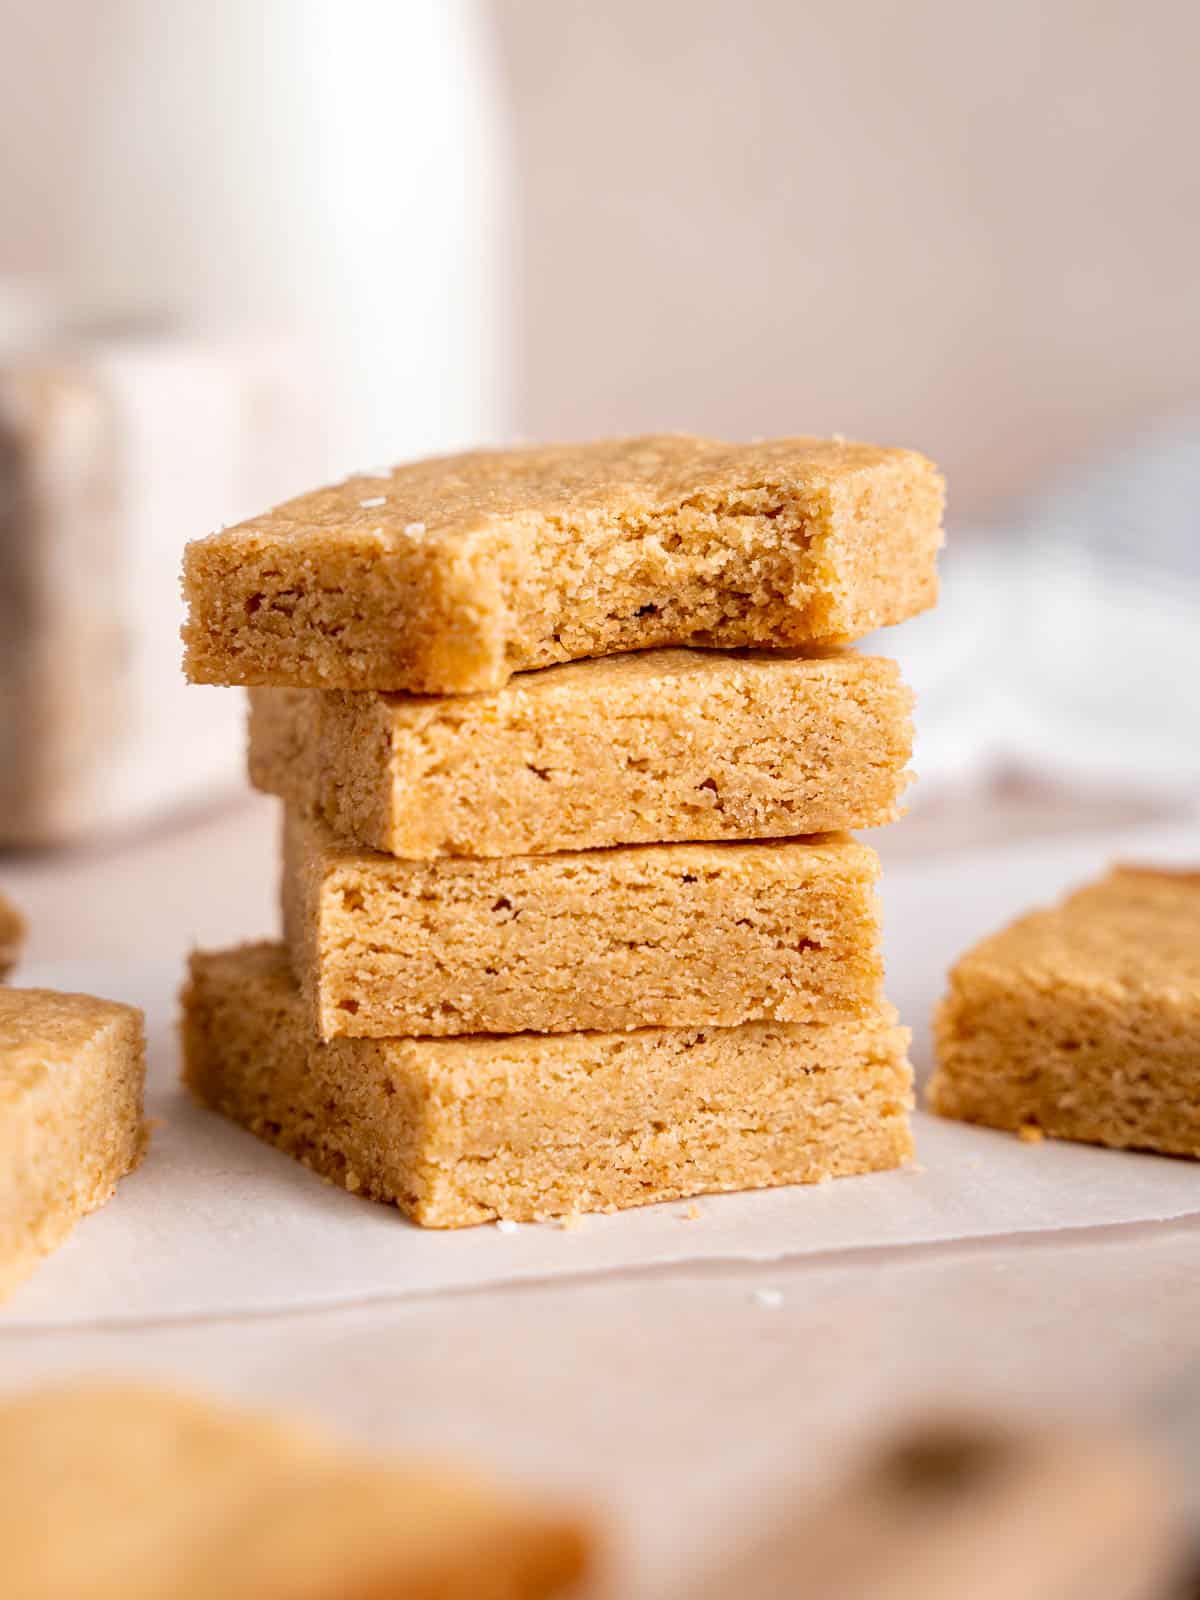
For those unfamiliar, blondies are essentially brownies’ lighter, golden-hued cousins – rich, dense, and wonderfully chewy cookie bars, but without the chocolate. While they might appear deceptively simple, the flavor profile of these brown butter blondies is anything but ordinary. Made with just 7 common pantry ingredients, this recipe transforms basic components into a dessert that will truly impress your taste buds with its depth and complexity.
Their delightful caramel-like notes and soft, fudgy center make them an ideal treat for any occasion, from casual weeknight desserts to gatherings with friends. Get ready to bake a batch of these unforgettable blondies!
Why Brown Butter is the Secret to Amazing Blondies
If you’ve never had the pleasure of browning butter, you’re in for a treat! This simple technique elevates ordinary butter into a culinary powerhouse, infusing it with a sweet, nutty, and deeply caramelized flavor that transforms baked goods. The process itself is enchanting: as the butter melts and cooks, it bubbles and froths, releasing a heavenly aroma that will fill your kitchen. Tiny milk solids at the bottom of the pan toast to a beautiful golden brown, providing those coveted nutty notes.
When this golden elixir is incorporated into these blondies, it imparts an unparalleled caramel-like depth, all without the effort of making actual caramel. It’s a flavor hack that adds sophistication and richness to a simple recipe. This same magical ingredient is also a star in other beloved recipes, like my salted espresso chocolate chip cookies and my luscious chocolate chip banana bundt cake.
Don’t let the idea of “browning butter” intimidate you! Many home bakers shy away, thinking it’s complicated, but I promise it’s far easier than it sounds. It typically takes only about 5 minutes, and if I can master it, so can you. The key is to pay attention and stir consistently. I’ll guide you through each step in the instructions below, but please don’t hesitate to leave a comment if any questions pop up along the way!
Essential Ingredients for Perfect Brown Butter Blondies
You’ll love how straightforward the ingredient list is for these delightful brown butter blondies. Chances are, you already have most, if not all, of these pantry staples on hand. Each ingredient plays a crucial role in achieving that perfect chewy texture and rich, caramelized flavor.
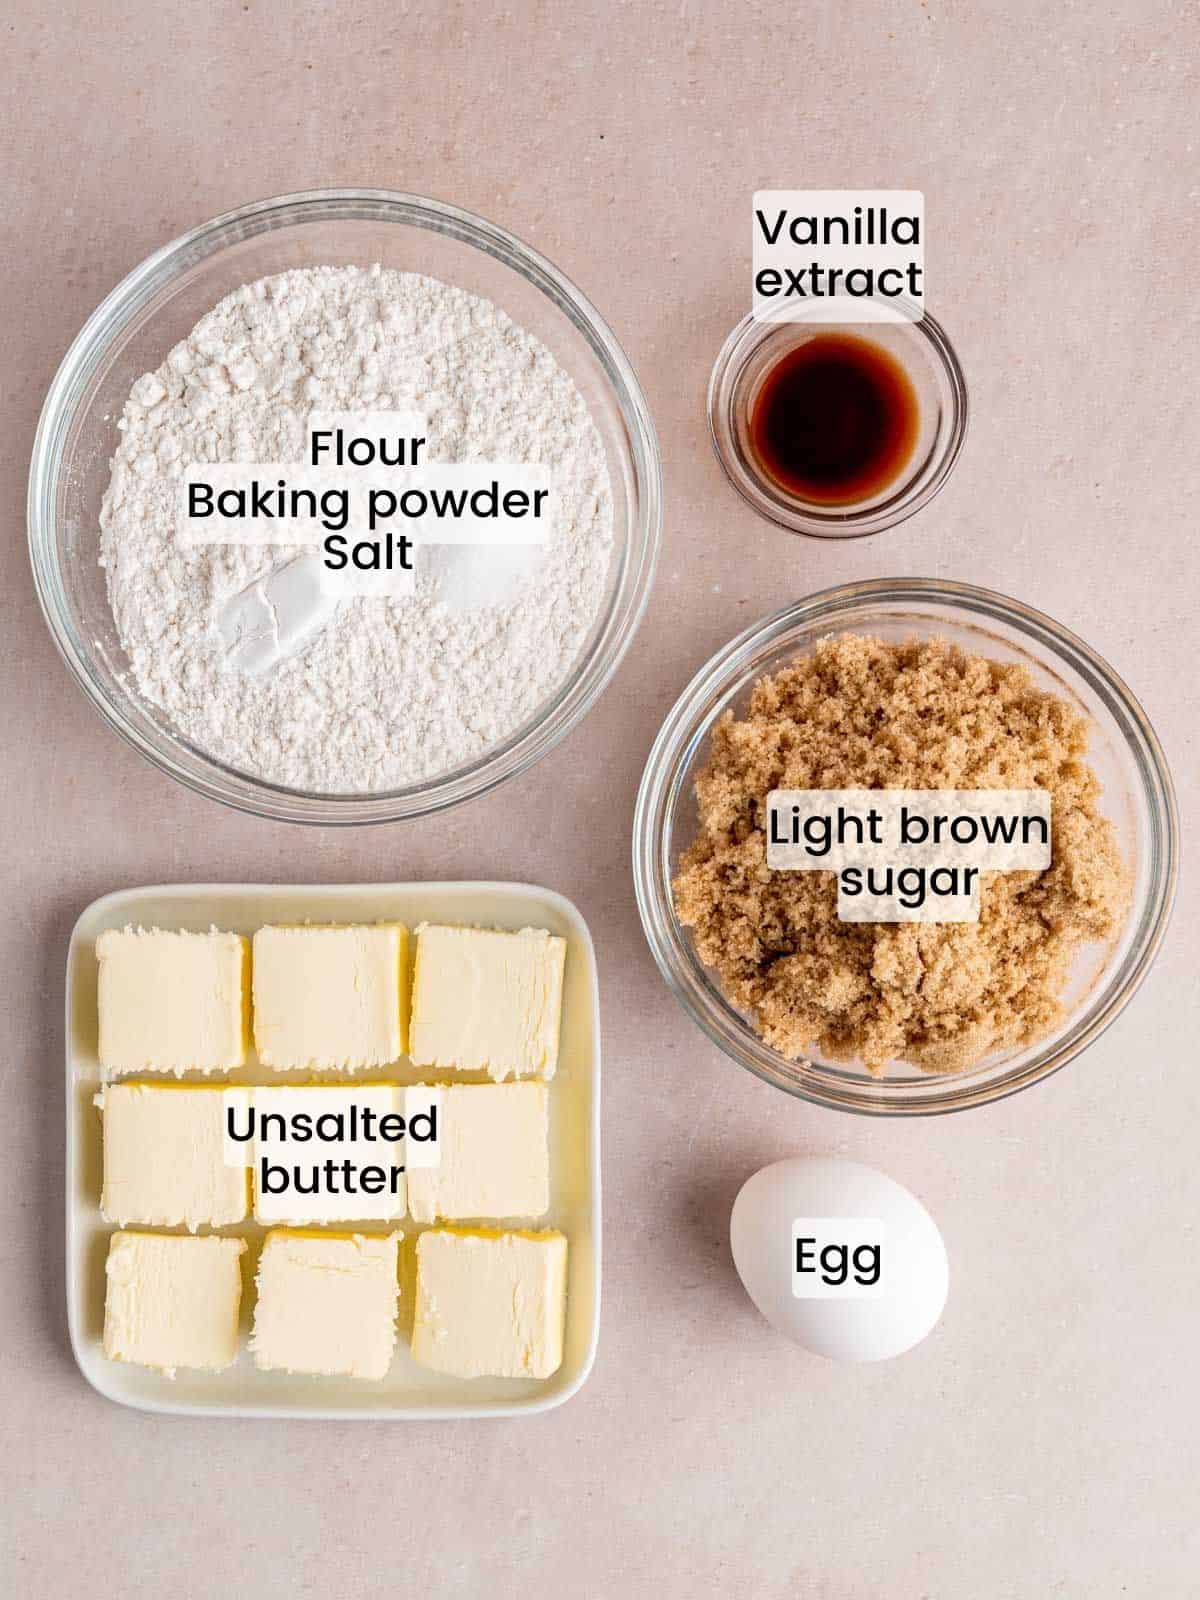
- Unsalted Butter: This is the star of our show. Using unsalted butter gives you complete control over the final salt content, which is especially important when browning, as you don’t want any extra salt to interfere with the delicate caramelization process.
- Light Brown Sugar: Essential for both sweetness and contributing to that irresistible chewy texture. The molasses in brown sugar keeps these blondies moist and adds to their rich, caramel-like flavor. If you only have dark brown sugar on hand, don’t worry – it will work perfectly and add an even deeper molasses note.
- Large Egg: Acts as a binder, providing structure and richness to the blondies. Make sure it’s at room temperature for better incorporation into the batter.
- Vanilla Extract: A classic flavor enhancer that complements the brown butter and brown sugar beautifully, adding warmth and depth to the overall taste. Opt for pure vanilla extract for the best flavor.
- All-Purpose Flour: The primary dry ingredient that gives the blondies their structure. For most accurate results, especially in baking, I highly recommend weighing your flour in grams rather than using measuring cups, as this can vary widely.
- Baking Powder: Provides just the right amount of lift, ensuring your blondies aren’t too dense but maintain their signature fudgy chewiness.
- Salt: A crucial ingredient that balances the sweetness and enhances all the other flavors, making the brown butter and caramel notes pop. A pinch of salt goes a long way in bringing out the best in sweet treats.
For exact measurements and a complete list of ingredients, please refer to the detailed recipe card below.
Unlock New Flavors: Creative Substitutions & Variations
While these Brown Butter Blondies are spectacular on their own, they also serve as a fantastic canvas for your culinary creativity! The rich, caramelized base pairs wonderfully with a variety of add-ins and toppings. Here are some ideas to inspire your next batch:
- Sweet & Crunchy Mix-ins: Enhance the caramel notes by stirring in half a cup of chocolate toffee bar bits, butterscotch chips, or chopped walnuts. These additions bring extra texture and complementary flavors that truly shine. Feel free to use your favorite chocolate chips (dark, milk, or white) for a classic touch.
- Spice it Up: For a delightful snickerdoodle cookie twist, sprinkle a generous cinnamon sugar mixture (about 1 tablespoon cinnamon mixed with 2 tablespoons granulated sugar) evenly over the blondie batter before baking. The cinnamon will toast beautifully, adding a warm, aromatic layer.
- Decadent Drizzle: Take your blondies to the next level by drizzling a homemade or store-bought cream cheese icing on top once they’ve completely cooled. The tangy sweetness of the icing provides a wonderful contrast to the rich blondies. A simple caramel sauce drizzle would also be divine!
- Caffeine Kick: Stir a teaspoon (or more, to taste!) of instant espresso powder or finely ground coffee into the cooled browned butter. This will deepen the caramel flavor and add a subtle, sophisticated coffee note that is truly addictive. It pairs perfectly with the butter’s nuttiness.
- Nutty Additions: Beyond walnuts, consider pecans, almonds, or even macadamia nuts for different textural and flavor profiles. Lightly toast them beforehand to bring out their full aroma.
- Fruity Fun: For a burst of freshness, try folding in a handful of dried cranberries, chopped dried apricots, or even a small amount of finely diced apple tossed in cinnamon.
Please note that this recipe has been thoroughly tested with the original ingredients. If you decide to replace or add any ingredients, we’d love to hear how it turned out! Share your delicious results and creative variations in the comments section below to inspire other bakers.
Step-by-Step: How to Make Irresistible Brown Butter Blondies
Making these chewy brown butter blondies is a straightforward process, even for beginner bakers. Follow these steps closely for best results, paying special attention to the browning of the butter – it’s the secret weapon here!
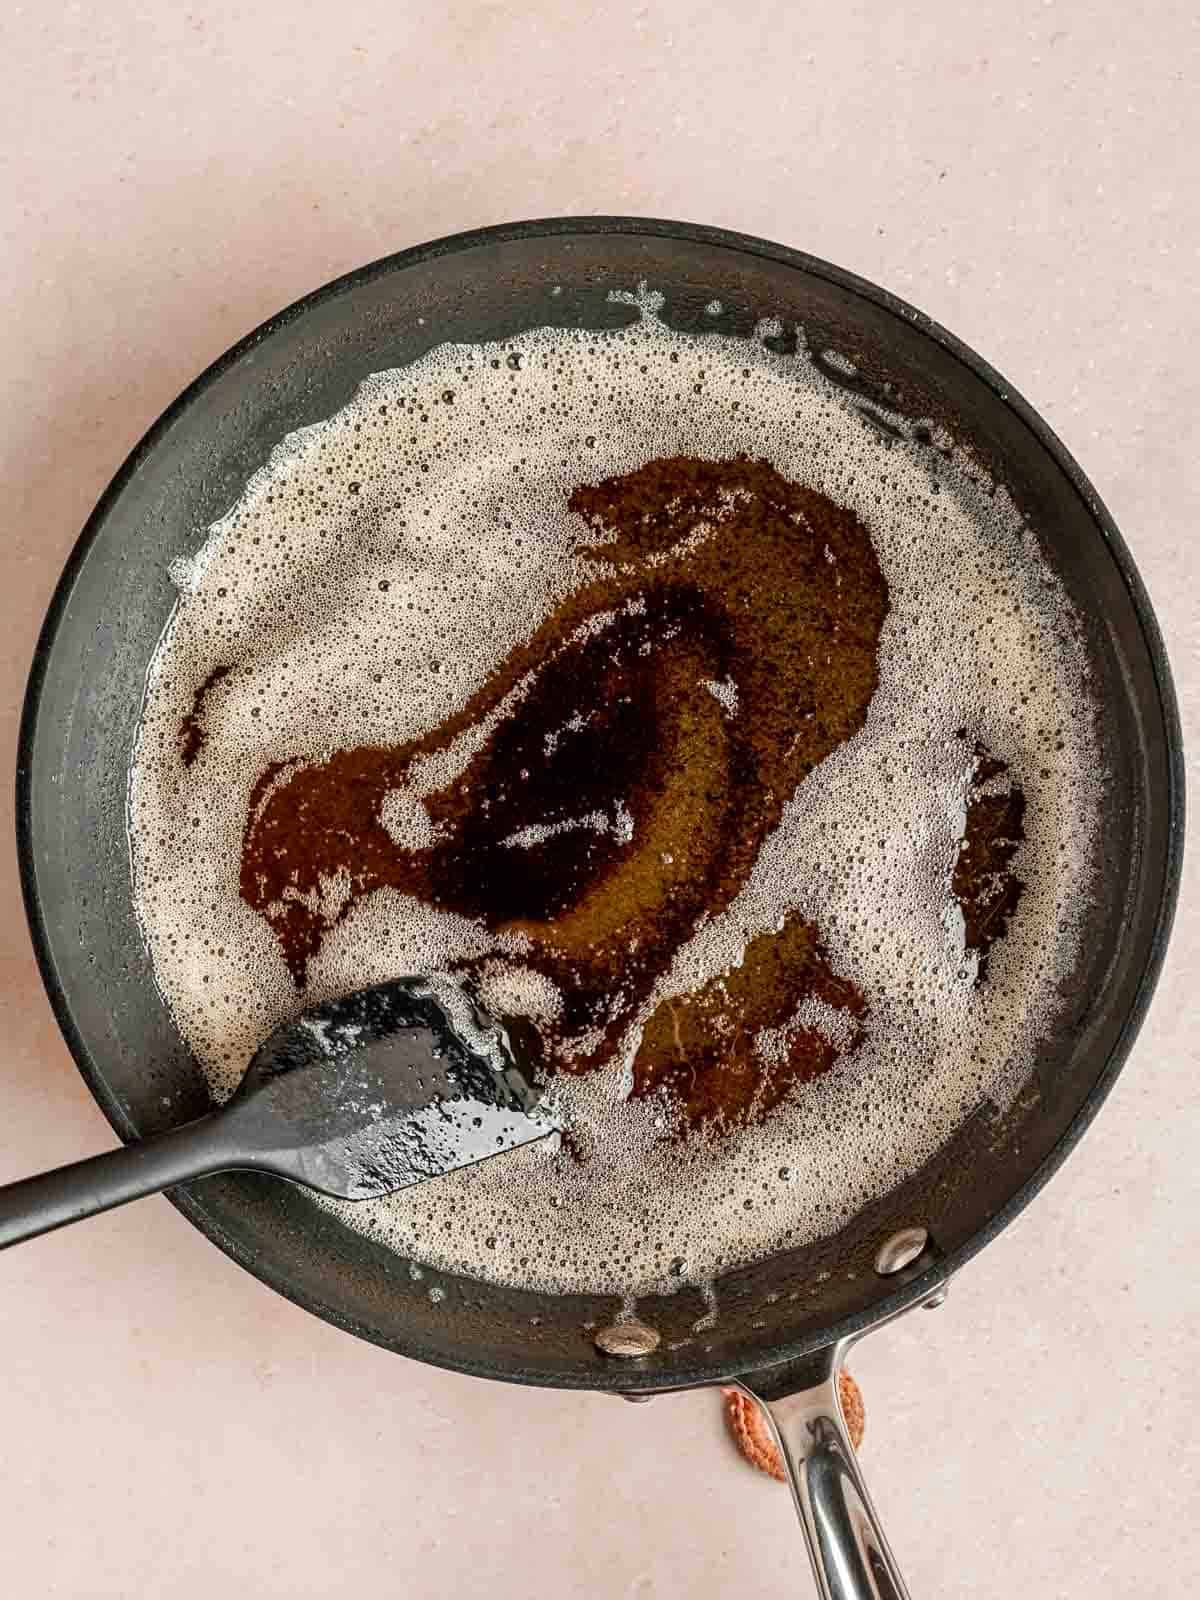
Step 1: Brown the Butter to Perfection. In a light-colored skillet or saucepan, melt the unsalted butter over medium-low heat. Continue to cook, stirring constantly with a whisk or spatula. The butter will melt, then begin to foam. Keep stirring! Soon, small golden-brown bits will start forming at the bottom of the pan, and a rich, nutty aroma will fill your kitchen. Once you see these amber-colored flecks and smell that distinct nutty scent, immediately remove the pan from the heat. Pour the browned butter (including all the browned bits!) into a heat-proof bowl and let it cool completely to room temperature. This cooling step is crucial!
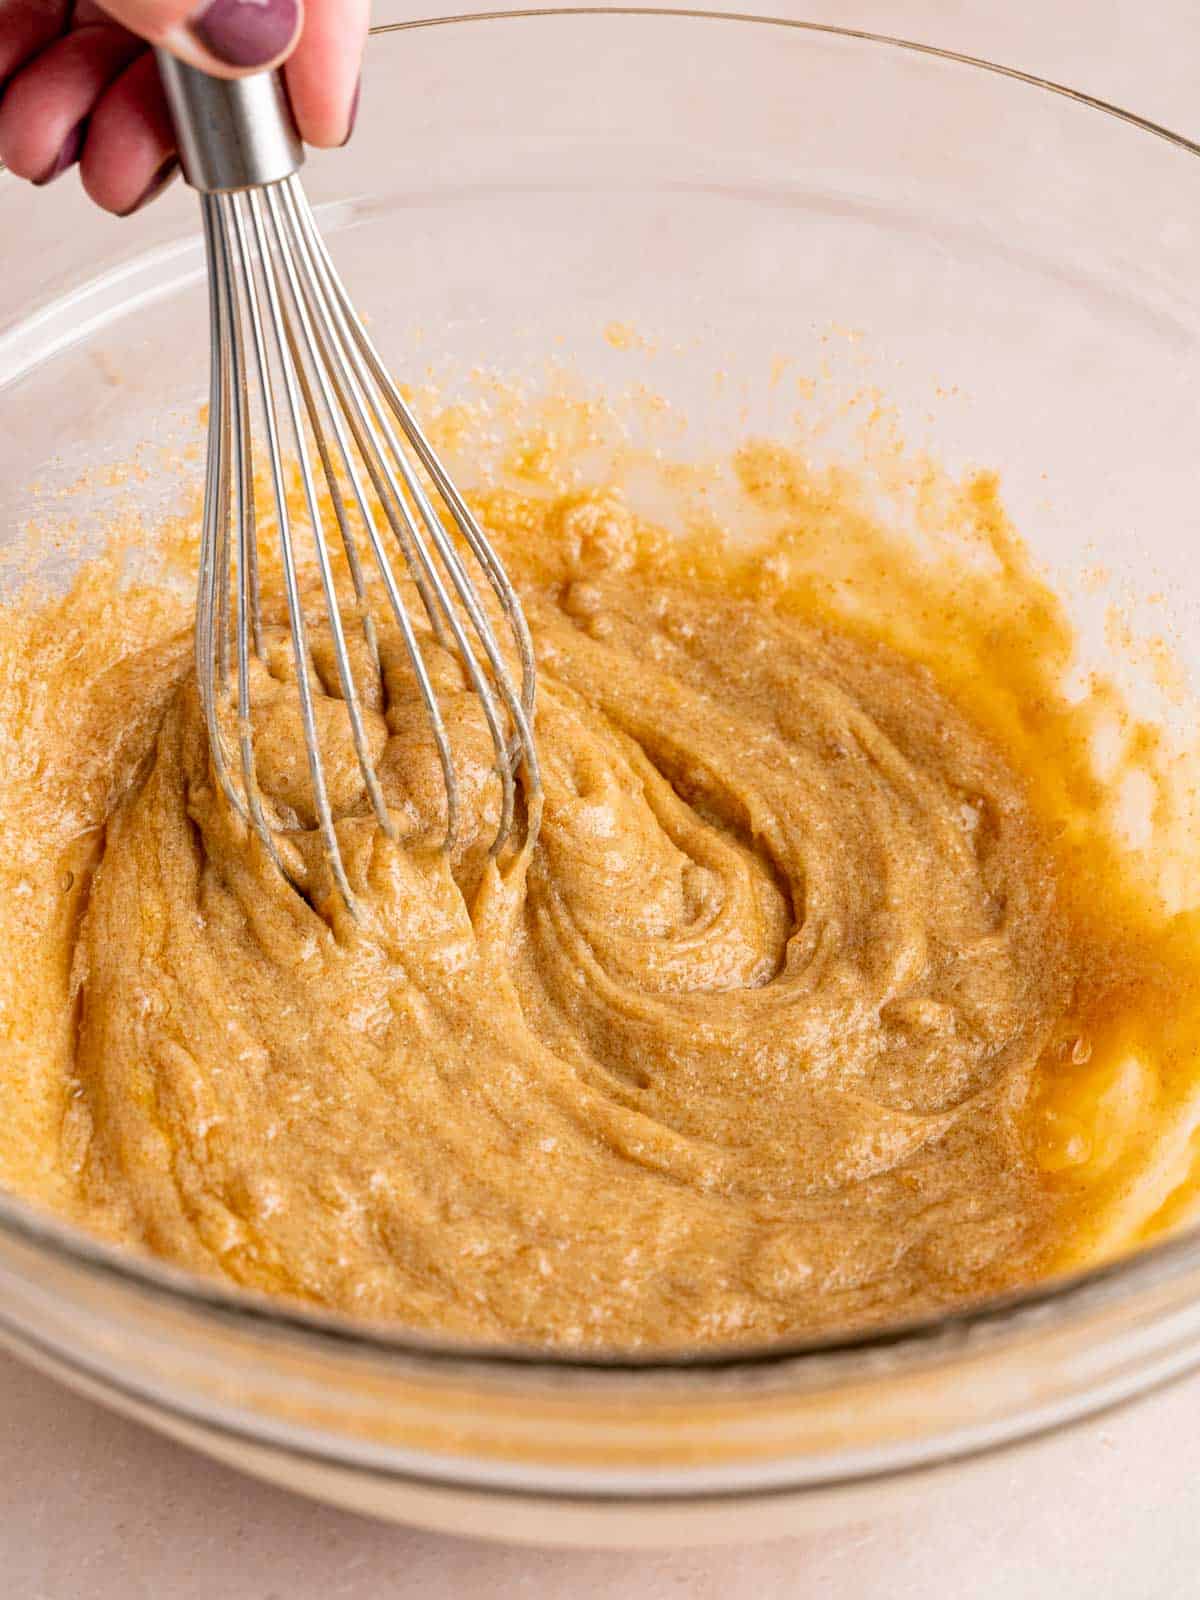
Step 2: Combine Wet Ingredients. Once the brown butter has cooled, transfer it to a large mixing bowl. Add the light brown sugar and whisk vigorously until thoroughly combined and smooth. Then, stir in the room temperature egg and vanilla extract until they are fully incorporated into the mixture. The mixture should be well-emulsified and lighter in color.
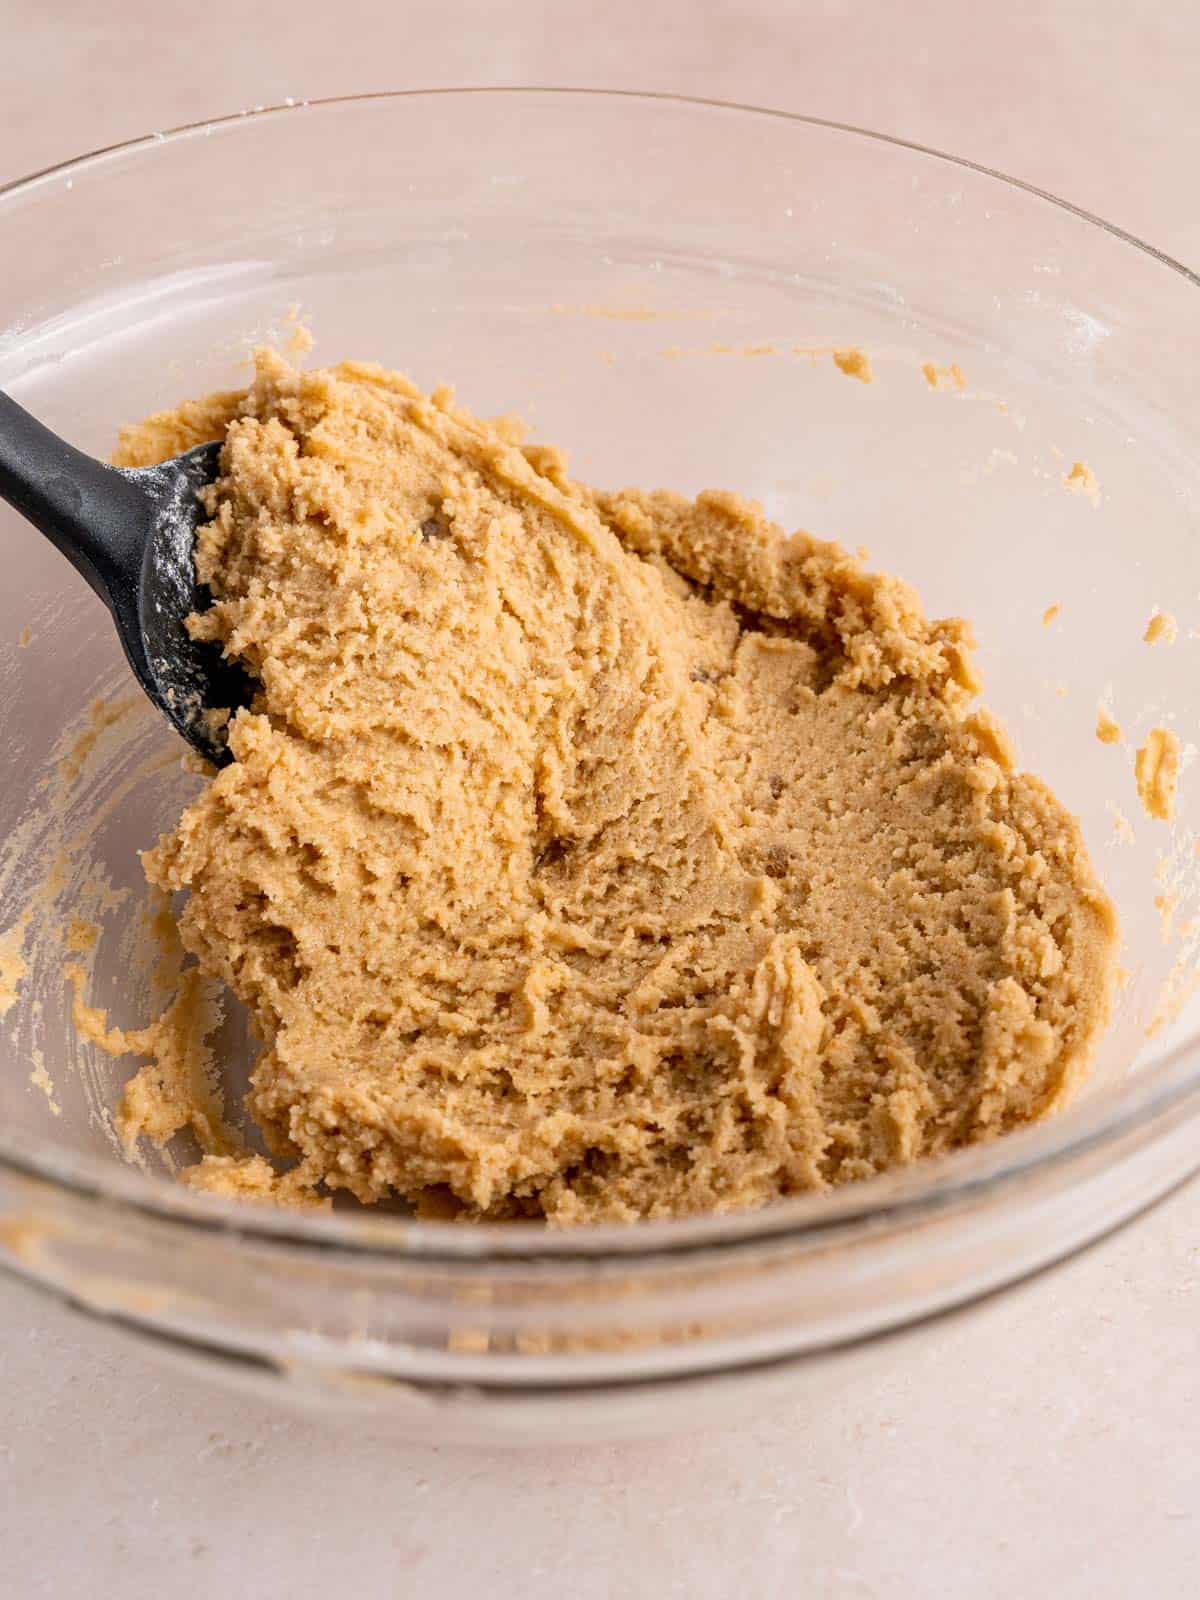
Step 3: Gently Mix Dry Ingredients. In a separate smaller bowl (or directly over the wet ingredients if using a fine mesh sieve), whisk together the all-purpose flour, baking powder, and salt. Gradually add the dry ingredients to the wet mixture. Mix gently with a spatula or wooden spoon until just combined, being careful not to overmix. Overmixing can develop the gluten in the flour, leading to tough blondies. Stop as soon as no streaks of flour remain.
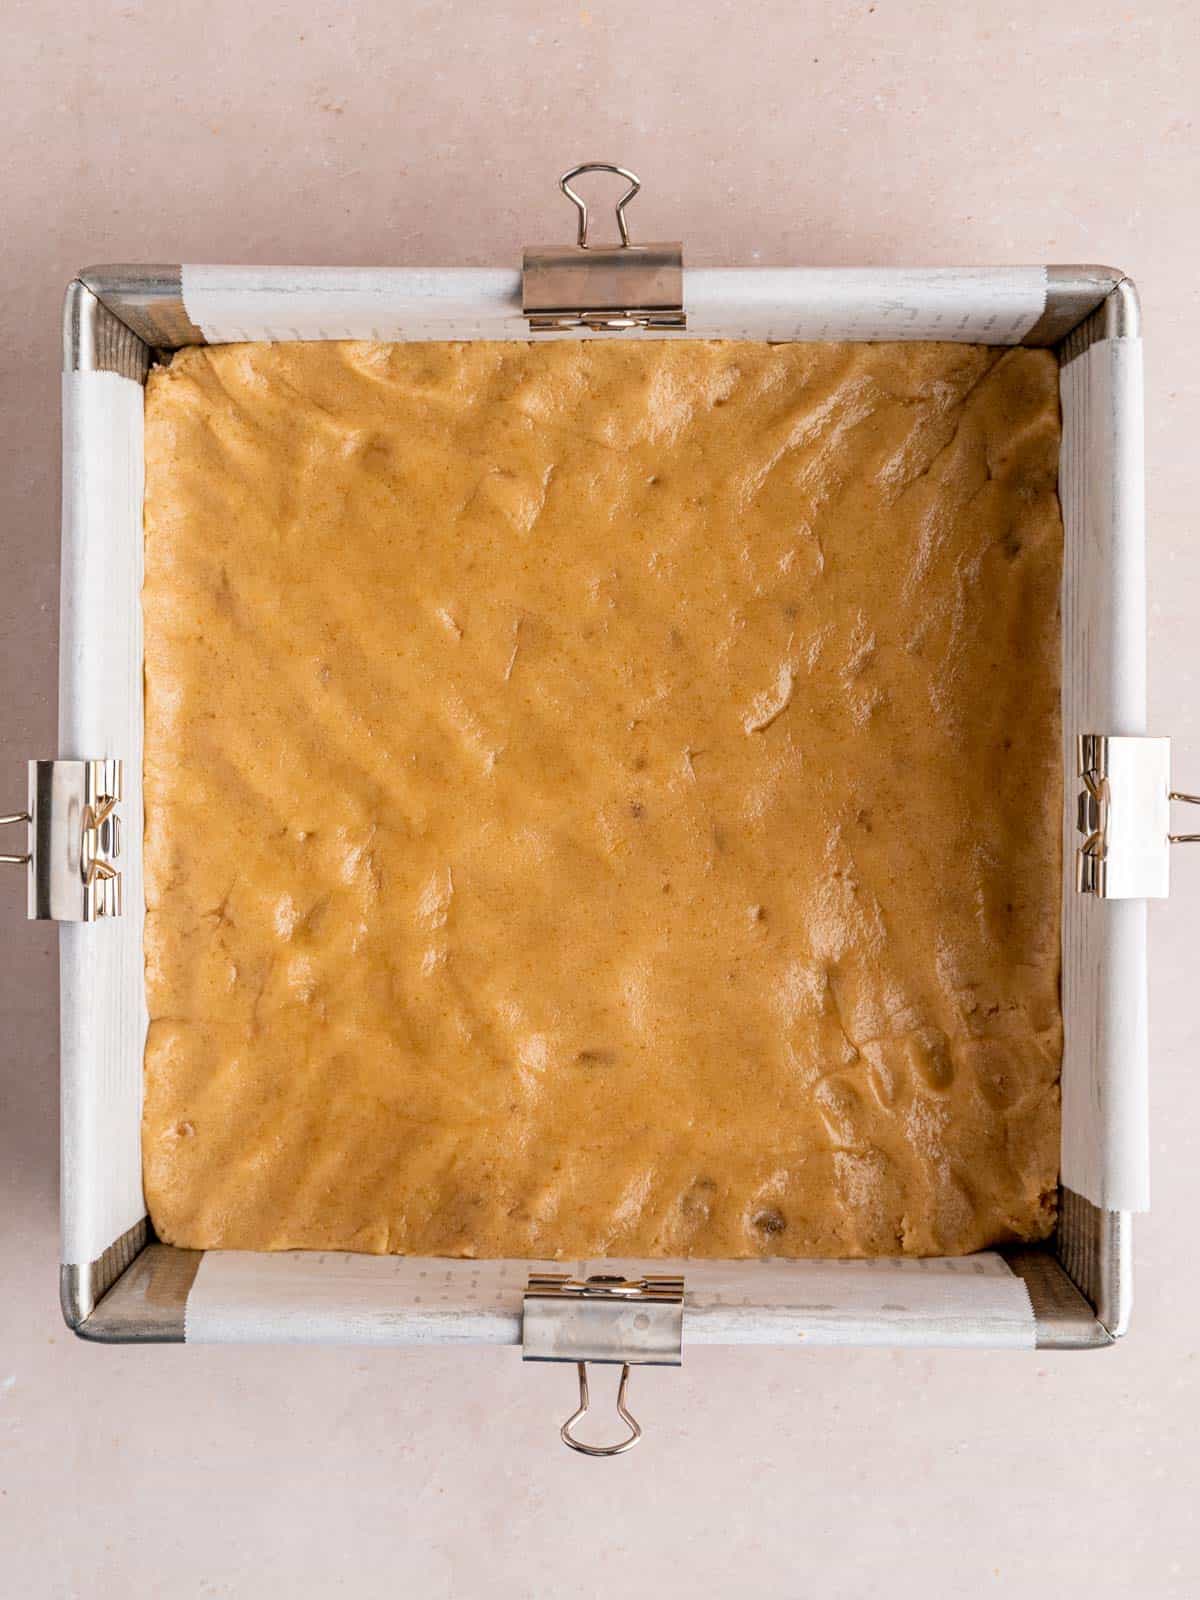
Step 4: Bake to Golden Perfection. Press the blondie dough evenly into a parchment-lined 8×8 inch metal pan. Before baking, consider sprinkling a pinch of flaky sea salt over the top for an extra delightful sweet and salty combination – it’s optional but highly recommended! Bake in the preheated oven at 350°F (175°C) on the middle rack for about 18-21 minutes, or until the edges are lightly golden brown and the center is just barely set. A slight jiggle in the center is perfectly fine and desired for a chewy texture. Do not overbake!
Expert Baking Tips for the Best Blondies
Achieving perfectly chewy and flavorful brown butter blondies is simple when you know a few tricks. These expert tips will help ensure your blondies turn out incredibly moist, soft, and bursting with that signature caramelized taste every time.
- Cool the Browned Butter Fully: This is arguably the most critical step! After browning the butter, allow it to cool completely to room temperature. If you add hot or warm butter to your sugar and egg, it can dissolve too much sugar (leading to a less chewy texture) or even scramble the egg, resulting in a curdled batter. To speed up the cooling process, you can place the bowl of browned butter in the refrigerator, but make sure to stir it every 5-10 minutes. This prevents it from solidifying unevenly and ensures it remains pourable for mixing.
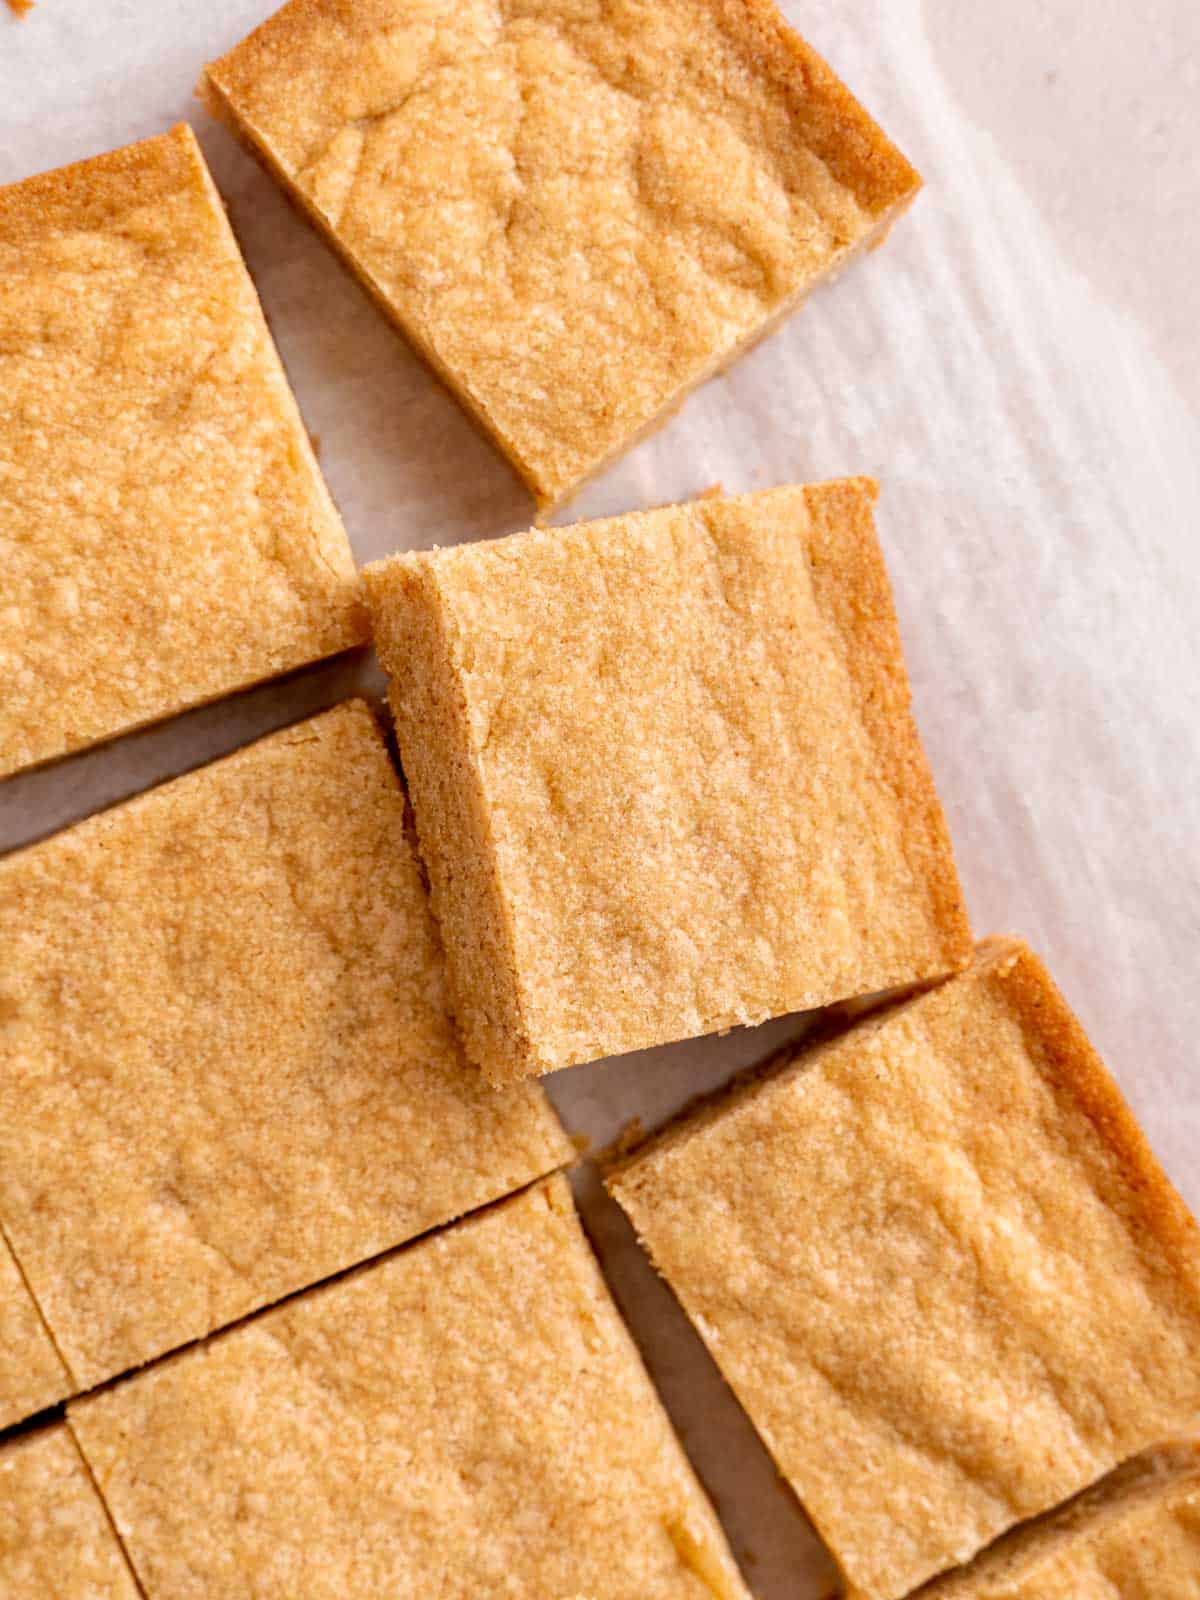
- Patience is Key: Wait to Cut: As tempting as it is to dig into warm blondies straight from the oven, resist the urge! Blondies, like many bar desserts, need time to set up properly. Waiting until they are fully cooled before cutting will prevent them from sticking to your knife and ensure clean, perfectly formed squares. This also helps them achieve their ideal chewy, fudgy texture.
- Avoid Overbaking for Ultimate Softness: The secret to soft, chewy blondies lies in slightly underbaking them. Keep a close eye on your oven; pull them out when the edges are lightly tanned and the very center is just barely set – it might still have a slight jiggle. The blondies will continue to cook slightly from the residual heat of the pan once removed from the oven. Overbaking is the quickest way to end up with dry, cakey blondies instead of the moist, fudgy treat you’re aiming for.
- Measure Flour Accurately: For consistent and professional baking results, always weigh your flour using a kitchen scale. Volume measurements (cups) can vary significantly depending on how the flour is scooped and leveled. Too much flour will lead to dense, dry blondies. If you don’t have a scale, spoon the flour into your measuring cup and level it with a straight edge rather than scooping directly from the bag.
- Room Temperature Egg: A room temperature egg incorporates more evenly into the batter, creating a smoother, more cohesive mixture. If you forget to take your egg out in advance, simply place it in a bowl of warm water for 5-10 minutes before using.
Common Questions About Brown Butter Blondies
Here are answers to some frequently asked questions about making and enjoying brown butter blondies, to help you troubleshoot and achieve perfect results every time.
Absolutely! If your browned butter has solidified, it simply means it cooled too much. You can easily fix this by giving it a quick spin in the microwave, usually 5-10 seconds at a time, until it returns to a liquid form. Stir it well to redistribute the browned bits, and then let it cool back down to room temperature before mixing with other ingredients. Be careful not to let it solidify again.
Dry blondies are typically a result of two main culprits: too much flour or overbaking. To ensure accurate flour measurement, always use a food scale and measure in grams (as specified in the recipe card). If you don’t have a scale, spoon the flour into your measuring cup and level it off, rather than scooping it directly. Secondly, be mindful of baking time. Blondies should be removed from the oven when the edges are lightly golden and the center is just barely set. A slight wobble is good! They will continue to firm up as they cool.
A lack of rise in blondies can usually be attributed to inactive baking powder or accidentally using baking soda instead of baking powder. To test if your baking powder is still active, pour ¼ cup of hot water over ½ teaspoon of baking powder. If it fizzes and bubbles, it’s still good to go! If there’s no reaction, it’s time to replace it with a fresh container. Ensure you’re always using baking powder for this recipe.
This recipe is designed for an 8×8 inch pan. If you wish to use a larger 9×13 inch pan, you will need to double the entire recipe to achieve a similar thickness. Keep in mind that baking time may vary slightly with a larger pan and doubled recipe, so start checking for doneness a few minutes earlier than suggested and adjust as needed.
The primary difference is chocolate! Brownies are rich, dark, and typically made with cocoa powder or melted chocolate. Blondies, on the other hand, are often called “brownies without chocolate.” They feature a vanilla, butterscotch, or caramel-like base, often highlighted by ingredients like brown sugar and, in this case, brown butter, which gives them their distinctive golden hue and rich, complex flavor.
Absolutely! Chocolate chips are a fantastic addition to brown butter blondies. The rich, caramelized flavor of the brown butter pairs beautifully with various types of chocolate. You can stir in ½ to 1 cup of semi-sweet, milk, dark, or even white chocolate chips into the batter before spreading it into the pan. This will add another layer of flavor and a delightful texture to your blondies.
Storage Solutions for Your Blondies
Once you’ve baked a batch of these delicious brown butter blondies, proper storage ensures they remain fresh, soft, and enjoyable for as long as possible. Here’s how to keep them at their best:
Room Temperature Storage
For short-term enjoyment, store your cooled brown butter blondies in an airtight container at room temperature. They will remain wonderfully soft and delicious for up to 5 days. A little trick to extend their softness even further is to place a slice of plain bread in the container with them. The blondies will absorb moisture from the bread, helping them stay moist and fresh for a longer period.
Freezing Instructions
If you’re looking to save some for later or prepare a batch in advance, these blondies freeze beautifully! Once they are completely cooled, slice them into individual portions. Place the slices in a single layer on a baking sheet and freeze for about an hour until firm. Then, transfer the frozen blondie slices to a freezer-safe container or a heavy-duty freezer bag, separating layers with parchment paper to prevent sticking. They will keep well in the freezer for up to 2 months. To enjoy, simply thaw them at room temperature for an hour or two, or warm them gently in the microwave for a few seconds for a freshly baked feel.
More Delicious Recipes You’ll Love
If you enjoyed the simplicity and incredible flavor of these brown butter blondies, you’re sure to find new favorites among these other delectable recipes. Explore more chewy bars and irresistible cookies from our collection:
- Easy Mini Egg Blondies (Quick Easter Dessert)
- The Best Easy Nutella Bars
- Chocolate Chip Butterscotch Blondies
- Salted Espresso Chocolate Chip Cookies
Did you try this recipe? Leave a ⭐️ rating & review below and tag @brokenovenbaking on Instagram & Facebook! We love seeing your creations!
📖 Recipe: Easy Brown Butter Blondies

Easy Brown Butter Blondies
By Kayla Burton
These Brown Butter Blondies taste like caramelized shortbread cookies! They’re soft, full of delicious flavor, and easy to make in about 30 minutes, staying soft for days!
5 from 2 votes
Pin Recipe
Prep Time: 20 mins
Cook Time: 18 mins
Total Time: 38 mins
Course: Dessert
Cuisine: American
Servings: 16 blondies
Calories: 145 kcal
Equipment
- 8×8 inch metal pan lined with parchment paper
- Skillet
- Mixing bowls
- Measuring spoons
- Scale/measuring cups
- Whisk
- Spatula
Ingredients
- 10 tablespoons (140 g) unsalted butter
- ¾ cup (150 g) light brown sugar (packed, dark brown sugar works too)
- 1 large egg (room temperature)
- 1½ teaspoons vanilla extract
- 1⅓ cups (166.67 g) all-purpose flour (weighed in grams or spooned and leveled)
- ½ teaspoon baking powder
- ½ teaspoon salt
- Flaky sea salt (optional, for topping)
Instructions
- Preheat oven to 350°F (175°C) and line an 8-inch square metal pan with parchment paper, leaving an overhang on the sides for easy removal.
- In a skillet over medium-low heat, cook the butter while stirring constantly until golden brown bits form on the bottom and it releases a nutty scent. Transfer immediately to a heat-proof bowl and let cool completely to room temperature.
- In a medium-large bowl, vigorously mix together the cooled brown butter and brown sugar until well combined. Stir in the room temperature egg and vanilla extract until fully incorporated and smooth.
- In a separate bowl, whisk together the all-purpose flour, baking powder, and salt. Gradually add the dry ingredients to the wet mixture, mixing gently with a spatula until just combined and no streaks of flour remain. Be careful not to overmix.
- Press the blondie batter evenly into the prepared pan. Bake on the middle rack for about 18-21 minutes, or until the edges are lightly tanned and the center is just barely set with a slight jiggle. If desired, sprinkle flaky sea salt on top immediately after removing from the oven.
- Transfer the pan to a wire rack to cool completely. Once fully cooled and firm enough, use the parchment paper overhang to lift the blondies out of the pan before slicing into squares.
Notes
Storage: Store cooled blondies in an airtight container at room temperature for up to 5 days. For extra softness, include a slice of bread in the container. For longer storage, freeze individual slices in a freezer-safe container for up to 2 months.
Nutrition: The provided nutrition information is an estimate for 1 blondie, assuming they are cut into 16 equal slices. Accuracy is not guaranteed and may vary based on specific ingredients and preparation methods.
Calories: 145 kcal | Carbohydrates: 18g | Protein: 2g | Fat: 7g | Saturated Fat: 5g | Polyunsaturated Fat: 0.4g | Monounsaturated Fat: 2g | Trans Fat: 0.3g | Cholesterol: 30mg | Sodium: 94mg | Potassium: 32mg | Fiber: 0.3g | Sugar: 10g | Vitamin A: 236IU | Calcium: 21mg | Iron: 1mg
The provided nutritional information is an estimate per serving. Accuracy is not guaranteed.
Tried this recipe? Leave a comment below & tag @brokenovenbaking on social!
