Easy Fudgy Sourdough Discard Brownies: A Decadent Chocolate Delight
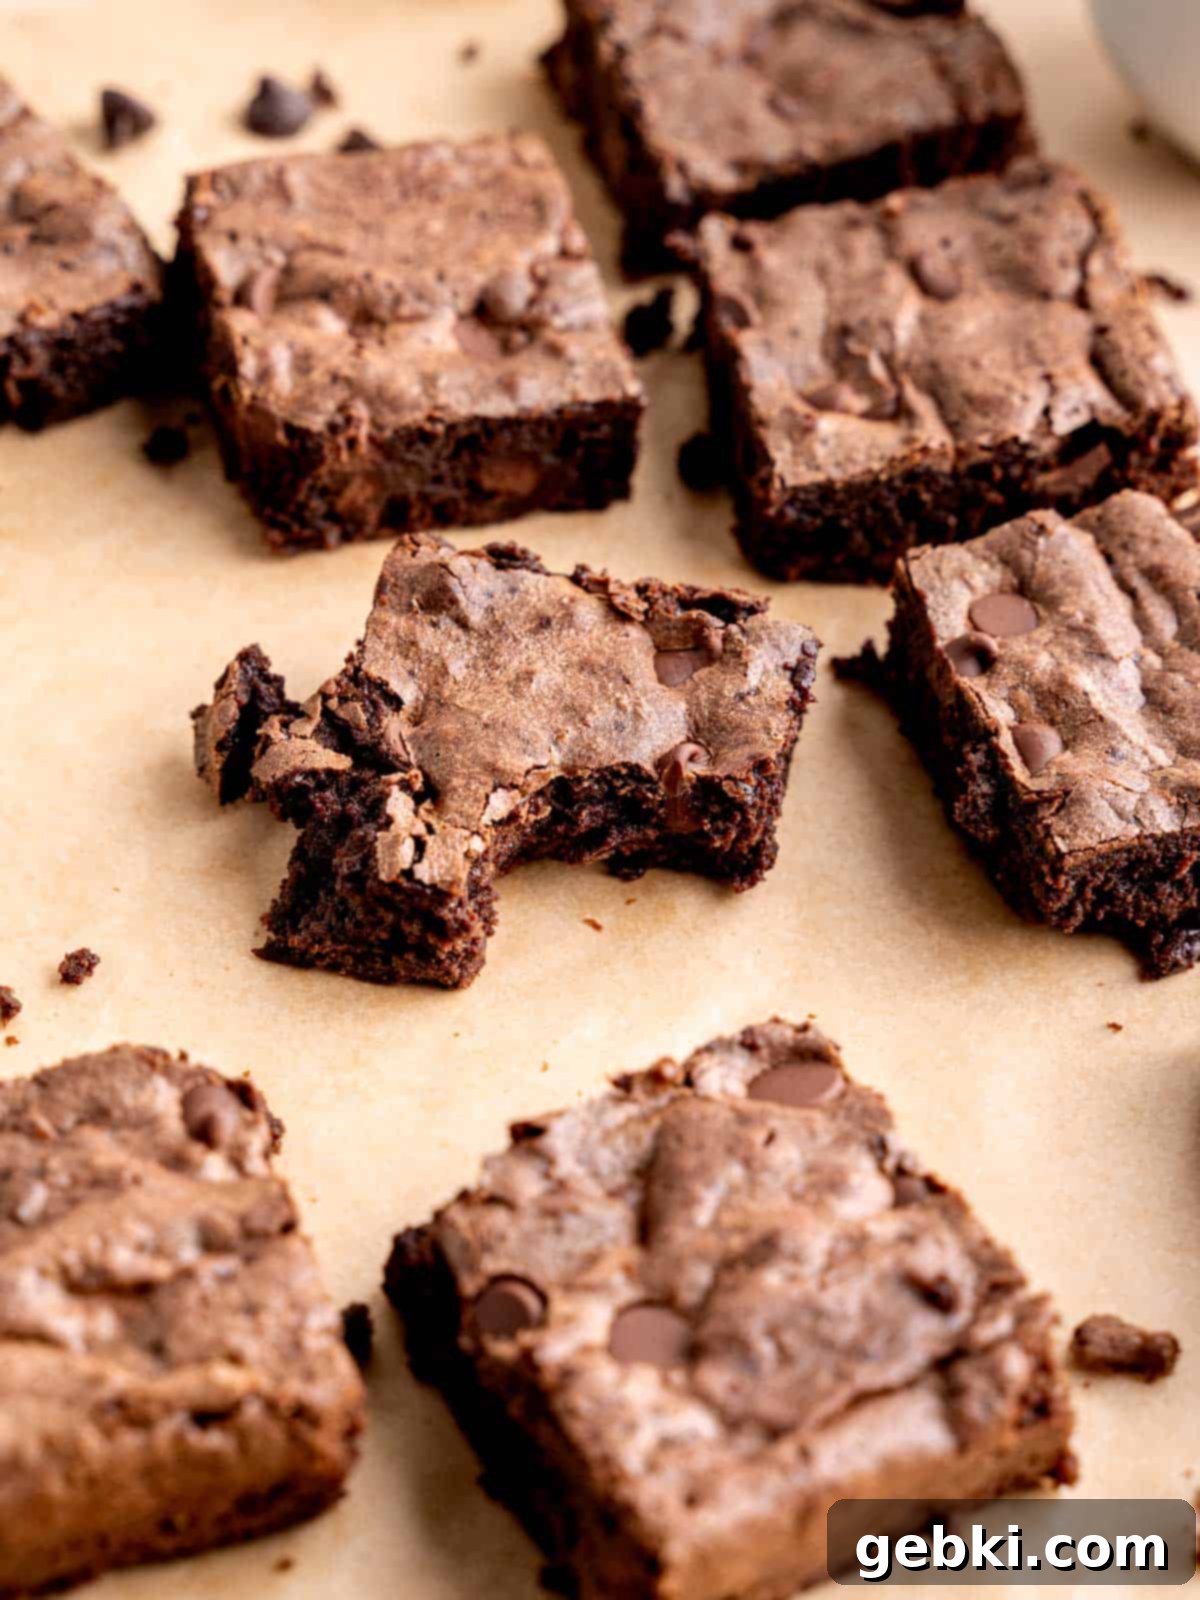
Prepare yourself for a truly irresistible treat: these Sourdough Brownies are the epitome of rich, intensely fudgy, and incredibly simple to create using your sourdough discard! Boasting an abundance of chocolate flavor from not one, but three distinct types of chocolate, these brownies are guaranteed to silence even your most persistent chocolate cravings. What’s even better? They come together quickly, requiring only about 20 minutes of active prep time before they hit the oven. Once these glorious sourdough discard brownies start baking, your entire home will be enveloped in an aroma so captivating, you’ll feel like you’ve stepped into a gourmet chocolate factory!
These were the best brownies I ever had! The depth of flavor was so intense…⭐️⭐️⭐️⭐️⭐️
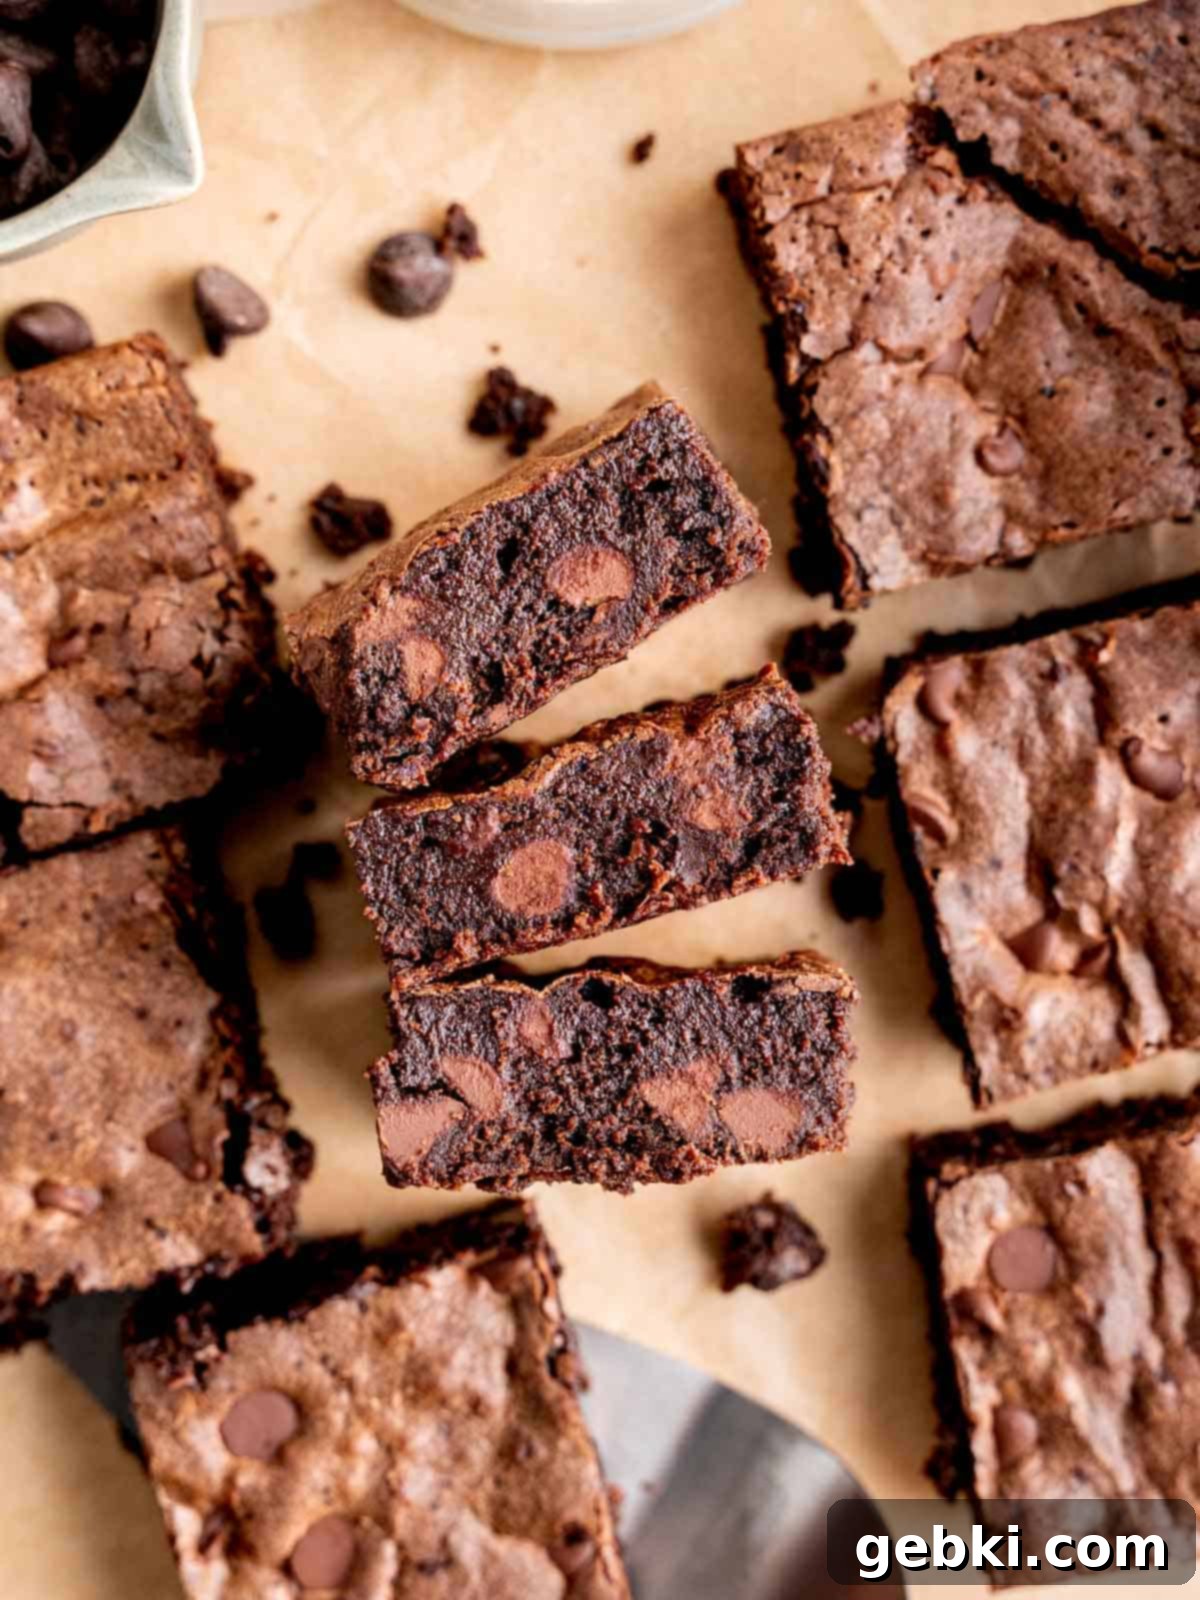
While some sourdough discard desserts can sometimes carry a distinct, noticeable tangy flavor, you’ll be delighted to find that these brownies offer a deep, complex chocolate experience without any strong sourdough taste. The clever combination of high-quality cocoa powder, rich melted chocolate, and sweet chocolate chips masterfully balances any potential tang from the discard. The result? Hands down, these are the best brownies I’ve ever made, a sentiment echoed by everyone who tries them!
This truly decadent dessert is the ideal solution when you find yourself with about ½ cup of unfed sourdough starter. Instead of letting it go to waste, transform it into something extraordinary. If you happen to have a bit more starter (say, ¼ cup) left after whipping up these fudgy brownies, don’t let that go either! Consider making a batch of our equally delicious sourdough chocolate chip cookies for another amazing way to utilize your discard.
Why You’ll Absolutely Love These Sourdough Brownies
These sourdough discard brownies aren’t just another dessert; they’re a revelation. Here’s why this recipe will quickly become a cherished favorite in your baking repertoire:
- The Most Delicious Way to Use Sourdough Discard: Gone are the days of feeling guilty about throwing out your unfed sourdough starter! This recipe provides a wonderfully creative and incredibly tasty solution to food waste, transforming a byproduct into a star ingredient. Your discard adds a subtle depth and moisture that truly elevates the brownie experience.
- Achieve the Perfect Fudgy Texture Every Time: Say goodbye to dry, cakey brownies. This recipe is specifically designed to deliver that quintessential fudgy, dense, and moist texture that brownie lovers dream of. The combination of ingredients and precise baking instructions ensures a melt-in-your-mouth experience with every bite.
- A Symphony of Three Types of Chocolate: We believe in maximum chocolate impact! By incorporating cocoa powder for deep chocolate flavor, melted high-quality chocolate chunks for richness and fudginess, and semi-sweet chocolate chips for pockets of gooey goodness, these brownies offer an unparalleled chocolate intensity.
- Super Simple to Make for Any Craving: Don’t let the “sourdough” in the title intimidate you. This recipe is incredibly straightforward, making it an ideal choice for satisfying those sudden chocolate cravings without a lengthy, complicated process. With minimal prep, you’ll be enjoying warm, homemade brownies in no time.
- A Top-Tier Sourdough Discard Recipe: Along with our beloved sourdough banana bread and sourdough blueberry muffins, these fudgy brownies stand out as one of my absolute favorite ways to use up sourdough discard. They’re consistently delicious and always a crowd-pleaser.
Essential Ingredients for Fudgy Sourdough Brownies
Creating these remarkably fudgy sourdough brownies requires a thoughtful selection of ingredients, each playing a crucial role in achieving the perfect taste and texture. Here’s a detailed look at what you’ll need:
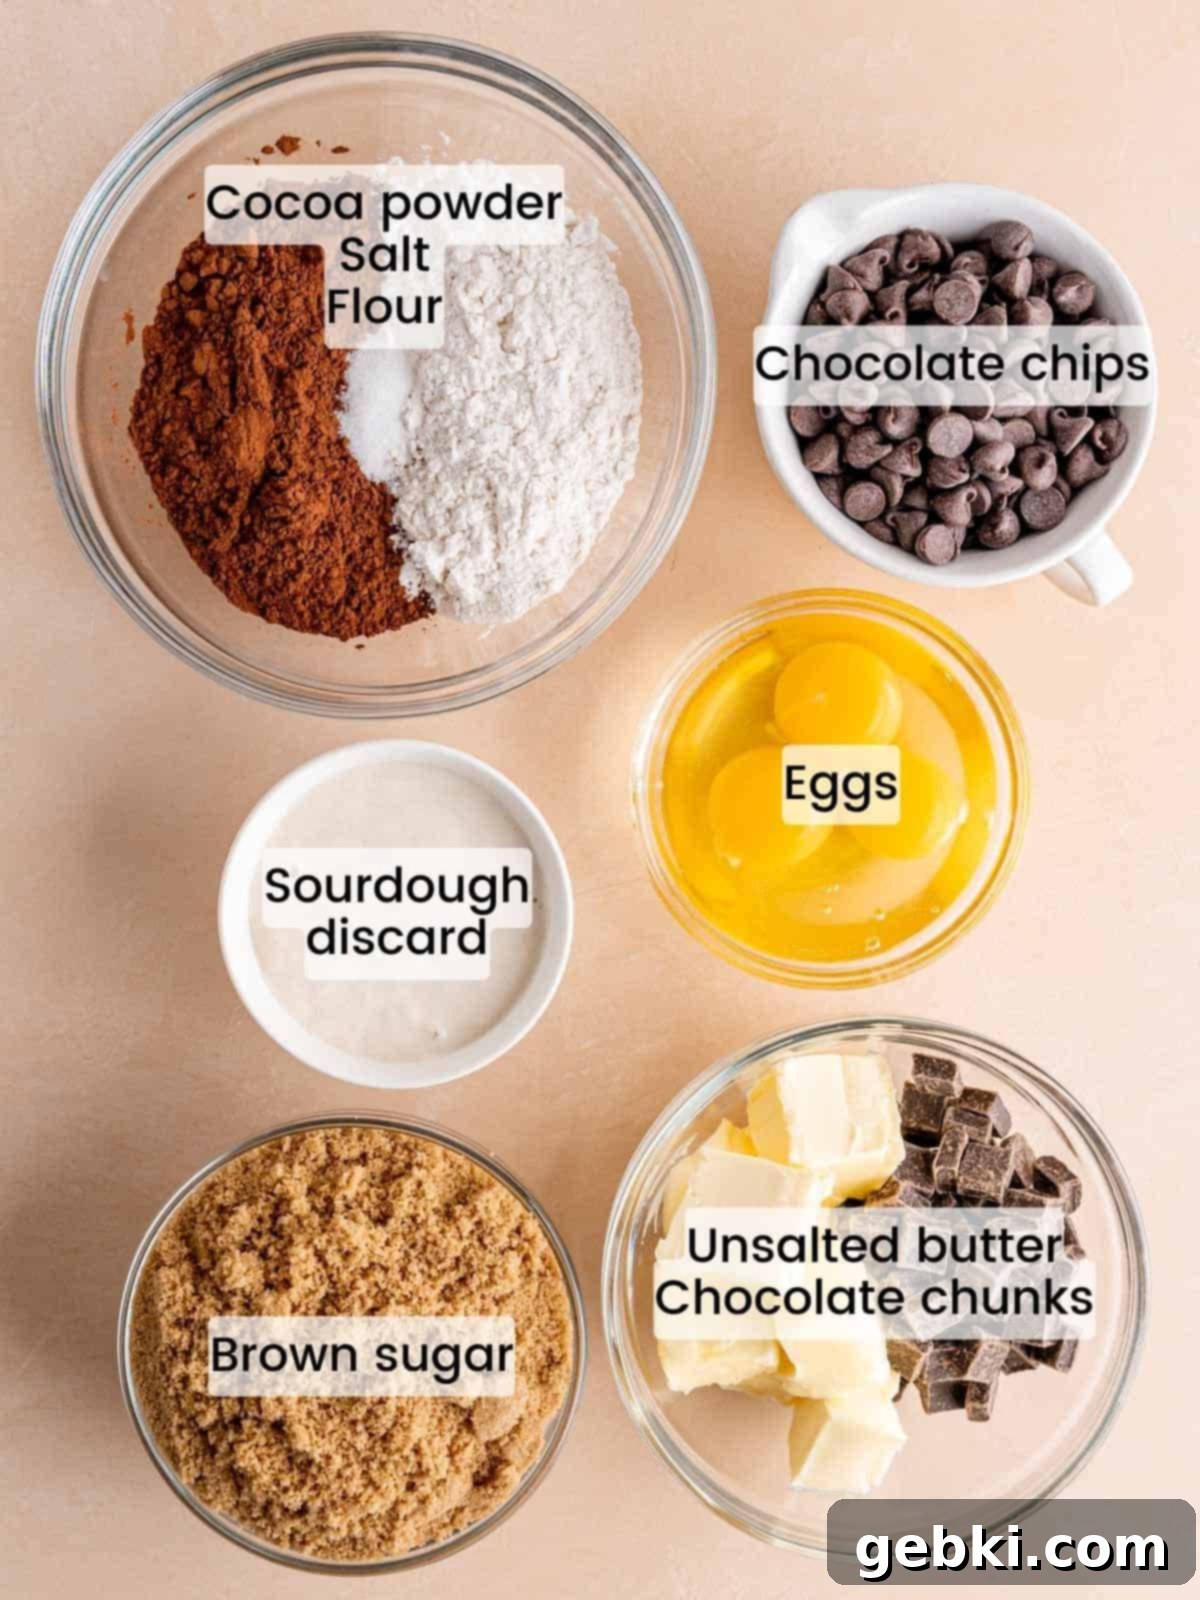
- The Triple Chocolate Threat: To ensure an extra fudgy texture and an abundance of rich chocolate flavor, this recipe strategically uses three forms of chocolate:
- Cocoa Powder: Provides a deep, earthy chocolate foundation.
- Melted High-Quality Chocolate Chunks (or chopped baking chocolate): This is key for supreme richness and that signature dense, gooey texture. Opt for bittersweet or dark chocolate for the best results, as quality truly makes a difference here.
- Chocolate Chips: These are stirred into the batter and sprinkled on top, offering delightful pockets of melted chocolate and a pleasant textural contrast.
- Sourdough Starter Discard: You’ll need about ½ cup of sourdough starter that has not been fed in the last 24 hours. This “unfed” or “discard” starter is less active, meaning it won’t leaven your brownies significantly, but instead contributes moisture, a unique subtle depth of flavor, and helps tenderize the crumb. If your discard has a layer of liquid (hooch) on top, gently pour it off before measuring your discard.
- No Starter? No Problem! If you don’t maintain your own starter at home, consider asking a local bakery if they have any sourdough discard they’re willing to share. Many bakers are happy to help!
- Brown Sugar: This is our sweetener of choice. Brown sugar, whether light or dark, contains molasses, which not only imparts a richer, caramel-like flavor but also adds extra moisture and contributes significantly to the brownies’ signature chewiness, making them far superior to those made with just granulated sugar.
- Eggs and Extra Egg Yolk: This sourdough brownie recipe calls for both whole eggs and an additional egg yolk. The whole eggs provide structure and moisture, while the extra egg yolk is the secret weapon for achieving that coveted, perfectly shiny, crackly top and an even more intensely fudgy interior. Ensure your eggs are at room temperature for better emulsification with the other ingredients.
- All-Purpose Flour: Measured correctly (preferably by weight), this provides the necessary structure without making the brownies too cakey.
- Unsalted Butter: Essential for richness and moisture. Using unsalted butter allows you to control the overall salt content of the recipe.
- Salt: A pinch of salt is crucial for balancing the sweetness and enhancing all the chocolate flavors.
For a precise list of all ingredients and their exact measurements, please refer to the comprehensive recipe card located below.
Exciting Substitutions & Creative Variations
While these fudgy sourdough brownies are perfect as is, they also lend themselves beautifully to customization. Feel free to get creative with these delicious additions and tweaks:
- Nuts for Crunch: If you appreciate a delightful crunch in your brownies, consider folding in ¼ to ½ cup of toasted, chopped walnuts, pecans, or even almonds into the batter. You can also sprinkle some on top before baking for extra texture and visual appeal. Toasting them beforehand enhances their flavor significantly!
- Edge Piece Perfection: Are you one of those who always gravitates towards the crispy, chewy corner pieces? Achieve an “all-edge” brownie experience by baking these sourdough discard brownies in a greased and floured muffin tin. This method ensures every single piece has those desired crispy edges and a perfectly gooey center. Adjust baking time as needed (usually shorter).
- Candy Mix-Ins: Take your brownies to the next level of indulgence by mixing in your favorite candies! M&Ms, Reese’s Pieces, chopped peanut butter cups, or even mini marshmallows can add a fun twist and burst of flavor. Add about ½ cup during the last step of mixing.
- Espresso Powder for Depth: For an even deeper, more intense chocolate flavor (without making the brownies taste like coffee), add 1 teaspoon of espresso powder or instant coffee granules to your dry ingredients. It truly amplifies the chocolate notes.
- Swirls of Flavor: For a beautiful presentation and added taste, swirl a few tablespoons of caramel sauce, peanut butter, or cream cheese frosting into the batter just before baking. Use a knife to create elegant patterns.
Please note that this particular recipe has been meticulously tested and perfected using the exact ingredients and methods described. If you choose to replace or add any ingredients, we’d love to hear how it turned out! Share your delicious experiments and results in the comments section below!
Step-by-Step Guide: How to Make Irresistible Sourdough Brownies
Follow these simple steps to create a batch of incredibly fudgy and rich sourdough discard brownies. Precision and patience are key to achieving that perfect texture and shiny, crinkly top!
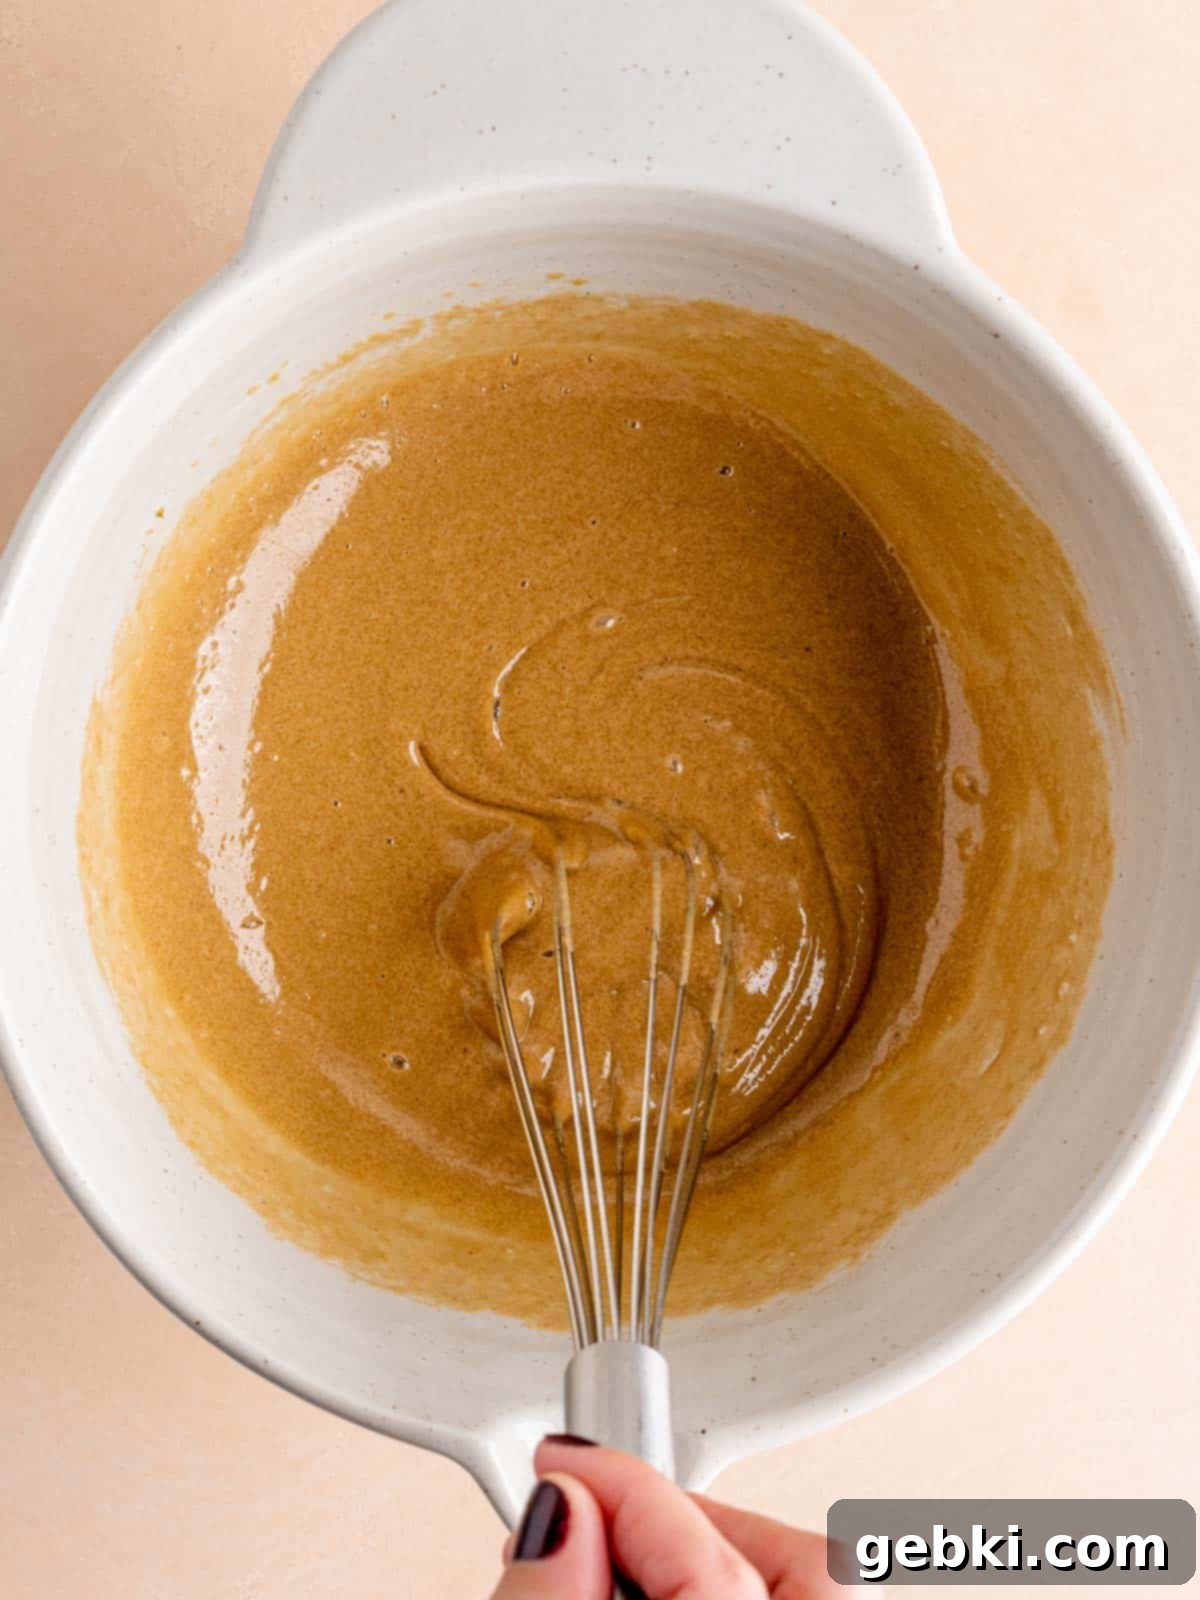
Step 1: Create a Fluffy Egg-Sugar Mixture. In a large mixing bowl, combine your room temperature eggs, the extra egg yolk, and brown sugar. Whisk these ingredients together vigorously for a good 4-5 minutes until the mixture transforms into a pale yellow, light, and fluffy consistency. This crucial step incorporates air and helps create that desirable shiny, crackly top on your brownies.
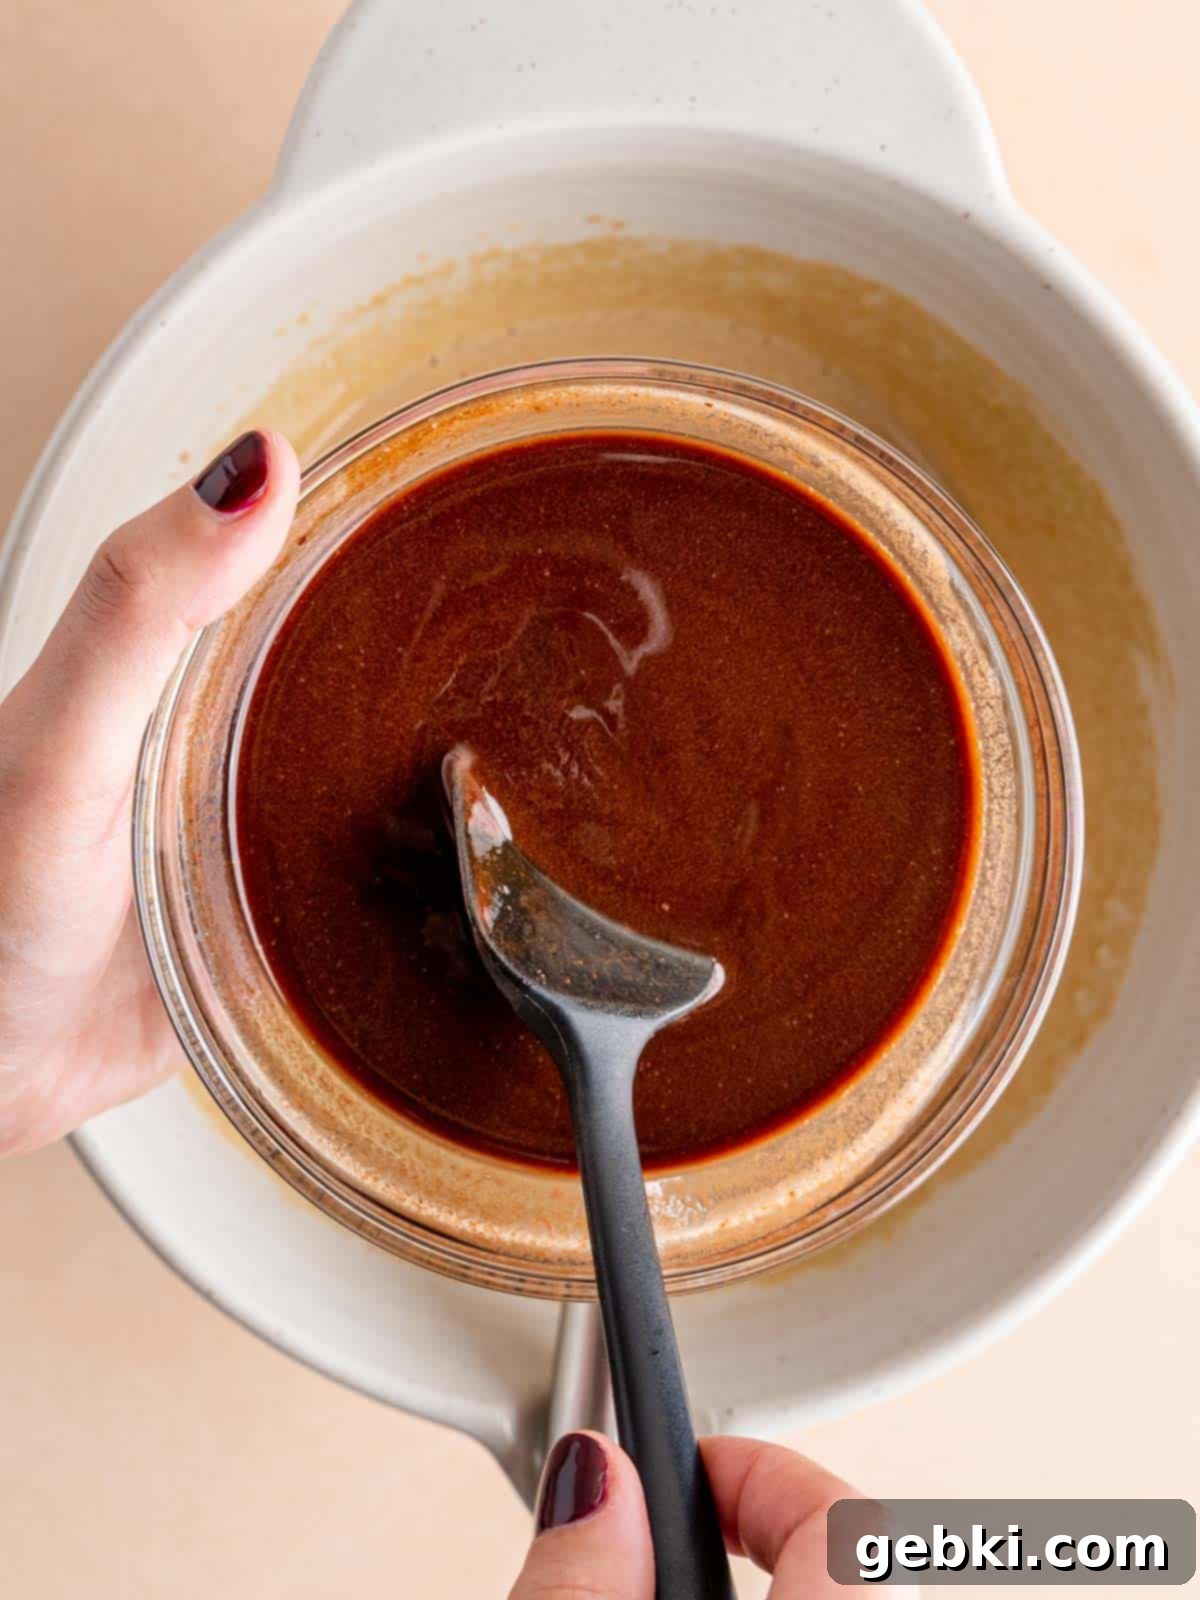
Step 2: Melt Butter and Chocolate. In a separate microwave-safe bowl, combine the unsalted butter and high-quality chocolate chunks (or chopped baking chocolate). Gently melt them together until completely smooth and homogeneous. Allow this rich chocolate mixture to cool slightly before moving to the next step; you don’t want it too hot, or it might cook the eggs.
You have a couple of convenient options for melting your butter and chocolate together:
Microwave Method: Place the butter and chocolate in a microwave-safe bowl. Microwave in short 20-second increments, stirring thoroughly after each interval, until the mixture is completely smooth and glossy. Be careful not to overheat.
Stovetop Double Boiler Method: Place the butter and chocolate in a heat-safe bowl over a pot containing about an inch of simmering water (ensure the water does not touch the bottom of the bowl). Stir continuously with a rubber spatula over medium-low heat until the chocolate and butter are fully melted and combined into a smooth mixture.
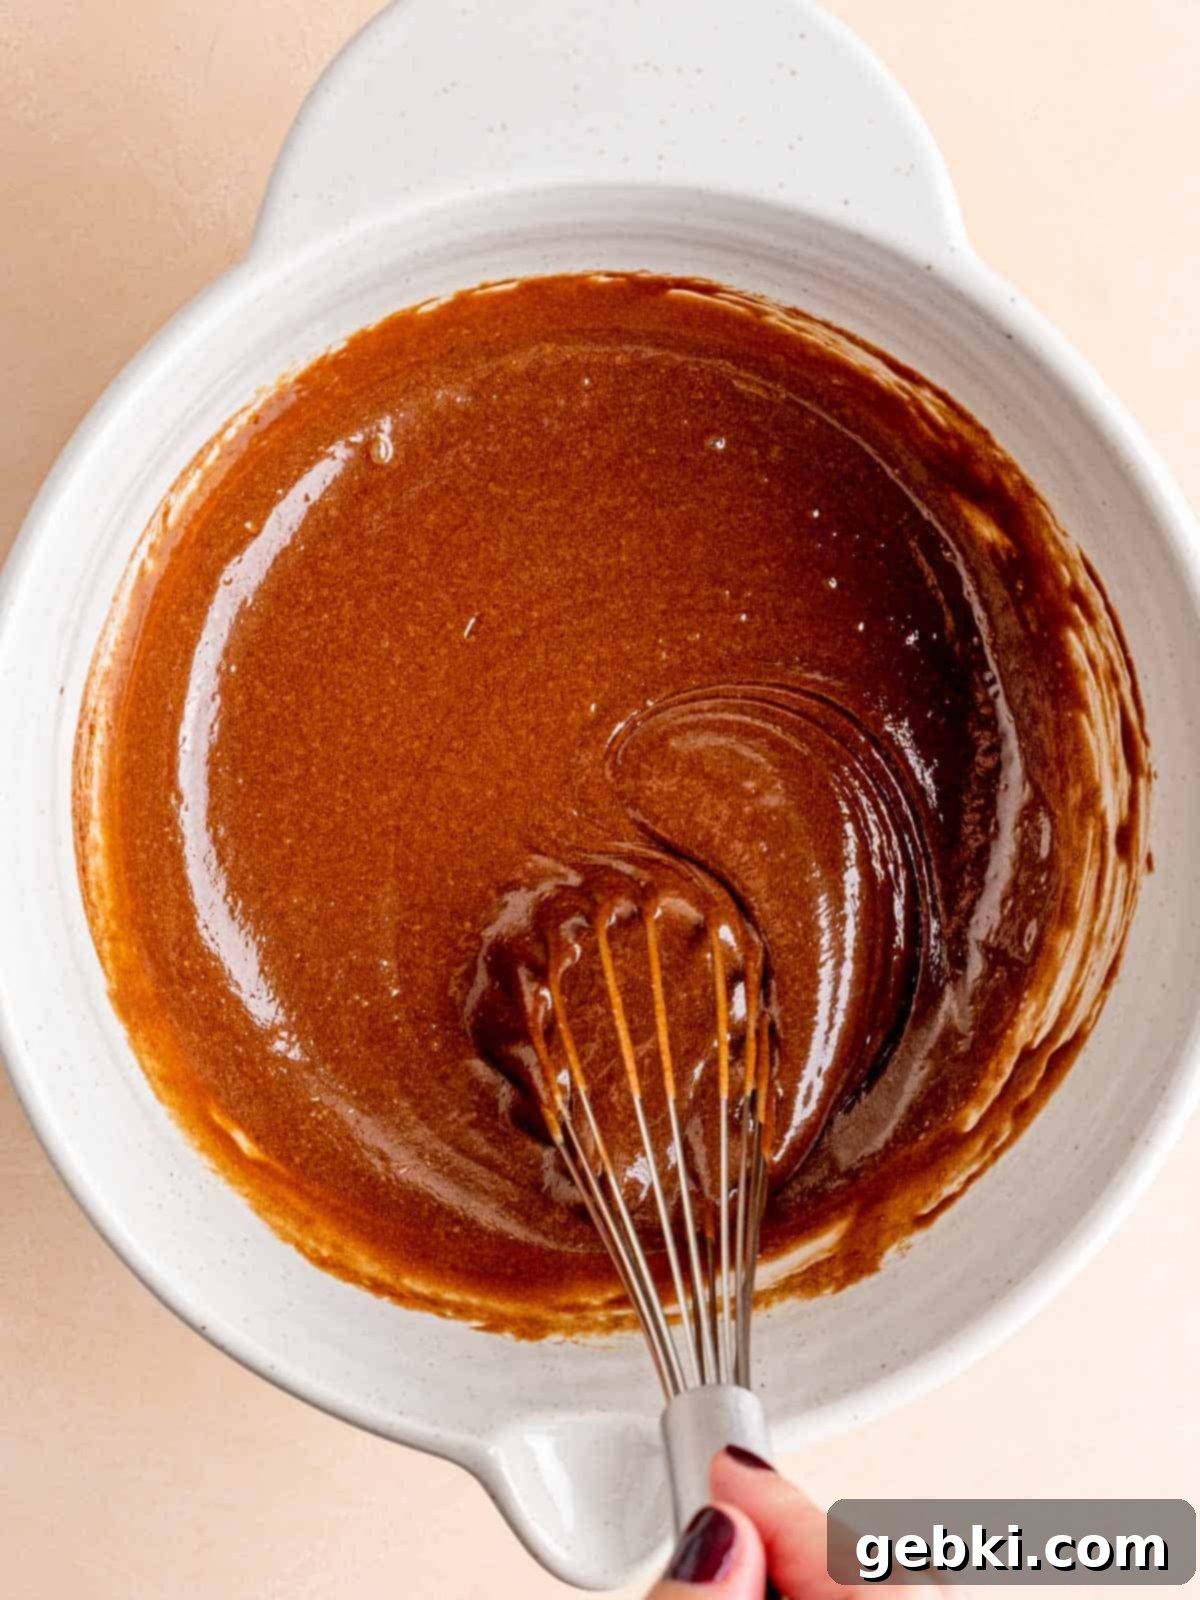
Step 3: Combine Wet Ingredients. Pour the slightly cooled butter and chocolate mixture into the large bowl with the whisked eggs and brown sugar. Mix thoroughly until everything is well combined and glossy. Then, gently stir in your sourdough discard until it is fully incorporated into the wet mixture, adding its subtle magic to the batter.
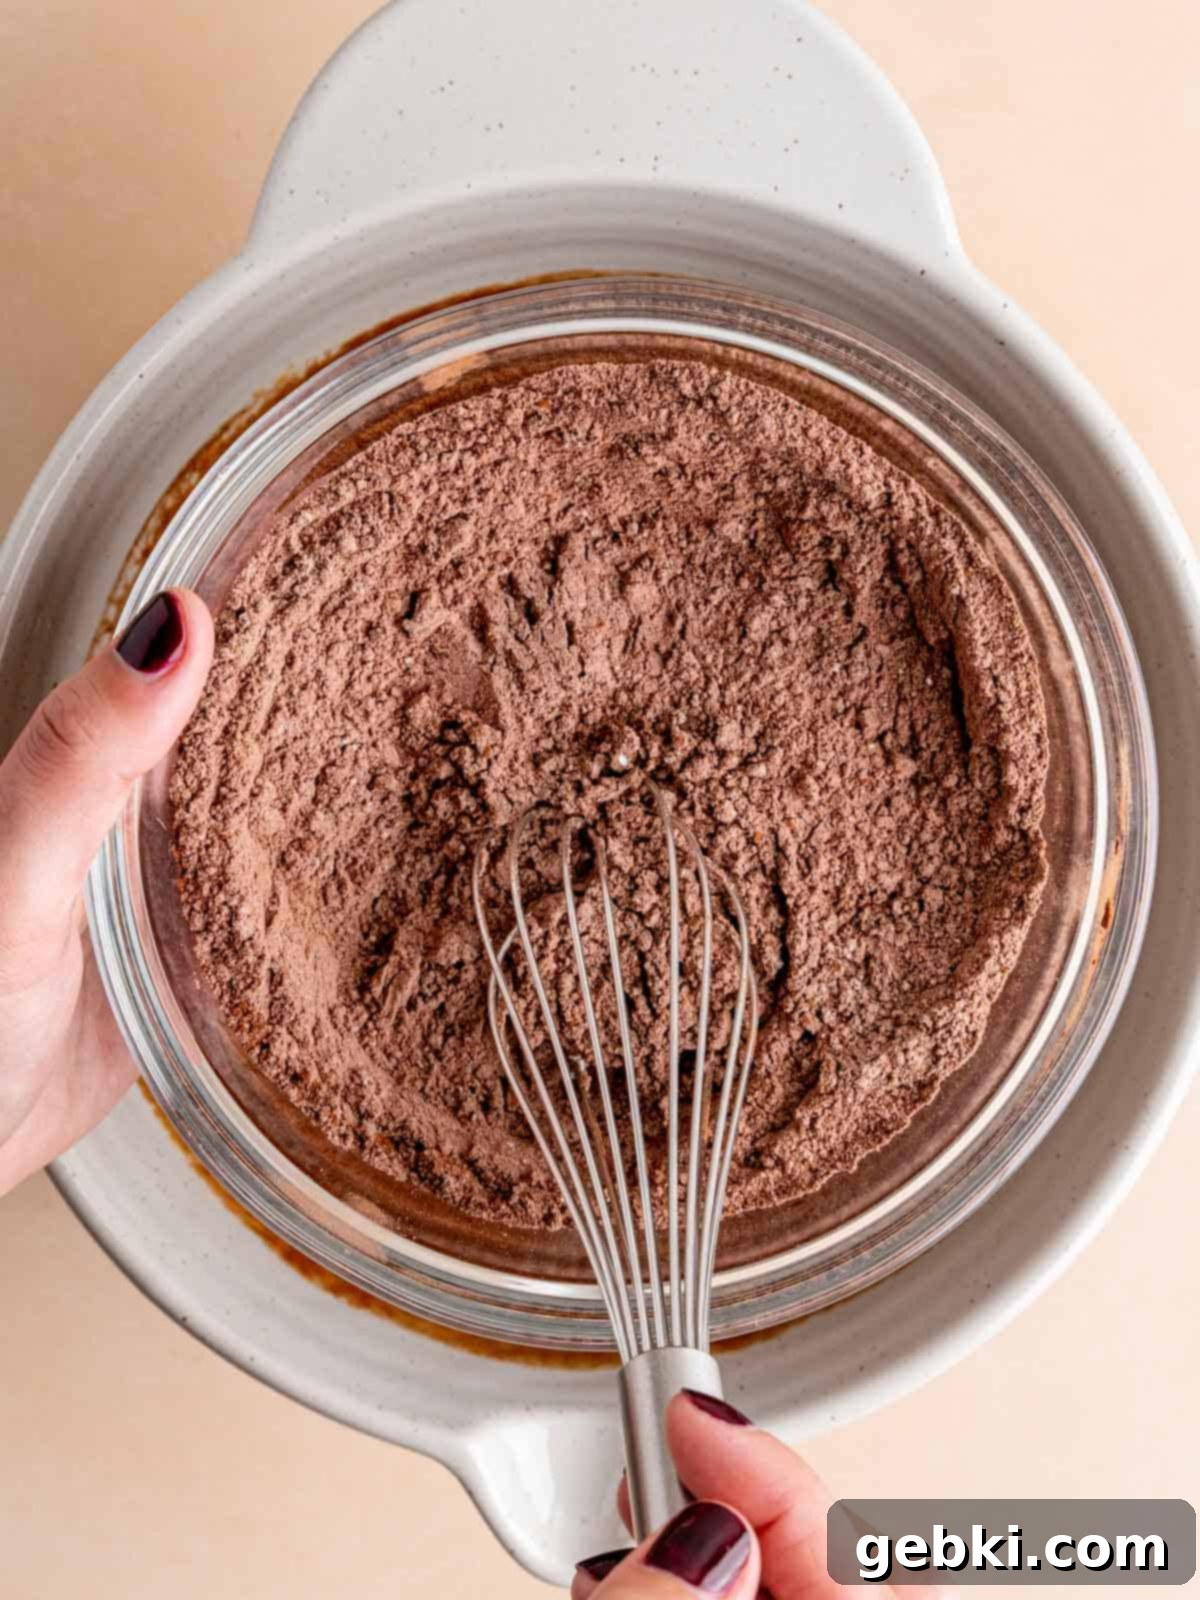
Step 4: Prepare Dry Ingredients and Chocolate Chips. In a separate, medium-sized bowl, whisk together the all-purpose flour, cocoa powder, and salt until uniformly combined. This prevents pockets of dry ingredients in the final batter. Next, gently stir in two-thirds of your semi-sweet chocolate chips (the remaining one-third is for topping). This ensures they are evenly distributed throughout the brownie batter.
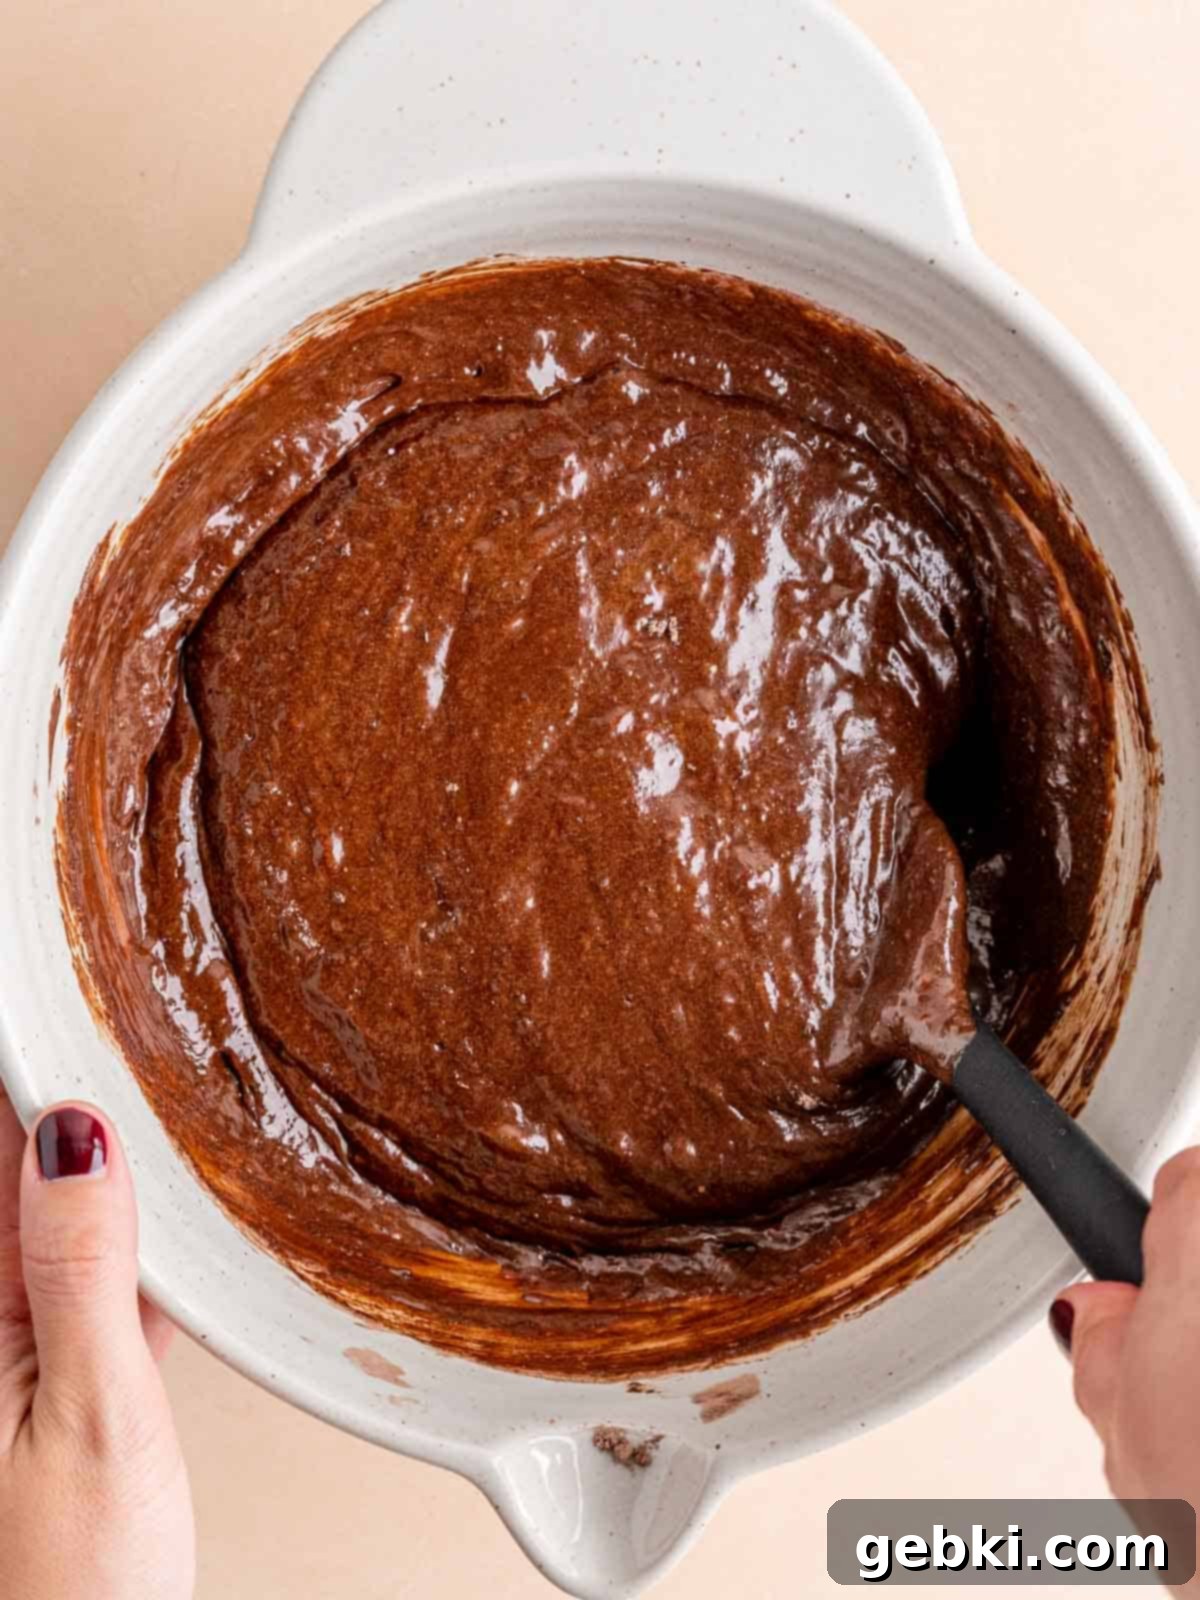
Step 5: Gently Combine Wet and Dry Mixtures. Add the dry ingredient mixture (with chocolate chips) to the wet chocolate and sourdough batter. Using a rubber spatula, gently fold the dry into the wet ingredients. Mix just until the last streaks of flour disappear. Be careful not to overmix, as this can lead to tough, cakey brownies. A few small lumps are perfectly fine!
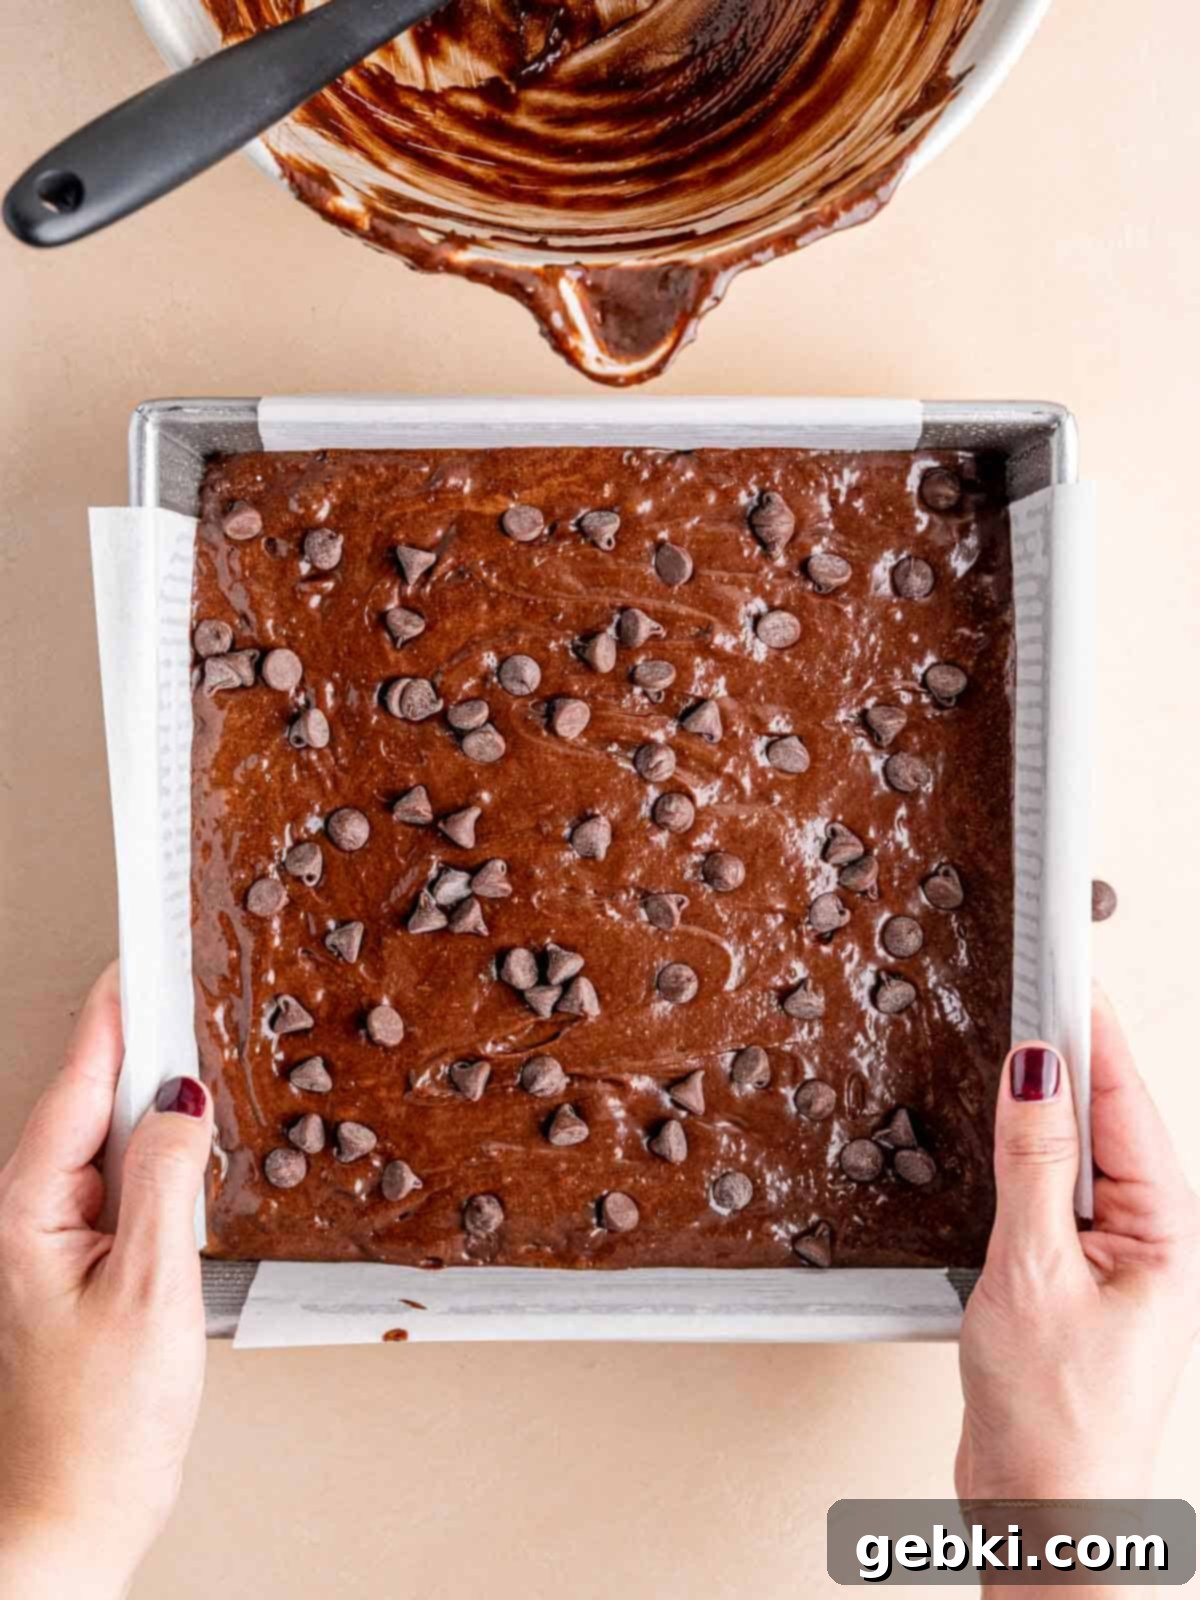
Step 6: Bake to Perfection. Pour the decadent brownie batter evenly into your prepared 9-inch square pan (lined with parchment paper for easy removal). Sprinkle the remaining one-third of chocolate chips generously over the top of the batter. Bake in a preheated oven at 350°F (175°C) for approximately 22-27 minutes. The brownies are ready when the edges appear set and firm, but the center still retains a slight wobble or jiggle. Immediately transfer the pan to a wire rack to allow the brownies to cool completely inside the pan. This cooling process is essential for achieving that ultimate fudgy texture.
Expert Tips for the Ultimate Sourdough Brownies
Achieving bakery-quality, fudgy sourdough brownies is easier than you think with these insider tips and tricks:
- Whisk Eggs and Brown Sugar Thoroughly: This is a non-negotiable step for that iconic shiny, crackly top. Vigorously whisking the eggs and brown sugar for at least 4-5 minutes until the mixture is visibly lighter in color and fluffy incorporates air, creating a stable meringue-like structure on top as the brownies bake. Don’t skip or rush this!
- Master the Parchment Paper Sling: For effortless removal and perfectly clean cuts, create a parchment paper sling. Simply cut a piece of parchment paper long enough to cover the bottom and extend up two opposite sides of your baking pan, allowing for “handles.” Grease the pan lightly, place the sling, then grease the remaining two exposed sides and the parchment. This allows you to easily lift the cooled brownies out of the pan in one piece.
- Do Not Over-Bake Your Brownies: This is arguably the most crucial tip for fudgy brownies. Over-baking is the enemy of fudginess, leading to dry, cakey results. Keep a close eye on them! They are perfectly done when the edges are visibly set and slightly firm, but the very center still has a slight, gentle jiggle when the pan is lightly shaken. A toothpick inserted into the center should come out with moist crumbs attached, but not wet batter. Trust your instincts and err on the side of under-baking slightly for maximum fudginess.
- Use Quality Chocolate: Since chocolate is the star here, using high-quality cocoa powder and chocolate chunks (or baking chocolate) will make a noticeable difference in the final flavor profile. Brands like Guittard, Ghirardelli, or Valrhona for chocolate chunks are excellent choices.
- Room Temperature Ingredients: Ensure your eggs and sourdough discard are at room temperature. This helps them combine more smoothly and evenly with the other ingredients, leading to a more uniform batter and better texture.
- Weigh Your Dry Ingredients: For the most consistent and accurate results, especially with flour and cocoa powder, use a kitchen scale to measure ingredients in grams (g) rather than cups. This eliminates variations due to packing and ensures your brownies are perfectly balanced every time.
Frequently Asked Questions About Sourdough Brownies
Unlike many other baked goods where you want a clean toothpick, with fudgy brownies, you’re looking for a slightly gooey center. The brownies are done when the edges are set and begin to pull away slightly from the sides of the pan. The top will have that characteristic shiny, crackly appearance, and the center will still have a slight jiggle. If a toothpick inserted into the center comes out with moist, fudgy crumbs, they are perfect. Avoid baking until the toothpick comes out completely clean, as this will result in cakey brownies.
The most common reason for cakey brownies is over-baking. If you bake them for too long, the moisture evaporates, and the batter sets up too much, losing its desirable fudgy texture. Ensure you’re following the baking time closely and looking for the visual cues of doneness mentioned above. Also, overmixing the batter after adding flour can develop too much gluten, which contributes to a cakey texture.
While this recipe is specifically formulated to incorporate sourdough discard for its unique moisture and subtle flavor, you could attempt to make them without it. A possible substitution would be to use an equal weight (or volume) of a combination of all-purpose flour and water. For example, if the recipe calls for 125g of discard, you could try using approximately 60g flour and 65g water. However, the brownies would then lack the extra depth of flavor and tenderizing qualities that the discard provides. The texture might also vary slightly, but it should still result in a delicious chocolate brownie!
Yes, absolutely! It is highly recommended to let the brownies cool completely in the pan on a wire rack before cutting into them and indulging. This cooling period is crucial for several reasons: it allows the brownies to finish setting, intensifies their rich chocolate flavor, and helps them develop that perfect, dense, and fudgy texture. Cutting them while warm can lead to a messier appearance and a less stable, softer crumb.
I typically use a robust starter similar to the King Arthur Baking starter, usually fed with a 1:1:1 ratio (e.g., 113 grams of starter, 113 grams of all-purpose flour, and 113 grams of water). For this recipe, it’s best to use unfed sourdough discard, meaning it hasn’t been fed in the last 12-24 hours and has little to no activity. This ensures it primarily contributes moisture and flavor without actively fermenting the batter. Generally, any well-maintained sourdough starter, when used as discard, should work wonderfully in this recipe.
Absolutely! If you love a nutty crunch, feel free to add about 1/4 to 1/2 cup of toasted, chopped walnuts or pecans to the batter along with the chocolate chips. Toasting the nuts beforehand will enhance their flavor significantly.
Using room temperature eggs helps them emulsify more easily and thoroughly with the other ingredients, especially the sugar and melted butter. This leads to a smoother, more uniform batter and ultimately contributes to a better texture in your baked brownies, including that desirable shiny top.
Proper Storage for Freshness
To ensure your fudgy sourdough brownies remain as delicious as the day they were baked, proper storage is essential. Here’s how to keep them fresh:
Room Temperature Storage
Once your sourdough brownies have cooled completely to room temperature, transfer them to an airtight container. Store them on your kitchen counter or in a pantry, away from direct sunlight or heat. They will stay wonderfully fresh and fudgy for up to 1 week. Placing a piece of parchment paper between layers can prevent sticking if stacking.
Freezing Instructions
If you want to enjoy these delectable treats for an extended period, freezing is a great option. Once the brownies are fully cooled, wrap individual brownies tightly in plastic wrap, then place them in a freezer-safe airtight container or heavy-duty freezer bag. This double layer of protection helps prevent freezer burn. They can be stored in the freezer for up to 3 months.
Reheating Instructions
To enjoy a warm brownie, first allow frozen brownies to thaw at room temperature for a few hours. Once thawed (or if starting from room temperature), you can gently warm them in the microwave for 10-20 seconds. This will make the chocolate chips melty and restore that fresh-baked warmth, making them even more irresistible, especially when served with a scoop of vanilla ice cream.
More Decadent Chocolate Recipes You’ll Love
If these sourdough brownies have sparked your passion for chocolate, you’re in luck! We have an array of other fantastic chocolate-filled recipes that are sure to delight your taste buds. Explore these delicious options for more sweet inspiration:
-
Sourdough Discard Chocolate Chip Cookies
-
Mini Brownie Bites
-
Mini Brownie Bites
-
Easy Triple Chocolate Brownie Muffins
-
Easy Triple Chocolate Brownie Muffins
-
Fudgy Small Batch Brownies
-
Fudgy Small Batch Brownies
-
Fudgy Small Batch Brownies

Did You Try This Recipe?
We absolutely love hearing from you! If you’ve whipped up a batch of these fudgy sourdough discard brownies, please let us know what you thought by leaving a comment below. Don’t forget to share your delicious creations on Instagram, Facebook, & Pinterest! Tag us so we can see your amazing work!
Thank you for baking with us!
-Kayla
📖 Recipe
Easy Fudgy Sourdough Discard Brownies
Kayla Burton
Pin Recipe
Equipment
-
9×9 inch pan
-
Parchment paper
-
Mixing bowls
-
Measuring spoons
-
Scale/measuring cups
-
Whisk
-
Spatula
Ingredients
- 2 large eggs room temperature
- 1 large egg yolk room temperature
- 1½ cups (300 g) brown sugar light or dark, packed
- 10 tablespoons (140 g) unsalted butter
- ½ cup (90 g) chocolate chunks or chopped baking chocolate bittersweet or dark, high quality
- ½ cup (125 g) sourdough discard (unfed sourdough starter)
- ¾ cup (93.75 g) all-purpose flour weighed in grams or spooned and leveled
-
Cocoa Powder
½ cup (43 g) cocoa powder
- ½ teaspoon salt
- 1 cup (180 g) semi-sweet chocolate chips divided (⅔ in the batter, ⅓ for topping)
Instructions
-
Preheat your oven to 350°F (175°C) and prepare a 9-inch square baking pan by lining it with parchment paper, creating a sling for easy removal later.
-
In a large mixing bowl, thoroughly whisk together the room temperature eggs, the extra egg yolk, and brown sugar until the mixture becomes light yellow, thick, and fluffy (this usually takes about 4-5 minutes of vigorous whisking). This step is key for a crinkly brownie top!
-
In a separate microwave-safe bowl, melt the unsalted butter with the ½ cup of high-quality chocolate chunks until smooth. Let this rich chocolate mixture cool slightly (it should be warm to the touch, not hot). Once cooled, whisk it into the egg-sugar mixture for 1-2 minutes until fully combined and glossy. Then, gently stir in the sourdough discard until it is completely incorporated into the wet batter.
-
In a medium bowl, whisk together the all-purpose flour, cocoa powder, and salt. Stir in ⅔ cup of the semi-sweet chocolate chips.
-
Add the dry ingredients and chocolate chips to the wet mixture. Using a rubber spatula, carefully fold them together just until the streaks of flour are no longer visible. Be careful not to overmix the batter. Pour the brownie batter evenly into the prepared 9-inch square pan, then sprinkle the remaining ⅓ cup of chocolate chips generously over the top.
-
Bake for 22-27 minutes, or until the edges are set and firm, but the center still has a slight jiggle to it, and the top is shiny and crackly. Immediately remove the pan from the oven and transfer it to a wire rack. Let the brownies cool completely in the pan before attempting to remove them. Once cooled, use the parchment paper sling to lift them out, slice them into squares, and savor every fudgy bite!
Save This Recipe! 💌
We’ll email this post to you, so you can come back to it later!
Notes
The Toothpick Test: Remember, for fudgy brownies, a toothpick inserted into the center should not come out completely clean. Instead, it should have a few moist, gooey crumbs attached. If it comes out with wet batter, bake for a few more minutes. If it comes out clean, you’ve likely overbaked for that desired fudgy texture.
Storage Tips: To maintain their delightful fudginess, store fully cooled brownies in an airtight container at room temperature for up to 1 week. For longer preservation, wrap individual brownies tightly in plastic wrap and then place them in an airtight freezer bag or container; they will keep well in the freezer for up to 3 months.
Nutritional Information: The provided nutrition information is an estimate per serving and is calculated automatically. Calorie accuracy is not guaranteed and can vary based on specific ingredients and brands used.
