Irresistible Honey Vanilla Cake: An Easy Layer Cake Recipe with Homemade Whipped Cream
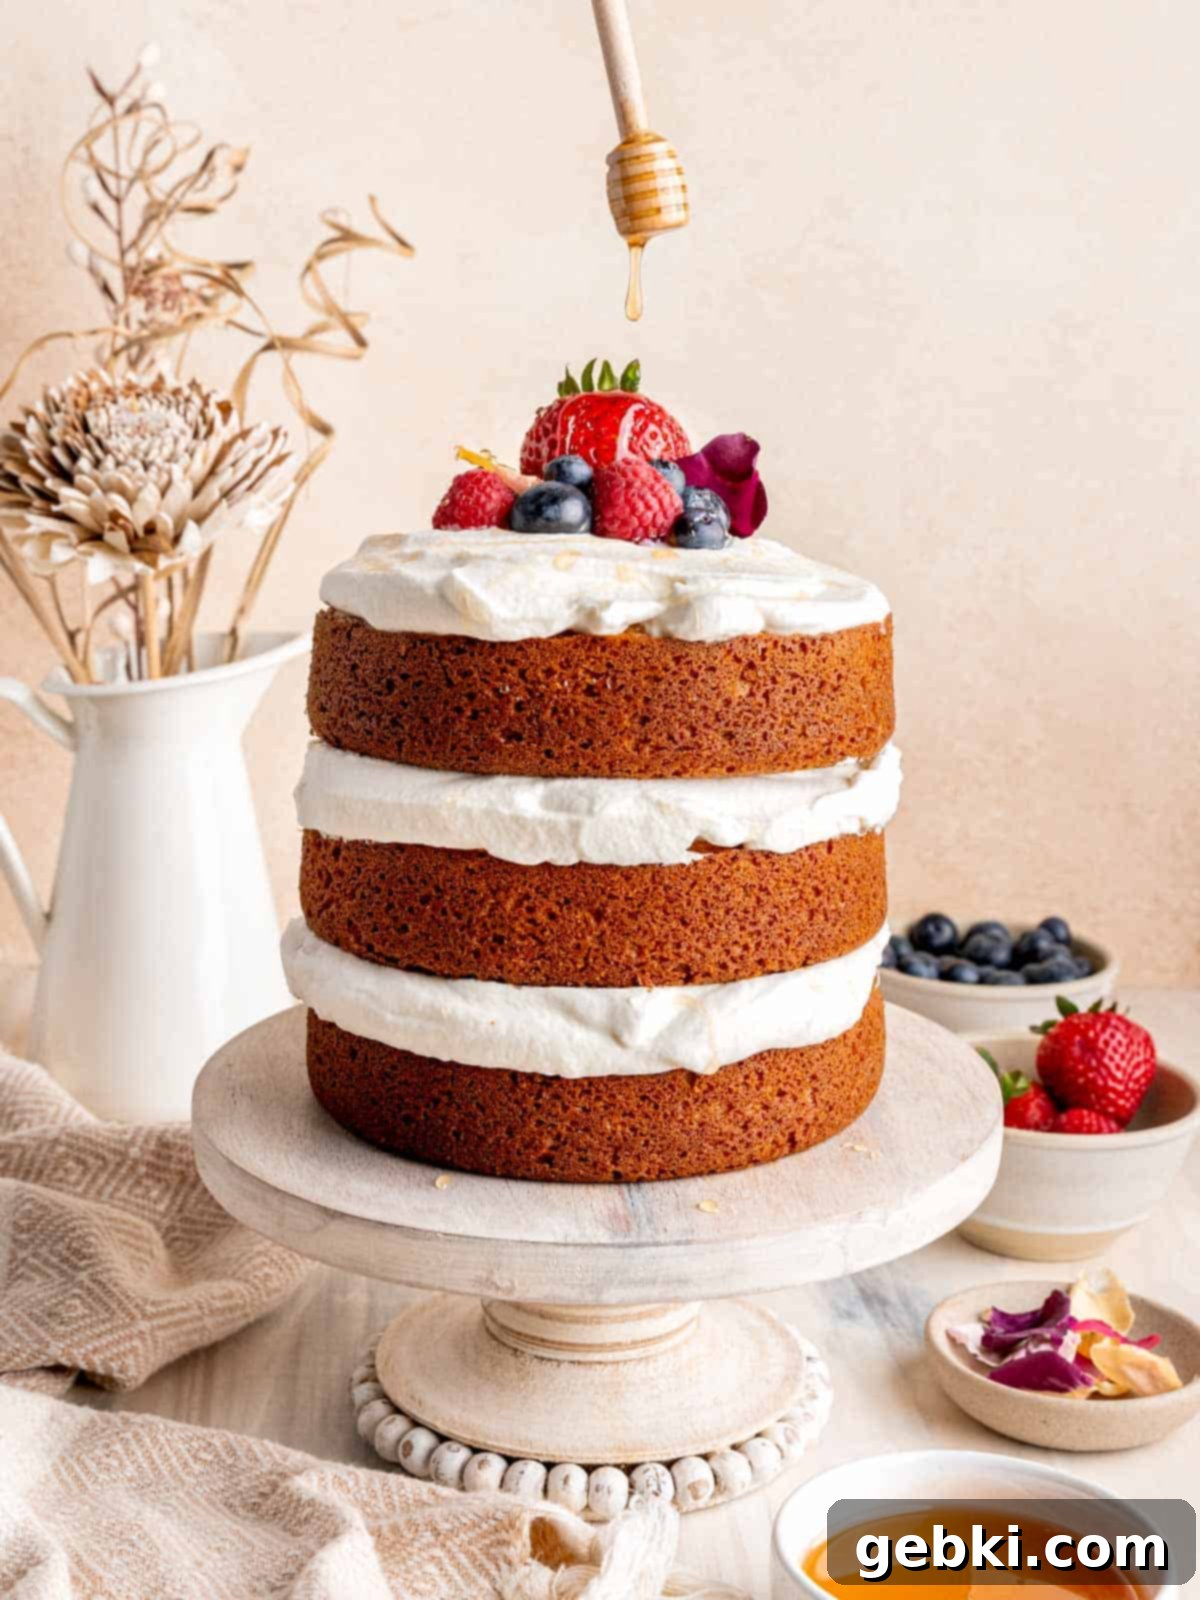
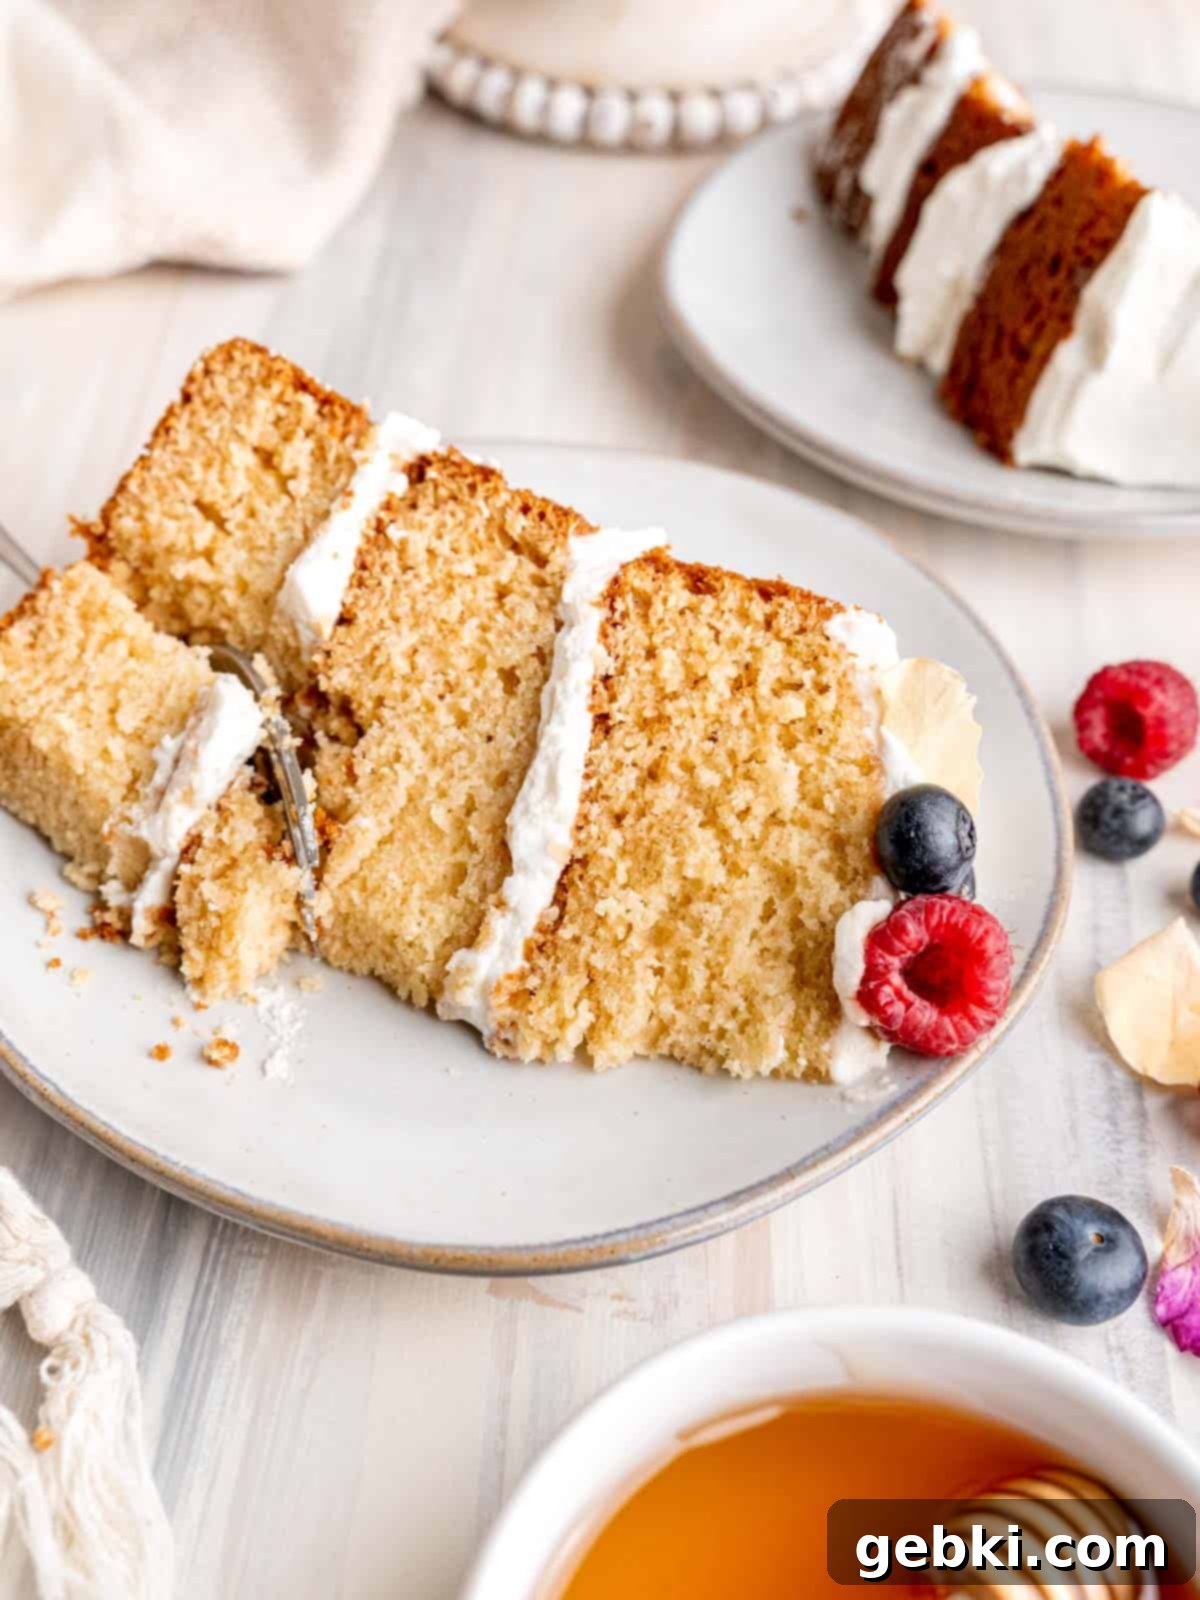
Prepare to be enchanted by this Honey Vanilla Cake, a truly delightful creation featuring three layers of tender, honey-infused sponge cake perfectly complemented by a luscious homemade vanilla whipped cream. This isn’t just a cake; it’s an experience! It’s designed to be effortlessly delicious, coming together in under an hour, making it an ideal choice for any small gathering or a sweet indulgence. Crowned with a vibrant medley of fresh fruit, this cake transforms into the ultimate summer dessert, offering a harmonious balance of natural sweetness and light, airy texture.
This post was originally published on May 26, 2021 and updated on June 3, 2022.
Have you ever experienced the unique sweetness that honey brings to a cake? It’s surprisingly subtle yet profoundly delicious, and I can hardly believe it took me this long to discover its magic in baking! This simple layer cake showcases a delicate honey flavor that harmonizes beautifully with the light, refreshing, and creamy homemade whipped topping. Unlike many overly sweet desserts, this cake offers a perfectly balanced sweetness, making it a crowd-pleaser for any occasion, from casual family dinners to more festive celebrations.
Why You’ll Adore This Honey Vanilla Cake Recipe
This Honey Vanilla Cake isn’t just another dessert; it’s a testament to simple elegance and delightful flavors. Here’s why this recipe will quickly become a favorite in your baking repertoire:
- Effortlessly Simple Layer Cake: Forget complicated techniques! This is an incredibly easy layer cake to assemble. There’s no need for elaborate crumb coating or lengthy freezing times, which often deter home bakers. We focus on clean layers and a beautiful presentation that’s achievable for everyone.
- Delicate and Distinct Honey Flavor: The honey flavor in this cake is present but never overpowering. It offers a warm, floral undertone that perfectly complements the vanilla without being cloyingly sweet. Each bite is a delightful discovery of natural sweetness.
- Perfectly Balanced Sweetness: This delicious honey cake features layers of fluffy, lightly sweetened whipped cream, all crowned with fresh, natural berries. The combination ensures the entire cake isn’t overly sweet, allowing the natural flavors of the honey and vanilla to truly shine through. It’s a sophisticated sweetness that appeals to all palates.
- Versatile for Any Occasion: While designed as a stunning layer cake, this recipe is incredibly adaptable. If you prefer individual portions or are catering to a larger crowd, it can easily be transformed into adorable honey vanilla cupcakes. Simply adjust baking time as noted in the recipe card.
- Healthier Indulgence: Compared to many traditional cakes, this recipe is intentionally less sweet, focusing on natural flavors. It offers a satisfying sweetness similar to my Almond Cupcakes with Raspberry Frosting, but with its own unique honey-vanilla profile.
- Made with Basic Pantry Staples: No need for special trips to the store! This recipe uses readily available, basic ingredients. You won’t require expensive or hard-to-find items like cake flour, making it accessible for bakers of all skill levels.
- Ideal for Summer Freshness: This cake is simply divine when topped with fresh summer fruit. Berries, peaches, or even sliced apricots add a burst of color and tangy sweetness. If you find yourself with extra fruit, don’t let it go to waste – consider trying my refreshing fruit pizza cookies!
Essential Ingredients for Your Honey Vanilla Cake
Crafting this exquisite Honey Vanilla Cake begins with a selection of high-quality ingredients, each playing a vital role in achieving its perfect flavor and texture. Ensure all cold ingredients are at room temperature unless specified otherwise, as this significantly impacts the consistency of your batter.
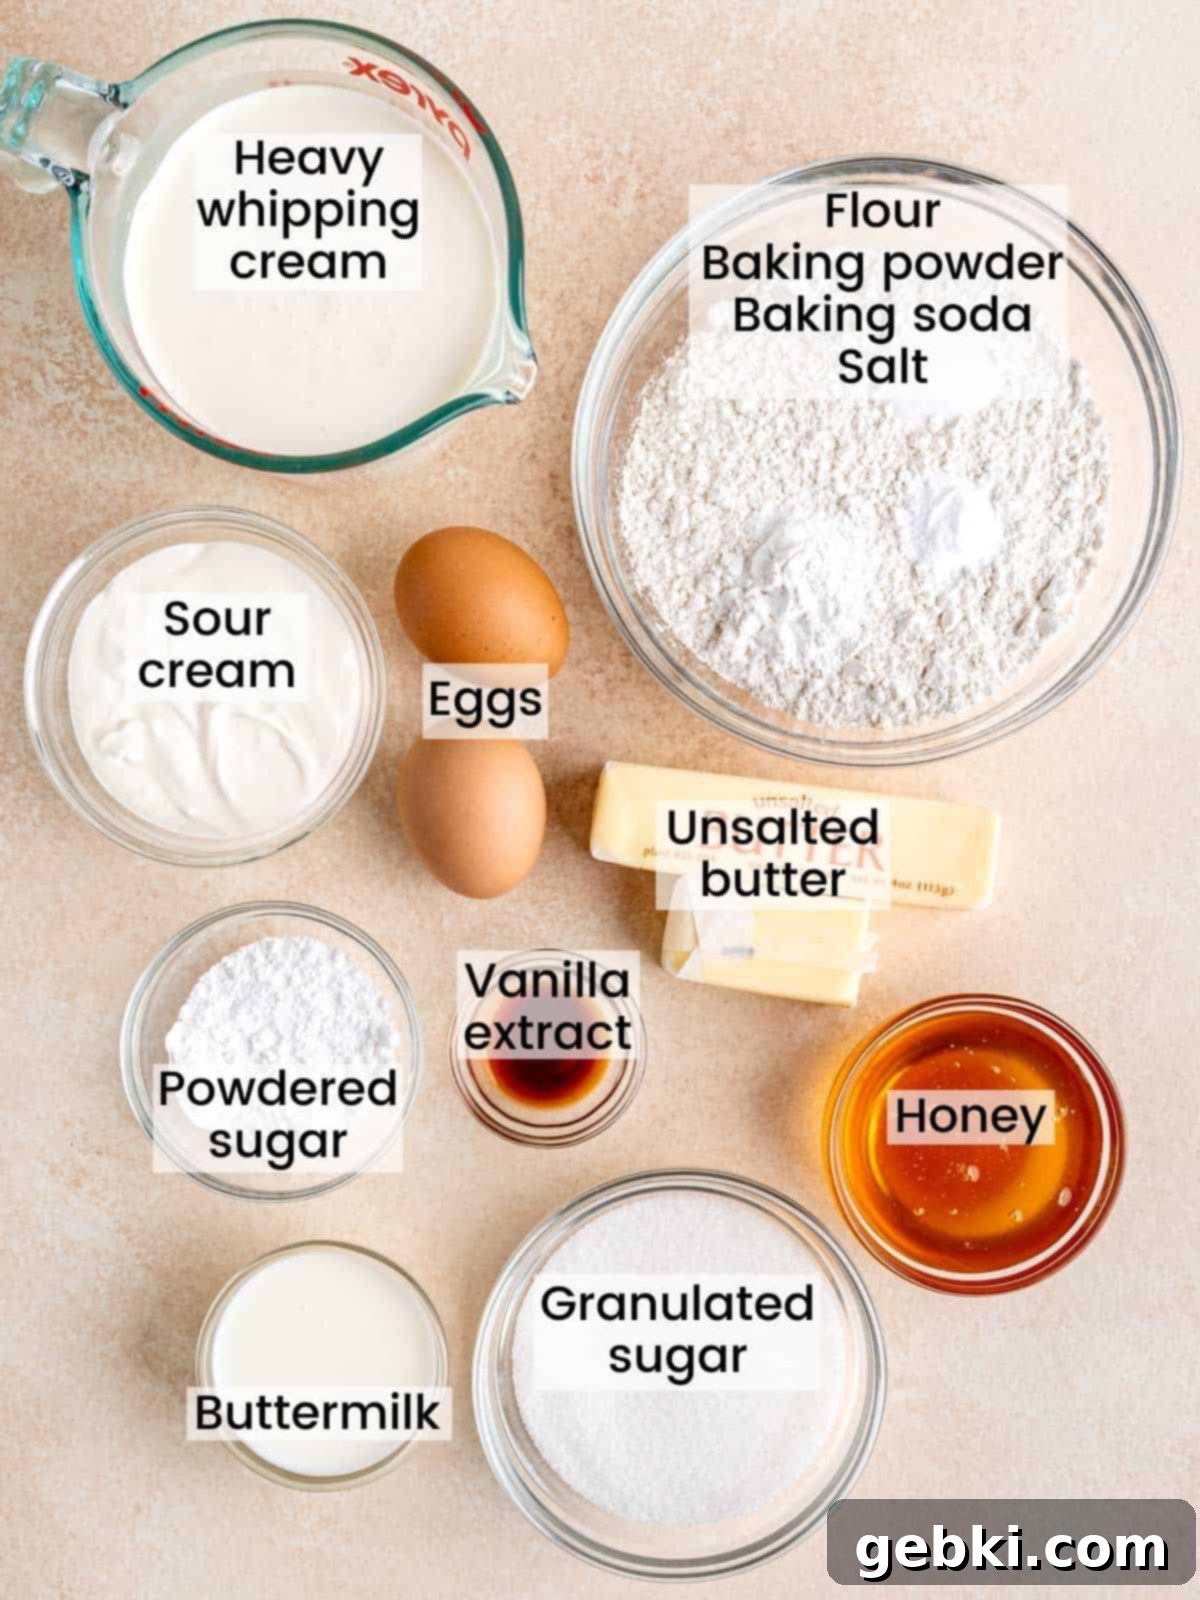
- All-purpose flour: The foundation of our cake, providing structure. Sifting it ensures an even, lump-free batter.
- Baking powder: A leavening agent that helps the cake rise, contributing to its fluffy texture.
- Baking soda: Works with the acidic ingredients (like buttermilk and sour cream) to create a tender crumb.
- Salt: Essential for balancing the sweetness and enhancing all the other flavors in the cake.
- Unsalted butter: Softened butter creams beautifully with sugar, incorporating air for a light texture. Using unsalted gives you control over the overall salt content.
- Large eggs: Act as a binder, add richness, and contribute to the cake’s structure and moisture. Ensure they are at room temperature for optimal emulsification.
- Vanilla extract: A classic flavor enhancer that complements the honey beautifully, adding depth and warmth.
- Honey: The star ingredient! I highly recommend using a local variety of honey if possible. Different regions produce honeys with distinct floral, fruity, or earthy notes, allowing you to truly “hone in” on specific flavor profiles and make your cake unique.
- Granulated sugar: Provides additional sweetness and helps tenderize the cake crumb.
- Buttermilk: Adds a subtle tang and incredible moisture to the cake, reacting with the baking soda for a tender result. If you don’t have it, see the notes section on how to easily make your own.
- Sour cream: Contributes to a rich, moist crumb and a slight tanginess that balances the sweetness. Make sure it’s at room temperature.
- Heavy whipping cream: The base for our homemade whipped cream, providing a luxurious, airy topping. It must be very cold to whip properly.
- Powdered sugar: Sweetens the whipped cream and helps stabilize it, ensuring a smooth and silky texture.
See recipe card below for exact quantities and metric measurements.
Exciting Substitutions & Creative Variations
While this Honey Vanilla Cake is perfect as is, you can easily customize it to suit your taste or dietary needs. Here are some fantastic ideas to get you started:
- For a richer, more traditional cake experience, consider replacing the whipped cream with a decadent vanilla buttercream frosting or a tangy cream cheese frosting. These options will add a different level of sweetness and texture, creating a truly indulgent treat.
- Transform this into an aromatic honey almond cake by simply replacing the vanilla extract with ¼ teaspoon of almond extract. For an extra boost of flavor and texture, sprinkle the cake layers or the top with toasted sliced almonds or a fine dusting of ground almonds.
- Infuse your cake with a bright, citrusy note by adding a teaspoon of finely grated lemon zest to the softened butter and sugar mixture when creaming them together. The lemon will cut through the sweetness and add a refreshing zing, especially appealing in warmer months. Orange zest would also be a delightful alternative!
- Next time, turn this delightful layer cake recipe into a batch of 18 individual cupcakes! Follow the cake batter instructions as written, then use a large ice cream scoop to fill your cupcake liners evenly. Bake them until a toothpick comes out clean (typically 14-19 minutes). Top them generously with whipped cream, then adorn with fresh summer berries and a delicate drizzle of honey for a charming, portable dessert.
- Dairy-Free Option: For those avoiding dairy, you can try using dairy-free butter, a plant-based sour cream alternative, and your favorite non-dairy milk (like almond or oat milk with a splash of vinegar for “buttermilk”). For the whipped cream, well-chilled full-fat coconut cream can be whipped to stiff peaks.
- Spice It Up: Add a pinch of cinnamon or nutmeg to your dry ingredients for a subtle warmth, particularly lovely during autumn.
This recipe has been thoroughly tested with the original ingredients. If you replace or add any ingredients, please let us know how it turned out in the comments below! We love hearing about your creative baking adventures!
Essential Equipment for Perfect Baking
You’ll be pleased to know that creating this scrumptious Honey Vanilla Cake requires only a few standard baking tools that you likely already have in your kitchen. No fancy gadgets needed!
- 3 6-inch round cake pans: These smaller pans are perfect for creating those beautifully high, elegant layers that are characteristic of this cake, making it suitable for smaller gatherings.
- Parchment paper rounds (or cut your own from a roll): Essential for preventing sticking and ensuring your delicate cake layers release cleanly from the pans every time.
- An electric hand mixer or stand mixer with the paddle attachment: While a whisk works for some steps, a mixer makes quick work of creaming butter and sugar and whipping the heavy cream to perfection, saving you time and effort.
- A cooling rack: Crucial for allowing your cake layers to cool evenly and prevent them from becoming soggy due to trapped steam.
- Large and medium mixing bowls: For separating wet and dry ingredients and combining them efficiently.
- Measuring cups and spoons: Accurate measurements are key in baking for consistent results.
- Rubber spatula: Indispensable for scraping down bowls and gently folding ingredients, preventing overmixing.
- Offset spatula (optional but recommended): Makes spreading the whipped cream between layers and on top of the cake much easier and smoother.
Detailed Step-by-Step Baking Instructions
Creating this exquisite Honey Vanilla Cake is a straightforward and enjoyable process. Follow these detailed steps to ensure a moist, flavorful cake and perfectly fluffy whipped cream.
Before you begin your baking journey, remember to preheat your oven to a consistent 350°F (175°C). Next, meticulously prepare your three 6-inch round cake pans by lightly coating them with a non-stick cooking spray. Then, press a round piece of parchment paper into the bottom of each pan. This simple step is vital for ensuring your cake layers release effortlessly after baking, preventing any frustrating sticking.
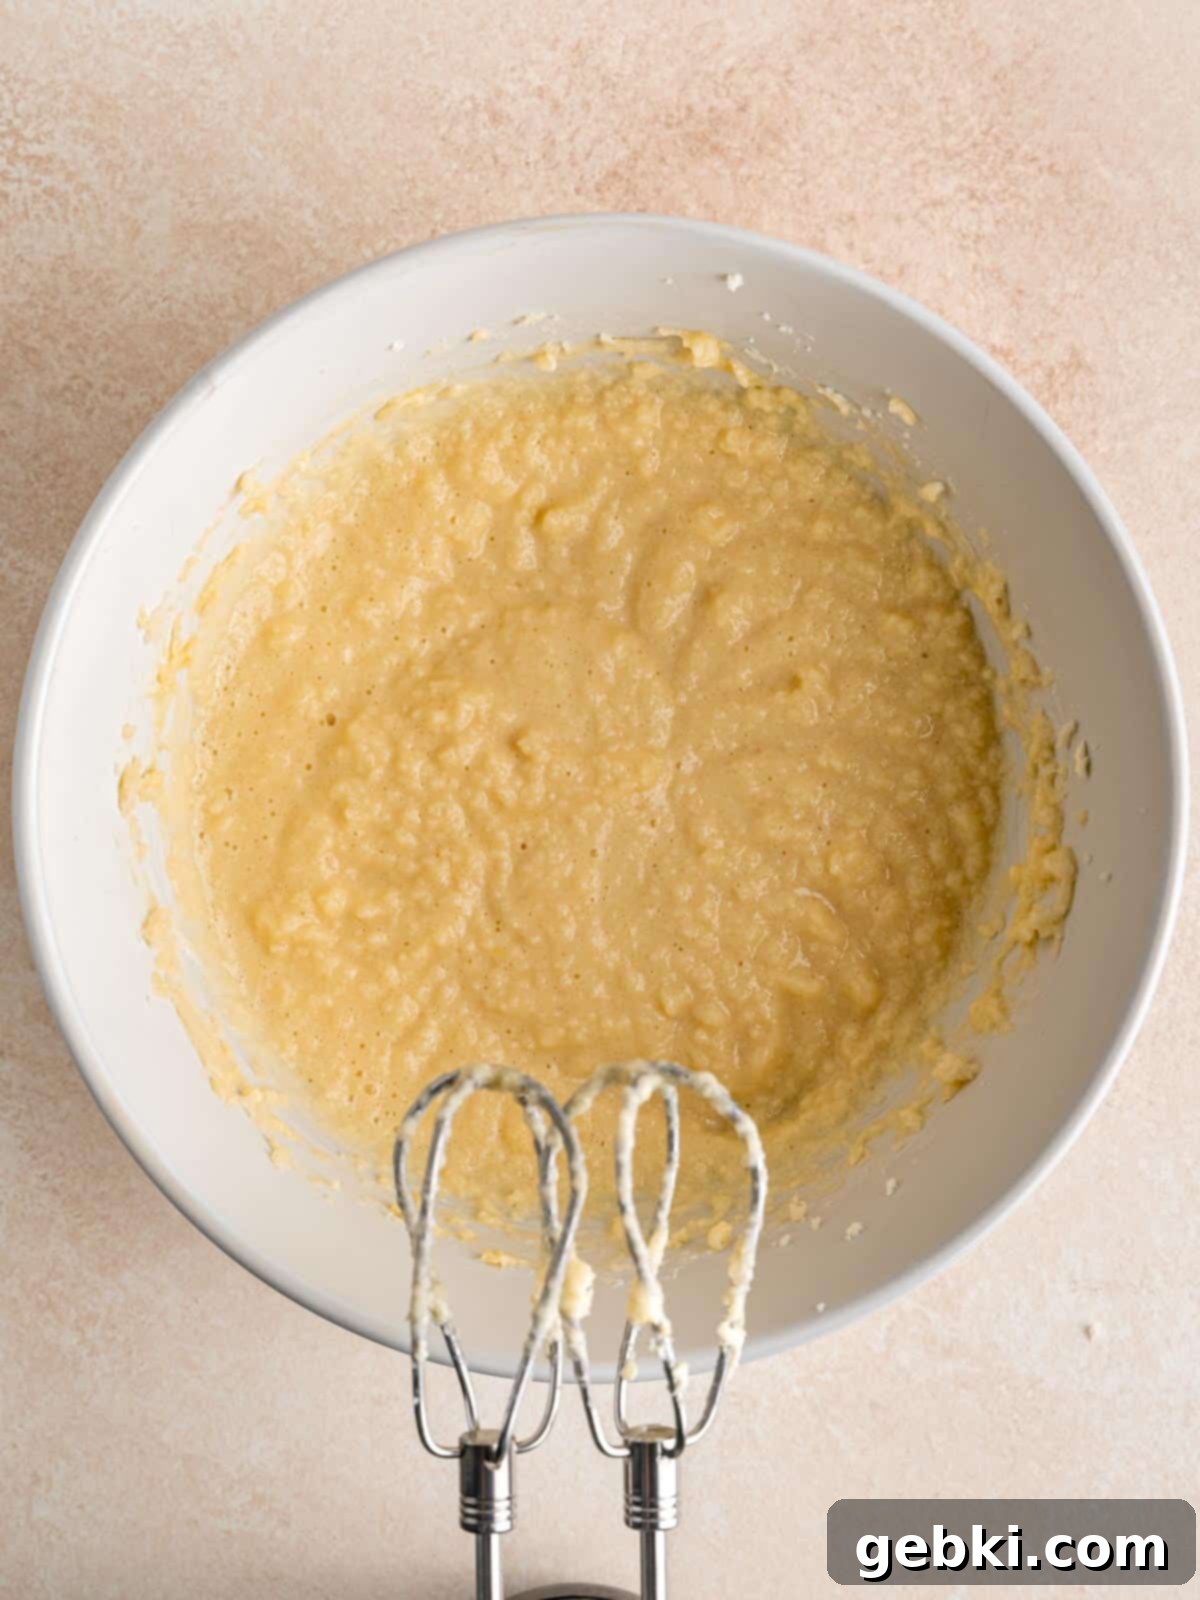
Step 1: Prepare the Wet Ingredients. In a large mixing bowl, using an electric hand mixer (or a stand mixer fitted with the paddle attachment), cream together the softened unsalted butter and granulated sugar on medium speed. Beat until the mixture is visibly light in color and fluffy in texture, which usually takes about 2-3 minutes. This creaming process incorporates air, essential for a tender cake. Once light and fluffy, gradually mix in the honey until well combined. Then, add the large eggs one at a time, mixing well after each addition until fully incorporated. Finally, stir in the vanilla extract and sour cream, beating until the mixture is smooth and cohesive. Scrape down the sides of the bowl to ensure everything is evenly combined.
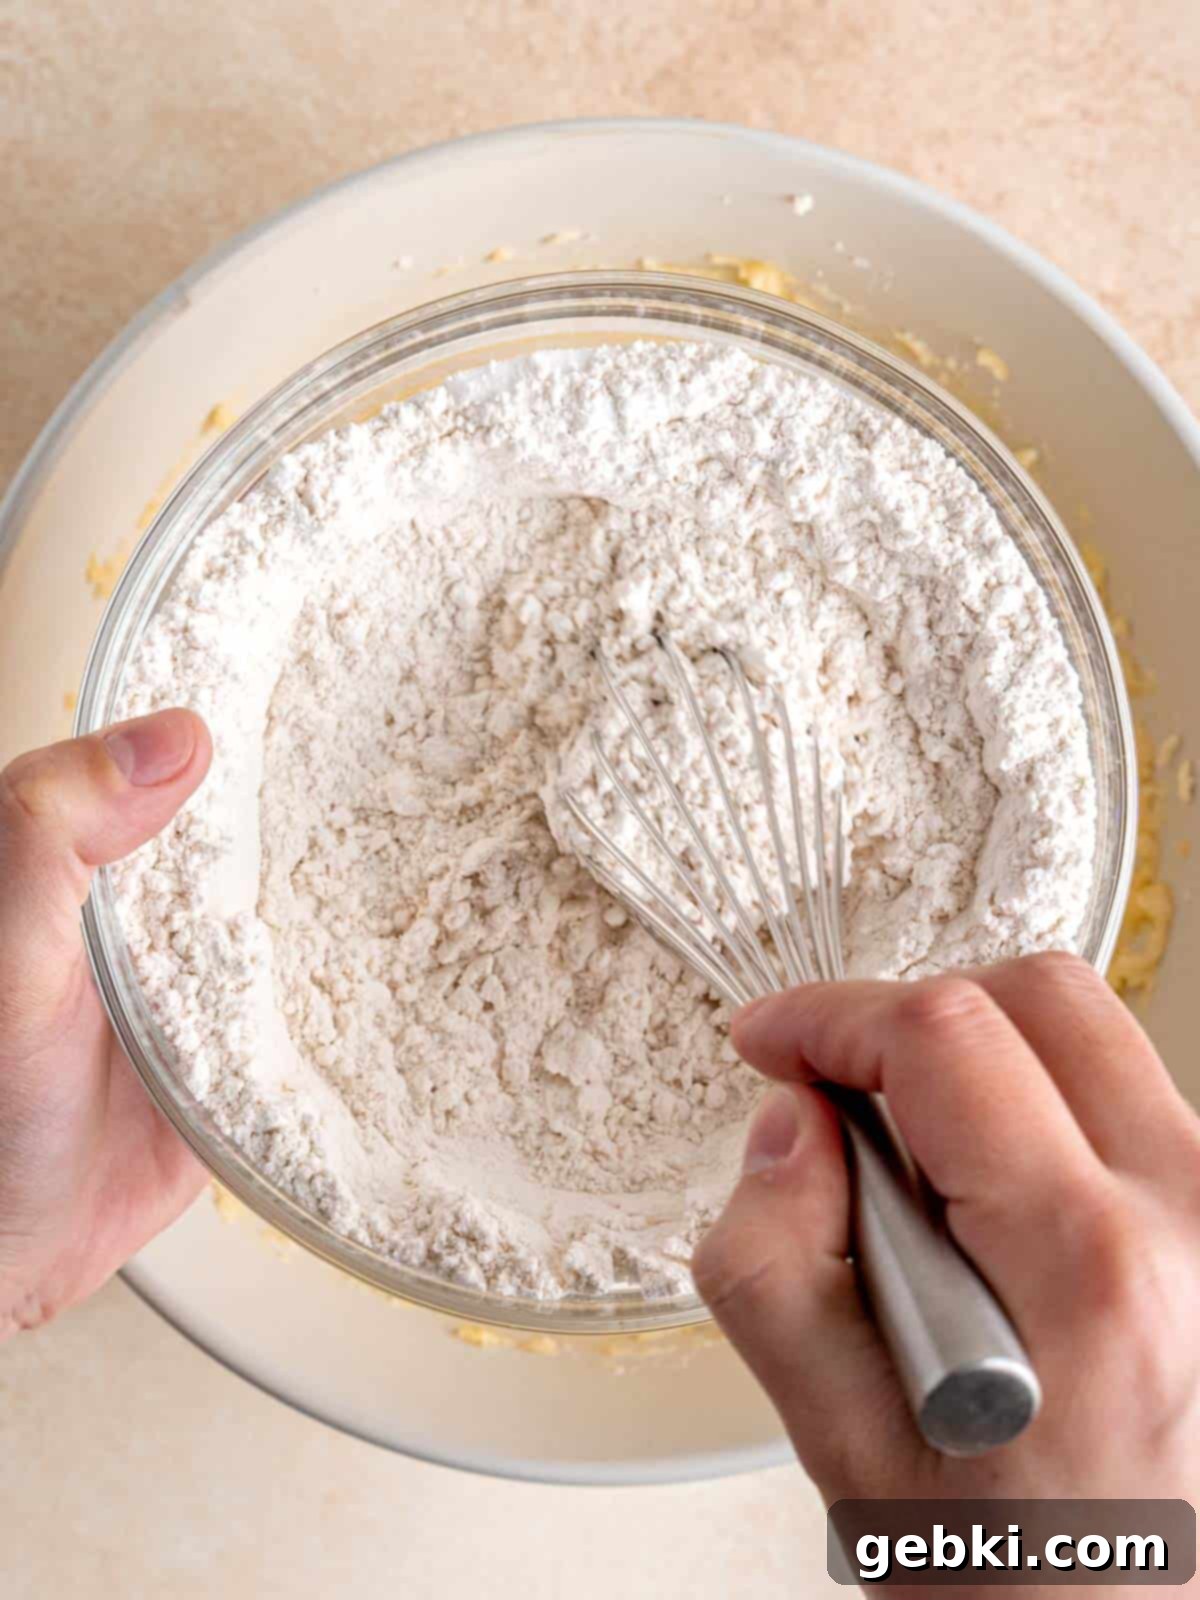
Step 2: Combine the Dry Ingredients. In a separate, small bowl, thoroughly whisk together all the dry ingredients: all-purpose flour, baking powder, baking soda, and salt. Whisking ensures these ingredients are evenly distributed, so the leavening agents can work effectively throughout the batter, leading to a consistent rise and texture in your cake layers.
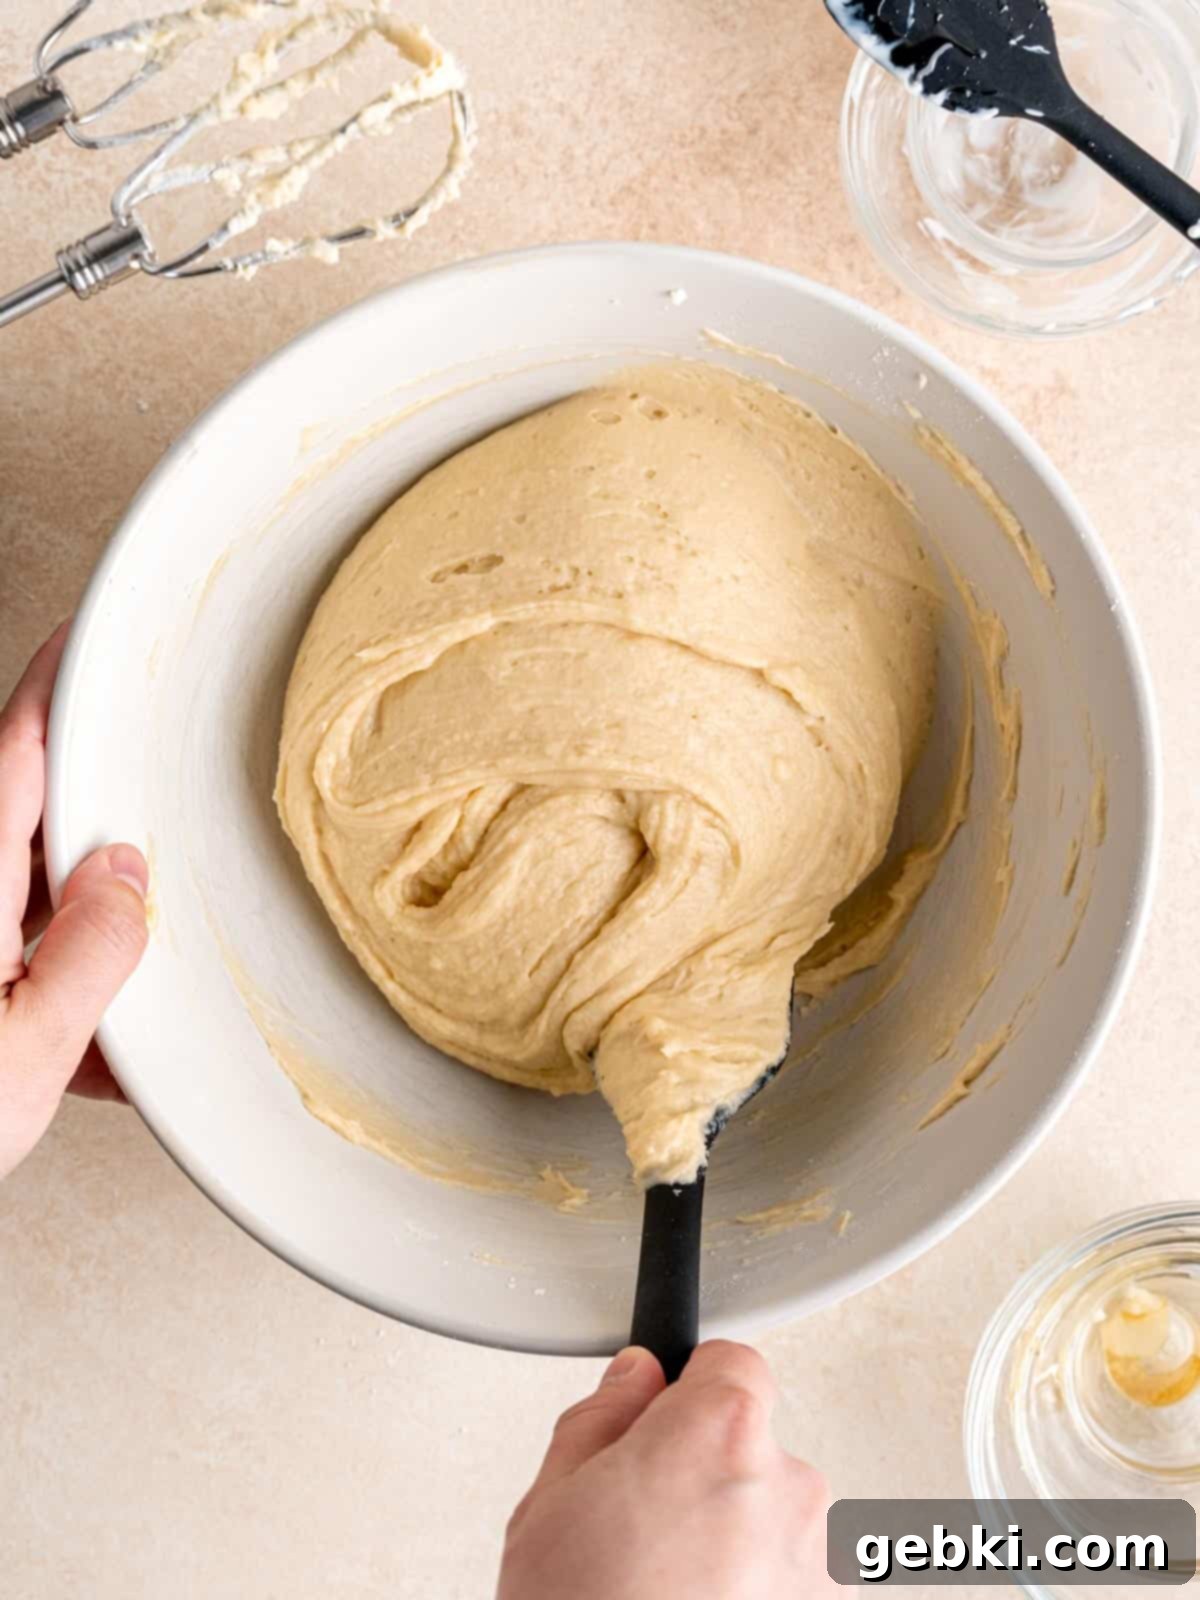
Step 3: Combine Wet and Dry Ingredients. Now, it’s time to bring the two mixtures together. Alternately fold approximately a third of the whisked flour mixture into the wet ingredients, mixing gently just until streaks of flour disappear. Follow this with a third of the buttermilk, mixing until just combined. Repeat this process two more times, alternating between dry ingredients and buttermilk, ensuring you finish with the dry ingredients. The key here is to mix *just* until everything is combined to avoid overmixing, which can lead to a tough cake. A rubber spatula is ideal for this gentle folding.
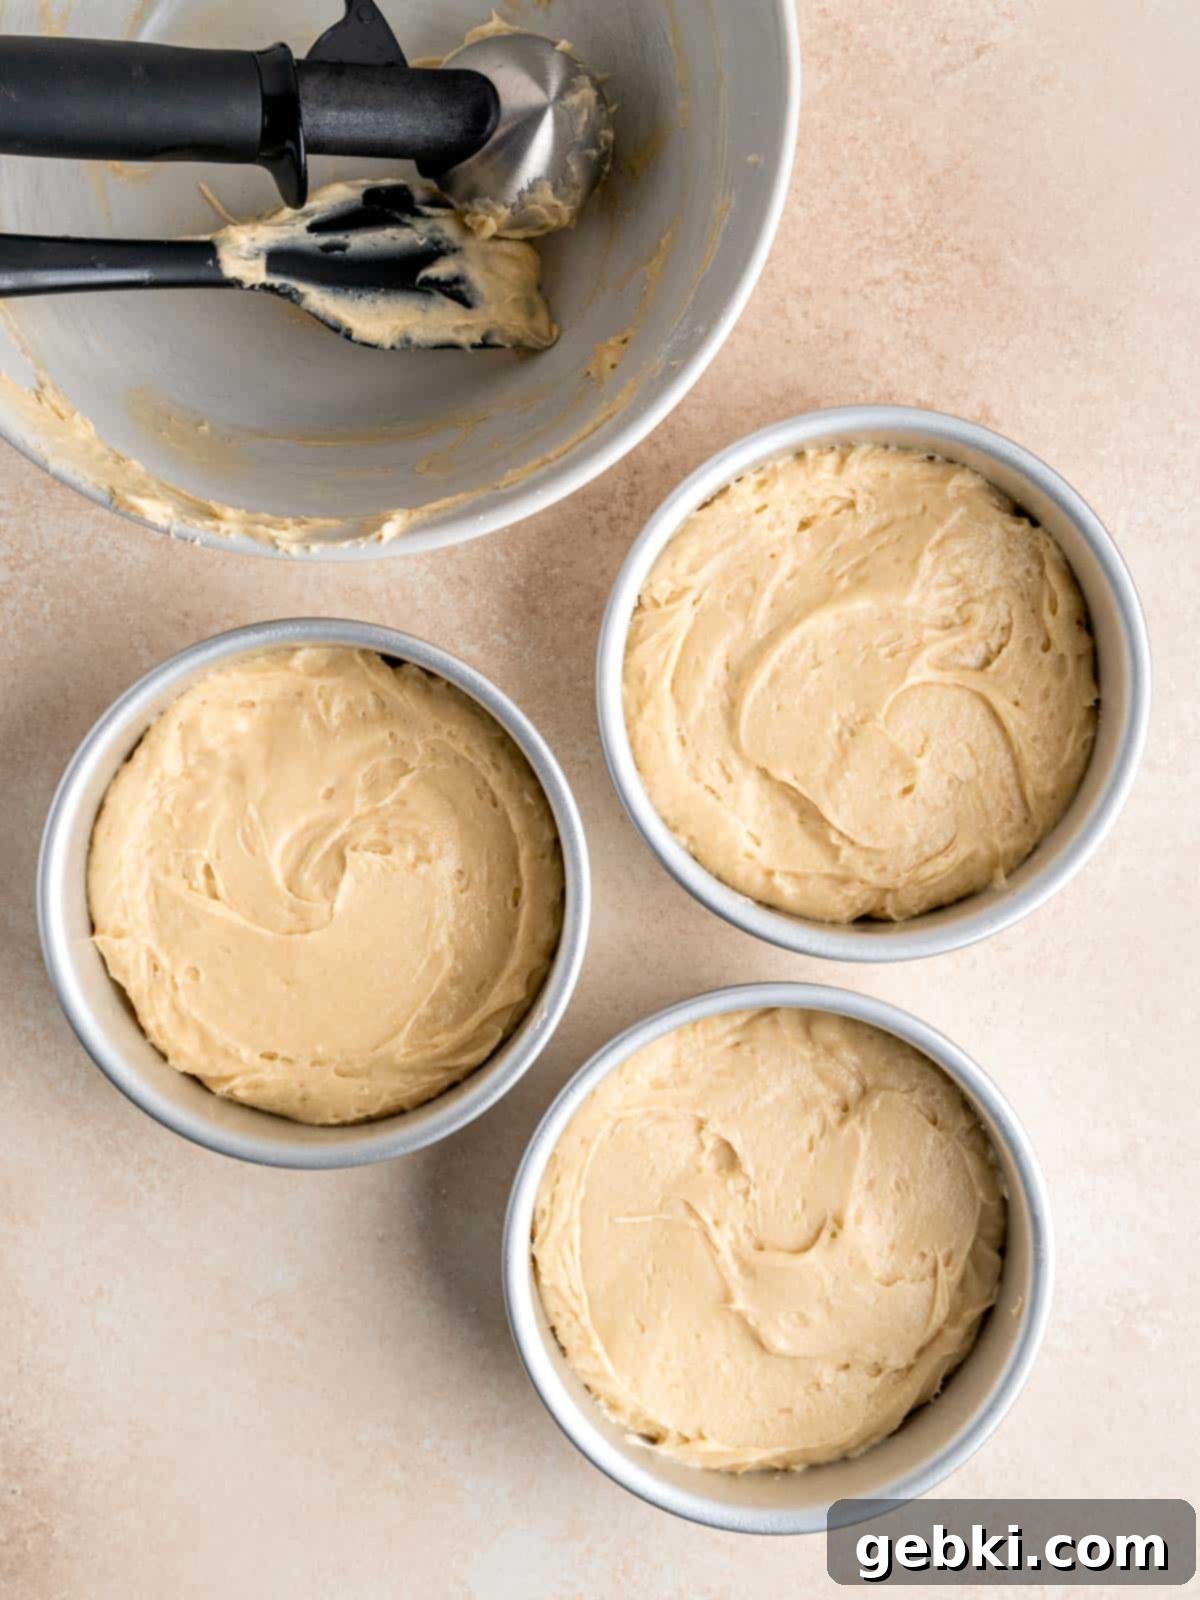
Step 4: Bake the Cake Layers. Divide the cake batter evenly among the three prepared 6-inch cake pans. Use a spatula to gently smooth out the tops as much as possible, ensuring even baking. Place all three pans on the middle rack of your preheated oven. Bake for approximately 23-29 minutes. The cakes are ready when the tops are lightly golden brown, and a wooden toothpick inserted into the center of a cake comes out clean, with no wet batter clinging to it. You might need to rotate the pans halfway through for even baking. Once baked, remove the cakes from the oven and let them cool in their pans on a wire rack for about 30 minutes. After this initial cooling, carefully invert them onto the wire rack, peel off the parchment paper, and allow them to cool completely to room temperature. This complete cooling is essential before frosting!
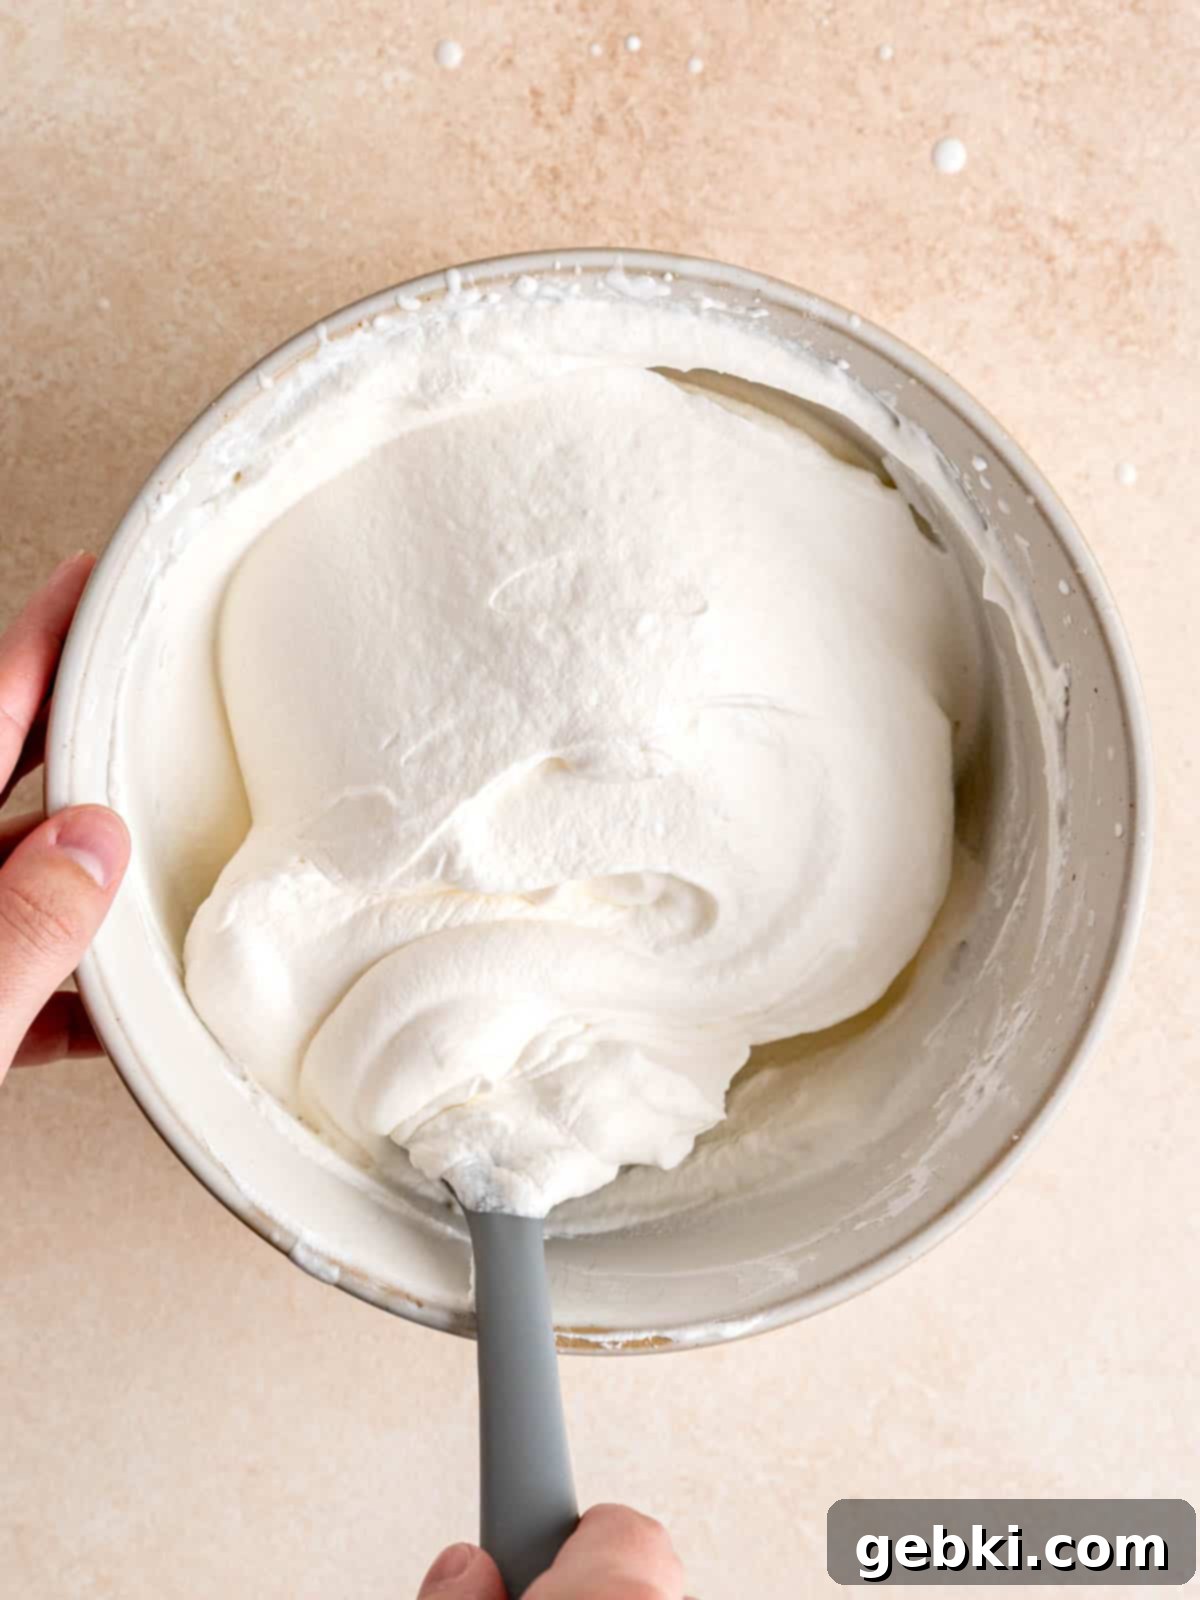
Step 5: Prepare the Homemade Whipped Cream. While your cake layers are cooling, prepare the light and airy whipped cream. In a medium-sized, very cold bowl (chilling the bowl and whisk attachments beforehand helps!), pour the very cold heavy whipping cream. Whisk on medium-high speed until the cream begins to thicken and reaches soft peaks – meaning it holds its shape but the tip of the peak gently curls over. At this point, add the vanilla extract and powdered sugar. Continue whisking on high speed until the cream forms stiff peaks, where the peaks hold their shape firmly when the whisk is lifted. Be careful not to over-whisk, or it will turn into butter! This step is fastest and easiest with an electric mixer, but a strong arm and a good whisk can also achieve excellent results.
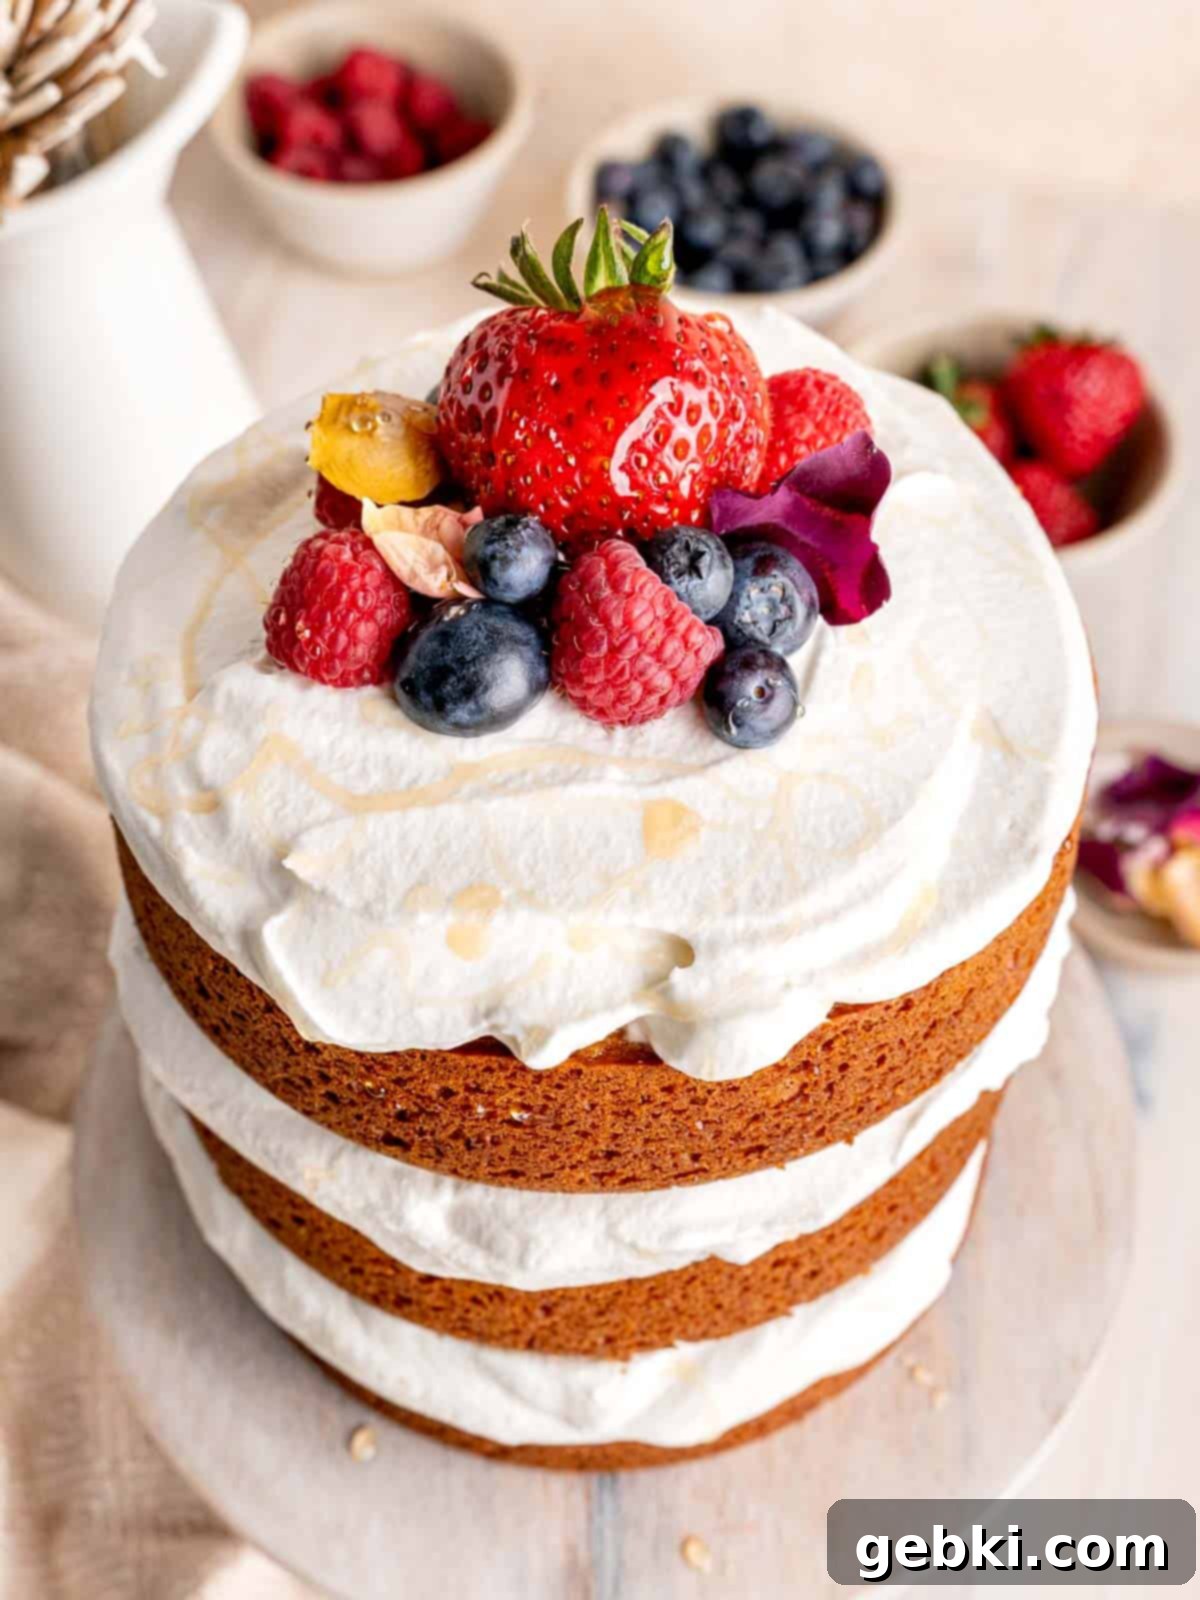
Step 6: Assemble and Garnish Your Masterpiece. Once the cake layers are completely cooled (this is critical to prevent the whipped cream from melting!), it’s time for assembly. Place one cake layer on your serving plate or cake stand. Spread an even layer of your freshly made vanilla whipped cream over the top, using an offset spatula for a smooth finish. Carefully place the second cake layer on top, followed by another generous layer of whipped cream. Repeat with the final cake layer and the remaining whipped cream, creating a beautiful tiered effect. For a stunning presentation, garnish your Honey Vanilla Cake with your favorite fresh fruits – berries, sliced peaches, or kiwi all work wonderfully. Edible flowers can add an elegant touch, and a final drizzle of extra honey will highlight the cake’s signature flavor. Serve immediately and enjoy!
Expert Tips for the Best Honey Vanilla Cake
Achieving bakery-quality results with your Honey Vanilla Cake is simple with these insider tips:
- Embrace Local Honey for Unique Flavors: This is my number one recommendation! Did you know that raw honey can vary dramatically in appearance, texture, and taste depending on its origin? The specific flora from which bees collect nectar directly influences its flavor profile, ranging from light and citrusy to deep and floral. Using locally sourced honey in this cake allows you to highlight and celebrate those specific, nuanced notes. I often decorate my cake to match the honey’s taste – for example, with floral honey, I’ll add edible flowers, which also beautifully complement fresh berries! This personal touch makes each cake a unique experience.
- Patience is Key: Cool Cakes Completely Before Frosting. This step cannot be stressed enough! If you attempt to add the delicate whipped cream to cake layers that are even slightly warm, the cream will melt, leading to a “droopy” and unstable cake. Allow your cake layers to cool to absolute room temperature, or even chill them briefly in the refrigerator, before applying the frosting. Furthermore, once assembled, avoid keeping the cake in warm environments for extended periods to maintain the whipped cream’s integrity.
- Precision in Measuring Flour with a Scale. For the most consistent and professional baking results, especially with flour, I highly recommend using a digital kitchen scale. Flour tends to compact significantly when scooped into measuring cups, which can lead to adding too much flour and a dense, dry cake. Weighing your flour in grams ensures an accurate measurement every time, guaranteeing a fluffy, moist, and tender cake crumb. Gram measurements are conveniently available by switching over to “Metric” in the recipe card below.
- Room Temperature Ingredients for a Smooth Batter: Ensure your butter, eggs, buttermilk, and sour cream are all at room temperature before you start mixing. Room temperature ingredients emulsify much better, creating a smooth, homogenous batter that traps air more effectively, resulting in a lighter and more tender cake.
- Don’t Overmix the Batter: Overmixing develops gluten in the flour, which can lead to a tough and chewy cake rather than a tender one. Mix the wet and dry ingredients just until they are combined and no streaks of flour remain. A few small lumps are perfectly fine!
Common Questions About Honey Vanilla Cake
Here are answers to some frequently asked questions to help you perfect your Honey Vanilla Cake:
While you can definitely taste the subtle, warm notes of honey in the cake layers, it is not an overwhelmingly strong flavor. It’s designed to be delicate and balanced, allowing the vanilla to shine through as well. The intensity can vary slightly depending on the type of honey you use.
Absolutely! Crystallization is a natural process for raw honey and indicates its purity. To make it liquid again for easy measurement and mixing, simply microwave it for a few seconds on low power or place the jar in a bowl of warm water until it returns to its smooth, pourable consistency. Be careful not to overheat it, as excessive heat can diminish its beneficial properties.
Yes, you can! If you only have two 8-inch round cake pans, you can use those. Your layers will be slightly thinner, and the baking time may need to be adjusted (likely a few minutes less). Keep a close eye on them and use the toothpick test. For a single 9×13 inch sheet cake, the baking time will also change, likely increasing to 30-35 minutes. Ensure your batter is evenly distributed.
It’s incredibly easy! If you don’t have buttermilk on hand, measure out ¼ cup of 2% or whole milk. Stir in ¾ teaspoon of white vinegar or lemon juice. Let it sit for 5-10 minutes until it slightly curdles. Voila! You have homemade buttermilk ready for your cake.
Storage Guidelines for Your Honey Vanilla Cake
Proper storage is essential to keep your Honey Vanilla Cake fresh and delicious. Here’s how to ensure its longevity:
Room Temperature: If you’re preparing the cake layers in advance, they can be individually wrapped tightly in plastic wrap (once completely cooled) and stored at room temperature for up to two days before you assemble the entire honey vanilla cake. Ensure they are in an airtight container or well-sealed to prevent drying out.
Refrigerator: Once the cake is assembled with the homemade whipped cream, it must be stored in the refrigerator due to the dairy in the frosting. Place the cake in an airtight cake carrier or cover it loosely with plastic wrap to prevent it from absorbing refrigerator odors. It will stay fresh and delicious for up to 3 days. For best flavor and texture, allow slices to come to room temperature for about 15-20 minutes before serving.
Freezing Instructions: Freezing individual cake layers is a fantastic way to prep ahead! Once your cake layers have cooled completely, wrap each layer tightly in several layers of plastic wrap, then an additional layer of aluminum foil. Freeze them for up to 1 month. When you’re ready to enjoy your cake, simply transfer the frozen layers to the refrigerator overnight to thaw, or let them thaw at room temperature for a few hours. Once thawed, prepare a fresh batch of whipped cream and assemble as per the instructions. Freezing the layers separately helps maintain their moisture and prevents freezer burn.
More Delicious Recipes You’ll Love
If you enjoyed this Honey Vanilla Cake, we’re sure you’ll love exploring some of our other delectable baking recipes. Discover your next favorite treat!
-
The Best Carrot Cake Cupcakes
-
Cinnamon Streusel Muffins
-
Sweet Potato Cupcakes with Toasted Meringue Frosting
-
Cowboy Cookie Cake
Did you try this recipe? We’d love to see your creations!
Tag @brokenovenbaking on Instagram & Facebook and don’t forget to leave a ⭐️⭐️⭐️⭐️⭐️ rating and review below!
📖 Recipe
Simple Honey Vanilla Layer Cake
Kayla Burton
Pin Recipe
20
minutes
25
minutes
45
minutes
Dessert
American
1
cake
5284
kcal
Equipment
-
(3) 6-inch round cake pans -
Mixing bowls -
Measuring spoons -
Measuring cups/scale -
Whisk -
Spatula -
Hand mixer or stand mixer with paddle attachment (recommended) -
Wire rack
Kayla’s Top Tip
Weigh dry ingredients in grams (g) with a food scale for best results!
Toggle on to prevent your screen from going dark
Ingredients
Honey Cake
-
¾
cup (1½ sticks)
(
169
g)
unsalted butter
room temperature -
¾
cup
(
150
g)
granulated sugar -
6
tablespoons
(
6
tablespoons)
honey -
2
large
(
2
large)
eggs
room temperature -
1½
teaspoons
(
1½
teaspoons)
vanilla extract -
½
cup
(
120
g)
sour cream
room temperature -
2
cups
(
250
g)
all-purpose flour -
½
teaspoon
(
½
teaspoon)
baking soda -
1½
teaspoon
(
1½
teaspoon)
baking powder -
½
teaspoon
(
½
teaspoon)
salt -
¼
cup
(
59.15
ml)
buttermilk
room temperature*see notes below to make your own
Whipped Cream
-
2
cups
(
473.18
ml)
heavy whipping cream
cold -
1
teaspoon
(
1
teaspoon)
vanilla extract -
2
tablespoons
(
16
g)
powdered sugar
Instructions
Honey Cake
-
Preheat your oven to 350°F (175°C). Prepare three 6-inch round cake pans by generously spraying them with non-stick cooking spray, then lining the bottoms with parchment paper rounds. This ensures easy release of your cake layers.
-
In a large mixing bowl, cream together the softened unsalted butter and granulated sugar using a hand mixer (or stand mixer with paddle attachment) until the mixture is light, fluffy, and pale in color, typically taking about 2 minutes. Next, stir in the honey until it’s well incorporated. Add the eggs one at a time, mixing thoroughly after each addition. Finally, mix in the vanilla extract and sour cream until everything is smooth and combined.
-
In a separate medium bowl, whisk together the dry ingredients: all-purpose flour, baking soda, baking powder, and salt. Whisking ensures these ingredients are evenly distributed, which is crucial for a consistent rise.
-
Alternately fold a third of the dry flour mixture into the wet ingredients, mixing gently with a spatula until just combined. Follow this with a third of the buttermilk, mixing until incorporated. Repeat this process two more times, always being careful not to overmix the batter. Stop stirring as soon as all ingredients are just combined to keep the cake tender.
-
Evenly distribute the cake batter across the three prepared cake pans. Use a spatula to gently smooth the tops of the batter in each pan to promote even baking.
-
Bake all three cake layers on the middle oven rack for approximately 23-29 minutes. Baking times can vary, so keep an eye on them. The cakes are done when their tops are light golden brown and a toothpick inserted into the center of a cake comes out clean. You may need to rotate the pans halfway through to ensure even baking.
-
Once baked, remove the cakes from the oven and allow them to cool in their pans on a wire rack for about 30 minutes. After this initial cooling, carefully invert them onto the wire rack, gently peel off the parchment paper from the bottoms, and allow them to cool completely to room temperature before frosting. While they’re cooling, proceed to make the whipped cream.
Whipped Cream
-
In a chilled medium bowl, vigorously whisk the very cold heavy whipping cream using an electric mixer until it reaches soft peaks. This means the cream will be thick and hold its shape, but the tips will gently droop. Add the vanilla extract and powdered sugar, then continue whisking on high speed until the cream forms stiff peaks, holding its shape firmly when the whisk is lifted. Be careful not to over-whisk, as it can quickly turn grainy.
Assemble the Cake
-
Once your cake layers are completely cool, place one layer on your desired serving plate or cake stand. Spread about a third of the prepared whipped cream evenly over the top using an offset spatula. Carefully place the second cake layer on top, followed by another layer of whipped cream. Repeat with the third and final cake layer.
-
Spread the remaining whipped cream over the top of the cake, creating a beautiful domed or swirled effect. Now for the fun part: decorate the cake however you’d like! We highly recommend adding a vibrant medley of fresh fruits, such as mixed berries or sliced peaches, for an extra touch of freshness and color. A final drizzle of extra honey will emphasize the cake’s signature flavor. Serve immediately for the best experience!
Save This Recipe! 💌
We’ll email this post to you, so you can come back to it later!
Notes
This recipe is also perfectly suited to make 18 delightful cupcakes! Follow the instructions to prepare the cake batter as written, then scoop the batter evenly into 18 cupcake liners. Bake them at 350°F (175°C) for a shorter duration of 14-19 minutes, or until a toothpick inserted comes out clean.
For optimal freshness, store the frosted cake in an airtight container in the refrigerator for up to 3 days. The whipped cream will hold its structure best when kept cold.
The provided nutrition information is an estimate for the entire cake. Please note that calorie accuracy is not guaranteed and can vary based on exact ingredients and portion sizes.
Calories:
5284
kcal
Carbohydrates:
484
g
Protein:
54
g
Fat:
357
g
Saturated Fat:
219
g
Polyunsaturated Fat:
16
g
Monounsaturated Fat:
98
g
Trans Fat:
6
g
Cholesterol:
1472
mg
Sodium:
2856
mg
Potassium:
1133
mg
Fiber:
7
g
Sugar:
278
g
Vitamin A:
12787
IU
Vitamin C:
5
mg
Calcium:
1005
mg
Iron:
15
mg
The provided nutritional information is an estimate per serving. Accuracy is not guaranteed.
Tried this recipe?
Leave a comment below & tag @brokenovenbaking on social!
