Ultimate Homemade S’mores Donuts with Fluffy Marshmallow Cream Filling
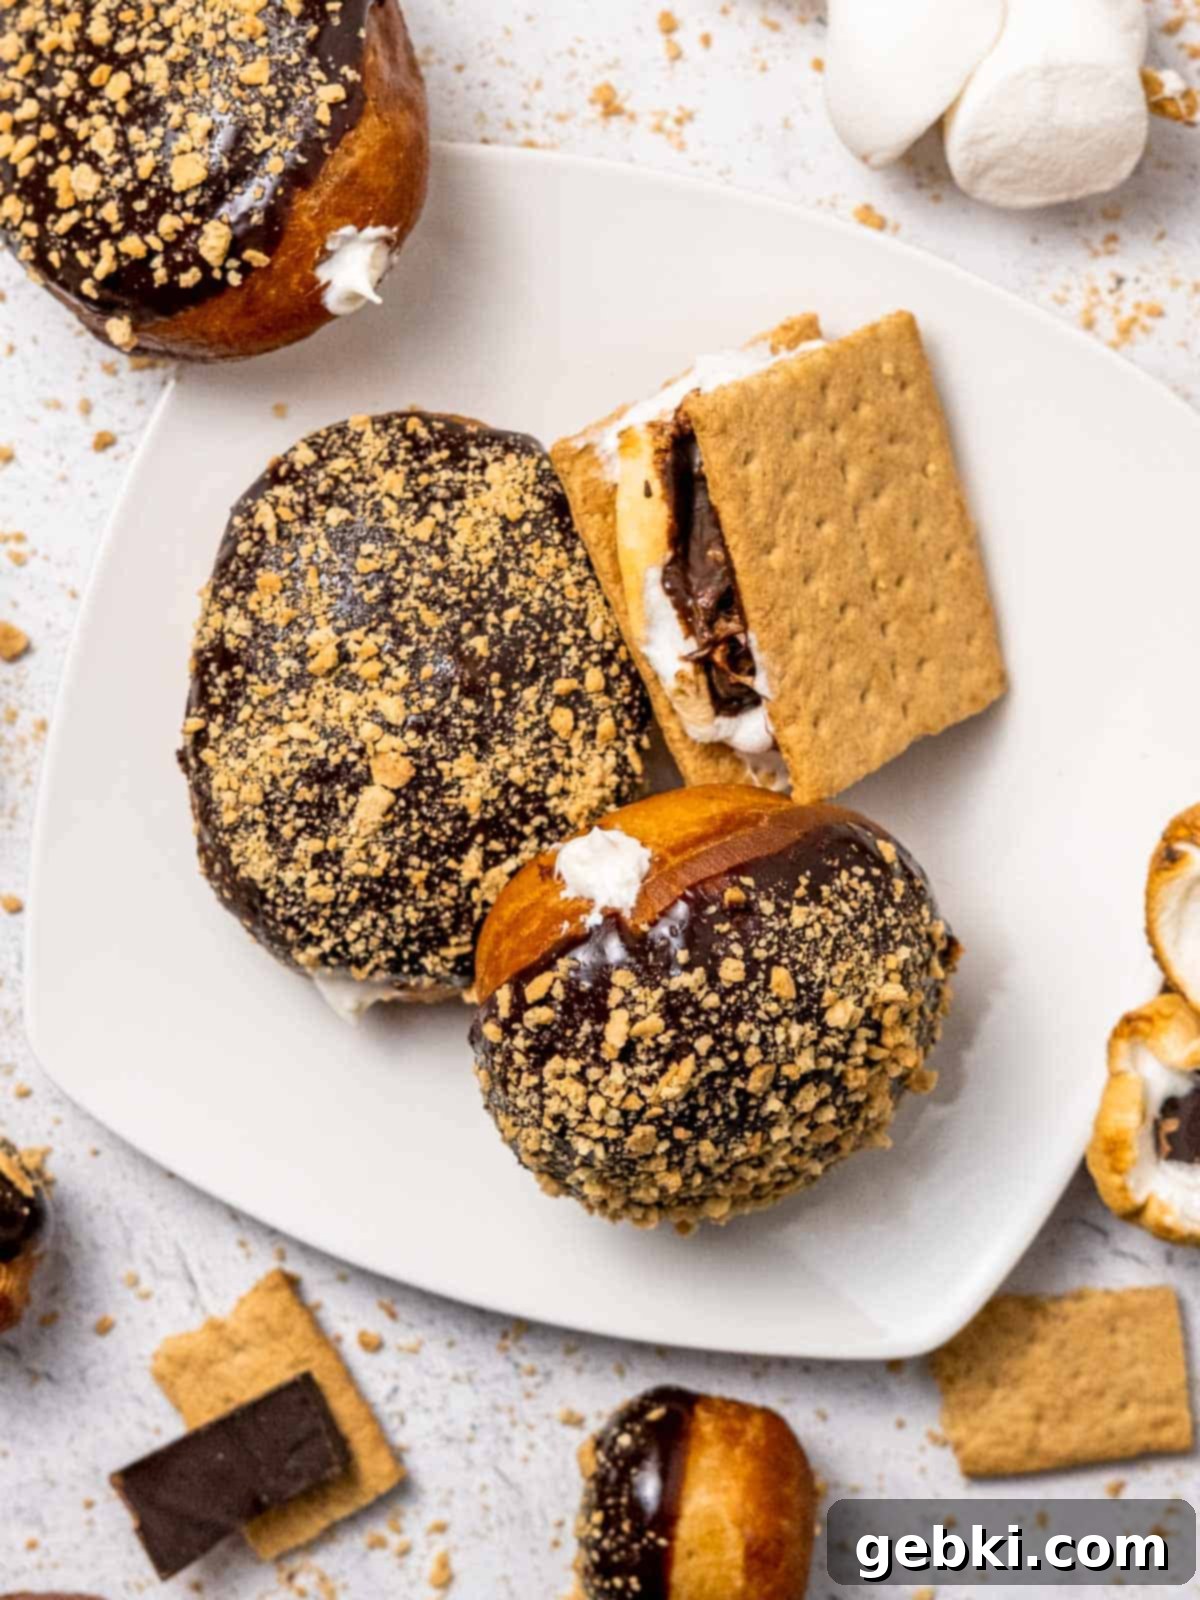
There’s nothing quite like the nostalgic aroma and taste of s’mores enjoyed around a crackling campfire. As an avid camper and hiker, I often find myself longing for those serene outdoor moments. To capture that cozy, fireside feeling right at home, I decided to embark on a delicious baking adventure: creating **S’mores Donuts**! Imagine sinking your teeth into incredibly fluffy homemade donuts, generously filled with luscious marshmallow buttercream, then dunked into a decadent chocolate ganache, and finally crowned with delightful graham cracker pieces. These aren’t just any donuts; they’re a portable, elevated s’mores experience designed to bring those cherished camping memories indoors.
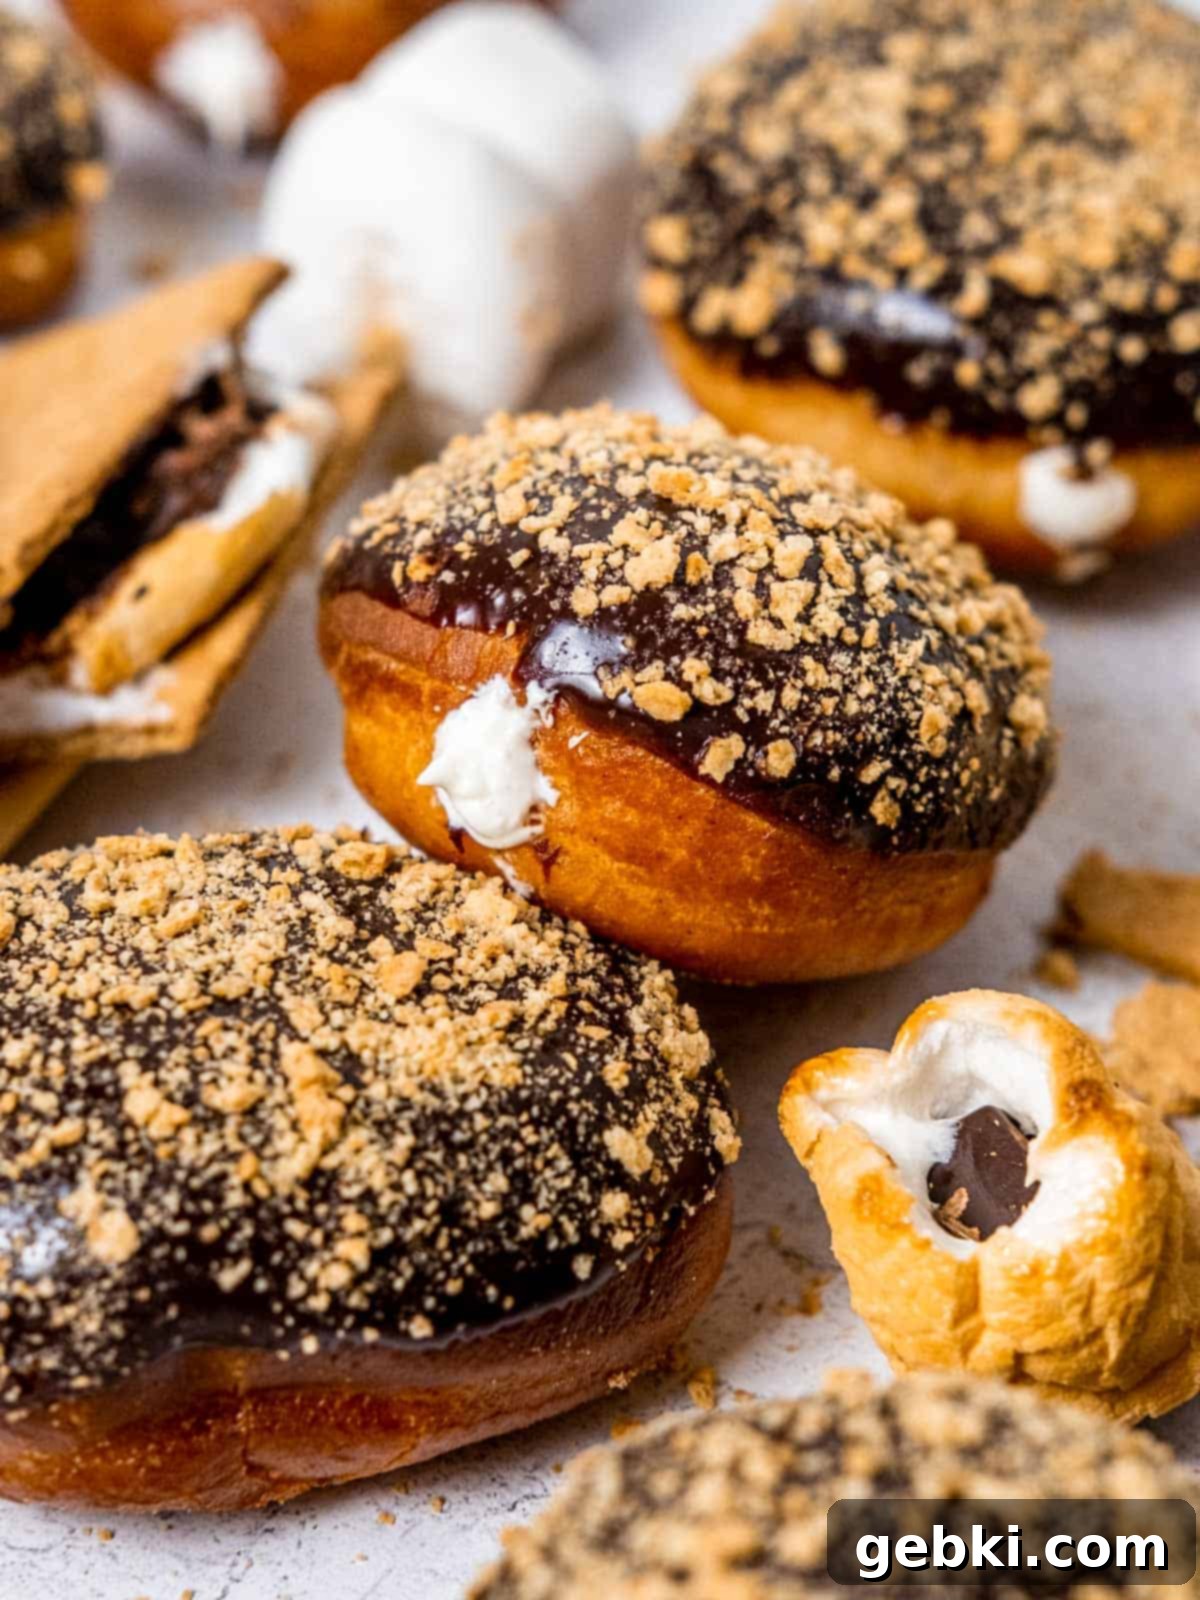
My first unforgettable camping adventure with my boyfriend took us to the breathtaking Zion National Park back in October 2019. Each evening, as the stars twinkled above towering cliffs and mule deer roamed nearby, s’mores by the campfire became our cherished ritual. These delightful s’mores donuts immediately transport me back to those magical nights. If you share our love for the classic s’mores combination, then these indulgent, deep-fried treats are absolutely going to become your new favorite!
[feast_advanced_jump_to]
Why You’ll Adore These Homemade S’mores Donuts
Crafting homemade donuts might seem daunting, but this recipe is designed to guide you through every step, making the process enjoyable and rewarding. Here’s why these S’mores Donuts will quickly become a beloved staple in your kitchen:
- **Simple & Rewarding:** Despite being yeasted and cream-filled, the easy-to-follow, step-by-step instructions break down the process, making these donuts surprisingly simple to achieve. You’ll feel like a master baker!
- **Master Donut Techniques:** Once you learn the foundational techniques for making this light and airy yeasted donut dough, a world of donut flavors will open up to you. This recipe provides a fantastic basis for future culinary experiments.
- **Irresistible S’mores Flavor:** Who can resist the timeless trio of crunchy graham crackers, gooey marshmallows, and rich chocolate? These donuts perfectly encapsulate that beloved campfire flavor, delivering a burst of nostalgia with every bite.
- **A Fun Baking Challenge:** Unlike simpler baked donut recipes (like my chocolate baked donuts and maple chai donuts), frying donuts offers a unique and satisfying challenge. It’s a fantastic way to expand your baking skills and enjoy a truly authentic donut experience. The result is a wonderfully crisp exterior and a soft, pillowy interior that baked donuts just can’t replicate.
- **Perfect for Any Occasion:** Whether it’s a weekend breakfast treat, a special dessert, or a unique party favor, these s’mores donuts are sure to impress and delight.
Essential Ingredients for Your S’mores Donuts
Creating these magical S’mores Donuts relies on a few key ingredients that perfectly replicate the classic campfire treat. High-quality ingredients make a noticeable difference in the final taste and texture, so choose wisely!
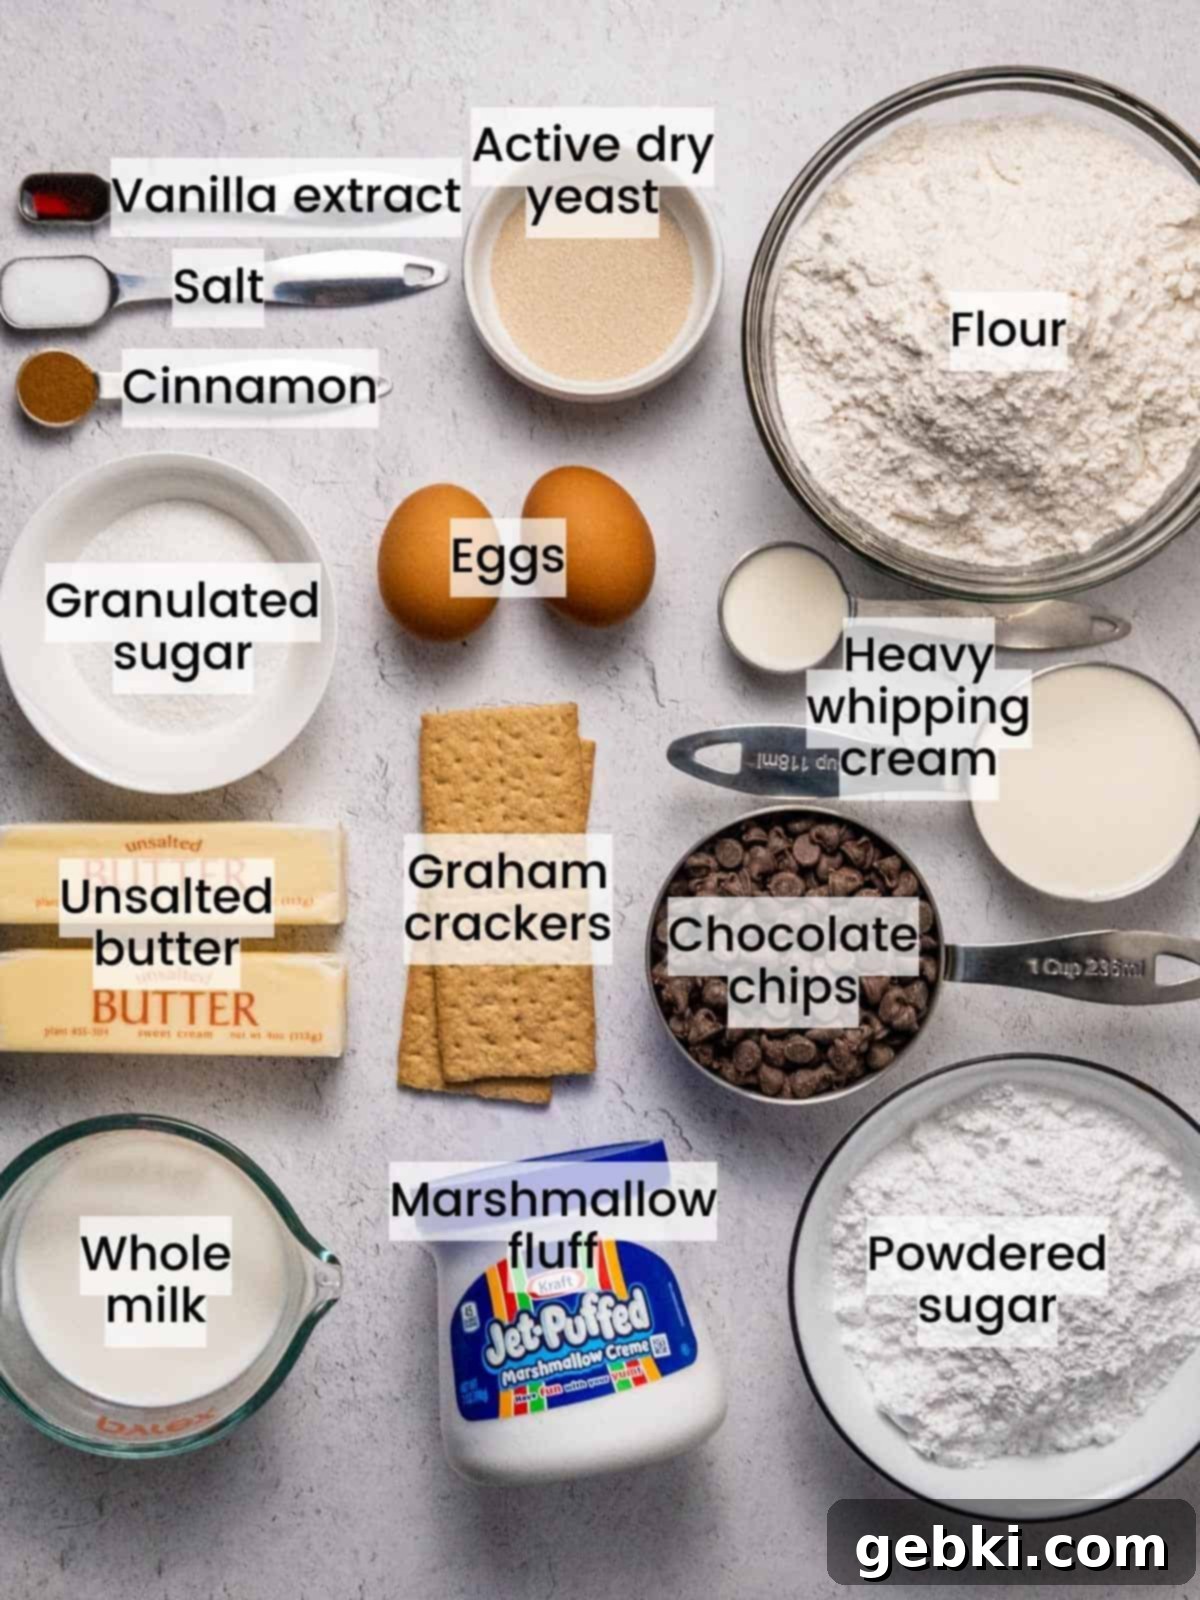
- Active Dry Yeast: This is the magic behind those wonderfully fluffy, airy donuts. Active dry yeast is a living organism that, when activated by warm liquid, ferments and produces carbon dioxide, causing your dough to rise. It’s crucial for achieving that characteristic light texture and classic yeasted flavor. You’ll find it in the baking aisle of any grocery store. Ensure it’s fresh for optimal rising power.
- Graham Cracker Crumbs: No s’mores are complete without the signature crunch of graham crackers! These crumbs are absolutely critical for capturing that authentic s’mores flavor and texture. You can easily make your own by crushing whole graham crackers in a gallon-sized Ziploc bag with a rolling pin or by pulsing them in a food processor until finely ground. Alternatively, many stores offer pre-ground graham cracker crumbs for a convenient shortcut.
- Marshmallow Fluff: This sticky, sweet, and wonderfully airy ingredient forms the base of our incredible marshmallow buttercream filling. While you could technically make marshmallow fluff from scratch, using the classic store-bought jarred version is a fantastic time-saver that ensures consistency and delivers that familiar, beloved marshmallow taste without extra effort. It’s perfect for creating a truly indulgent, cream-filled donut experience.
- Other Dough Essentials: You’ll also need whole milk, unsalted butter (melted and cooled), granulated sugar, vanilla extract, salt, cinnamon, large eggs, all-purpose flour, and vegetable oil for frying. Each plays a vital role in creating the perfect donut base.
- For the Topping: In addition to the graham cracker crumbs, you’ll need heavy whipping cream and chocolate chips to create the luscious chocolate ganache.
For a precise list of all ingredients and their exact measurements, please refer to the detailed recipe card below.
Creative Substitutions & Delicious Variations
While the classic s’mores flavor is unbeatable, this recipe is incredibly versatile, allowing you to experiment with different tastes and textures. Feel free to get creative and tailor these donuts to your liking!
- **Cookies and Cream Twist:** For a delightful twist, swap out the graham cracker crumbs for crushed Oreo cookies and omit the cinnamon from the donut dough. This creates a decadent “cookies and cream” version of these fluffy donuts that’s sure to be a hit with cookie lovers.
- **Chocolate Graham Experience:** Elevate the graham flavor by trying a different variety of graham crackers, such as chocolate graham crackers, for your crumb topping. This simple change adds an extra layer of cocoa goodness without much effort.
- **Ultimate S’mores Topping:** Take the s’mores experience to the next level by adding mini marshmallows and mini chocolate chips directly onto the still-wet chocolate ganache glaze. A quick toast with a kitchen torch can even give those mini marshmallows that irresistible lightly browned, gooey texture!
- **Nut Butter Swirl:** For an extra layer of flavor in the marshmallow buttercream, try swirling in a tablespoon or two of creamy peanut butter or almond butter. This adds a rich, nutty complexity that pairs wonderfully with chocolate and marshmallow.
- **Spiced Dough:** Enhance the warmth of the donut by adding a pinch of nutmeg or cardamom to the dough along with the cinnamon. These spices can add an unexpected depth that complements the s’mores profile.
Please note: This specific recipe has been thoroughly tested with the original ingredients. If you choose to replace or add any ingredients, we encourage you to share your delicious results in the comments below! Your feedback helps other bakers explore new possibilities.
Easy Step-by-Step Instructions for Perfect S’mores Donuts
Making these homemade S’mores Donuts is a rewarding process, and breaking it down into manageable steps makes it a breeze. Follow these instructions carefully for the best results, and don’t be afraid to take your time and enjoy the baking journey!
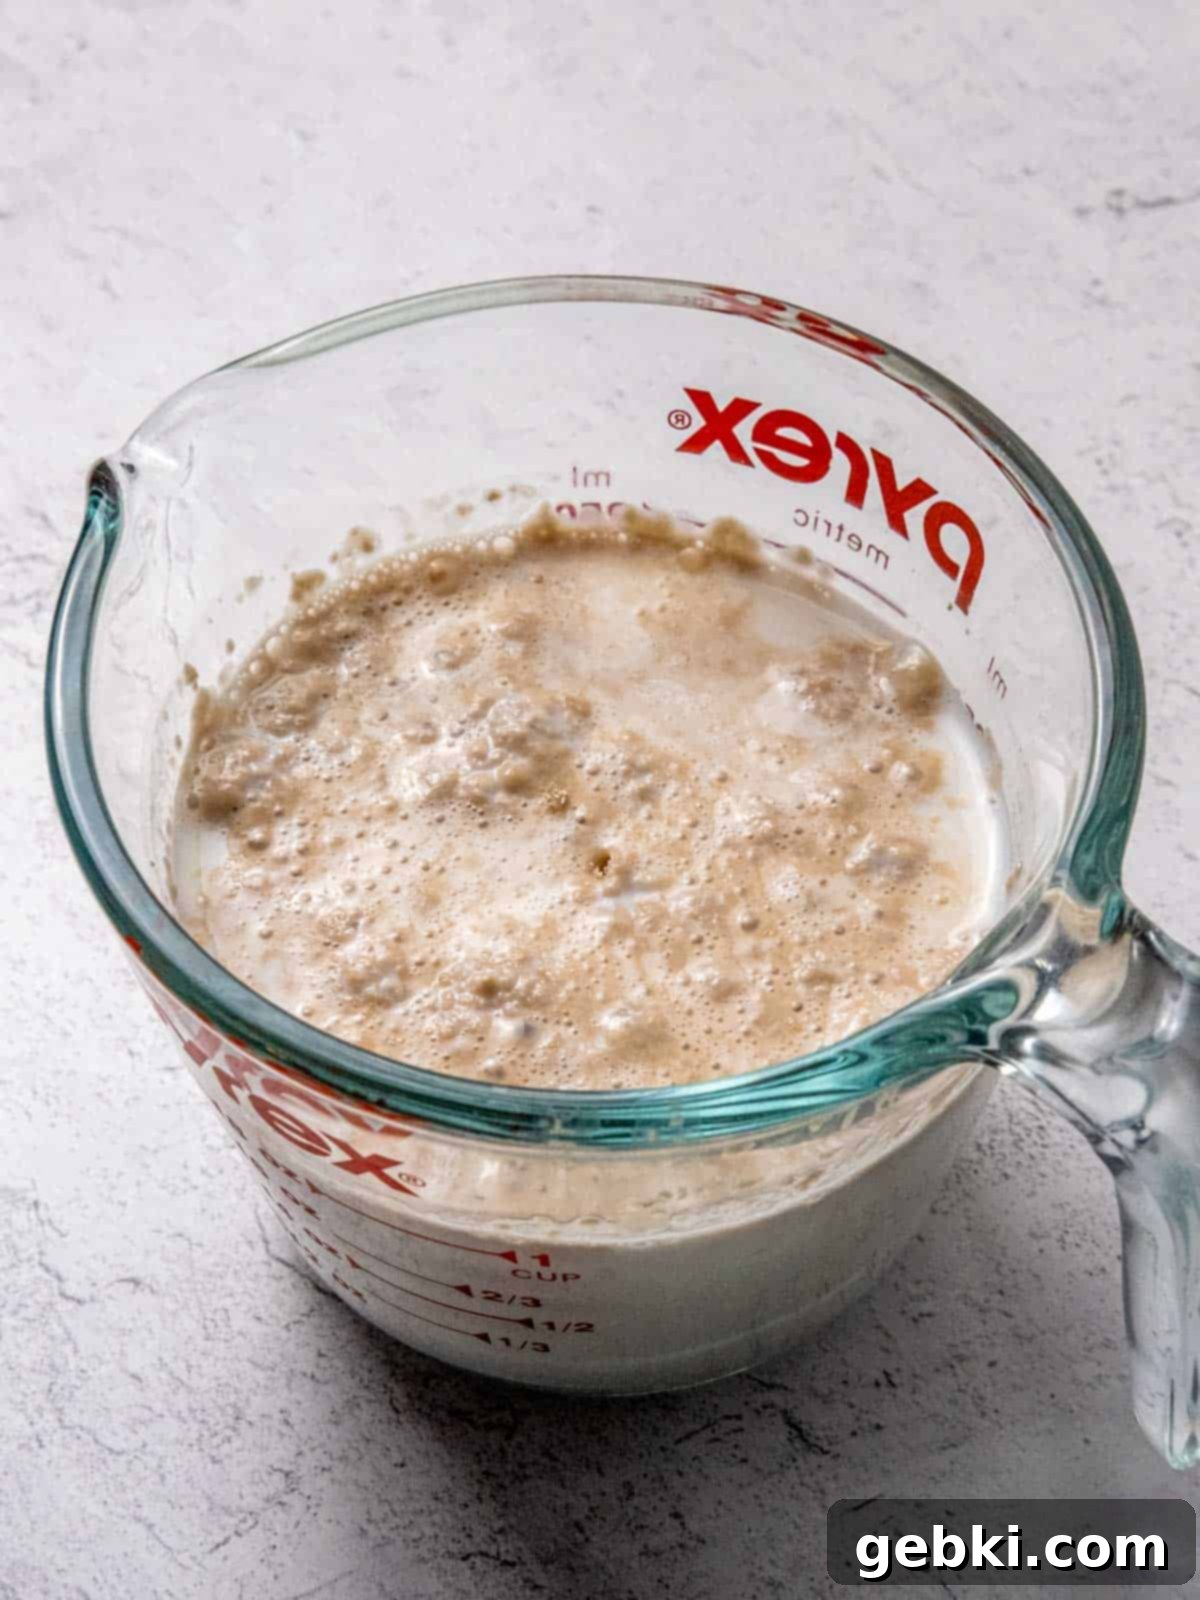
Step 1: Activate the Yeast. In a small saucepan, gently heat your whole milk to a temperature of 110°F. This precise temperature is crucial for waking up the active dry yeast without killing it. Remove the milk from the stove, add the active dry yeast, and let it sit for 5-10 minutes. You’ll know it’s active when a foamy layer appears on the surface, signifying it’s ready to bring life to your dough. This step can also be done quickly in the microwave for convenience.
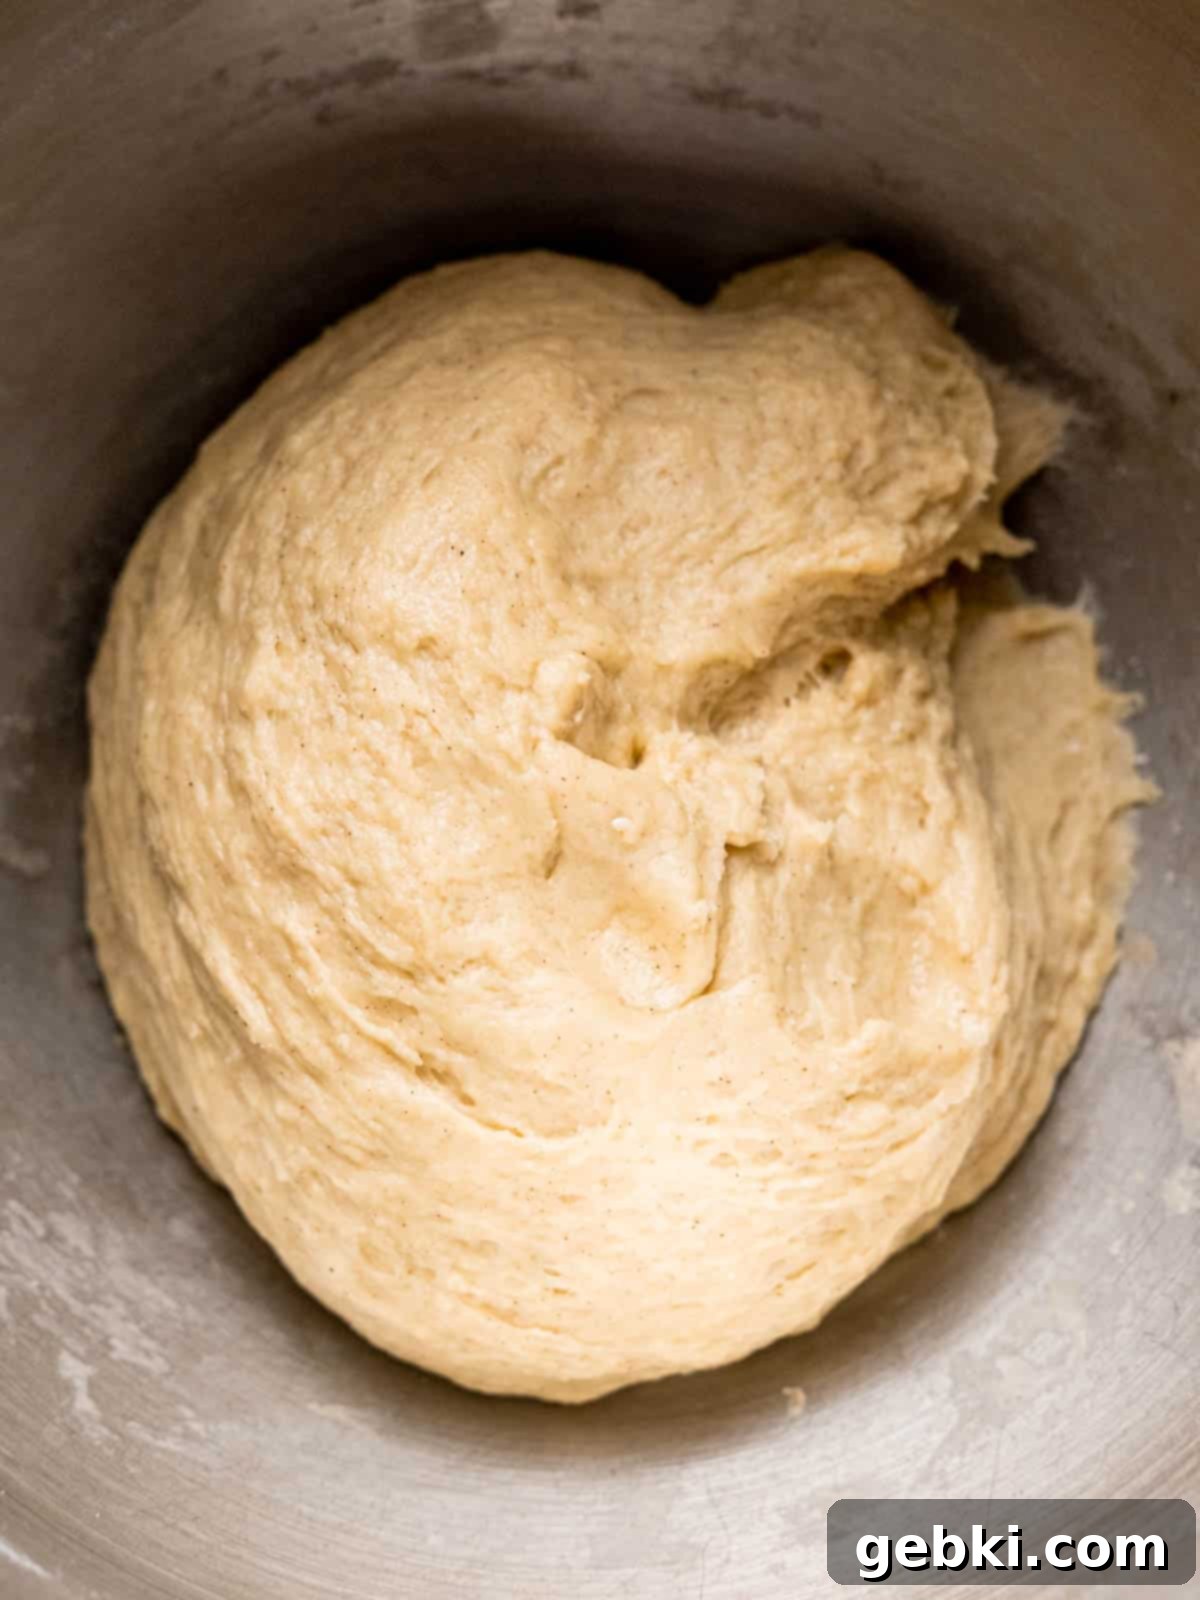
Step 2: Prepare and Rise the Dough. In the bowl of your stand mixer fitted with the paddle attachment, combine the melted butter (ensure it’s cooled!), granulated sugar, vanilla extract, salt, and cinnamon. Mix until well combined. Pour in the milk and yeast mixture, then add the eggs one at a time, mixing until fully incorporated. Switch to the dough hook attachment and knead on medium-high speed. Gradually add the all-purpose flour until the dough forms a soft ball that doesn’t stick to your finger or the sides of the bowl. Cover the bowl with a clean kitchen towel and let the dough rise in a warm place for about 1 hour, or until it has visibly doubled in size. This first rise is crucial for developing flavor and a light texture.
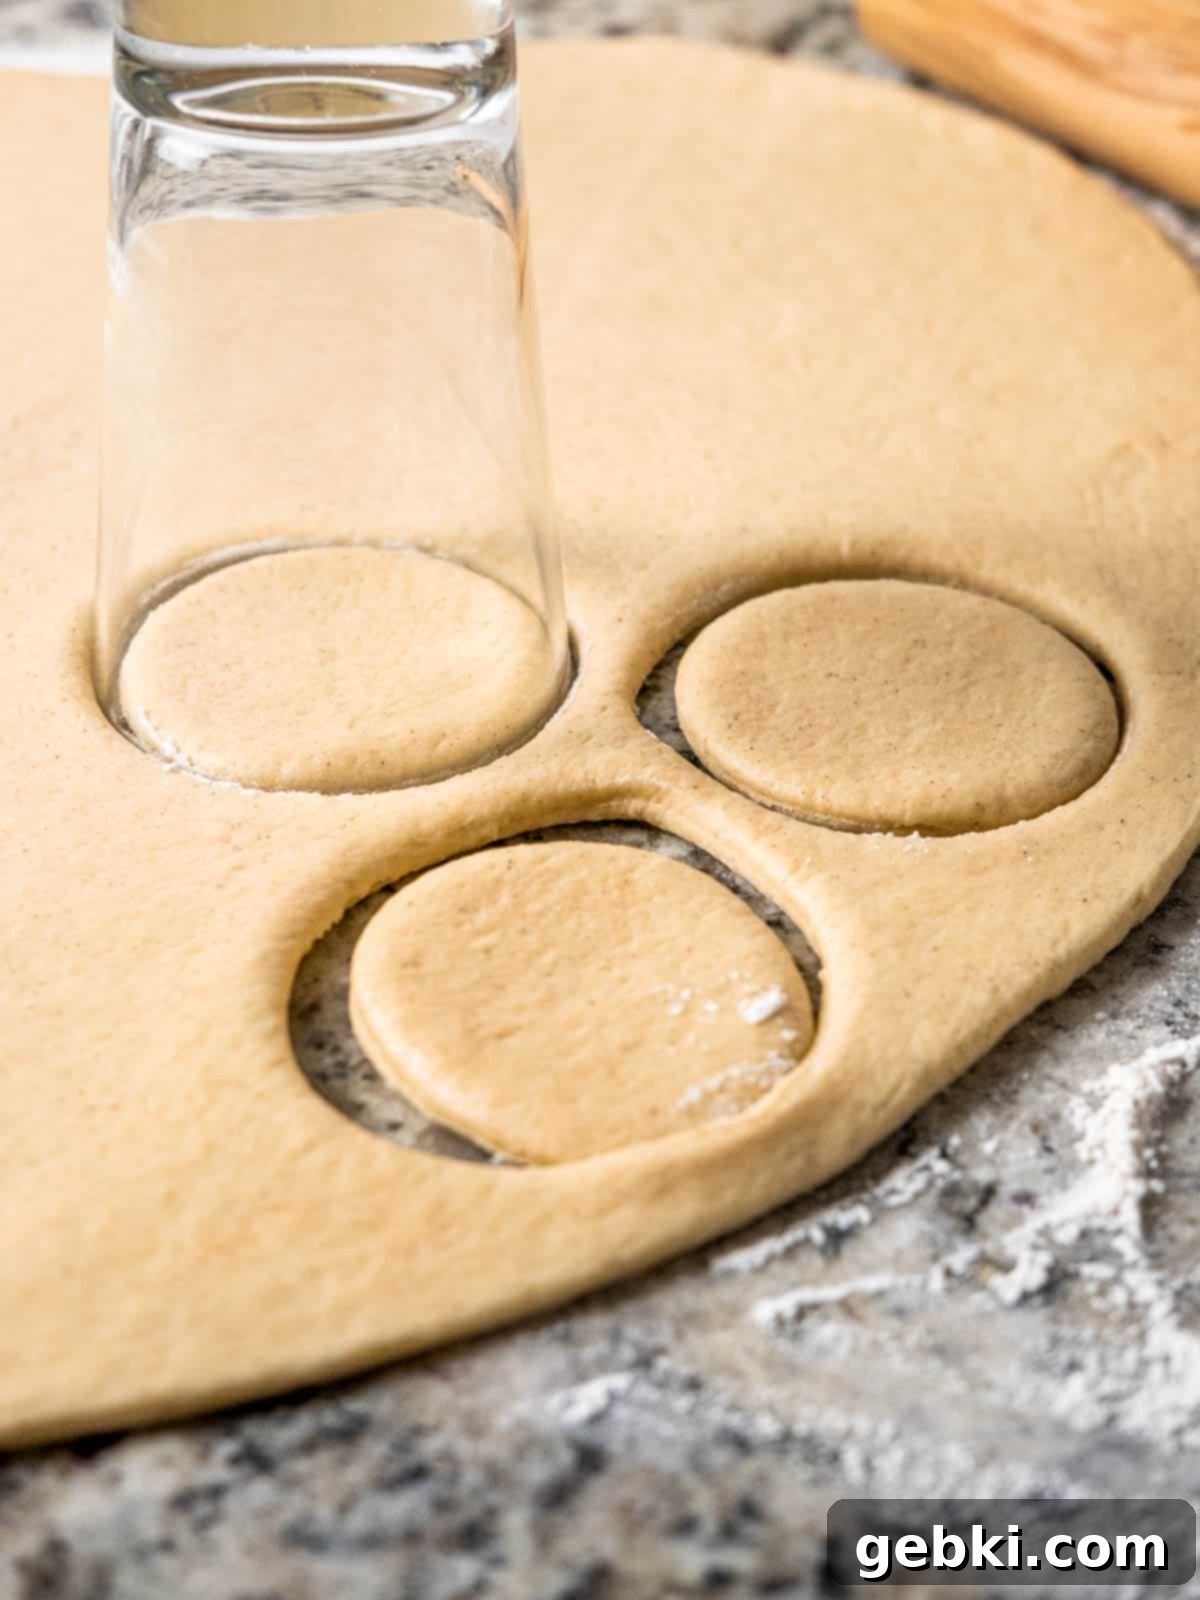
Step 3: Cut and Second Rise. Once the dough has risen, gently transfer it to a lightly floured surface. Using a rolling pin, roll the dough out evenly to about ½ inch thickness. Now it’s time to cut your donut shapes! You can use a dedicated donut cutter, a biscuit cutter, or even the rim of a pint glass (my personal favorite!). Place the cut donuts onto a lightly floured baking sheet, ensuring there’s ample space between each one. Cover them again with a kitchen towel and let them undergo a second rise for another 30 minutes. This shorter second rise helps them become extra airy and light when fried.
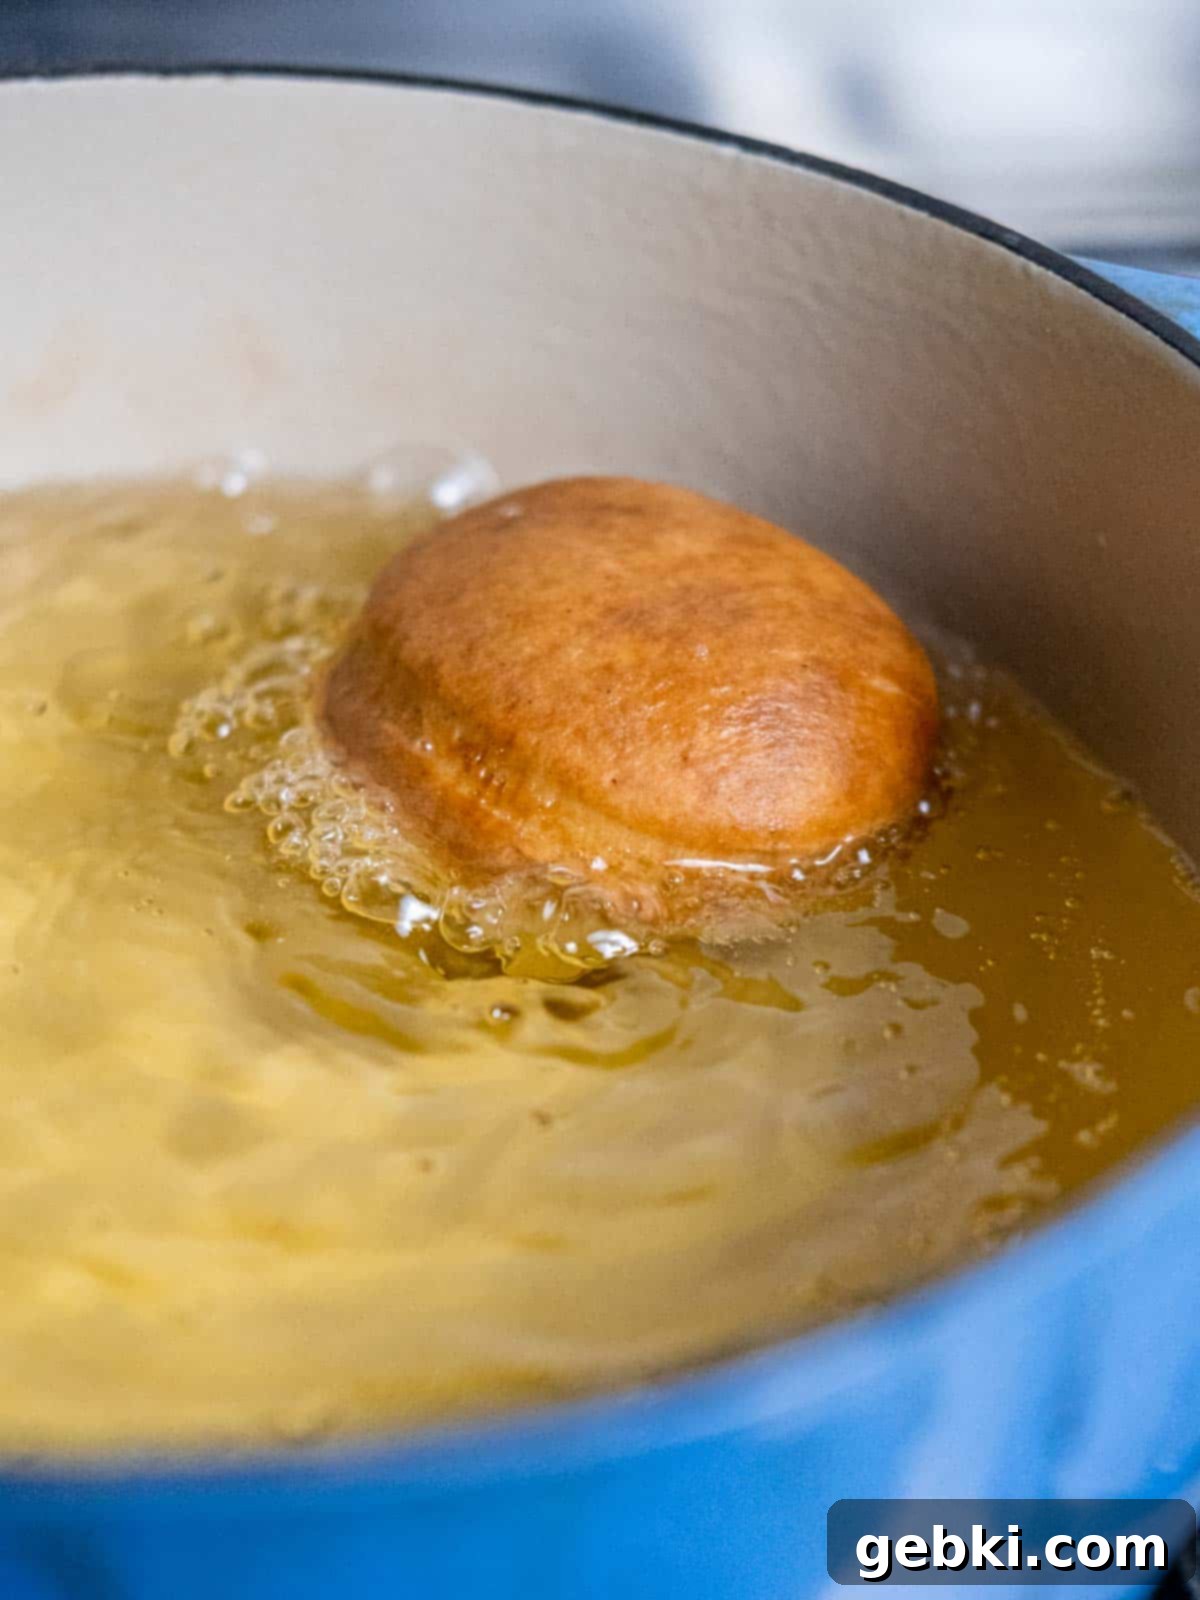
Step 4: Fry the Donuts. While your donuts are undergoing their second rise, prepare your frying oil. Heat a generous amount of neutral oil (like vegetable oil) in a heavy-bottomed pot or Dutch oven to a steady 365°F (185°C). Use a kitchen thermometer to monitor the temperature closely. Carefully place one donut at a time into the hot oil. Fry for about 45-60 seconds per side, flipping once, until they are beautifully golden brown and puffed up. Transfer the perfectly fried donuts to a wire rack lined with paper towels to drain any excess oil and cool completely before filling.
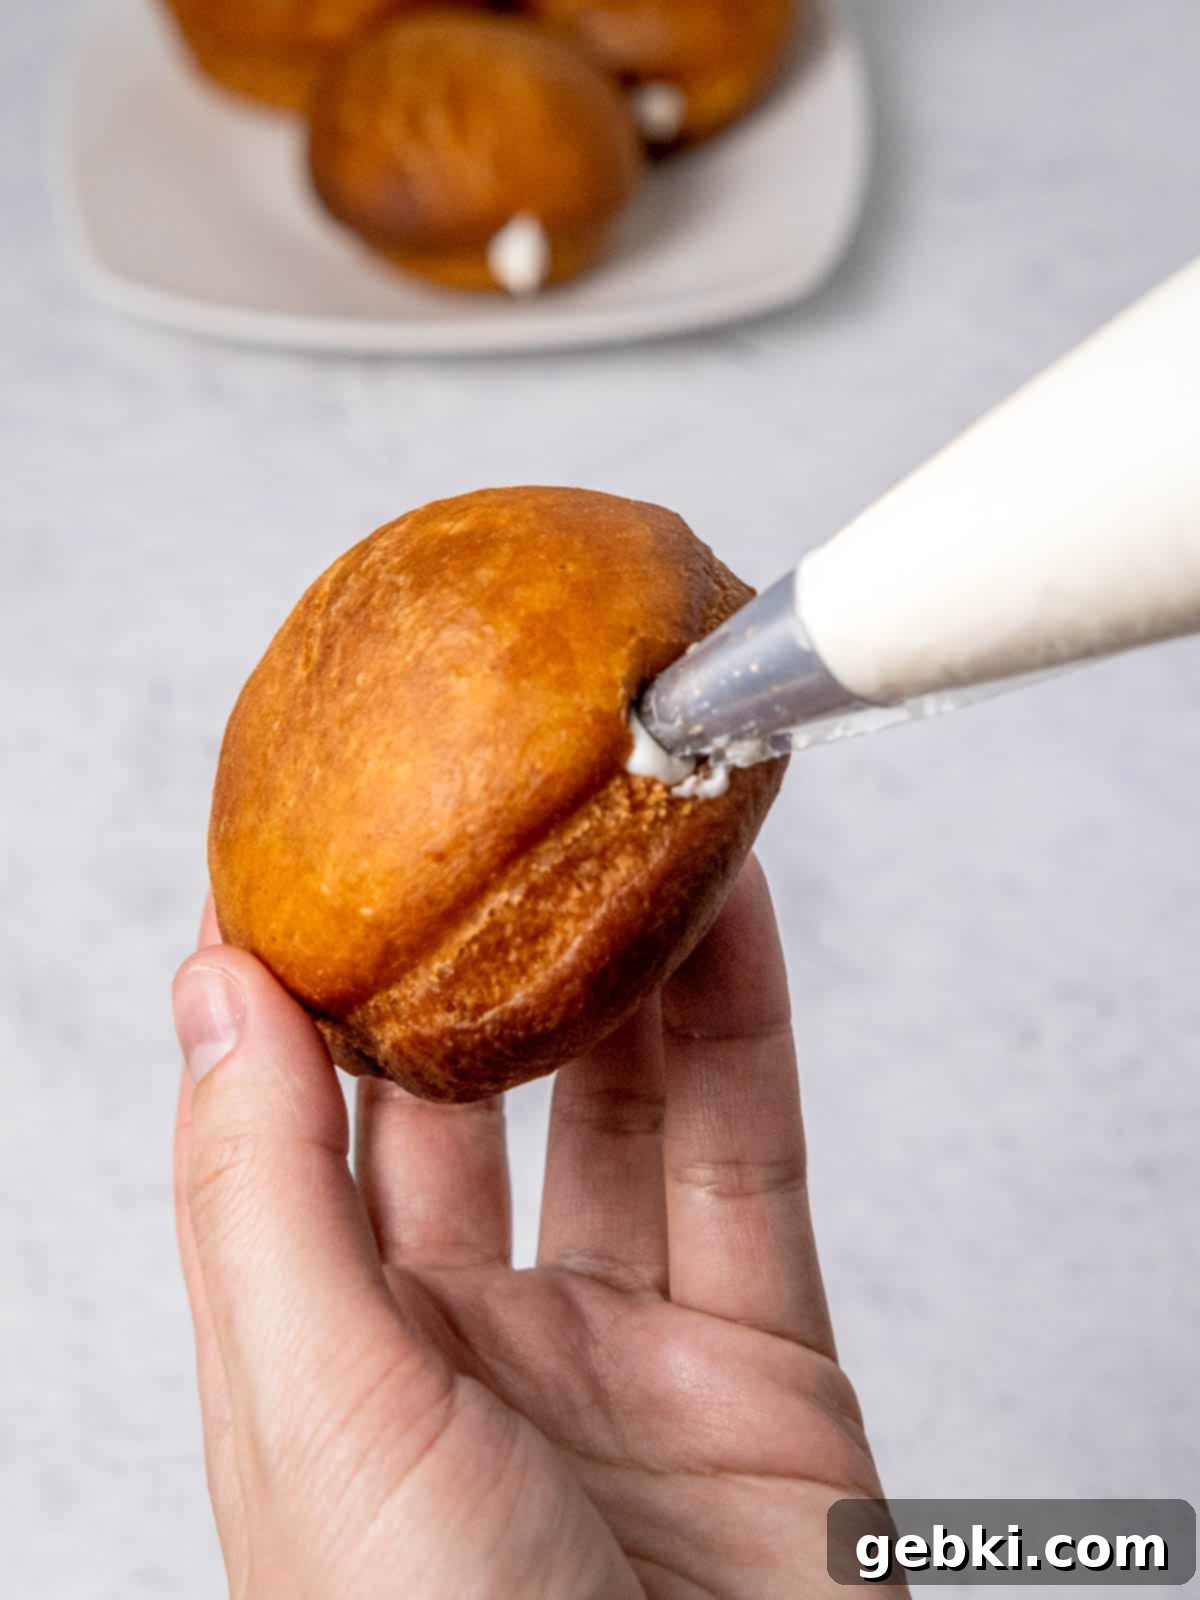
Step 5: Prepare and Fill with Marshmallow Buttercream. While the donuts cool, prepare the star filling! In a mixing bowl, combine marshmallow cream, softened unsalted butter, powdered sugar, and a splash of heavy cream. Beat with a hand mixer until the mixture is light, fluffy, and perfectly smooth. Transfer this heavenly buttercream to a piping bag fitted with a sturdy metal tip (a Bismark tip works wonders for filled donuts). Gently poke a hole into the side of each cooled donut with a butter knife or chopstick to create space, then pipe in a generous amount of the marshmallow filling until the donut feels pleasantly plump. Each bite will be a cloud of sweet marshmallow goodness.
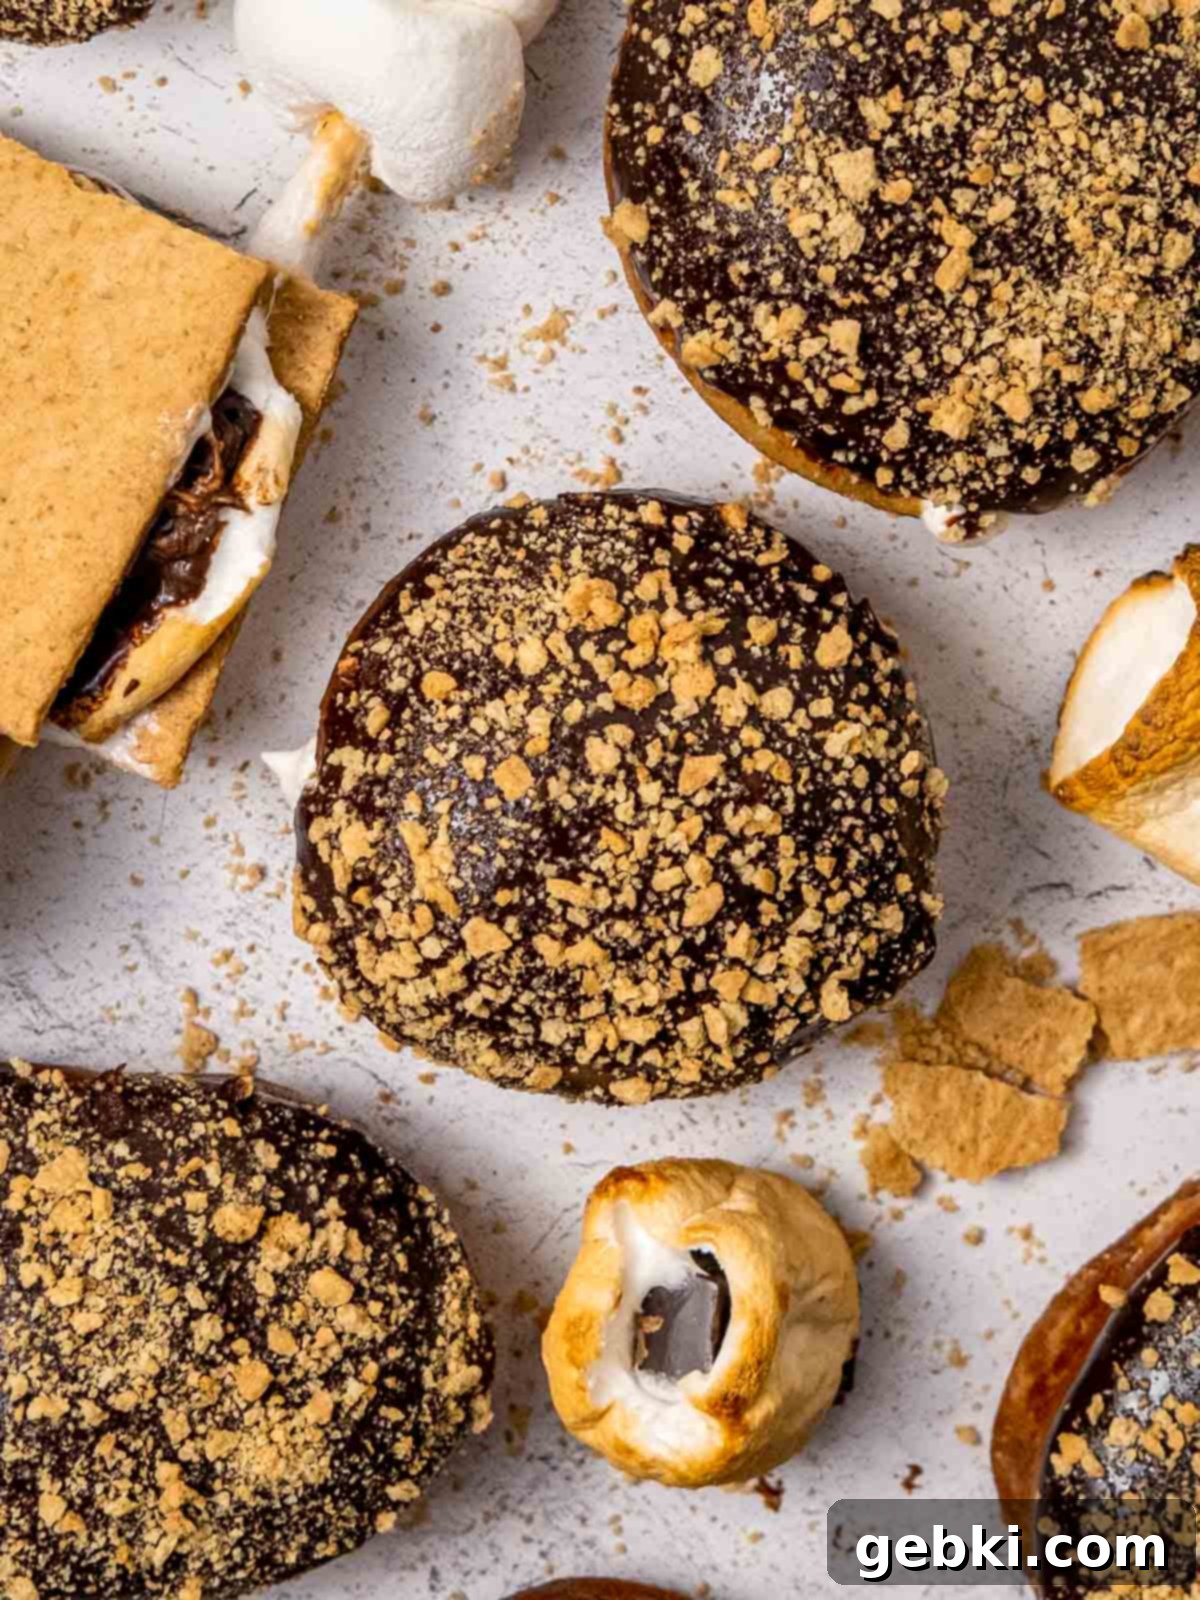
Step 6: Glaze with Chocolate Ganache and Finish. For the grand finale, prepare the rich chocolate ganache. Heat heavy cream in a small saucepan until it’s scalded (just before boiling). Remove from heat and pour it over your chocolate chips. Let it sit undisturbed for a few minutes to allow the heat to melt the chocolate, then stir gently until you achieve a smooth, glossy, and irresistible ganache. Dip the tops of your filled donuts into the warm chocolate ganache, letting any excess drip off. Immediately, sprinkle generously with the prepared crushed graham crackers. Allow the ganache to set slightly, then serve these incredible S’mores Donuts and watch them disappear!
Expert Tips for Donut Success
Making homemade donuts can be incredibly fun and rewarding, especially with these insider tips to ensure your S’mores Donuts turn out perfectly every time:
Tip #1 – The Power of Yeast Activation: Yeast donuts might seem intimidating, but they’re surprisingly straightforward once you understand the fundamentals. The absolute key in the first step is ensuring your milk is at the correct temperature, precisely 110°F (43°C). Invest in a reliable kitchen thermometer to accurately measure this. If the milk is too cold, the yeast won’t activate properly, and your dough won’t rise. If it’s too hot, it will kill the yeast, leading to flat, dense donuts. Look for that foamy, bubbly layer after 5-10 minutes – that’s your green light!
Tip #2 – Achieving Perfect Dough Consistency: When adding flour to your dough, do so gradually. After incorporating about 3.5 cups, start sprinkling in small amounts, a tablespoon at a time, while your stand mixer continues to knead. The goal is to reach a dough that is soft and elastic but no longer excessively sticky. You’ll know it’s ready when it starts to pull cleanly away from the sides of the mixing bowl. A quick touch test is also helpful: if it feels moist but doesn’t leave a significant residue on your finger, it’s perfect and ready for its first rise.
Tip #3 – Smart Donut Cutting: Don’t fret if you don’t own a specialized donut cutter. A simple biscuit cutter or even the clean rim of a pint glass works wonderfully for cutting out perfectly round donut shapes. For best results and to prevent sticking, dip the edge of your chosen cutter in a little flour before each cut. This ensures clean edges and easy release of the dough.
Tip #4 – Frying Safely and Effectively: Working with hot oil requires caution. Always prioritize safety! I strongly recommend wearing long sleeves and an apron to protect yourself from splatters. For added peace of mind, consider wearing safety goggles. When placing the donut dough into the hot oil, do so very gently and carefully, using a slotted spoon or spatula, to avoid any splashes. Maintain a consistent oil temperature of 360-370°F (182-188°C) throughout the frying process with your thermometer; this ensures even cooking and a beautiful golden-brown color without burning the exterior or leaving the inside raw. Fry in small batches to avoid overcrowding the pot, which can drop the oil temperature and result in greasy donuts.
Tip #5 – Don’t Overfill Your Donuts: While a generous filling is delicious, overfilling can cause the donuts to burst. When piping in the marshmallow buttercream, aim for the donut to feel plump and slightly heavy, but not overly stretched. You can gently squeeze the donut as you fill to get a feel for how much cream it can hold comfortably.
S’mores Donut Recipe FAQs
Here are some frequently asked questions to help you on your journey to making the perfect S’mores Donuts:
While this recipe is primarily designed for deep frying to achieve that classic fluffy and crisp texture, one of our resourceful readers has reported successfully making a version of these in an air fryer! However, please note that the texture will be different – more cake-like rather than the traditional fried donut texture. Adjustments to cooking time and temperature will be necessary if you choose this method.
It is not recommended to directly substitute instant yeast for active dry yeast in this recipe. These two types of yeasts are processed differently, causing instant yeast to bloom and activate much faster. This specific recipe benefits from the slower, more controlled activation of active dry yeast, which contributes to the optimal rise and texture of the donut dough. Using instant yeast might lead to an over-risen or over-proofed dough if not handled with very precise timing and measurement adjustments.
The easiest way to check if your active dry yeast is still potent is by “proofing” it. If, after mixing the yeast with warm milk (around 110°F / 43°C) and letting it sit for 5-10 minutes, a foamy layer appears on the surface, your yeast is active and ready to go! If there’s no foam or bubbles, your yeast is likely dead, and you should start over with a fresh packet. To keep your active dry yeast fresh longer, I highly recommend storing it in an airtight jar in the freezer.
For frying donuts, it’s best to use a neutral-flavored oil with a high smoke point. Excellent choices include vegetable oil, canola oil, sunflower oil, or peanut oil. These oils won’t impart unwanted flavors to your donuts and can withstand the high temperatures required for frying.
Yes, you can prepare the donut dough the night before! After the first rise (Step 2), punch down the dough, cover the bowl tightly with plastic wrap, and refrigerate it overnight. The next morning, remove it from the fridge, let it come to room temperature for about 30-60 minutes, and then proceed with rolling, cutting, and the second rise (Step 3) as directed.
Storage Tips for Your S’mores Donuts
These glorious S’mores Donuts are undoubtedly at their absolute best when enjoyed fresh, ideally on the same day they are made. The delicate texture of the fried dough and the creamy filling are most perfect right after preparation. However, if you find yourself with leftovers (a rare but possible occurrence!), they can be stored. Place them in an airtight container at room temperature for up to 2 days. Be aware that the texture of the donuts will soften over time, and the graham cracker crumbs might lose some of their crispness. Avoid refrigerating, as this can dry out the donuts and make them dense.
More S’mores Inspired Recipes You’ll Love
If you can’t get enough of that delightful s’mores flavor combination, you’re in luck! Here are some other fantastic recipes to satisfy your cravings for graham, marshmallow, and chocolate:
- S’mores Macarons
- No Bake S’mores Cookie Recipe
- Mini Peanut Butter S’mores Tarts
- Cinnamon Roll Donuts
Did you try this recipe? I’d love to see it! Tag @brokenovenbaking on Instagram & Facebook and leave a ⭐️ review below!
📖 Recipe

Marshmallow Cream Filled S’mores Donuts
Kayla Burton
Pin Recipe
Equipment
-
Stand mixer with hook attachment
-
Mixing bowls
-
Hand mixer
-
Measuring spoons
-
Kitchen scale or measuring cups
-
Spatula
-
Whisk
-
Small pan
-
Dutch oven or medium-large pot
-
Cooling rack
-
Thermometer
-
Towel
-
Donut cutter or pint glass
-
Food chopper
Ingredients
Dough
- 1 cup (236.59 ml) whole milk
- 2¼ teaspoons (1 packet) (15.75 g) active dry yeast
- ½ cup (1 stick) (113.5 g) unsalted butter melted and cooled
- ¼ cup (50 g) granulated sugar
- ½ teaspoon (½ teaspoon) vanilla extract
-
1 teaspoon(6 g)
salt
- ½ teaspoon
cinnamon
(2 large) eggs
(468-531 g) all-purpose flour
(1.89 l) vegetable oil (or a neutral oil of your choice, for frying)
Graham Cracker Sprinkle
- 2 whole
(28 g) graham crackers crushed (~½ cup graham cracker crumbs)
Marshmallow Buttercream Filling
- 7 oz
(7 oz) marshmallow fluff
Chocolate Ganache Frosting
- ½ cup
(118.29 ml) heavy whipping cream
Instructions
Dough
-
In the microwave or over the stove, carefully bring the whole milk to 110°F (43°C). A thermometer is highly recommended for accuracy.
-
Gently mix 2¼ teaspoons of active dry yeast into the warmed milk. Let it sit and foam for 5-10 minutes to ensure the yeast is active.
-
In the bowl of a stand mixer, using the paddle attachment, whisk together the melted (and cooled) butter, granulated sugar, vanilla extract, salt, and cinnamon. Pour in the milk and yeast mixture, then mix in the eggs one at a time until thoroughly combined.
-
Switch to the dough hook attachment. Gradually add the all-purpose flour, about 1 cup at a time, until you’ve added approximately 3½ cups. Continue adding a small amount of flour (a tablespoon at a time) until the dough is no longer excessively sticky and pulls away from the sides of the bowl (scrape the sides as needed). The dough should feel moist but not adhere to your finger.
-
Cover the mixing bowl with a clean kitchen towel and let the dough rise in a warm, draft-free place for approximately 1 hour, or until it has clearly doubled in size.
-
Once the dough has risen, transfer it to a lightly floured surface. Use a rolling pin to roll the dough out evenly to about ½ inch (1.25 cm) thick.
-
Cut out donut shapes from the rolled dough using a donut cutter, biscuit cutter, or the rim of a pint glass (flour the edges of your cutter before each cut to prevent sticking). Place the cut donuts on a lightly floured baking sheet, ensuring at least 1 inch of space between them.
-
Cover the donuts with a clean kitchen towel and let them rise again in a warm place for about 30 minutes. This second rise makes them extra light and fluffy.
-
While the donuts are undergoing their second rise, prepare your frying setup. Heat 2 quarts (1.89 liters) of vegetable oil (or another neutral frying oil) in a heavy-bottomed pot or Dutch oven to a depth of approximately 2 inches (5 cm).
Frying
-
Heat the oil to a consistent temperature of 360-370°F (182-188°C). Use a reliable kitchen thermometer to monitor the temperature throughout the frying process, adjusting the heat as necessary to maintain it.
-
When the oil is at temperature and the donuts are risen, carefully (and gently, to avoid splashing hot oil) place one donut into the hot oil. Fry in small batches to avoid overcrowding.
-
Fry each donut for 45-60 seconds per side, flipping once, until it reaches a beautiful golden-tan color all around and is puffed up. Carefully remove the fried donut from the oil using tongs and place it on a wire rack lined with paper towels to cool and drain excess oil.
-
Continue frying the remaining donuts one at a time (or in small batches, ensuring not to drop the oil temperature) until they are all golden, puffy, and cooked through.
Graham Cracker Sprinkle
-
Break up 2 whole graham crackers into a food processor or a Ziploc bag. Process or crush until the pieces are almost grainy, resembling coarse sand, ensuring they are small enough for an even sprinkle.
Marshmallow Cream Filling
-
In a clean mixing bowl, combine the marshmallow fluff, softened unsalted butter, powdered sugar, and heavy whipping cream. Beat with a hand mixer on medium speed until the mixture is completely smooth, light, and wonderfully fluffy.
-
Transfer the prepared marshmallow buttercream to a piping bag fitted with a sturdy metal tip (a Bismark tip is ideal for filling). Once your fried donuts are completely cooled, gently poke a small hole into the side of each donut using a butter knife or chopstick to create space for the filling. Then, pipe the marshmallow cream into each donut until it feels nicely plump.
Chocolate Ganache Frosting
-
In a small to medium saucepan, heat the heavy whipping cream until it just comes to a boil (scalded). Immediately remove it from the heat.
-
Add the chocolate chips to the hot cream. Let the mixture sit undisturbed for 2-3 minutes to allow the chocolate to melt fully. Then, stir gently with a whisk or spoon until the ganache is smooth, glossy, and fully combined.
-
Dip the top of each marshmallow-filled donut into the warm chocolate ganache, allowing any excess to drip off. Immediately, sprinkle the crushed graham cracker crumbs generously over the chocolate while it is still wet. Allow the ganache to set slightly before serving these irresistible treats!
Save This Recipe! 💌
We’ll email this post to you, so you can come back to it later!
Notes
Please note that the provided nutrition information is an estimate per serving and should be used as a guideline. The exact calorie accuracy is not guaranteed and can vary based on ingredients and preparation methods.
The provided nutritional information is an estimate per serving. Accuracy is not guaranteed.