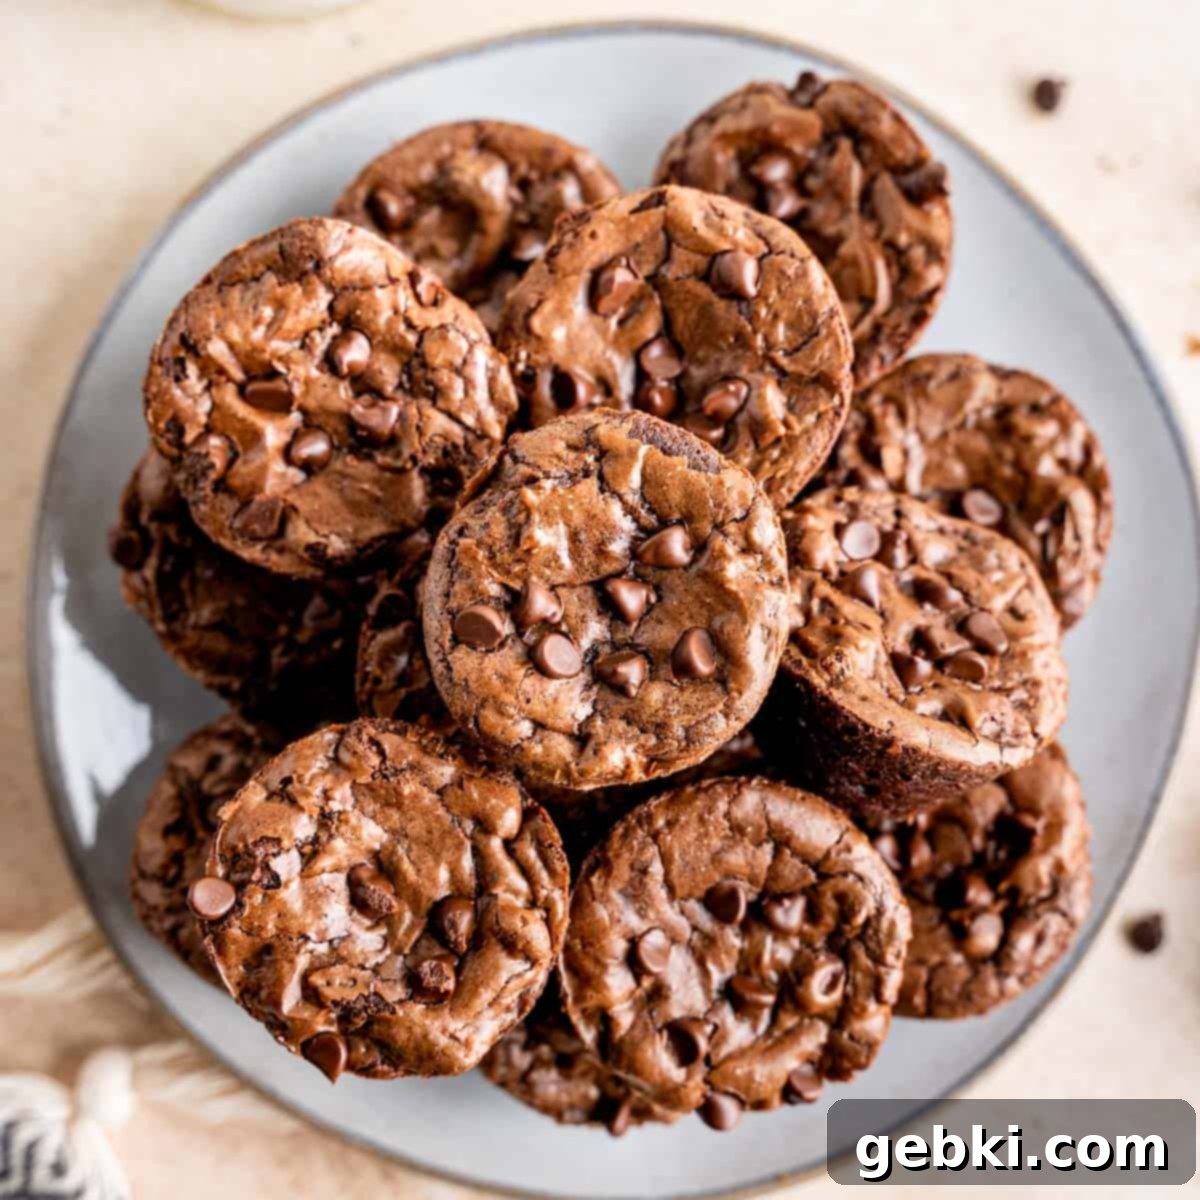
Homemade Fudgy Mini Brownie Bites: Your Ultimate Chewy, Crinkle-Top Treat!
Do you remember those delightful Fudge Brownie Little Bites from your childhood? That perfect two-bite treat that brought instant joy? This **Mini Brownie Bites recipe** is my elevated recreation of that cherished nostalgic snack, but I promise you, these are infinitely better than anything you’ll find pre-packaged! Imagine rich, fudgy, and incredibly chewy brownies, crowned with that signature crackly crinkle top, and studded throughout with an abundance of mini chocolate chips. These decadent little squares are designed to be savored in just two bites – which, of course, means you can enjoy more of them without guilt, right? With a triple chocolate punch from melted chocolate, intense cocoa powder, and delightful mini chocolate chips, these homemade gems are guaranteed to cure any chocolate cravings you might have, leaving you utterly satisfied.
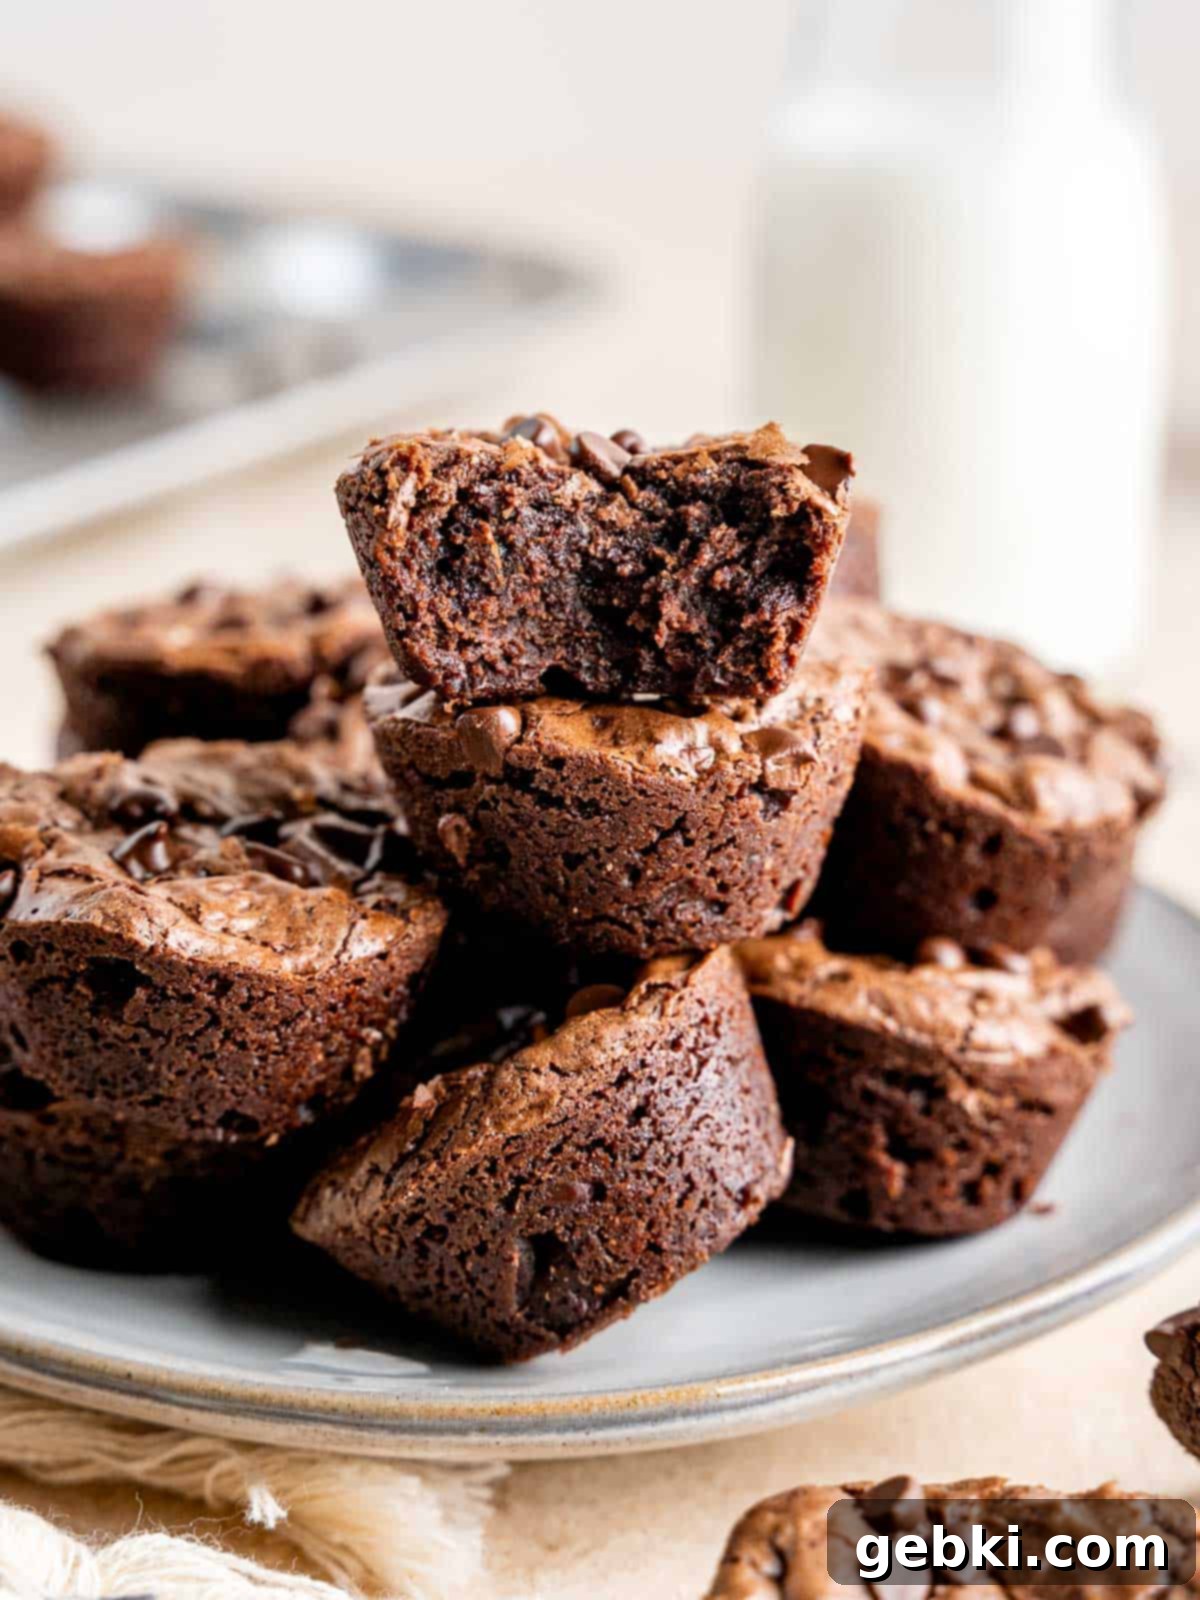
There’s something uniquely satisfying about bite-sized brownies. They offer the perfect portion control, acting like perfectly pre-cut individual treats. Their small size makes them incredibly easy to pop right into your mouth, making them ideal for quick snacking or elegant serving. Sometimes, when I’m not in the mood for a mini muffin pan, I’ll even cut my small batch brownies into similar tiny pieces to achieve that same delightful bite-sized experience. These mini brownie bites are not only a fantastic personal indulgence but also exceptionally versatile for any occasion. They’re absolutely perfect for sharing at parties, packing into lunchboxes, or even gifting in charming little goodie bags for friends and family. And for all the peanut butter enthusiasts out there, you’ll be thrilled to know there’s a delightful Mini Peanut Butter Cup Brownies version that’s just as easy to make!
Craving a slightly different texture or a more grown-up spin on these chocolatey delights? Be sure to explore my Triple Chocolate Brownie Muffins for a muffin-like treat that still delivers on intense brownie flavor. Or, if you happen to have some sourdough discard on hand and are looking for creative ways to use it up, my Fudgy Sourdough Discard Brownies offer an unbelievably rich and complex flavor profile. Each recipe promises a delicious journey into the world of homemade chocolate desserts, but these mini brownie bites hold a special place for their sheer simplicity and irresistible charm.
Whether you’re new to baking or a seasoned pro, this recipe for mini brownie bites is designed for success. Its straightforward steps and common ingredients mean you can whip up a batch of these delightful treats with minimal effort, making them a go-to for impromptu dessert needs or planned gatherings. Get ready to impress everyone with these homemade wonders that taste far superior to anything from a box!
[feast_advanced_jump_to]
Looking for more brownie recipes? Explore these other delicious options:
- Samoa Brownies
- Fudgy Mug Brownie
- Gingerbread Brownies
- Andes Mint Brownies
- Pecan Brownie Pie
- Edible Brownie Batter
Essential Ingredients for Fudgy Mini Brownie Bites
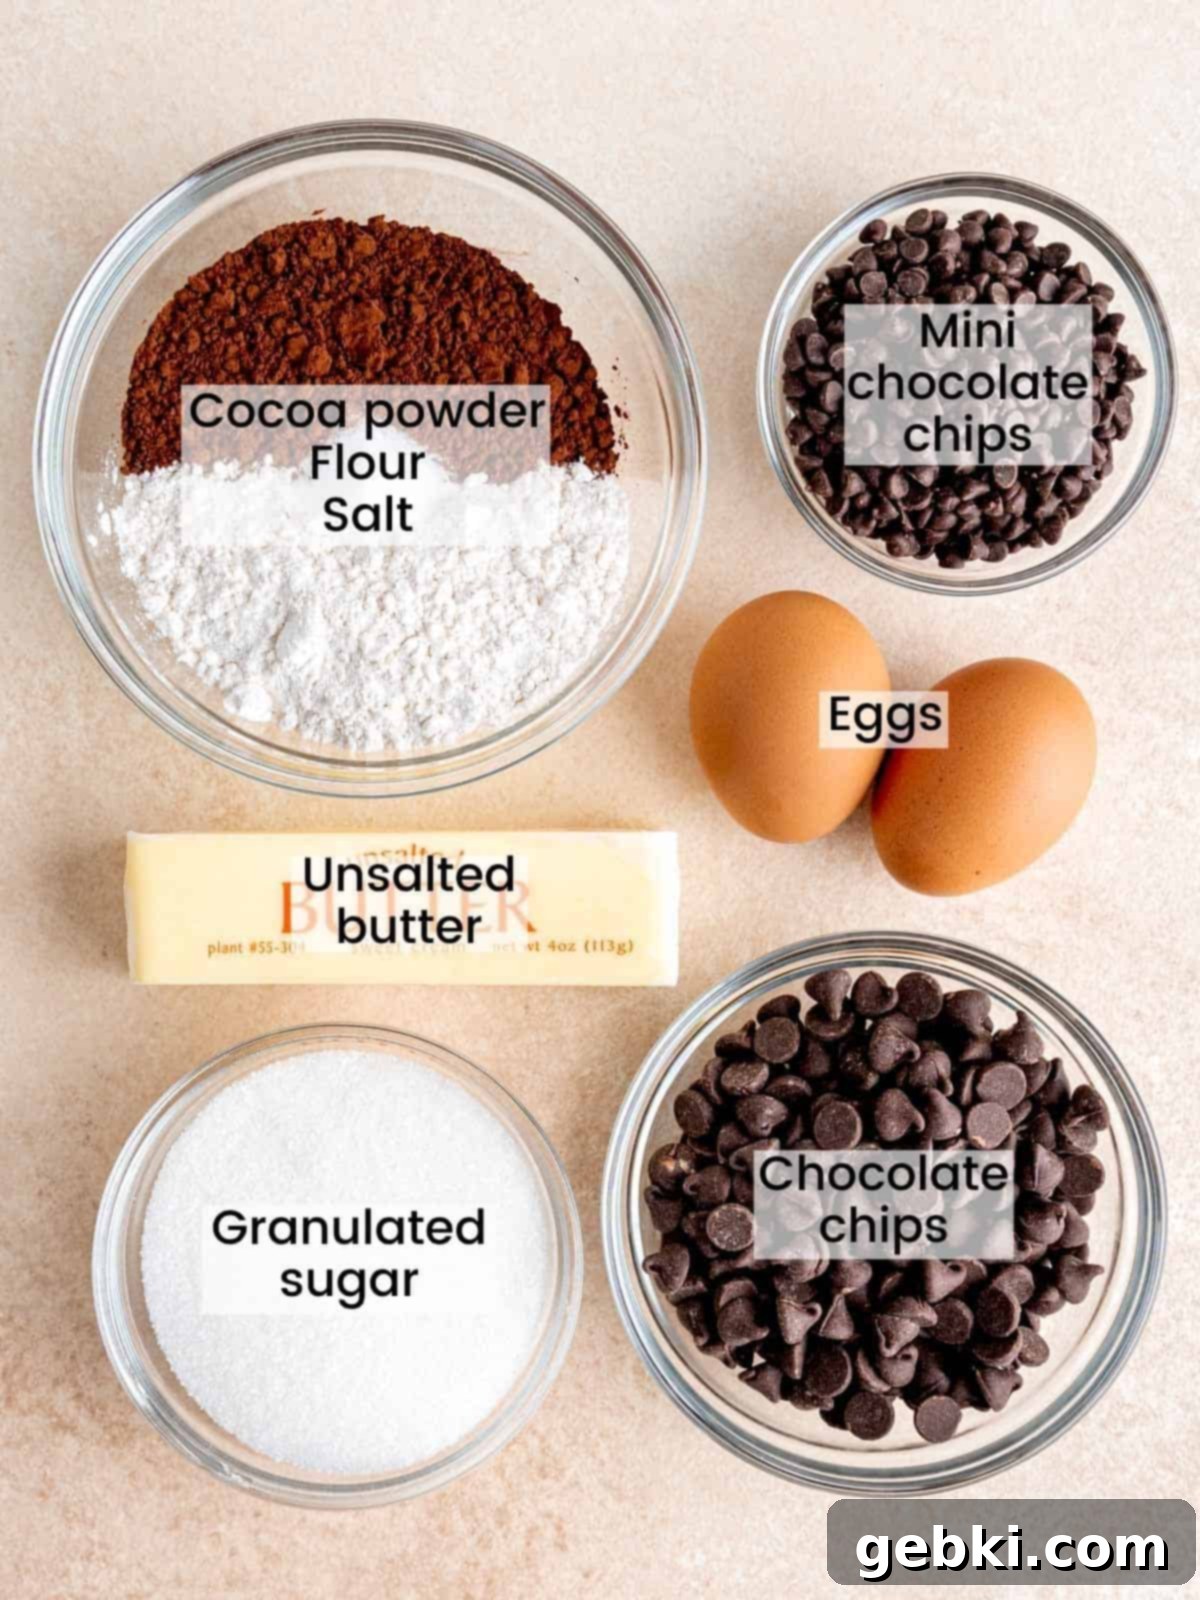
Crafting these irresistible mini brownie bites requires a selection of common baking ingredients, each playing a crucial role in achieving that perfect fudgy texture and intense chocolate flavor. Here’s what you’ll need:
- Unsweetened Cocoa Powder: For the deepest chocolate flavor and color, **Dutch process cocoa** is highly recommended. It’s less acidic and creates a richer, smoother chocolate taste compared to natural cocoa.
- All-Purpose Flour: The structural backbone of our brownies. Ensure it’s measured correctly, preferably by weight, to avoid a cakey texture.
- Salt: A pinch of salt is vital to balance the sweetness and enhance the chocolate’s depth, preventing the brownies from tasting flat.
- Mini Chocolate Chips: These tiny chips melt beautifully into the batter and add delightful pockets of extra chocolate, making every bite extra special.
- Eggs: Eggs provide structure, richness, and contribute to the fudgy texture and the coveted crinkle top. Make sure they are at room temperature for better emulsion with the other ingredients.
- Unsalted Butter: The fat that provides moisture, tenderness, and a rich flavor. Using unsalted butter allows you to control the total salt content in the recipe.
- Granulated Sugar: Not just for sweetness, sugar also contributes to the moistness and the formation of that shiny, crackly crust characteristic of good brownies.
- Chocolate Chips (for melting): These are melted into the batter, forming the base of our intense chocolate flavor. Feel free to use your favorite kind – semi-sweet, dark, or even milk chocolate if preferred. However, for a truly decadent brownie, I highly recommend using a **high-quality chocolate** with at least 60% cocoa solids. Better chocolate yields a better brownie!
See the full recipe card below for exact quantities and detailed instructions.
Substitutions & Creative Variations
While this recipe is tried and true, you might be curious about making a few tweaks. Here’s what you need to know about substitutions and how you can get creative with variations:
Substitutions: This specific recipe has been carefully developed to achieve the perfect fudgy and chewy texture. As such, it has not been extensively tested with many substitutions for core ingredients like flour, butter, or sugar. Baking is a science, and altering key components can significantly change the outcome. If you do decide to replace any ingredients (e.g., trying a gluten-free flour blend or a sugar alternative), please be aware that the final texture and taste may vary. We’d love to hear how they turn out in the comments below if you experiment!
Creative Variations: This is where you can truly make these mini brownie bites your own!
- Mix-ins Galore: Don’t limit yourself to just mini chocolate chips! These brownies are incredibly versatile and welcome a variety of additions. Consider folding in mini M&Ms for a pop of color and candy crunch, chopped peanut butter cups for a rich peanut butter swirl, or even other chopped candies like Snickers or caramel bits. Nuts like chopped walnuts or pecans also make excellent additions, adding a delightful textural contrast.
- No Mini Muffin Pan? No Problem! If you don’t own a mini muffin pan, you can still enjoy these delicious brownies. They can easily be made in a **standard-sized cupcake or muffin pan**. Simply grease each well thoroughly or line the pan with regular cupcake liners. Instead of one small scoop, you’ll want to add about 2 scoops (approximately ¼ cup) of batter to each well. The baking time will be slightly longer, typically 15-20 minutes, so keep an eye on them for that familiar crinkle top and slightly set edges.
- Flavor Boosters: A splash of vanilla extract is classic, but you could also add a hint of almond extract for a different dimension, or a tiny bit of espresso powder to deepen the chocolate flavor without making it taste like coffee.
- Frosting & Toppings: Once cooled, these mini brownies are fantastic plain, but they also make a perfect canvas for a simple swirl of chocolate ganache, a dollop of cream cheese frosting, or a sprinkle of flaky sea salt for a sweet and salty kick.
Recommended Equipment for Easy Mini Brownie Bites
One of the best things about this easy mini brownie bites recipe is its simplicity! You can essentially make the batter in just one bowl using a whisk and a spatula. However, for the best results and an even easier baking experience, I highly recommend a few specific pieces of baking equipment:
- Mini Muffin Pan: The star of this recipe! A **mini muffin pan** is ideal for achieving those perfectly uniform, bite-sized brownie shapes. If you’re lucky, you might even find a great one at a thrift store, just like I did! A 24-well pan is typically perfect for a single batch.
- Small/Medium Cookie Scoop: This is a game-changer for consistency. A **small/medium cookie scoop** (usually holding about 2-3 tablespoons) works incredibly well to evenly distribute the brownie batter into each well of the mini muffin tin. You’ll only need one scoop per well for the ideal size.
- Microwave-Safe Mixing Bowl: A sturdy, microwave-safe bowl large enough to mix all your ingredients is essential. It’s especially useful for melting your butter and chocolate chips.
- Whisk and Spatula: These basic tools are all you’ll need for mixing. A whisk is great for combining wet ingredients thoroughly, and a flexible rubber spatula is perfect for gently folding in dry ingredients without overmixing, ensuring a tender brownie.
- Parchment Paper (Optional): While not strictly necessary if your pan is well-greased, lining the pan with mini cupcake liners or using a small square of parchment paper for easy removal can be a lifesaver, especially for delicate brownies.
Having these tools on hand will streamline your baking process, making it even more enjoyable to create these delightful treats.
Easy Step-by-Step Instructions for Perfect Mini Brownie Bites
Follow these simple steps to create incredibly fudgy and chewy mini brownie bites. This recipe is designed to be straightforward, ensuring delicious results every time!
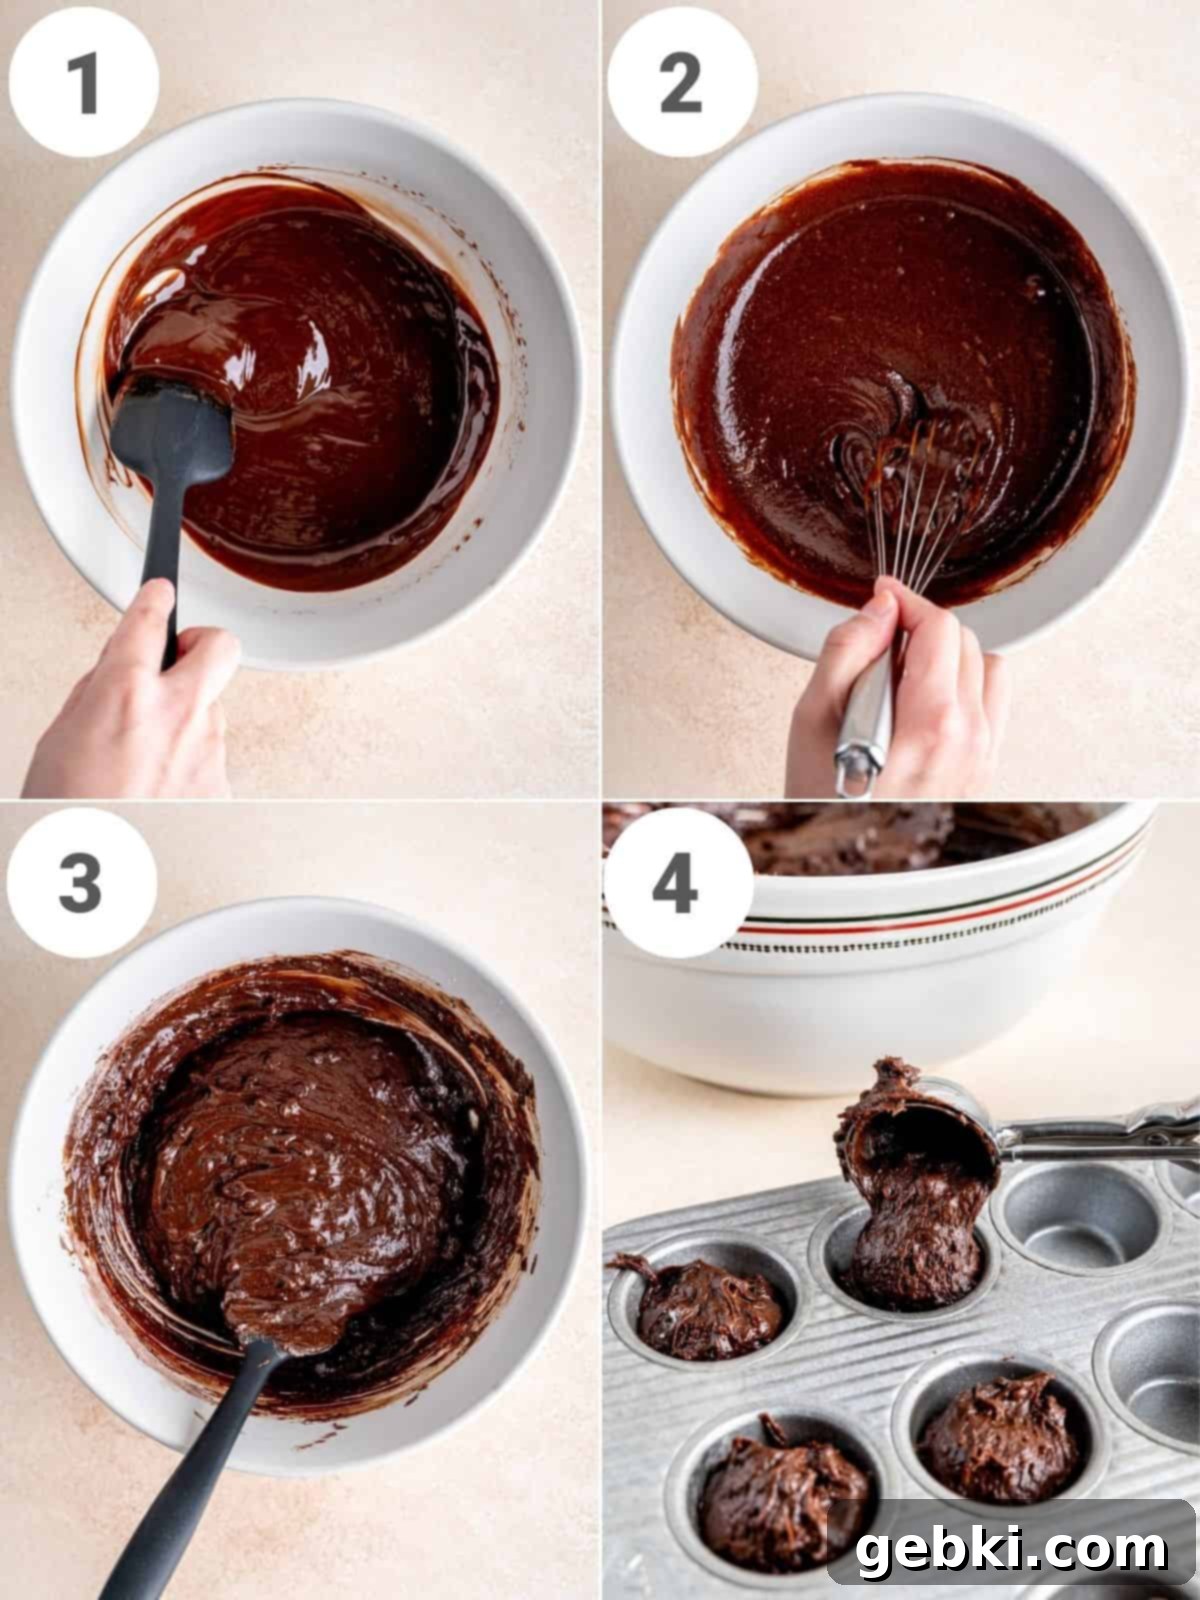
Step One (Picture 1 above): Prepare your chocolate and butter. In a medium microwave-safe bowl, combine the regular chocolate chips and unsalted butter. Microwave in 30-second intervals, stirring thoroughly after each interval, until the mixture is completely melted and smooth. Be careful not to scorch the chocolate.
Step Two (Picture 2 above): Create the fudgy base. Once the chocolate and butter mixture is smooth, whisk in the granulated sugar vigorously for about 2 minutes. This vigorous whisking is crucial for dissolving the sugar, which helps create that desirable crinkle top and chewy texture. Ensure the mixture has cooled down slightly (it should be warm, not hot) before adding the eggs to prevent them from cooking. Then, stir in the eggs until fully incorporated, mixing for another 1-2 minutes until the mixture is glossy and well combined.
Step Three (Picture 3 above): Fold in the dry ingredients. Add the all-purpose flour, cocoa powder, and salt to the chocolate mixture. Using a spatula, gently fold these dry ingredients into the batter. Mix just until no streaks of flour remain. Be careful not to overmix, as this can develop the gluten in the flour, leading to a more cake-like rather than fudgy brownie.
Step Four (Picture 4 above): Add mini chips and bake. Finally, fold in the mini chocolate chips until evenly distributed throughout the batter. Lightly grease a mini muffin pan with non-stick spray (or use mini cupcake liners). Using a small/medium cookie scoop (about 2-3 tablespoons), scoop the brownie batter into each well of the prepared pan. Bake in a preheated oven at 325°F (160°C) for approximately 12-16 minutes, or until the tops are set, have that beautiful crinkly appearance, and show slight cracks. The brownies will continue to cook slightly in the hot pan after removal from the oven, so avoid overbaking.
Allow the brownies to cool completely in the pan before attempting to remove them. This ensures they set properly and maintain their fudgy texture.
Expert Tips for the Best Mini Brownie Bites
Achieving perfectly fudgy, chewy, and crinkle-top mini brownie bites is easy with these expert tips:
- Do Not Over-mix the Batter: This is perhaps the most crucial tip for fudgy brownies. Once you add the dry ingredients (flour, cocoa powder, salt, and mini chocolate chips), use a spatula to gently fold them into the wet ingredients. Stop mixing as soon as the last streaks of flour disappear. Over-mixing develops the gluten in the flour, which will result in a tougher, more cakey brownie rather than a rich, fudgy one.
- Avoid Over-baking at All Costs: Mini brownies bake much faster than full-sized brownies. Because they are so small, they require a shorter baking time, typically 12-16 minutes. They will continue to bake slightly from residual heat once removed from the oven. Look for a delicate film to set on top and for small cracks to just begin to appear. If you bake them too long, they will lose their fudginess and become dry and crumbly. A slight wobble in the center is okay, as they’ll firm up as they cool.
- Cool Completely Before Removing: Patience is a virtue when it comes to brownies! It’s essential to **let the mini brownie bites cool completely in the pan** before attempting to remove them. Warm brownies are delicate and prone to crumbling. As they cool, they firm up, making them much easier to handle. Once cooled, they should twist out of a well-greased pan quite easily. If any do stick, gently run a thin knife around the edge of the well to loosen them before popping them out.
- Room Temperature Eggs: Ensure your eggs are at room temperature. Room temperature eggs emulsify better with the melted butter and chocolate, creating a smoother, more uniform batter and contributing to the desired fudgy texture and crackly top. If you forget to take them out, simply place them in a bowl of warm water for 5-10 minutes.
- High-Quality Chocolate Matters: Since chocolate is the star ingredient, using a good quality chocolate (especially for the melted portion) will make a noticeable difference in the final flavor. Look for chocolate chips or bars with at least 60% cocoa for a richer, more complex taste.
Following these tips will help you achieve a batch of mini brownie bites that are perfectly fudgy, deliciously chewy, and truly irresistible!
Recipe FAQs: Your Mini Brownie Bite Questions Answered
Have questions about making these mini brownie bites? We’ve got answers to some of the most common queries to help you bake with confidence!
Absolutely! Using mini cupcake liners is a fantastic idea. While I don’t always have them on hand, they make baking and especially serving these mini brownies even easier. Plus, if you use liners, there’s no need to grease the muffin pan, saving you an extra step in preparation and cleanup!
Of course! You can definitely adapt this recipe for a standard-sized muffin pan. If you opt for a normal-sized pan, you’ll want to add about 2 scoops (approximately ¼ cup) of the brownie batter to each greased well. The baking time will be slightly longer, ranging from 15-20 minutes. Keep an eye on them for that signature crinkle top and slightly firm edges.
I haven’t personally tested this specific recipe with gluten-free ingredients, so I can’t guarantee the exact results. However, many brownie recipes can be adapted using a good quality 1:1 gluten-free all-purpose flour blend. If you decide to give it a try, I’d love to hear how it goes and what blend you used in the comments below!
The beauty of these mini brownie bites is their versatility! You can enjoy them as is for a simple, satisfying treat. For a more decadent experience, add them to a scoop of vanilla ice cream, or even dip them in a dollop of peanut butter for a classic flavor combination. They are also wonderful with a light dusting of powdered sugar or a drizzle of chocolate sauce. There are truly so many delicious ways to enjoy these bite-sized delights!
The crinkle top often comes from whisking the sugar into the warm melted butter and chocolate mixture for an extended period (about 2 minutes). This helps dissolve the sugar, which then creates that shiny, crackled crust as the brownies bake. Using room temperature eggs also contributes to a better emulsion and can help achieve this desired texture.
Absolutely! For the melted chocolate in the batter, you can use dark, semi-sweet, or even milk chocolate chips or chopped chocolate bars. Just remember that the flavor intensity will vary. For the mini chocolate chips folded in, feel free to use white chocolate chips, butterscotch chips, or even chopped nuts for added crunch.
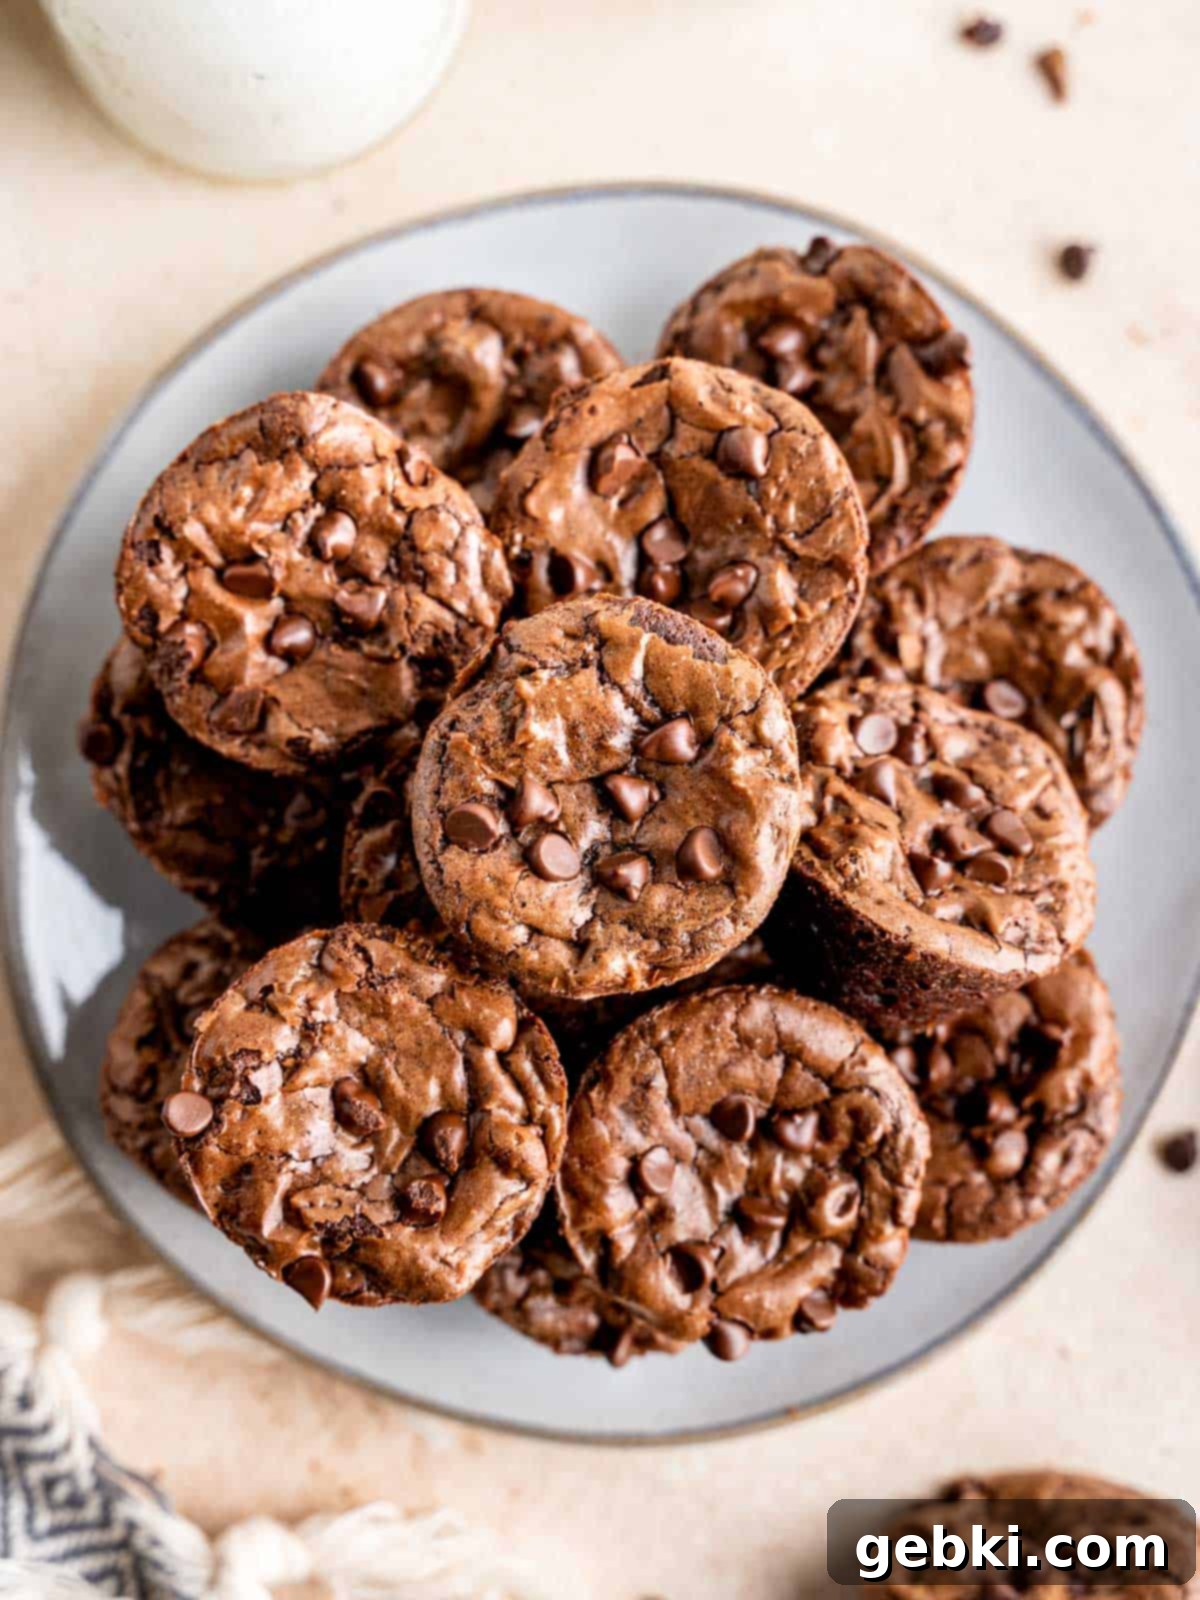
Storage & Freezing Tips for Your Mini Brownie Bites
Properly storing your homemade mini brownie bites ensures they stay fresh and delicious for as long as possible. Here’s how to keep them at their best:
Room Temperature Storage: For immediate enjoyment, store these mini brownies in an airtight container at room temperature. They will remain wonderfully fudgy and fresh for up to 1 week. Placing a piece of parchment paper between layers can prevent them from sticking together, especially if they’re still slightly soft.
Freezing Instructions: These mini brownie bites freeze beautifully, making them perfect for meal prep or saving for a future treat. Once the brownies have cooled completely, wrap them tightly in a layer of plastic wrap, then place them in a freezer-safe bag or an airtight container. They can be frozen for up to 1 month without compromising their texture or flavor. When you’re ready to enjoy them, simply let them thaw at room temperature for an hour or two, or pop them in the microwave for a few seconds for a warm, gooey treat.
Always ensure the brownies are completely cool before storing them, whether at room temperature or in the freezer. Storing warm brownies can lead to condensation, making them soggy.
Discover More Delicious Recipes You’ll Love
If you enjoyed these fudgy mini brownie bites, you’re in for a treat! Our kitchen is always buzzing with new ideas and classic favorites. Explore these other highly-rated recipes from our collection that are sure to tantalize your taste buds and add more delightful bakes to your repertoire. From comforting classics to innovative twists, there’s something here for every sweet craving.
-
Fudgy Small Batch Brownies
-
Mini Peanut Butter Cup Brownies
-
Samoa Brownies
-
Soft Almond Sugar Cookies

Did you try this recipe?
We absolutely love seeing your creations! Let us know what you thought by leaving a comment below and sharing it on Instagram, Facebook, & Pinterest! Tag us so we can see your delicious results!
Thank you for baking with us!
-Kayla
📖 Recipe

Mini Brownie Bites
Kayla Burton
Pin Recipe
Equipment
-
Mixing bowl
-
Measuring Cups or Scale
-
Measuring spoons
-
Whisk
-
Spatula
-
Small/medium cookie scoop
-
24-well Mini Muffin Pan
Ingredients
- ½ cup (1 stick) (113.5 g) unsalted butter
- 1 cup (170 g) semi-sweet chocolate chips
- ⅔ cup (133 g) granulated sugar
- 2 large (2 large) eggs room temperature
- ⅔ cup (83 g) all-purpose flour
- ¼ cup (25 g) cocoa powder
- ¼ teaspoon (¼ teaspoon) salt
- ½ cup (90 g) mini semi-sweet chocolate chips
Instructions
-
Preheat your oven to 325°F (160°C). Prepare a 24-well mini muffin pan by greasing each well thoroughly with non-stick spray. This step is crucial for easy removal of the brownies later.
-
In a medium microwave-safe bowl, combine the semi-sweet chocolate chips (1 cup) and unsalted butter. Microwave in 30-second intervals, stirring well after each, until the mixture is completely smooth and melted. This typically takes 1-2 minutes.
-
Add the granulated sugar to the warm chocolate mixture and whisk vigorously for approximately 2 minutes. This thorough whisking helps dissolve the sugar, which is key to achieving that signature crinkle top. Ensure the mixture is cool enough to touch before incorporating the room temperature eggs. Then, mix in the eggs for another 1-2 minutes until the batter is glossy and well combined.
-
Gently fold in the all-purpose flour, cocoa powder, and salt using a spatula. Mix just until all flour streaks have completely disappeared. It’s important not to overmix to keep the brownies fudgy. Finally, fold in the mini semi-sweet chocolate chips until they are evenly distributed throughout the batter.
-
Using a small/medium cookie scoop (which holds about 2-3 tablespoons of batter), fill each well of your greased mini muffin pan with the brownie batter. Aim for consistency to ensure even baking.
-
Bake for 12-16 minutes. The brownies are done when their tops look slightly firm, have developed a beautiful crinkly appearance, and show small cracks. A wooden skewer inserted into the center should come out with moist crumbs, not wet batter. Avoid overbaking to maintain their fudgy texture.
-
Allow the brownie bites to cool completely in the pan on a wire rack before attempting to remove them. This is essential for them to firm up and prevents them from falling apart. If your pan was well-greased, you should be able to give them a gentle twist and pull them right out. Otherwise, a thin knife run carefully along the edge might be needed to loosen them.
Save This Recipe! 💌
We’ll email this post to you, so you can come back to it later!
Video
Notes
Accurate Dry Ingredient Measurement: For the most consistent and best results in baking, especially for dense treats like brownies, it is highly recommended to use a kitchen scale to weigh your dry ingredients in grams. If you don’t have a scale, scoop your flour into the measuring cup and level it off with a straight edge rather than packing it.
Choosing Your Chocolate: The quality of your chocolate significantly impacts the final flavor. For the chocolate melted into the batter, I recommend using high-quality chocolate chips or a chopped bar with at least 60% cocoa for a rich, deep chocolate experience.
Optimal Storage for Freshness: Store any leftover mini brownie bites in an airtight container at room temperature for up to 1 week to maintain their fudgy texture. For longer storage, they can be tightly wrapped and frozen in a freezer-safe bag or container for up to 1 month. Thaw at room temperature before serving.
Nutrition Disclaimer: The provided nutrition information is an estimate based on standard ingredient calculations. Calorie accuracy and other nutritional values are not guaranteed and may vary based on specific ingredients used and preparation methods.
The provided nutritional information is an estimate per serving. Accuracy is not guaranteed.
