The Best Soft Cut Out Sugar Cookies: Easy, Flavorful, and Perfect for Decorating Any Occasion
Imagine biting into a sugar cookie that’s perfectly soft in the center, with just a hint of crispness around the edges, and bursting with a delicate flavor that makes you reach for another. These Soft Cut Out Sugar Cookies are precisely that – a timeless treat reimagined for modern bakers. This simple yet incredibly reliable recipe comes together quickly and easily, making it perfect for any holiday or special occasion you’re baking for. From intricate festive shapes to simple rounds, these cookies can be customized using different cookie cutters. They also serve as an ideal canvas for decorating with vibrant sprinkles and smooth icing, transforming a simple cookie into a true edible work of art.

Our soft sugar cookies boast perfectly crisp, lightly browned edges that give way to wonderfully tender, melt-in-your-mouth centers – a truly irresistible combination. What makes this the best cut out cookie recipe you will find is not just its flawless texture, but also its unique flavor profile. The dough is subtly scented with bright lemon and warm, comforting nutmeg, providing an exquisite twist on a classic. This beloved recipe is a cherished adaptation from my grandma’s tried and true sugar cookie recipe, a family favorite that has been perfected over generations. These versatile treats can also be transformed into delightful, bite-size Christmas Cookie Truffles for an extra festive touch!
[feast_advanced_jump_to]
Why You’ll Adore This Easy Cut Out Sugar Cookie Recipe
Baking should always be a delightful and rewarding experience, and this recipe delivers exactly that! Here’s why these soft cut out sugar cookies are destined to become a beloved staple in your kitchen:
- Minimal Ingredients, Maximum Flavor: You’ll be amazed that such incredible cookies require only 10 common ingredients, most of which are probably already in your pantry. This means less grocery shopping and more time to enjoy the baking process!
- Unrivaled Texture: This recipe achieves the coveted perfect balance: cookies that are wonderfully soft and tender in the middle, yet hold their intricate cut-out shapes with crisp, defined edges. Say goodbye to spread-out, misshapen cookies!
- Effortless Baking Process: Whether you’re a novice baker or a seasoned pro, you’ll appreciate how straightforward these instructions are. We guide you on how to make soft sugar cookies in just 4 easy-to-follow steps, simplifying the art of cookie making.
- Distinctive & Delicious Flavor: What truly sets these cookies apart is their unique and inviting flavor. The subtle zest of lemon extract combined with the comforting warmth of freshly grated nutmeg creates a sophisticated taste that is both familiar and exciting, making them genuinely special.
- Ideal for Decorating: With their ability to hold shape beautifully, these cookies provide the perfect base for all your decorating dreams. From simple sprinkles to elaborate royal icing designs, they are a blank canvas for your creativity, making them excellent for holiday gatherings or kid-friendly baking sessions.
- Family Tradition Potential: Adapted from a cherished family recipe, these cookies carry a hint of nostalgic charm. Baking them can become a wonderful tradition in your own home, creating delicious memories for years to come.
Essential Ingredients for Tender & Flavorful Sugar Cookies

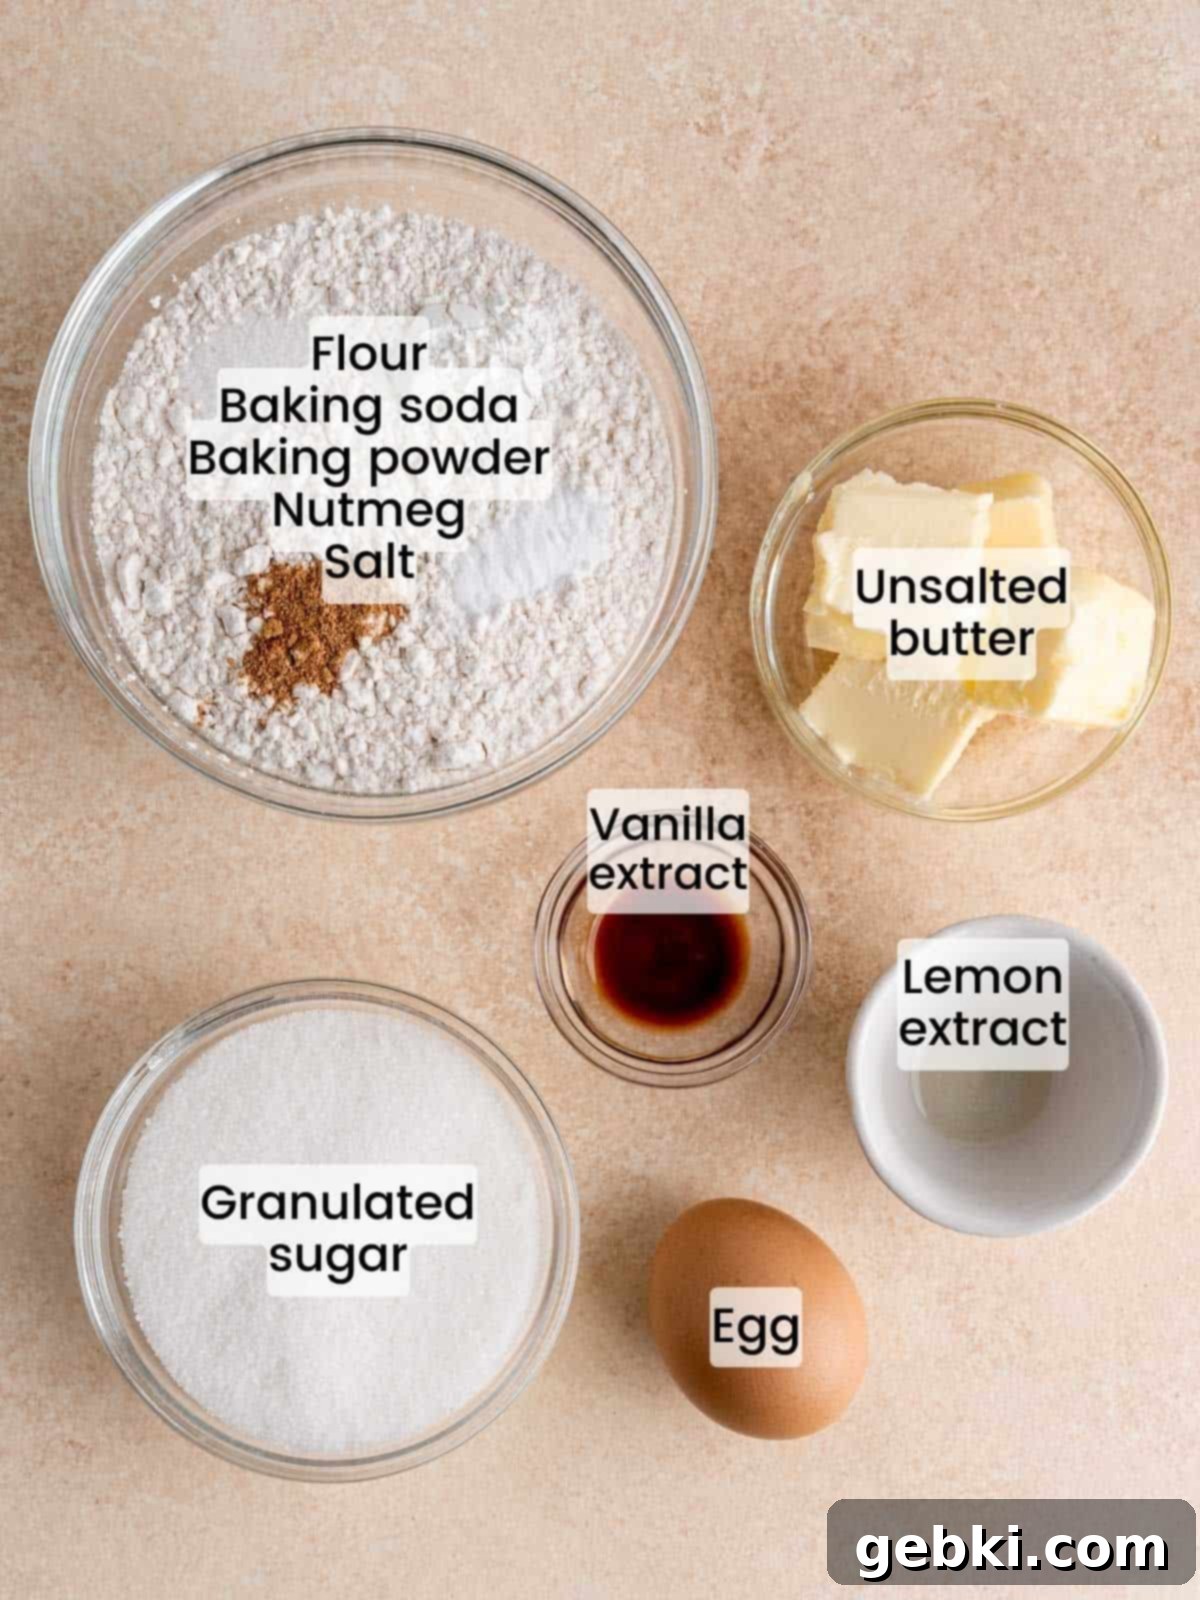
The success of these exquisite cut out sugar cookies hinges on the quality and preparation of your ingredients. Each component plays a crucial role in developing the perfect melt-in-your-mouth texture and the signature flavor that sets these cookies apart:
- Unsalted Butter (Room Temperature): I always advocate for unsalted butter as it gives you precise control over the overall salt content in your baked goods. This allows for a perfectly balanced flavor in your soft Christmas cookies. Crucially, ensure your butter is at true room temperature (soft enough to indent with a finger, but not greasy) for optimal creaming, which creates a light and airy dough.
- Granulated Sugar: Beyond providing essential sweetness, granulated sugar contributes to the cookies’ delicate texture and helps achieve those desirable lightly browned, slightly crisp edges.
- Large Egg (Room Temperature): An egg acts as a vital binder, bringing the dough together and adding richness. Using a room temperature egg ensures it incorporates smoothly and evenly into the butter mixture, preventing curdling.
- Lemon Extract: This is a secret weapon for a bright, refreshing flavor that cuts through the sweetness beautifully. A small amount of lemon extract, readily available in the baking aisle next to vanilla, goes a long way in adding a delightful zestiness. For quality extracts, Watkins is a brand I trust and recommend.
- Vanilla Extract: The classic, comforting aroma of vanilla is indispensable in any great cookie recipe. It enhances the overall flavor profile, adding depth and a familiar warmth.
- All-Purpose Flour: The structural backbone of your cookies. For the most accurate and consistent results in baking, I highly recommend weighing your flour in grams using a kitchen scale. If you’re measuring by volume, be sure to spoon the flour lightly into your measuring cup and level it off with a straight edge to avoid compacting it and adding too much.
- Baking Soda & Baking Powder: These leavening agents work in harmony to give the cookies their ideal lift and tender crumb, ensuring a soft, yet stable structure that holds its cut-out shape without spreading excessively.
- Ground Nutmeg: The other distinct flavor in this recipe, nutmeg provides a warm, slightly spicy, and aromatic note that perfectly complements the lemon. For an unparalleled fresh and stronger flavor, I highly recommend buying whole nutmeg and grating it with a microplane right before adding it to your dry ingredients.
- Salt: A small but mighty ingredient, salt is essential for balancing the sweetness and enhancing all the other wonderful flavors present in these cookies.
For a precise list of all ingredients and their exact measurements, please refer to the detailed recipe card located below.
Creative Substitutions & Delicious Flavor Variations
One of the many delightful aspects of baking soft sugar cookies is their incredible versatility. This recipe provides a robust and flavorful base that can be easily adapted to create a wide array of flavor profiles and decorating possibilities. Don’t be afraid to get creative and make these cookies uniquely your own! Here are some popular and exciting substitutions and variations to inspire your next batch:
- Classic Almond Sugar Cookies: For those who adore a more traditional sugar cookie flavor, simply swap the lemon extract for one teaspoon of almond extract and omit the nutmeg entirely. Almond extract imparts a wonderfully rich, slightly nutty, and sweet aroma that is a perennial favorite. If you’re specifically craving this flavor, you might also love my dedicated Soft Almond Sugar Cookies recipe!
- Effortless Sprinkle Topping: To instantly add a festive touch without complex decorating, generously top your unbaked cookie cut-outs with your favorite colorful sprinkles. Gently press them down lightly before placing the cookies in the oven. The sprinkles will bake beautifully onto the cookies, adding a delightful crunch and a burst of color.
- Sugar Cookie Icing Projects: If you’re eager to embark on a more elaborate baking project, these cookies are the perfect canvas for decorating with sugar cookie icing. Once the cookies have cooled completely, prepare a batch of Royal Icing for intricate designs and a smooth, hard finish, or a simple glaze. My grandma’s go-to icing, made with powdered sugar, a little softened unsalted butter, vanilla extract, and milk, is always a delicious and easy option.
- Rich Chocolate Sugar Cookies: To transform this recipe into a decadent chocolate version, simply omit both the lemon extract and nutmeg. Instead, add ¼ cup of unsweetened cocoa powder along with your other dry ingredients. This yields a deep, chocolatey cookie that pairs wonderfully with peppermint, espresso, or even more vanilla icing.
- Thick, Chewy Round Cookies: If you prefer a simpler, more rustic cookie without the fuss of cutters, roll the chilled cookie dough into uniform balls. You can gently flatten them slightly with the palm of your hand before baking. For an extra sparkly finish, roll the dough balls in granulated sugar before baking.
- Seasonal Spice Blends: Experiment with different spices to match the season. Instead of just nutmeg, consider adding a pinch of ground cinnamon, cardamom, or even a pre-made pumpkin pie spice blend for autumn. For a winter wonderland vibe, a tiny dash of peppermint extract (start with ¼ teaspoon) can be magical.
- Citrus Zest Boost: Amplify the bright notes by adding finely grated zest from one lemon or orange to the wet ingredients. The zest contains aromatic oils that intensify the citrus flavor without altering the cookie’s texture.
This recipe has primarily been tested with the original ingredient list and the variations described above. Should you choose to substitute or add ingredients not mentioned, we kindly encourage you to share your results and any insights in the comments section below! Your feedback helps other bakers in our community.
Baking the Perfect Soft Cut Out Sugar Cookies: A Step-by-Step Guide
Creating these delightful cut out sugar cookies is a rewarding and enjoyable process. Following these detailed steps will ensure your cookies are consistently soft, wonderfully flavorful, and beautifully shaped every single time.

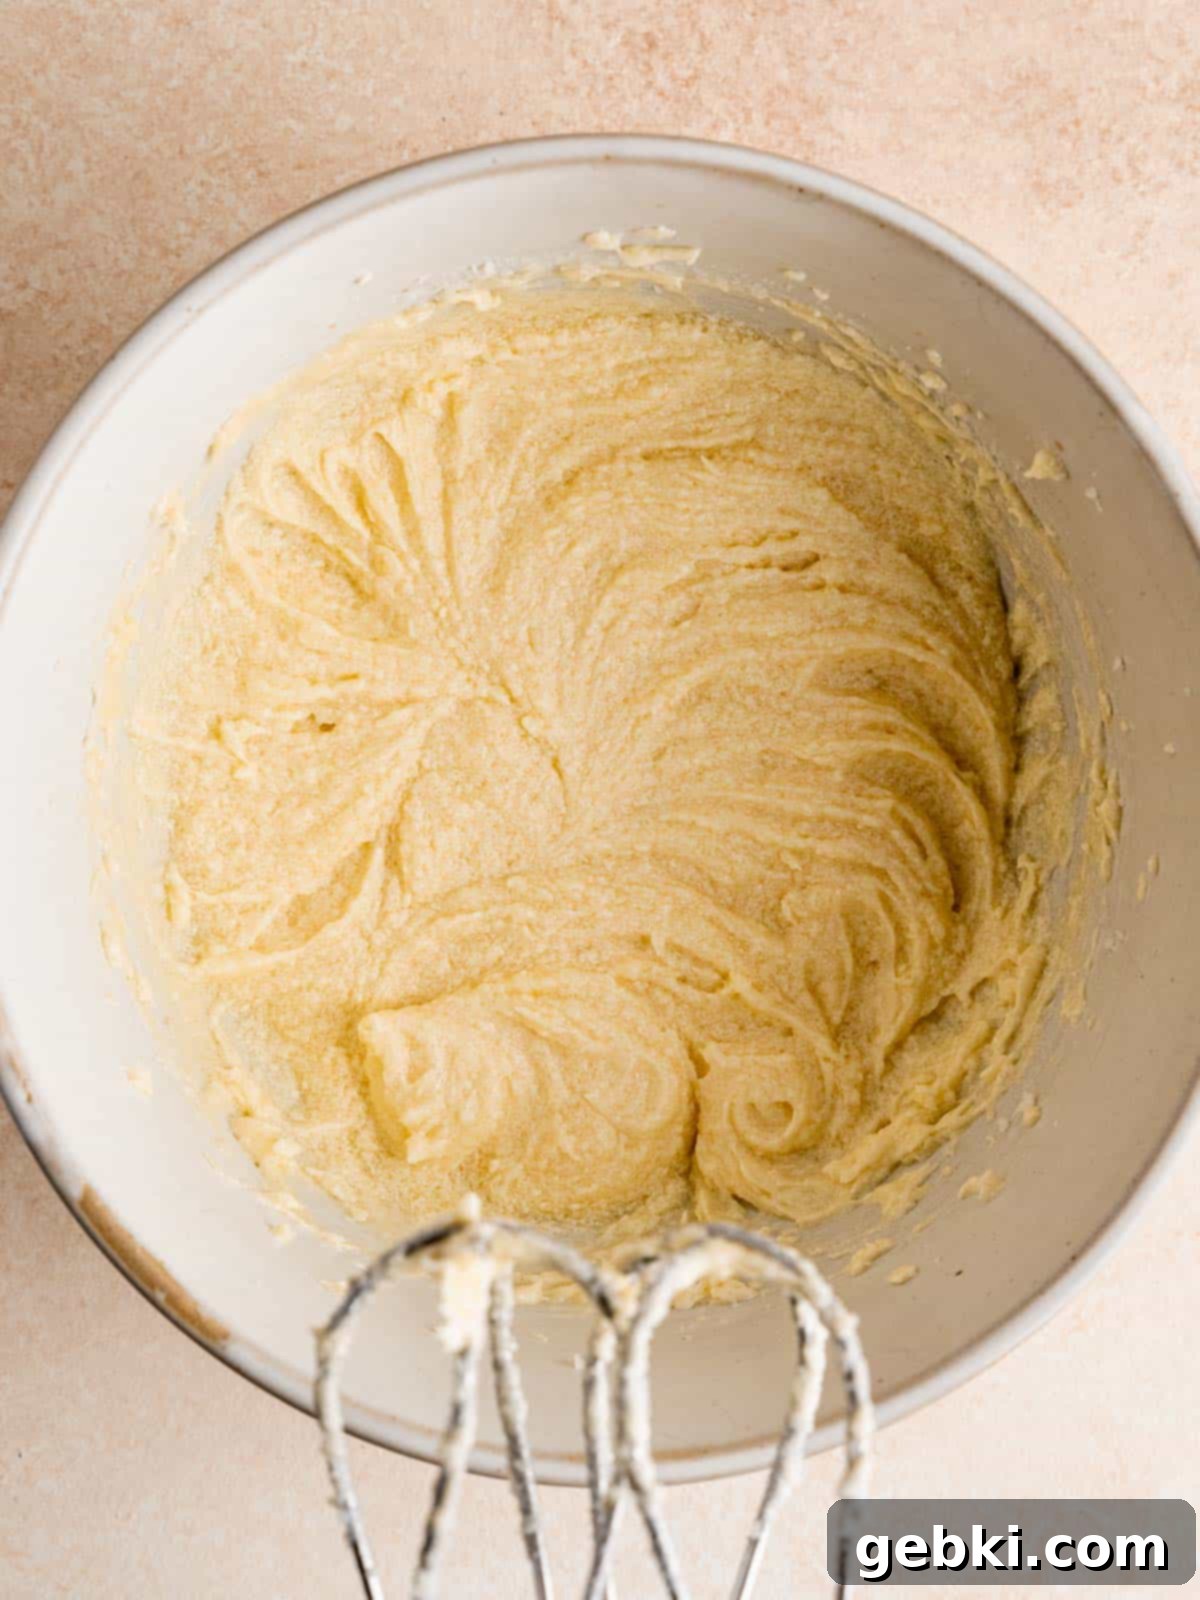
Step 1: Cream the Wet Ingredients. In a large mixing bowl, preferably using an electric stand mixer fitted with the paddle attachment, or with a hand mixer, cream together your room temperature unsalted butter and granulated sugar. Beat on medium speed for about 2 to 3 minutes until the mixture becomes notably light, pale, and fluffy. This important step incorporates air, which is crucial for achieving a tender and soft cookie texture. Next, beat in the large egg, followed by the lemon and vanilla extracts. Mix only until the ingredients are just combined and smooth, being careful not to overmix.

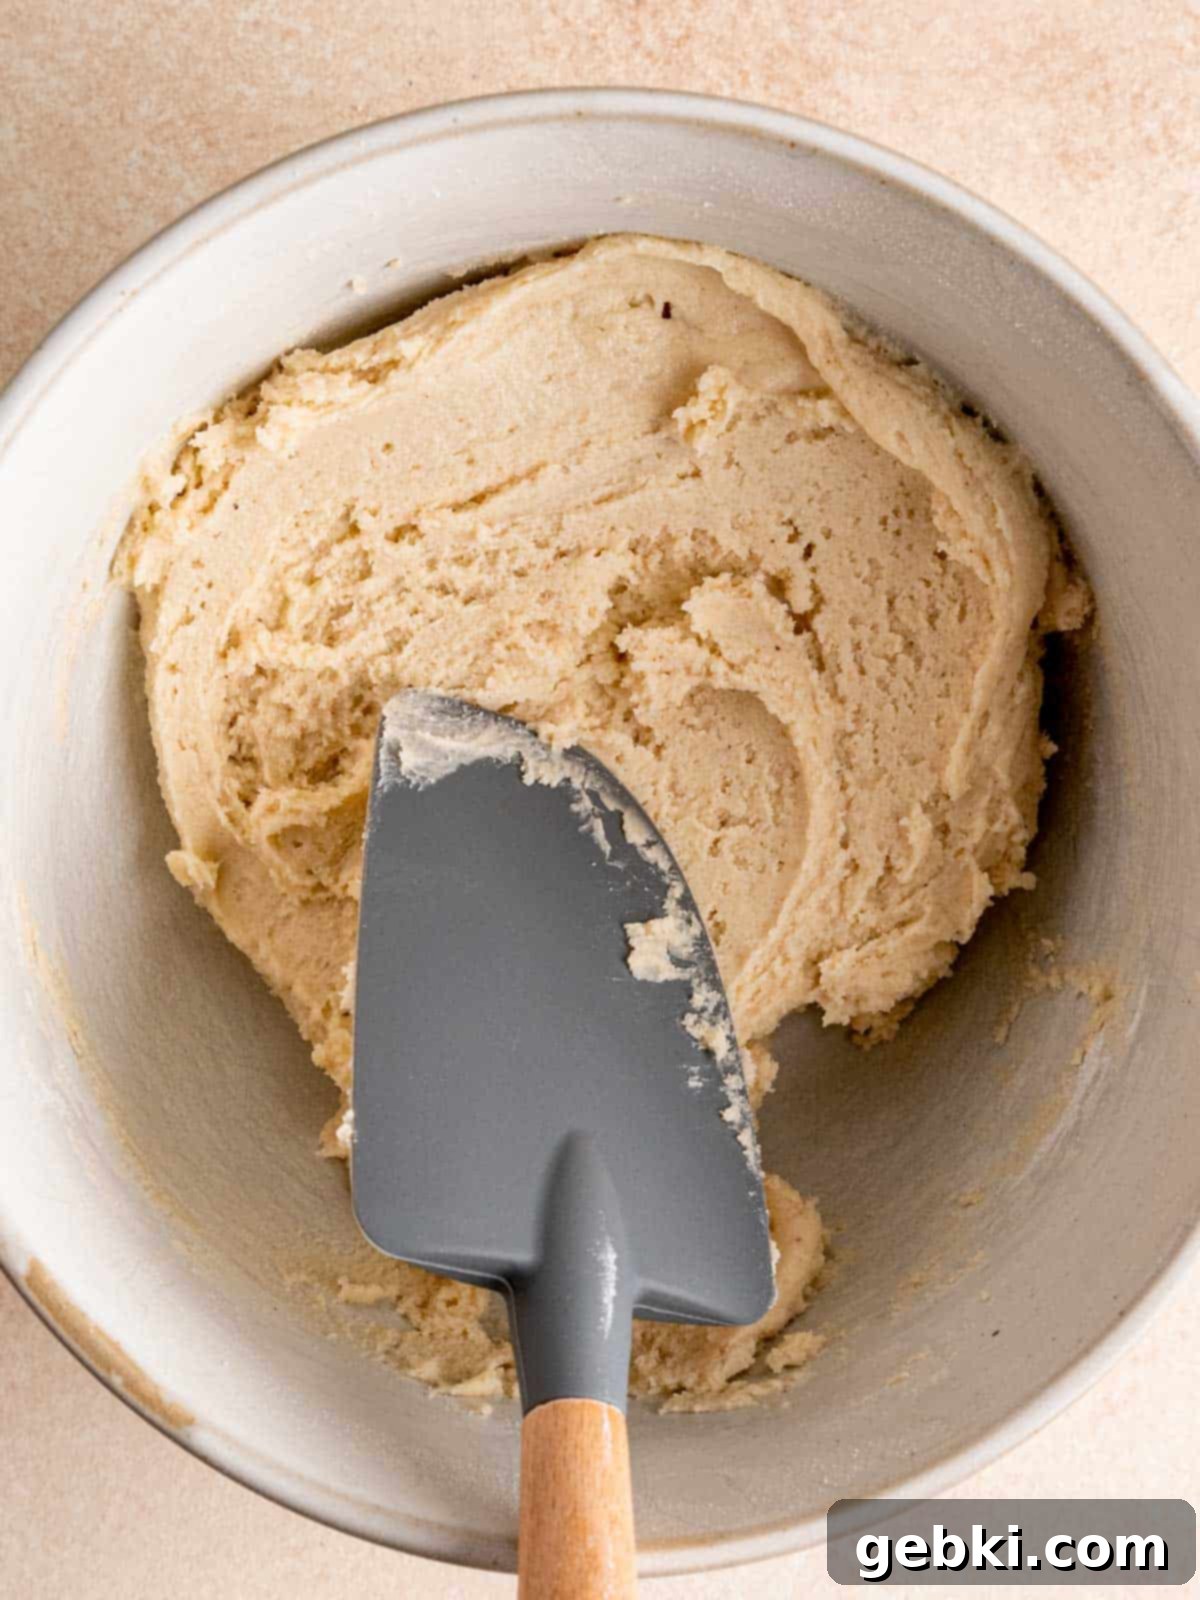
Step 2: Incorporate Dry Ingredients & Chill Dough. In a separate medium bowl, whisk together the all-purpose flour, baking soda, baking powder, freshly grated nutmeg, and salt until well combined. Gradually add these dry ingredients to your wet mixture, mixing on low speed or by hand with a spatula just until the dough comes together and no streaks of flour remain. Avoid overmixing at all costs, as this can develop gluten and result in tough cookies. Once the dough is formed, flatten it into a disc shape, wrap it tightly in plastic wrap (a double layer is even better), and refrigerate for a minimum of 2 hours, or ideally, overnight. This chilling period is crucial; it allows the butter to firm up and prevents the cookies from spreading too much in the oven, ensuring your intricate cut-out shapes stay perfectly defined.

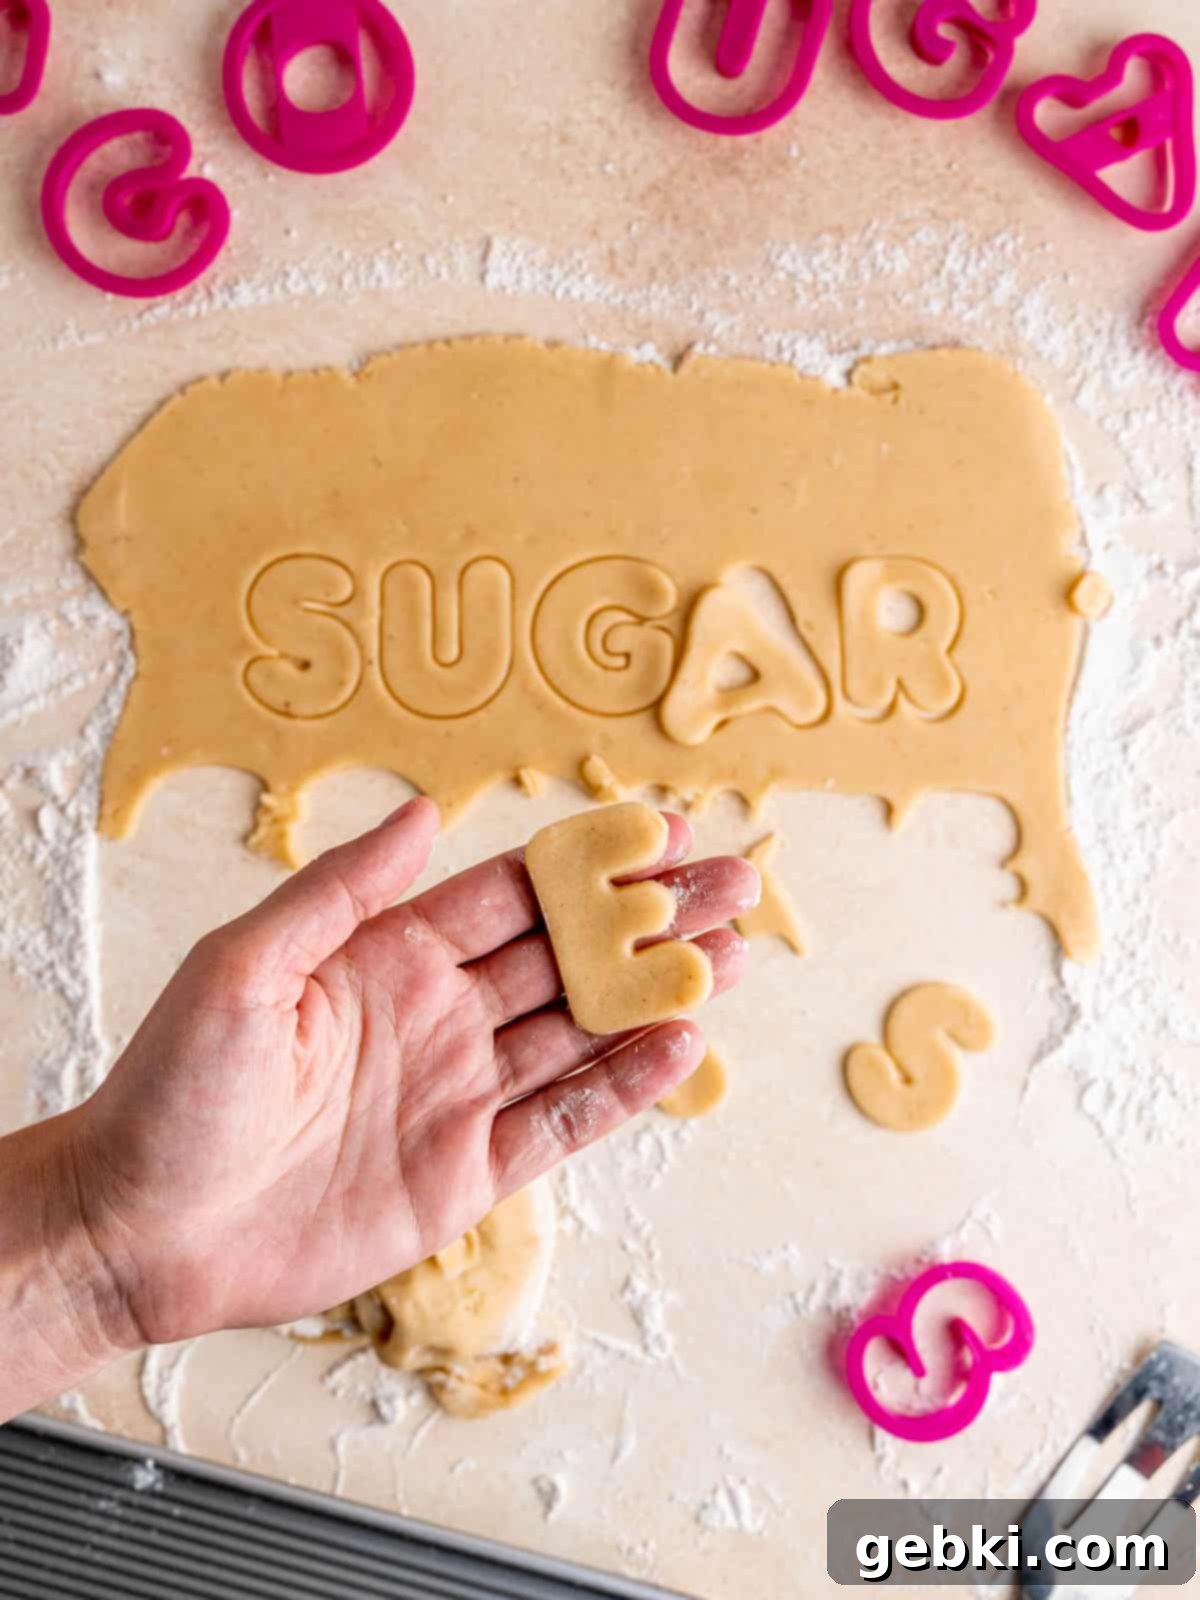
Step 3: Roll & Cut Your Cookies. When you’re ready to bake, remove the chilled dough from the refrigerator and let it sit at room temperature for about 10-15 minutes to soften slightly, making it more pliable for rolling. Lightly flour a clean work surface and your rolling pin. Roll out the cookie dough to an even ¼ inch thickness. This consistent thickness is crucial for ensuring all your cookies bake uniformly. Using your preferred cookie cutters (don’t forget to dip them in flour!), cut out your desired shapes. Carefully transfer the cut-outs to a baking sheet lined with parchment paper, arranging them about 1 inch apart to allow for minimal spreading.

Step 4: Bake & Cool to Perfection. Preheat your oven to 350°F (175°C). Bake the cookies for approximately 7-10 minutes. The exact baking time will depend on the size and thickness of your cookies, so keep a close watch. They are done when the edges just begin to turn a very light golden brown, and the centers still look soft and slightly pale. This visual cue is key to maintaining their tender texture. Once baked, let the cookies cool on the baking sheet for about 5 minutes; this allows them to firm up. Then, carefully transfer them to a wire rack to cool completely. Only once they are fully cooled should you begin to frost and decorate them!
Don’t Waste a Crumb: Re-rolling Dough Scraps. After cutting out your initial batch of cookies, gather the leftover dough scraps. Gently brush off any excess flour, then lightly press and knead them into a smooth ball. Avoid overworking the dough, as this can make it tough. Re-flour your surface and rolling pin, then roll out and cut out more cookies until all the dough is used up. If the dough becomes too warm and sticky during this process, simply pop it back into the refrigerator for 15-20 minutes to firm up before continuing.
Expert Tips for Baking the Best Soft Cut Out Sugar Cookies
Mastering the art of soft, perfectly shaped cut out sugar cookies is made easy with these professional baking tips. These insights will help you avoid common pitfalls and ensure your cookies are a delightful success every time, ready for any celebration:
- Tip #1: The Golden Rule of Room Temperature Ingredients. For impeccably smooth dough and superior cookie texture, ensure all your dairy ingredients, especially unsalted butter and eggs, are at true room temperature. This means they should be soft enough to leave a slight indentation when pressed, but not melted or greasy. Room temperature ingredients emulsify better, creating a cohesive batter that traps air, which is vital for that signature soft chew.
- Tip #2: Embrace the Chill Time. The initial chilling of the dough for at least 2 hours (or preferably overnight) is absolutely crucial for cut-out cookies. This step allows the butter to re-solidify and the gluten in the flour to relax. The result? Cookies that hold their intricate shapes beautifully in the oven with minimal spreading, giving you crisp, defined edges every time.
- Tip #3: Consistency in Thickness is Key. When rolling out your cookie dough, aim for a uniform ¼-inch thickness. This consistency is paramount for even baking; cookies of varying thicknesses will cook at different rates, leading to some being overdone while others are underbaked. An adjustable rolling pin can be a fantastic tool here, or you can use two same-sized rulers or wooden dowels placed on either side of your dough as a guide.
- Tip #4: Flour Your Cookie Cutters (and Your Surface!). Sticky dough can be frustrating, especially with detailed cookie cutters. To ensure clean cuts and easy release, lightly dip your cookie cutter in flour before each use. Similarly, keep your work surface lightly floured at all times. As you roll, carefully lift sections of the dough and pat a little flour underneath if it starts to stick. Using a silicone baking mat can also greatly reduce sticking and make cleanup a breeze, as can a cotton rolling pin cover.
- Tip #5: Avoid the Dreaded Overmix. Once you’ve added the dry ingredients, mix the dough only until it’s just combined and no streaks of flour are visible. Overmixing develops the gluten in the flour, which will lead to tough, dense, and chewy cookies rather than the soft, tender texture we’re aiming for. When re-rolling dough scraps, handle them as minimally as possible.
- Tip #6: Trust Your Eyes Over the Timer. Baking times are guides, but oven temperatures can vary, and cookie size affects doneness. Instead of strictly adhering to the clock, look for visual cues: the edges of your cookies should just begin to turn a very light golden brown. The centers will still appear pale and slightly soft; this indicates a perfectly baked, tender cookie.
- Tip #7: Use Parchment Paper or Silicone Mats. Always line your baking sheets with parchment paper or a silicone baking mat. This not only prevents sticking but also promotes even baking and makes transferring the warm cookies much easier, reducing breakage.
Common Questions About Soft Cut Out Sugar Cookies
The beauty of this recipe is its incredible versatility! You can confidently use any size and shape cookie cutter you prefer – from intricate holiday designs to simple geometric shapes. Just be mindful that baking times will need to be adjusted: smaller, thinner cookies will bake more quickly (closer to 7 minutes), while larger, thicker cookies will require a few extra minutes (closer to 10 minutes or slightly more). Always watch for the edges to be lightly golden, regardless of the cutter size. This adaptability is precisely why many consider this to be the best cookie cutter recipe!
Generally, no, you do not need to perform a second chill after cutting out your cookie shapes. One of the fantastic features of this particular soft sugar cookie recipe for cut-outs is its excellent ability to hold its shape reliably after the initial, crucial chilling period. However, if you are working in a particularly warm kitchen environment, or if the process of cutting out all your cookies takes a significant amount of time and the dough becomes noticeably soft and warm, a brief 10-15 minute chill in the refrigerator or even the freezer before baking can certainly help prevent any potential spreading and ensure your cookies maintain their crisp, defined edges.
These soft sugar cookies are incredibly versatile and pair beautifully with various types of icing! For a classic, simple, and utterly delicious finish, my personal favorite is still my grandma’s easy recipe: a basic blend of powdered sugar, a touch of softened unsalted butter, a dash of vanilla extract, and enough milk to achieve your desired consistency. This creates a creamy, sweet glaze that sets nicely. For more intricate designs, detailed piping, and a smooth, hard finish that’s ideal for stacking, royal icing is a fantastic and popular choice. Don’t forget to enhance your decorated cookies with sprinkles, edible glitter, or small candies for extra flair!
Tough or hard sugar cookies are a common issue, and it’s almost always due to overworking the dough. When flour is mixed excessively, the gluten within it develops too much, leading to a denser, chewier texture more akin to bread, rather than a tender, melt-in-your-mouth cookie. To prevent this, ensure you mix the dry ingredients into the wet ones only until they are just combined, with no visible streaks of flour remaining. Additionally, be mindful of adding too much extra flour when rolling out the dough, and consider measuring your flour by weight (grams) for the most accurate and consistent results.
Absolutely! This soft cut out sugar cookie dough is exceptionally well-suited for advance preparation, making your baking day much smoother. You can prepare the dough as directed, wrap it very tightly in plastic wrap (and an additional layer of aluminum foil for extra protection from freezer burn if freezing), and store it in the refrigerator for up to 3-5 days. For even longer storage, the dough can be frozen for up to 1 month. When you’re ready to bake, simply transfer the frozen dough to the refrigerator to thaw overnight. Then, allow it to soften slightly at room temperature for about 15-20 minutes before proceeding with rolling, cutting, and baking as outlined in the recipe instructions.

How to Store Your Soft Cut Out Sugar Cookies & Dough
Proper storage is key to preserving the delicious freshness and tender texture of your soft cut out sugar cookies. Whether baked or unbaked, here’s how to best store them for enjoyment now or later:
Room Temperature Storage (Unfrosted)
Once your cookies have completely cooled, any unfrosted sugar cookies can be stored in an airtight container at room temperature on your kitchen counter for up to 1 week. To help them retain their delightful softness, a classic trick is to place a slice of plain bread in the container with the cookies; the cookies will absorb moisture from the bread. Remember to replace the bread every couple of days to keep it fresh and prevent mold.
Refrigerated Storage (Frosted)
If your cookies are adorned with icing, especially a butter-based or cream cheese frosting, they should be stored in an airtight container in the refrigerator. This will keep them fresh for up to 5 days. To prevent the icing from sticking or smudging, it’s a good idea to arrange them in a single layer or separate layers with sheets of parchment paper.
Freezing Baked Cookies for Longer Freshness
These soft cut out sugar cookies freeze exceptionally well! Once completely cooled (and if frosted, ensure the icing is fully set and firm), arrange them in a single layer on a baking sheet and place in the freezer for about 30 minutes until they are firm. Then, transfer the flash-frozen cookies to a freezer-safe bag or an airtight container, layering them between sheets of parchment paper to prevent sticking. They will maintain their quality for up to 3 months. To enjoy, simply thaw them at room temperature before serving.
Freezing Cookie Dough for Future Baking Sessions
To make future baking sessions even easier, you can prepare and freeze the cookie dough ahead of time. After mixing, wrap the dough tightly in at least two layers of plastic wrap, followed by a layer of aluminum foil, and store it in the freezer for up to 1 month. When you’re ready to bake, transfer the frozen dough to the refrigerator and allow it to thaw overnight. Once thawed, let it soften slightly at room temperature (approximately 15-20 minutes) before rolling, cutting, and baking according to the recipe instructions.
More Delicious Cookie Recipes You’ll Love
- Soft Almond Sugar Cookies
