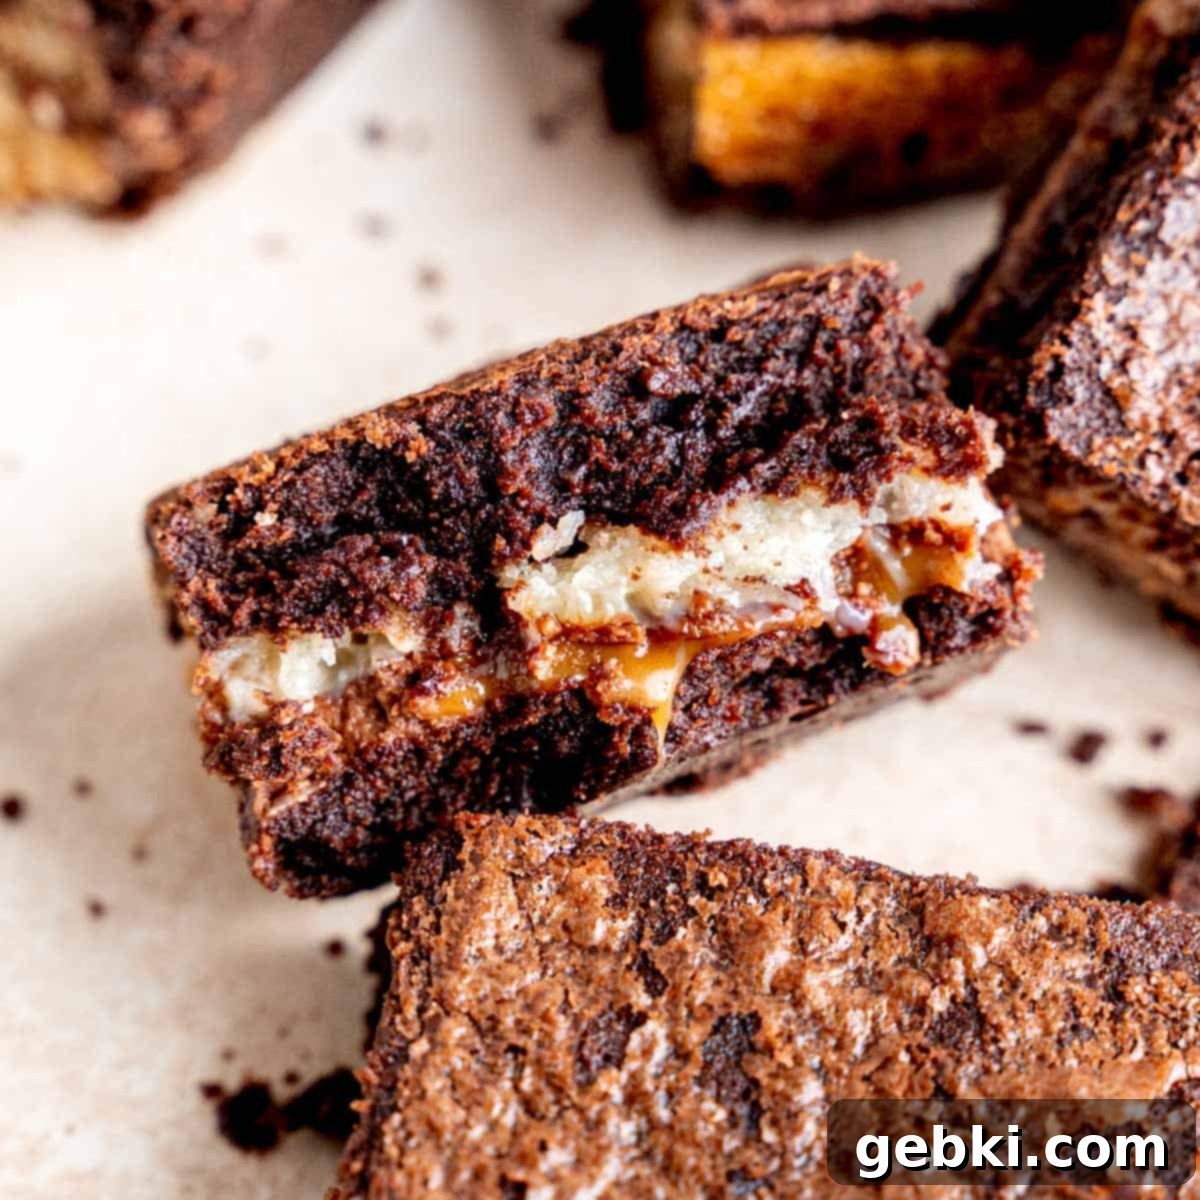
Ultimate Homemade Samoa Brownies: Chewy, Gooey, Chocolate Caramel Coconut Perfection
What’s your ultimate comfort dessert? For many, it’s the nostalgic delight of Girl Scout cookies. Among the iconic lineup, Samoas (also known as Caramel deLites) hold a special place with their irresistible blend of toasted coconut, rich caramel, and decadent chocolate. But what if you could capture that magic in a chewy, gooey brownie form, enjoying it any time of year, not just during cookie season? Enter these incredible **Samoa Brownies**!
These aren’t just any brownies; they’re a symphony of textures and flavors. Imagine layers of sweet, chewy coconut and luscious chocolate caramel squares nestled within a perfectly fudgy, deeply chocolatey brownie. Every bite delivers that quintessential Samoa experience, minus the shortbread layer, and with an added depth of brownie indulgence. The best part? This mouth-watering dessert takes just about an hour to prepare and bake, making it a perfect treat for spontaneous cravings or last-minute gatherings. They’re so good, they even caught the eye of national television!
As Seen On Good Morning America!
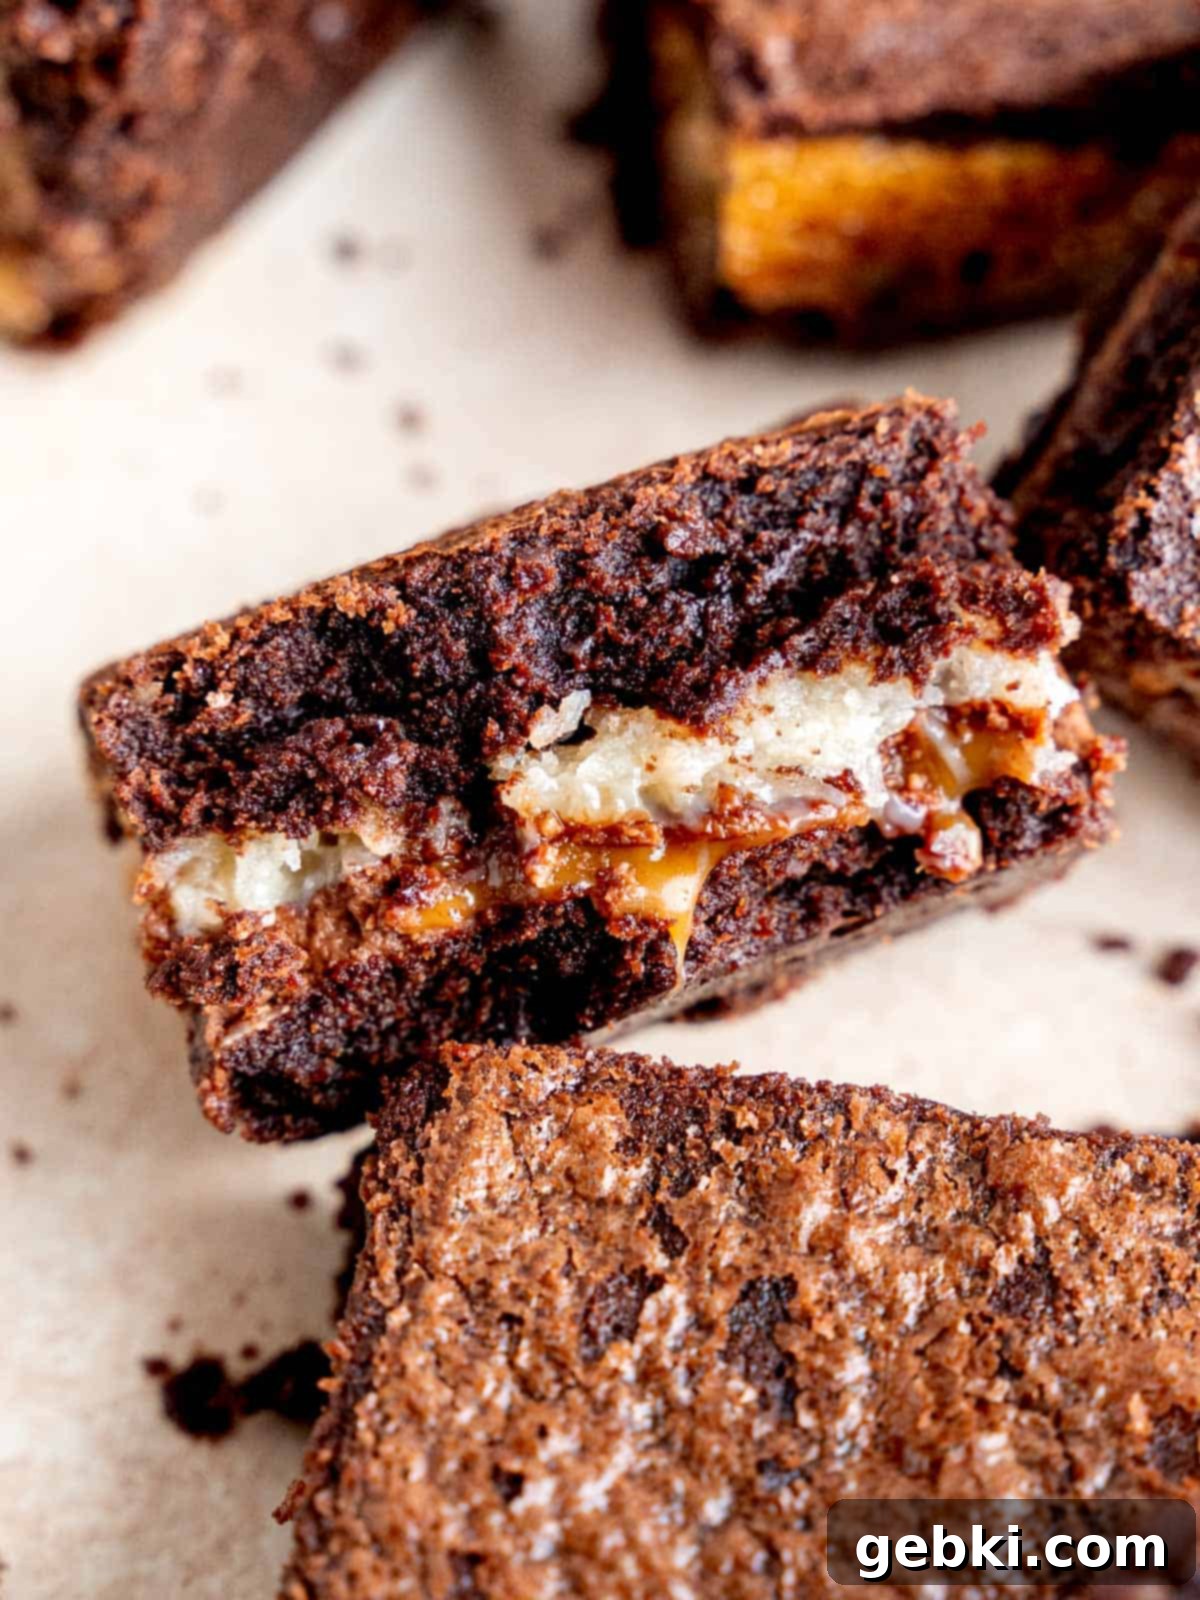
Girl Scout Cookies bring a delightful anticipation each winter, but why limit that joy? With this easy-to-follow recipe for Samoa Brownies, you can savor the iconic chocolate, coconut, and caramel combination whenever the craving strikes. These brownies are renowned for their incredibly gooey texture, and they miraculously stay fresh for days, making them perfect for meal prep, parties, or simply enjoying a sweet treat throughout the week.
Why You’ll Fall in Love with These Samoa Brownies
If you’re searching for a dessert that truly stands out, look no further. These Samoa Brownies are a revelation, offering everything you adore about the classic cookie but elevated to a new level of rich, fudgy goodness. Here’s why they’re destined to become a favorite in your kitchen:
- Irresistible Flavor Profile: They perfectly capture the signature taste of Samoas – the deep chocolate, the sweet, toasted coconut, and the buttery, soft caramel – all in one harmonious bite.
- Superior Texture: Unlike some brownies that can be dry, these are incredibly fudgy and moist, with a delightful chewiness from the coconut and a luscious melt-in-your-mouth experience from the warm caramel.
- Easy & Quick: Despite their impressive appearance and complex flavors, these brownies come together surprisingly fast. With about 20 minutes of prep and 30-35 minutes of bake time, you’ll have a show-stopping dessert ready in under an hour.
- Year-Round Indulgence: No need to wait for cookie season! Enjoy the delicious flavors of Samoas whenever you please, bringing a taste of spring to any time of year.
- Perfect for Any Occasion: Whether you’re hosting a party, bringing a dish to a potluck, or simply treating yourself, these Samoa brownies are guaranteed to be a crowd-pleaser.
- Great for Gifting: Their unique flavor and stunning layers make them a thoughtful and delicious homemade gift for friends, family, or neighbors.
Get ready to impress everyone, including yourself, with these truly irresistible homemade Samoa Brownies!
Craving more delightful brownie creations? Discover some other fantastic recipes:
- Andes Mint Brownies (a dream for Thin Mints enthusiasts!)
- Mini Brownie Bites
- Gingerbread Brownies
- Pecan Brownie Pie
- Individual Fudgy Mug Brownie
- Edible Brownie Batter
Essential Ingredients for Perfect Samoa Brownies
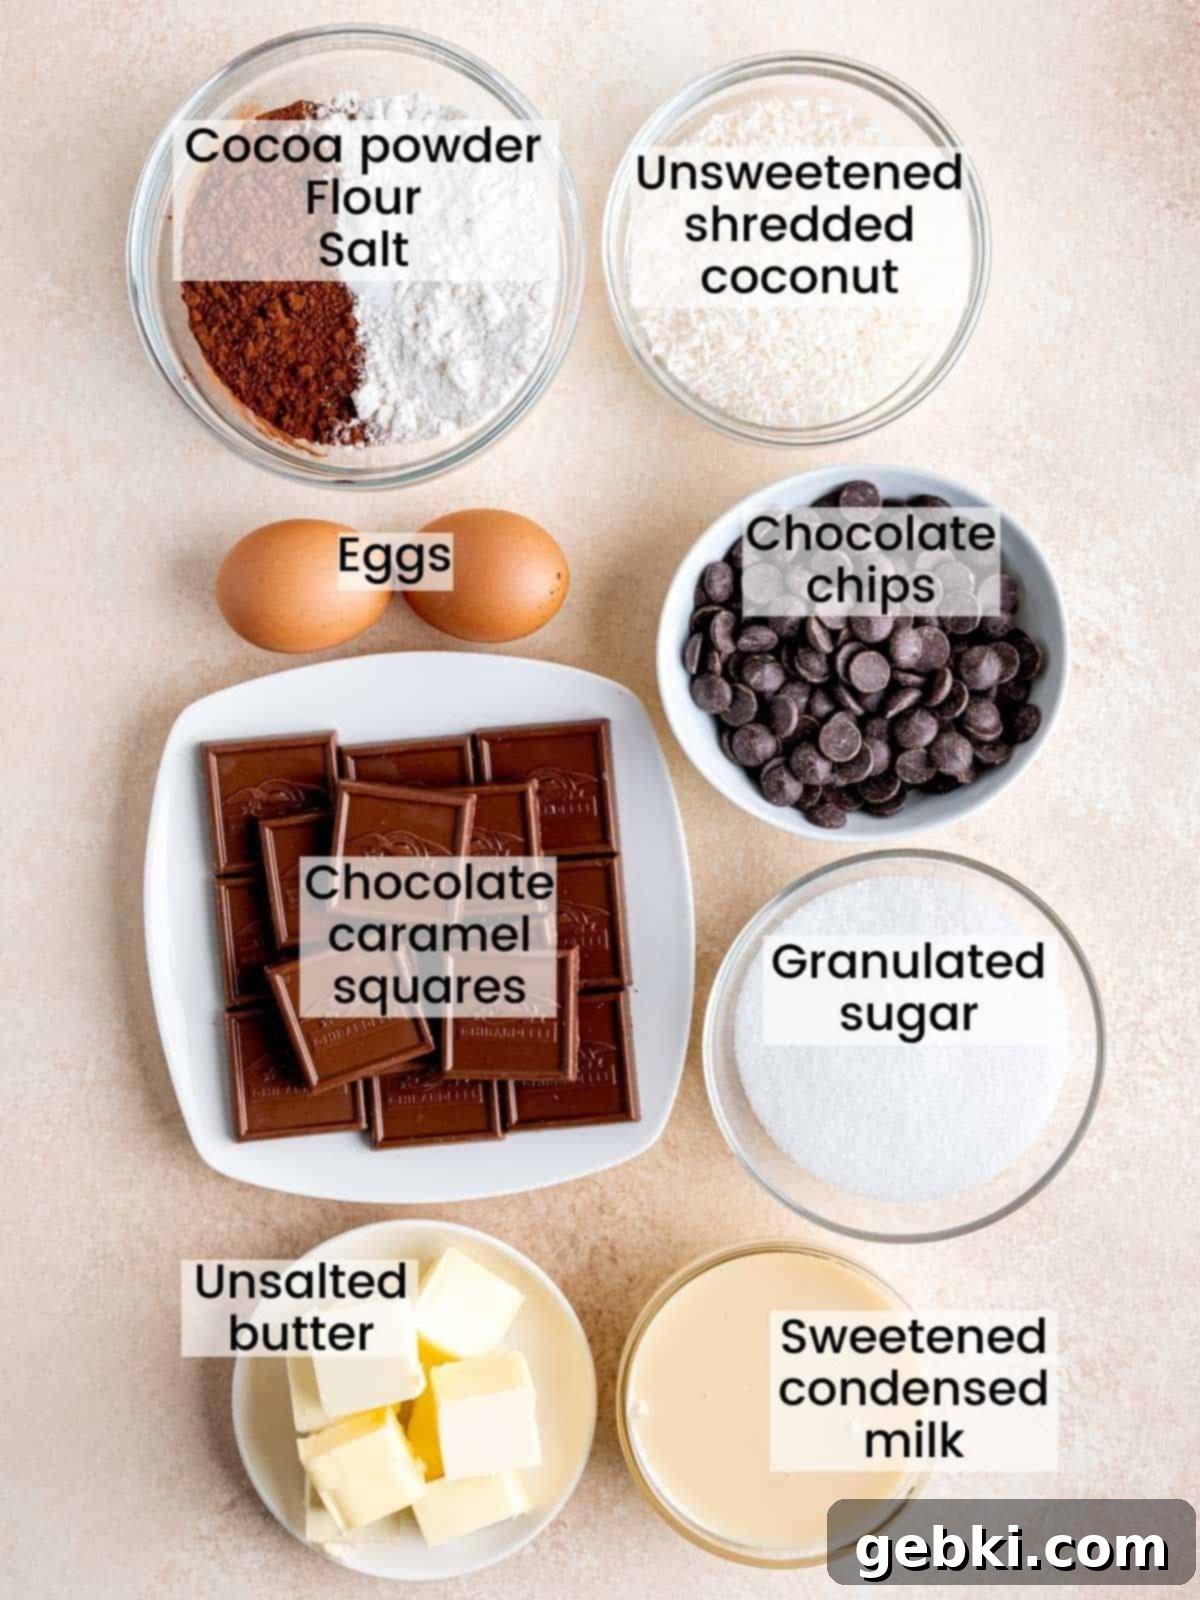
Crafting the perfect Samoa brownie starts with selecting the right ingredients. Each component plays a vital role in achieving that rich flavor and incredible texture:
- Unsweetened Cocoa Powder: For a deep, rich chocolate flavor and a dark brownie color, Dutch-process cocoa powder is highly recommended. It has been alkalized, giving it a milder, less acidic taste than natural cocoa. If you only have natural cocoa, it will still work, but the flavor and color might be slightly different.
- All-Purpose Flour: Standard all-purpose flour is perfect for these brownies. For the most accurate measurement, especially in baking, always use a kitchen scale (see “Equipment” below). If measuring by volume, remember to use the “scoop and level” method rather than packing the flour.
- Salt: A crucial ingredient that enhances all the other flavors, particularly the chocolate and caramel. Don’t skip it!
- Unsweetened Shredded Coconut: This is key for the classic Samoa texture and flavor. Using unsweetened coconut gives you control over the sweetness of the final product. Coconut flakes can also work; if they are particularly thick, a quick pulse in a food processor can help them integrate better into the filling. If you opt for sweetened coconut, consider slightly reducing the granulated sugar in the brownie batter to maintain balance.
- Large Eggs: Ensure your eggs are at room temperature. This helps them emulsify better with the other ingredients, leading to a smoother batter and a more uniform texture in your finished brownies.
- Chocolate Chips: I prefer semi-sweet chocolate chips from higher-quality brands like Ghirardelli or Guittard for their superior melt and flavor. Feel free to experiment with dark or milk chocolate chips based on your preference for sweetness and intensity.
- Chocolate Caramel Squares: These are the secret to the incredibly gooey caramel center! Ghirardelli Milk Chocolate Caramel Squares are a fantastic choice, offering a perfectly melty, rich caramel. They also come in a dark chocolate version if you prefer a less sweet option. Any brand with a soft, gooey caramel filling should work beautifully. While I haven’t personally tested plain caramel squares, they would likely be delicious as well.
- Granulated Sugar: Provides sweetness and contributes to the characteristic crinkly top of the brownies when properly whisked with the eggs.
- Unsalted Butter: Using unsalted butter allows you to control the exact amount of salt in your recipe. Make sure it’s good quality for the best flavor.
- Sweetened Condensed Milk: This thick, sweet milk is essential for creating the rich, sticky, and chewy coconut filling, binding it together perfectly.
Refer to the recipe card below for exact quantities for each ingredient.
Smart Substitutions & Creative Variations for Your Samoa Brownies
While this recipe is tried and true, there’s always room for personal touches and dietary adaptations. Here are some successful substitutions and exciting variations you can try:
- Gluten-Free Option: We’re thrilled to share that this recipe has been successfully tested by a reader using gluten-free all-purpose flour (Bob’s Red Mill brand). The brownies turned out wonderfully, so those with gluten sensitivities can absolutely enjoy this decadent treat! If trying a different brand of GF flour, look for a blend that is suitable for baking and contains xanthan gum.
- Baking in Muffin Tins: Another reader successfully made these Samoa Brownies in a muffin tin, creating individual portions perfect for serving. If you go this route, you’ll need to adjust the baking time. Start checking for doneness around 18-22 minutes, or until a toothpick inserted into the brownie (avoiding the caramel center) comes out with moist crumbs.
- Coconut-Free Brownies: If coconut isn’t your favorite, you can easily omit the coconut and sweetened condensed milk layer. You’ll still have incredibly fudgy brownies with a molten caramel center! Simply proceed with the brownie batter and chocolate caramel squares, baking as directed.
- Alternate Caramel Options: While chocolate caramel squares provide the perfect gooey pockets, you could experiment with other caramel options. You could use homemade caramel (ensure it’s a firm-setting caramel so it doesn’t entirely melt away during baking) or even individual soft caramels.
- Different Chocolate Types: Feel free to swap the semi-sweet chocolate chips in the brownie batter for dark chocolate chips for a more intense chocolate flavor, or milk chocolate chips for a sweeter, creamier brownie. You can also vary the type of chocolate caramel squares used for subtle flavor differences.
If you make any changes or try a new variation with this recipe, please share your results in the comments below! Your feedback helps the entire baking community.
Essential Equipment for Crafting Perfect Samoa Brownies
Having the right tools can make all the difference in your baking experience and the quality of your finished product. Here’s the essential equipment you’ll need for these Samoa brownies:
- 8-inch Square Baking Pan: This specific size is crucial for achieving the correct brownie thickness and ensuring the layers are perfectly distributed. It’s also important to generously spray your pan with non-stick spray and line it with parchment paper, leaving an overhang on two sides. This creates “handles” that will allow you to easily lift the cooled brownies out of the pan for clean, effortless cutting.
- Digital Food Scale: I cannot emphasize enough the importance of using a food scale to measure your dry ingredients, especially flour and cocoa powder. Measuring by weight (grams) is the most accurate method in baking, eliminating inconsistencies that can arise from variations in how ingredients are scooped or packed into measuring cups. This accuracy directly translates to consistent, perfect results every time. I invested about $20 USD in mine years ago, and it’s been an invaluable tool.
- Measuring Cups and Spoons: While a food scale is ideal for dry ingredients, measuring cups and spoons will still be necessary for liquids and smaller quantities. If you don’t have a food scale, be sure to use the “scoop and level” method for flour: spoon flour into your measuring cup until it’s overflowing, then level it off with a straight edge (like the back of a knife) without packing it down.
- Mixing Bowls: You’ll need at least two medium to large mixing bowls for preparing the coconut filling and the brownie batter separately.
- Whisk: An essential tool for thoroughly combining your wet ingredients, particularly for whisking the eggs and sugar to create that coveted crinkly brownie top.
- Rubber Spatula: Useful for mixing, scraping down the sides of bowls, and spreading the brownie batter and coconut filling evenly.
Crafting Your Samoa Brownies: A Detailed Step-by-Step Guide
Follow these instructions carefully to ensure your Samoa Brownies turn out perfectly fudgy with that irresistible gooey center.
Preparation: Begin by preheating your oven to 350°F (175°C). Prepare an 8×8-inch baking pan by spraying it lightly with non-stick spray, then lining it with parchment paper. Ensure the parchment paper hangs over two opposite edges to create “slings” for easy removal later.
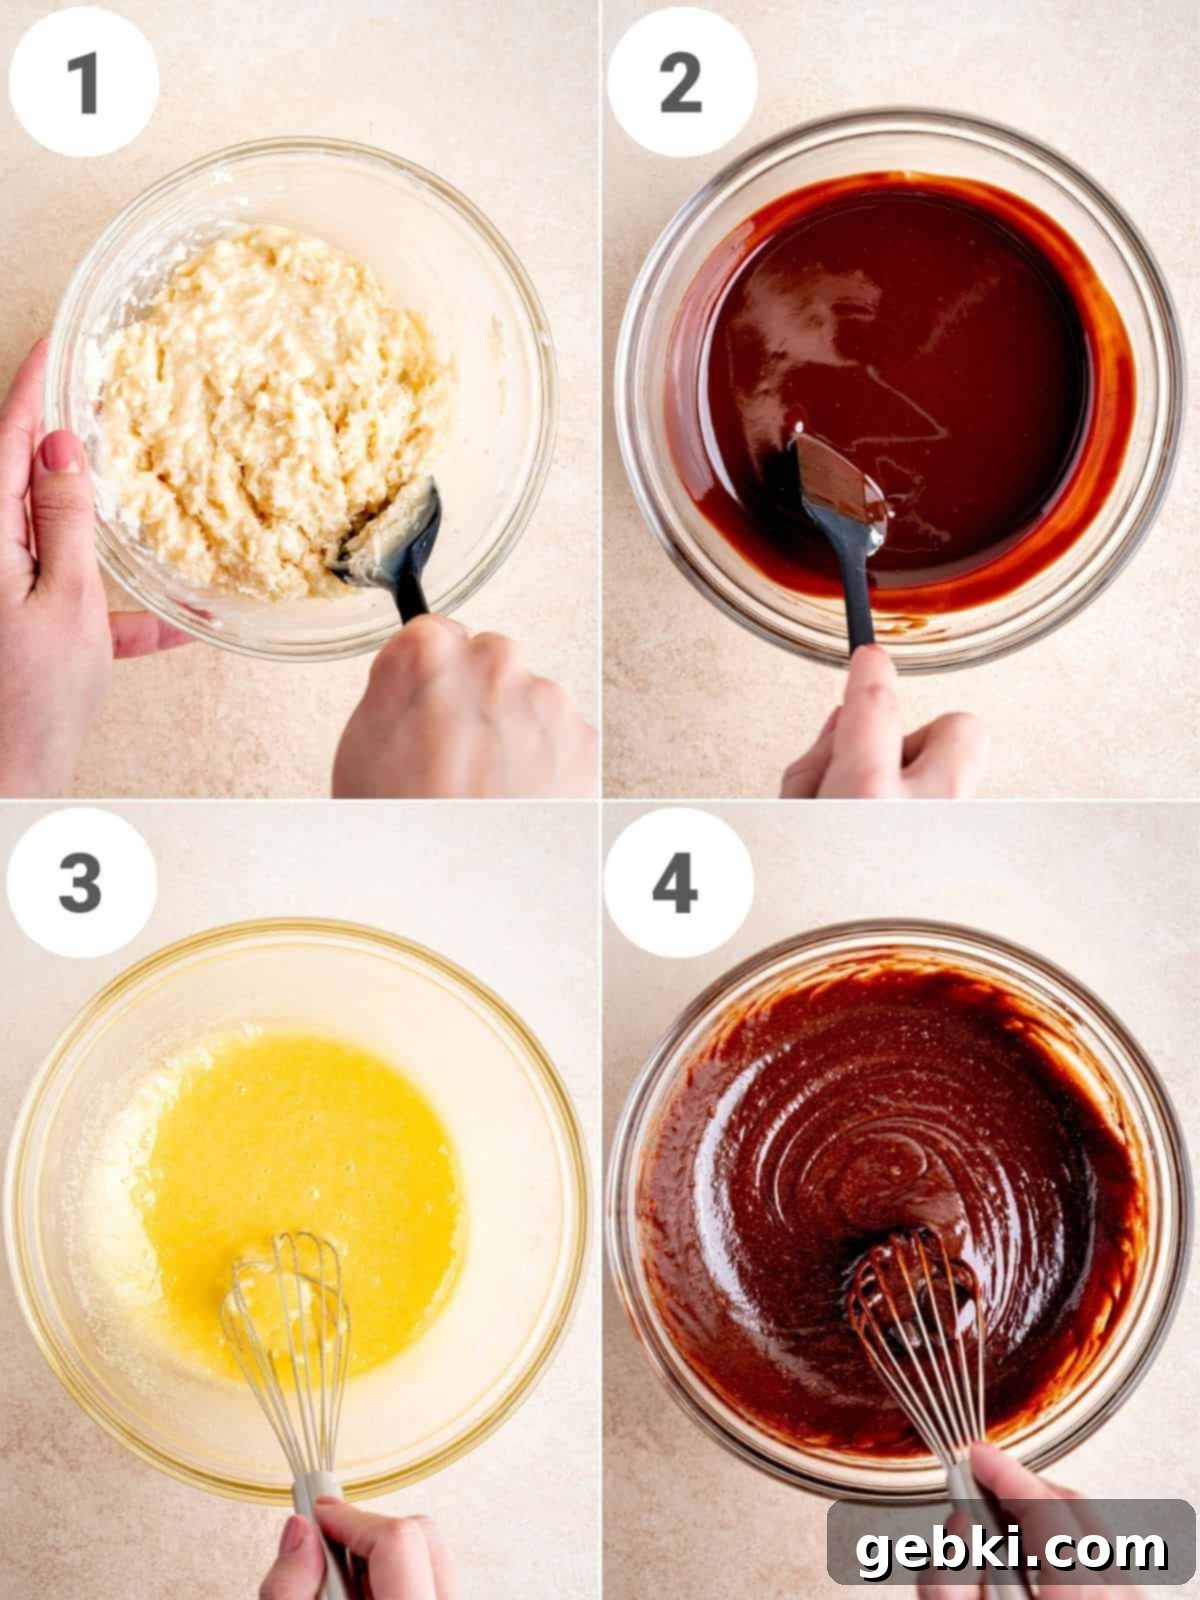
Step One (Coconut Filling – See Picture 1 above): In a medium-sized bowl, combine the unsweetened shredded coconut and the sweetened condensed milk. Stir these ingredients together thoroughly with a spatula until the coconut is completely coated and moist. Set this mixture aside for later assembly.
Step Two (Melting Chocolate & Butter – See Picture 2 above): In a microwave-safe bowl, combine the chocolate chips and unsalted butter. Microwave on medium power, stirring every 30 seconds, until the mixture is almost entirely melted and smooth. This usually takes about 1-2 minutes total. It’s crucial not to overheat it. Once melted, set it aside to cool slightly. You want it warm enough to be liquid, but not hot enough to scramble the eggs in the next step.
Step Three (Whisking Eggs & Sugar – See Picture 3 above): In a large mixing bowl, vigorously whisk together the large eggs and granulated sugar for 1 to 2 minutes. Continue whisking until the mixture becomes noticeably lighter in color, thicker, and airy. This aeration of the eggs and sugar is key to achieving that desirable crinkly top on your brownies.
Step Four (Combining Wet & Dry Ingredients – See Picture 4 above): Slowly pour the slightly cooled melted chocolate and butter mixture into the aerated egg and sugar mixture. Continue to whisk these together for another 2-3 minutes, ensuring they are well combined and smooth. In a separate small bowl, whisk together the all-purpose flour, cocoa powder, and salt. Then, gently fold the dry ingredients into the wet ingredients using a spatula. Mix just until all streaks of flour disappear, being careful not to overmix, as this can lead to tough brownies. The batter will be relatively thick.
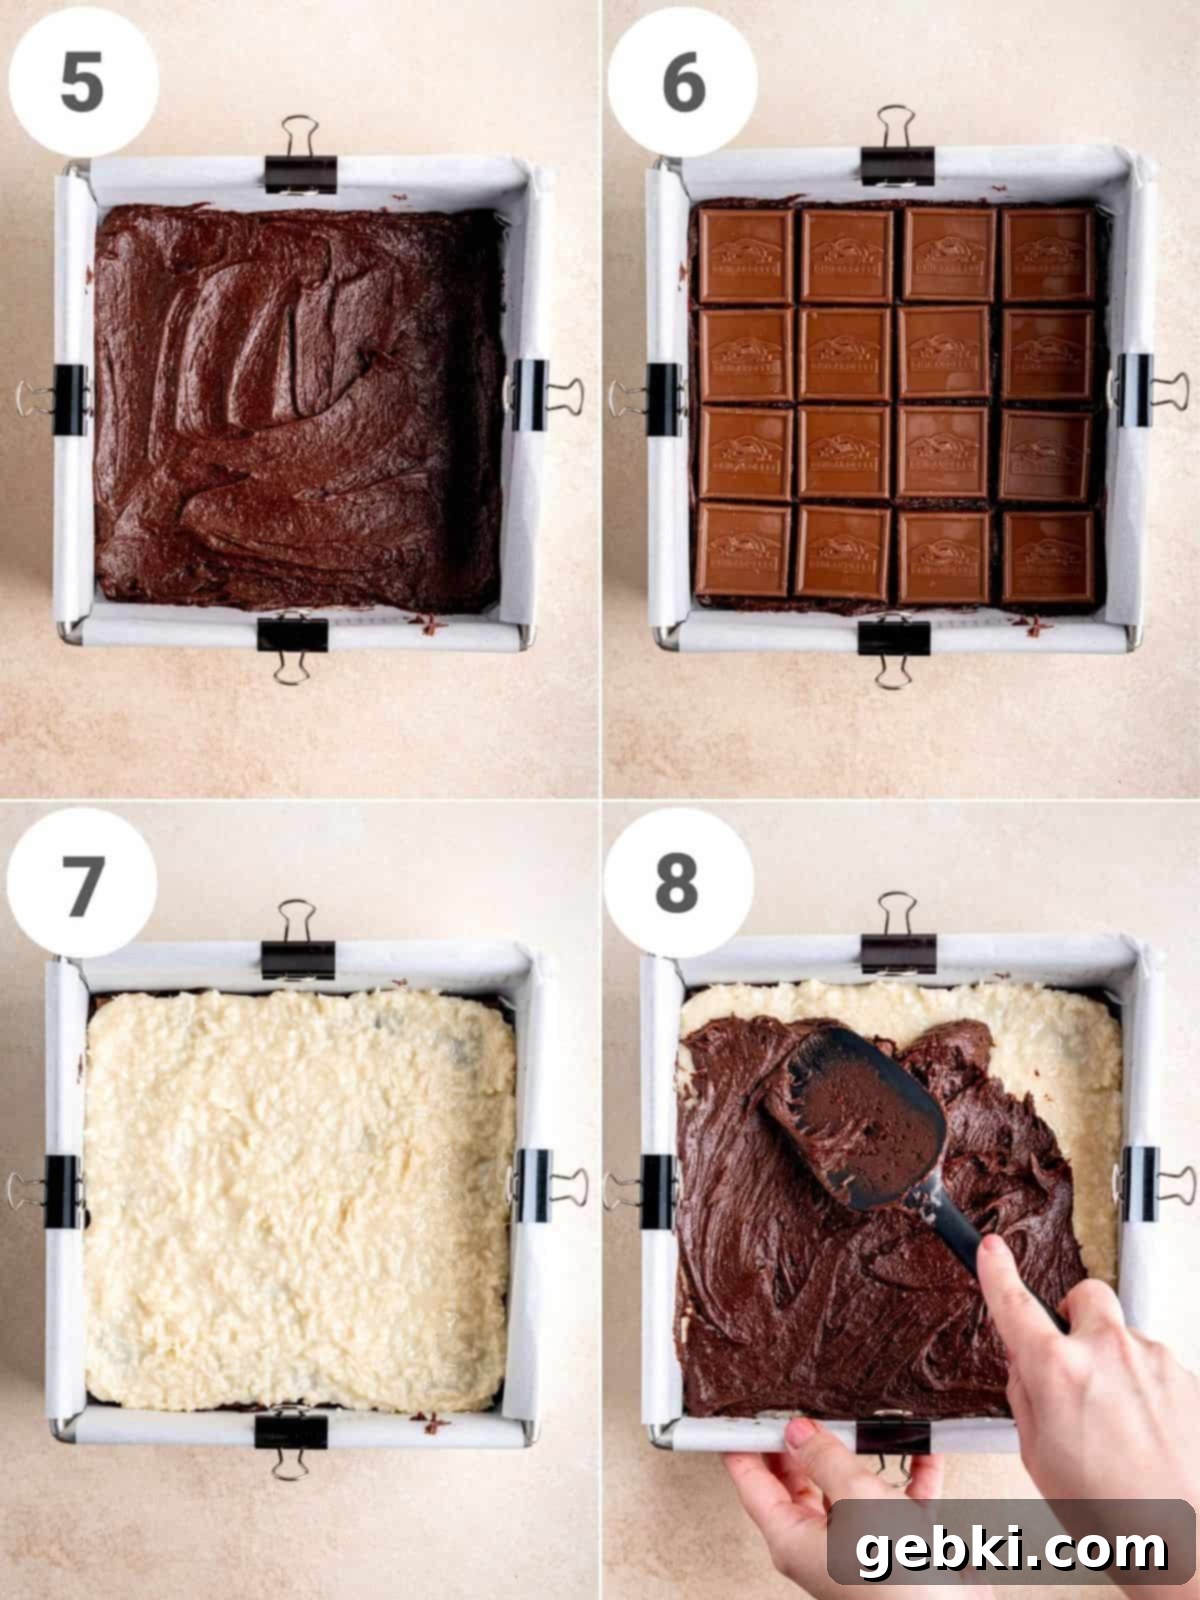
Step Five (First Brownie Layer – See Picture 5 above): Scoop out half of the prepared brownie batter into your parchment-lined pan. Using your spatula, carefully spread the batter evenly across the bottom of the pan to form a consistent layer.
Step Six (Caramel Layer – See Picture 6 above): Arrange the chocolate caramel squares evenly over the first layer of brownie batter. For 16 brownies, aim for a 4×4 grid, ensuring each eventual square gets a delightful caramel center.
Step Seven (Coconut Layer – See Picture 7 above): Gently spread the coconut filling over the chocolate caramel squares. Take your time to distribute it evenly across the surface.
Step Eight (Top Brownie Layer – See Picture 8 above): Finally, spoon the remaining brownie batter on top of the coconut filling. Carefully spread it around with your spatula, ensuring it completely covers the coconut layer from edge to edge.
Pro Tip: Brownie batter tends to thicken as it sits. To ensure easy spreading and layering, it’s best to assemble and bake these brownies in the order specified and without too much delay after mixing the batter.
Baking: Place the assembled Samoa Brownies in your preheated oven at 350°F (175°C) and bake for approximately 30-40 minutes. You’ll know they’re ready when the edges begin to set and a smooth, glossy film forms across the middle. A toothpick inserted into the center (avoiding a caramel square) should come out with moist crumbs attached, indicating a fudgy interior. Do not overbake!
Cooling: Allow the brownies to cool in the pan for at least 30 minutes. This cooling time is essential for the brownies to set properly. Once partially cooled, use the parchment paper overhang to carefully lift the entire slab of brownies out of the pan. Transfer them to a wire rack to cool completely for the neatest cuts. However, if you can’t resist, enjoying them slightly warm is highly recommended, as the caramel will be perfectly gooey! Once cooled, cut into 16 even squares (a warm knife helps with clean cuts). Enjoy your delicious homemade Samoa Brownies!
Samoa Brownie FAQs
This recipe yields 16 delicious Samoa brownie squares. When cut into a 4×4 grid, each individual brownie will feature its own delightful chocolate caramel square right in the middle, ensuring a perfect surprise in every bite!
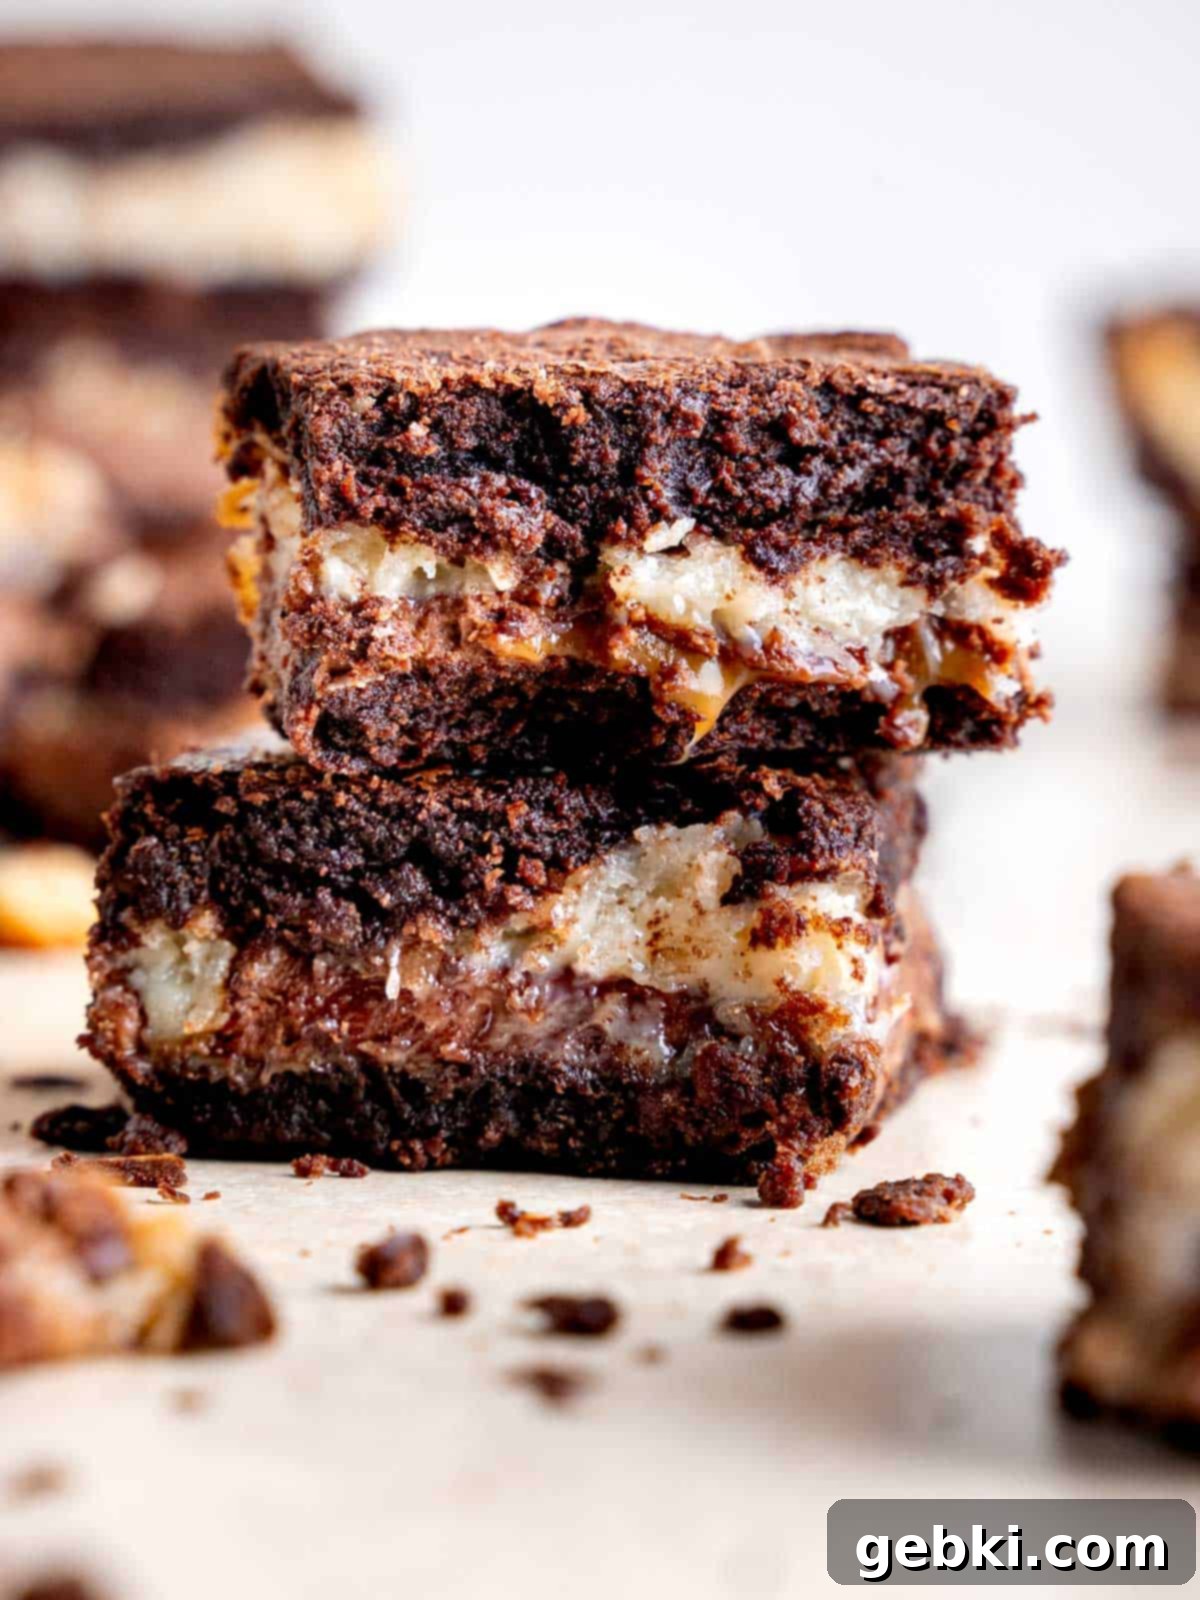
These brownies are truly at their best when served warm! The gentle heat melts the chocolate caramel squares in the middle, creating a luscious, gooey caramel drip with every bite. To achieve this, simply warm individual brownies in the microwave for 10-15 seconds just before enjoying. They are also incredibly delicious paired with a scoop of vanilla ice cream, creating a warm-and-cold dessert sensation.
The coveted crinkly top on brownies forms as a meringue-like layer. This happens when you vigorously whisk the granulated sugar and eggs together, incorporating air and dissolving the sugar. The best method is to use a hand whisk and mix the eggs and sugar for a good 2-3 minutes. This allows enough time for the sugar to fully dissolve, while also whipping in air to create that light, shiny film on top during baking. Avoid over-mixing once the flour is added, as this can make the brownies tough instead of fudgy.
Samoas, also famously known as Caramel deLites in some regions, are one of the most popular varieties of Girl Scout Cookies. They are distinct shortbread cookies generously covered in a layer of rich caramel, then sprinkled with toasted coconut flakes, and finished with a delicate drizzle of dark chocolate. This brownie recipe captures the essence of that beloved flavor combination without the shortbread base.
Absolutely! We’ve had successful reports from our readers who have made these brownies using gluten-free flour. One reader, in particular, achieved excellent results with Bob’s Red Mill Gluten-Free All-Purpose Baking Flour. If you’re adapting for a gluten-free diet, ensure your chosen GF flour blend is suitable for baking and you should be good to go!
Yes, these Samoa Brownies are excellent for making ahead! They maintain their freshness and delicious gooey texture for days when stored properly at room temperature. For longer storage, they freeze beautifully, allowing you to enjoy a homemade treat whenever you desire. See the “Storage” section below for detailed instructions.
Storage & Freshness Tips for Your Samoa Brownies
To keep your Samoa Brownies at their best, follow these simple storage guidelines:
- Room Temperature: Store any leftover brownies in an airtight container at room temperature for up to 1 week. This helps maintain their moist, fudgy texture.
- Freezing: For longer storage, these brownies freeze beautifully. Wrap individual brownies tightly in plastic wrap, then place them in a freezer-safe airtight container or heavy-duty freezer bag. They can be stored in the freezer for up to 1 month. When ready to enjoy, thaw them at room temperature or warm them gently in the microwave for that fresh-baked, gooey caramel experience.
More Decadent Brownie & Dessert Recipes You’ll Love
If you enjoyed these Samoa Brownies, you’re in for a treat! Explore more delightful baking adventures from our collection:
-
Mini Brownie Bites
★★★★★ (4.96 from 44 votes)
-
Cinnamon Roll Donuts
★★★★★ (5 from 7 votes)
-
Easy Mini No Bake Cheesecake Bites
★★★★★ (5 from 56 votes)
-
Chocolate Peanut Butter Rice Krispies
★★★★★ (5 from 12 votes)
Did you try this recipe? I’d love to see how it turned out!
Tag me on Instagram or Facebook & leave a ⭐️ review below!
📖 Recipe
Samoa Brownies
Kayla Burton
📍Pin Recipe
Equipment
-
8 inch square pan
-
Mixing bowls
-
Measuring spoons
-
Scale or measuring cups
-
Whisk
-
Spatula
Ingredients
Brownie Batter
- ½ cup + 2 tablespoons (141 g) unsalted butter
- 1 cup (170 g) semi-sweet chocolate chips
- ¾ cup (150 g) granulated sugar
- 2 large (2 large) eggs room temperature
- ¾ cup (93 g) all-purpose flour
- ¼ cup (25 g) cocoa powder
- ¼ teaspoon (¼ teaspoon) salt
Filling
- 1 cup (80 g) unsweetened shredded coconut
- ¾ cup (~8 oz) (230 g) sweetened condensed milk
- 16 (16) chocolate caramel squares
Instructions
-
Preheat oven to 350°F. Spray an 8×8″ pan with oil and line with parchment paper so that it hangs over the edges.
Coconut Filling
-
In a medium bowl, mix the coconut and sweetened condensed milk together with a spatula until well combined.
Brownie Batter
-
In a microwave safe bowl, melt the butter and chocolate chips (stir every 30 seconds until melted, ~1-2 minutes total). Let it cool slightly (so that it doesn’t cook the eggs when added in the next step).
-
In a large bowl, beat the eggs with a whisk for about a minute. Add the sugar and continue to whisk for another 2-3 minutes until it’s slightly thick, light, and airy. Then, slowly pour in the warm butter/chocolate mixture and whisk for another minute.
-
In a small bowl, combine the flour, cocoa powder, and salt. Then, gently fold them into the wet ingredients just until all flour streaks are gone. The batter will be slightly thick.
Assembly
-
Scoop half of the brownie batter into the prepared pan and spread it around with a spatula so that it’s even across the bottom.
-
Add the chocolate caramel squares on top of the brownie layer in an even layer.
-
Carefully spread the coconut filling over the chocolate caramel squares.
-
Finally, spread the remaining brownie batter on top of the coconut filling, covering it completely and evenly.
-
Bake for 30-40 minutes or until the edges begin to harden and a smooth film sets across the middle. The batter should leave behind a streak on a toothpick inserted into the middle.
-
Let the brownies cool in the pan until they’re sturdy enough to be lifted out. Cool completely for clean cuts, or indulge while they’re warm and gooey!
Save This Recipe! 💌
We’ll email this post to you, so you can come back to it later!
Video
Notes
Chocolate Caramel Squares: I use Ghirardelli’s Milk Chocolate ones. They also make them in dark chocolate. Any brand with melted caramel in the middle should work!
Coconut: Coconut flakes can work instead of shredded coconut. If they’re really thick, feel free to chop them in a food processor. If you don’t like coconut, you can omit the coconut and sweetened condensed milk layer.
Gluten-free: These were successfully tested as gluten free by one of our readers using Bob’s Red Mill Gluten Free Flour!
Storage: Store brownies in an airtight container at room temperature for up to 1 week or in the freezer for 1 month.
Nutrition: The provided nutrition information is an estimate, the calorie accuracy is not guaranteed.
The provided nutritional information is an estimate per serving. Accuracy is not guaranteed.
