Easy Mini Strawberry Rhubarb Galettes: The Perfect Sweet-Tart Spring Dessert
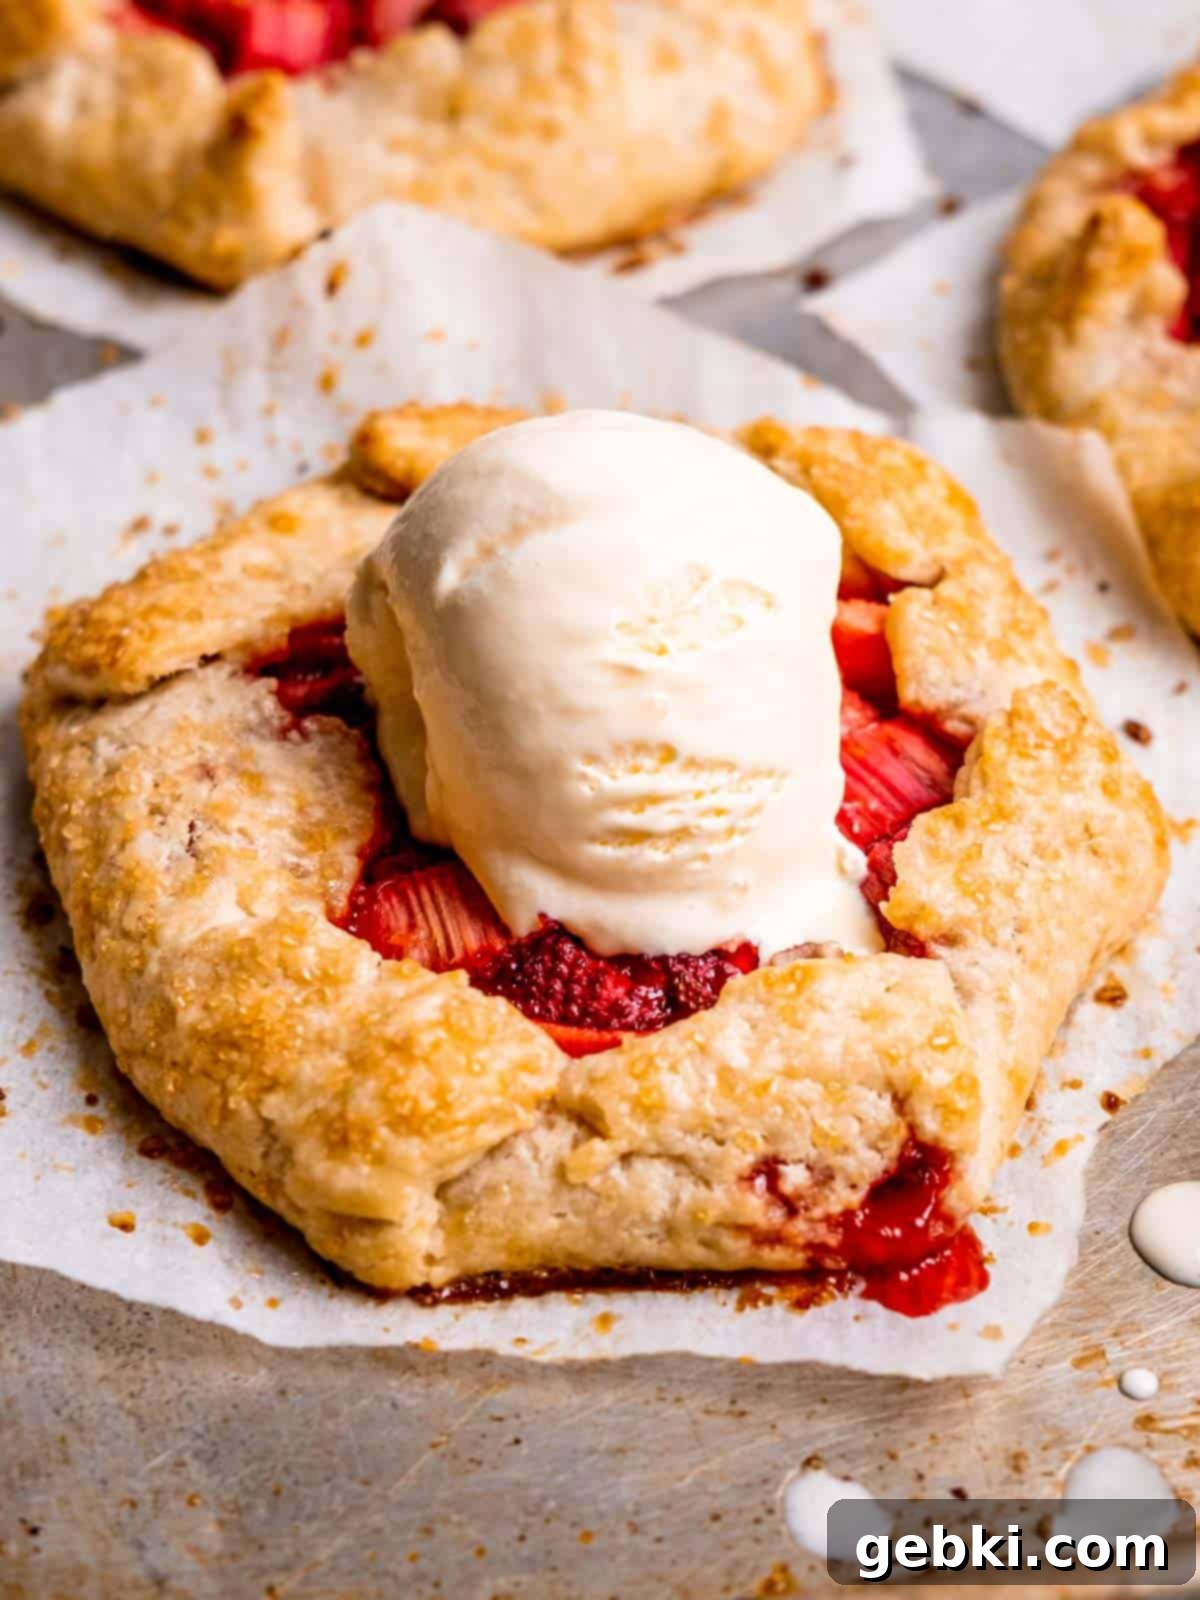
As spring unfurls its vibrant colors and summer approaches with its abundant harvest, few things signal the season’s arrival quite like fresh rhubarb. And what better way to celebrate its brief, glorious appearance than by baking these delightful Mini Strawberry Rhubarb Galettes? This recipe brings together the absolute best of both worlds: the bright, tangy kick of rhubarb perfectly complemented by the luscious sweetness of ripe strawberries. It’s a classic combination that creates a harmonious sweet and tart flavor profile, encased in a buttery, flaky homemade pie crust. Each galette is filled with a vibrant strawberry rhubarb mixture, lovingly brushed with an egg wash, and finished with a sparkling sprinkle of coarse sugar, making them as beautiful to behold as they are delicious to eat.
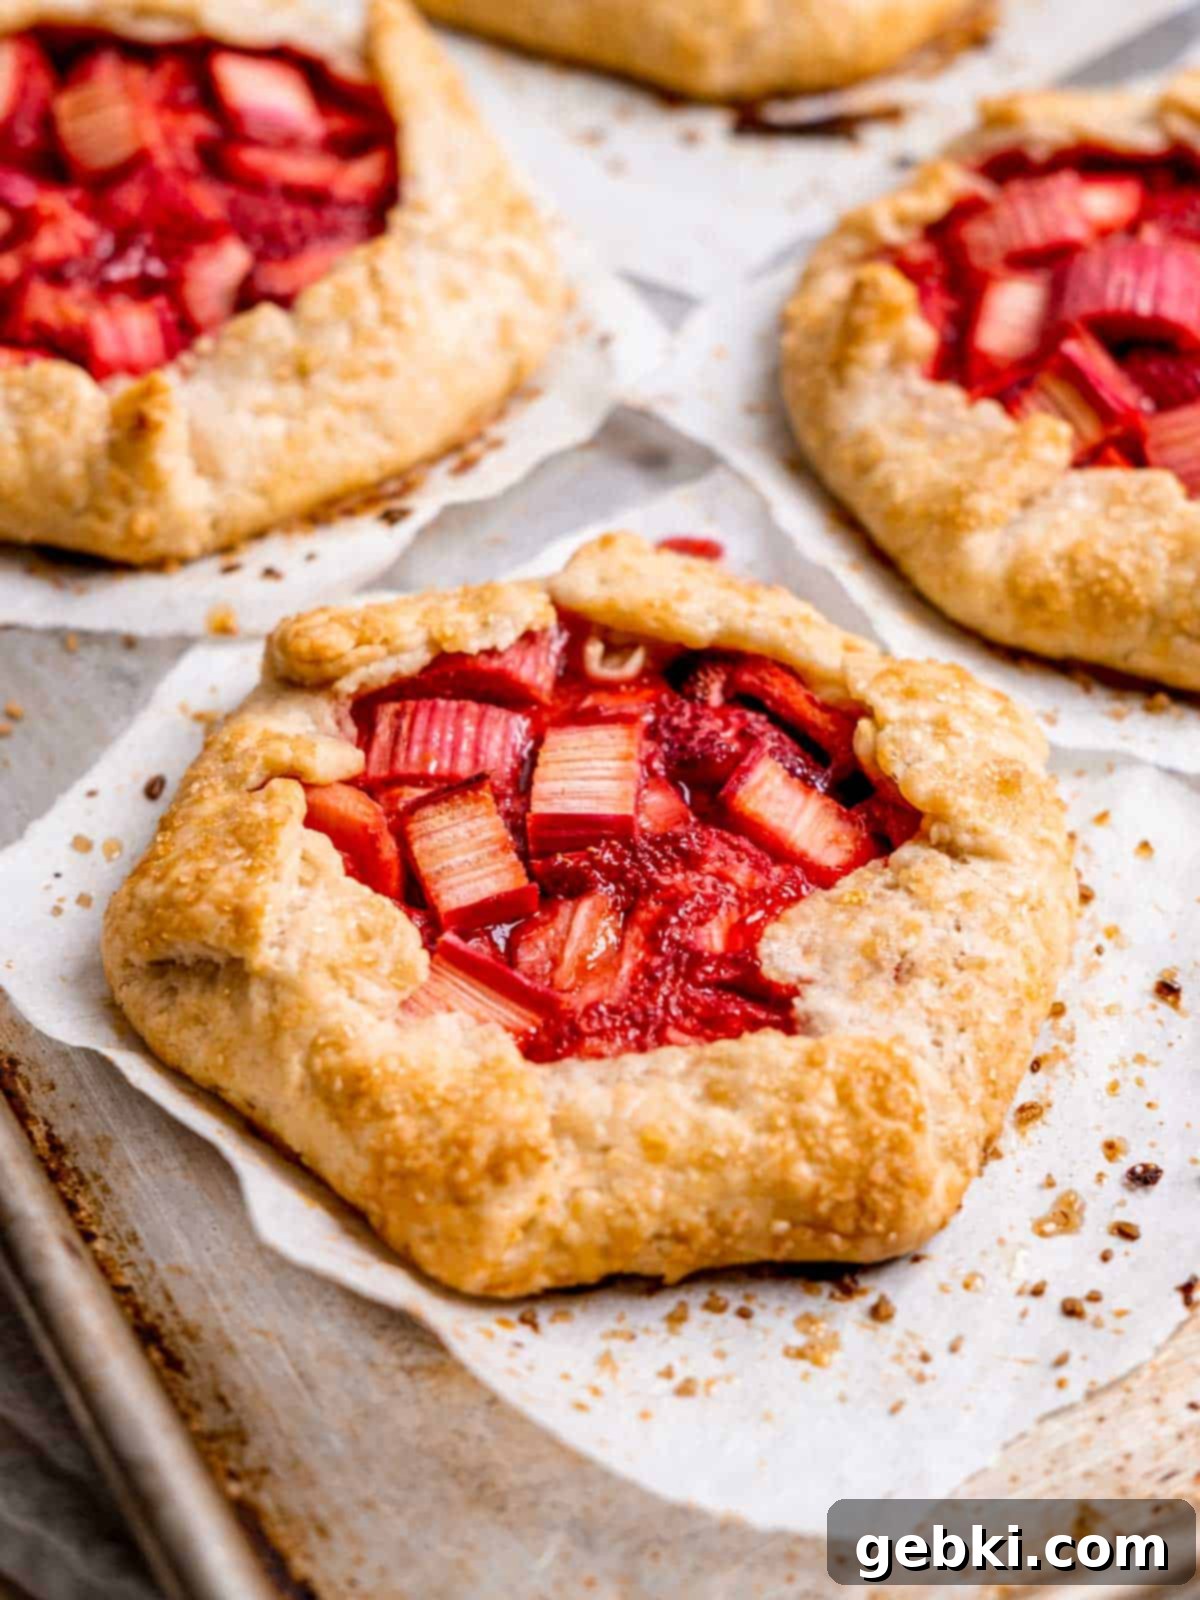
For many, the mention of rhubarb conjures up heartwarming memories. For me, it’s my grandma’s incredible strawberry rhubarb jam. Her freezer was always brimming with jars of it, and we’d devour them in no time! While classic strawberry rhubarb pie is always a beloved choice, these mini galettes offer a charmingly rustic and considerably easier alternative. You get all the comforting flavors of a pie, but without the fuss of a top crust or intricate crimping. They are the perfect individual portions, ideal for sharing (or not!).
If you’re a fan of a crumbly oat topping over a traditional pie crust, you might also love my strawberry rhubarb crisp recipe. It offers a different texture but the same fantastic flavor profile, providing yet another wonderful way to enjoy this seasonal fruit pairing.
Jump to Section
- Why You’ll Love This Recipe
- Recipe Ingredients
- Substitutions & Variations
- Equipment
- How to Make Mini Strawberry Rhubarb Galettes
- Making Dough Without a Food Processor
- Expert Baking Tips
- Common Questions
- Storage
- More Recipes You’ll Love
- Full Recipe Card
Why You’ll Love This Easy Strawberry Rhubarb Galette Recipe
- A Match Made in Heaven: Strawberries and rhubarb create an iconic pairing, offering a delightful balance of sweet and tart flavors. The sweetness of ripe strawberries mellows the rhubarb’s tang, resulting in a perfectly harmonious filling that’s never too sour, never too sugary. It’s a classic for a reason!
- Celebrate Seasonal Produce: This recipe is a fantastic way to utilize the freshest ingredients of the season. Rhubarb typically peaks in spring, while strawberries shine in early summer, making this the ideal dessert to enjoy when both fruits are at their flavorful best. Using seasonal ingredients ensures the most vibrant taste.
- Fresh or Frozen, Your Choice: Whether you’ve just picked fresh berries and rhubarb or you’re using your frozen stash, this recipe is incredibly adaptable. Just like my popular mixed berry galette, you don’t even need to thaw frozen fruit, simplifying the preparation process and allowing you to enjoy these treats year-round.
- Simpler Than Pie: If the thought of making a traditional pie crust from scratch feels daunting, fear not! Galettes are inherently rustic and forgiving. There’s no need for a perfectly crimped edge or a flawless top crust. Simply fold the edges of the dough over the filling, and you’ve got a beautifully imperfect, charming dessert. It’s a less intimidating entry into homemade baking.
- Perfect Individual Servings: This recipe yields four charming mini galettes, making them ideal for individual servings. They’re perfect for a small family gathering, a delightful treat for friends, or even a cozy dessert for two with leftovers for later. Their individual size also makes them easy to transport and serve.
Essential Ingredients for Flaky Strawberry Rhubarb Galettes
To create these undeniably delicious and visually appealing Mini Strawberry Rhubarb Galettes, you’ll need a selection of simple, wholesome ingredients for both the rich, flaky crust and the vibrant, juicy filling. Gather these essentials, and you’ll be well on your way to baking perfection:
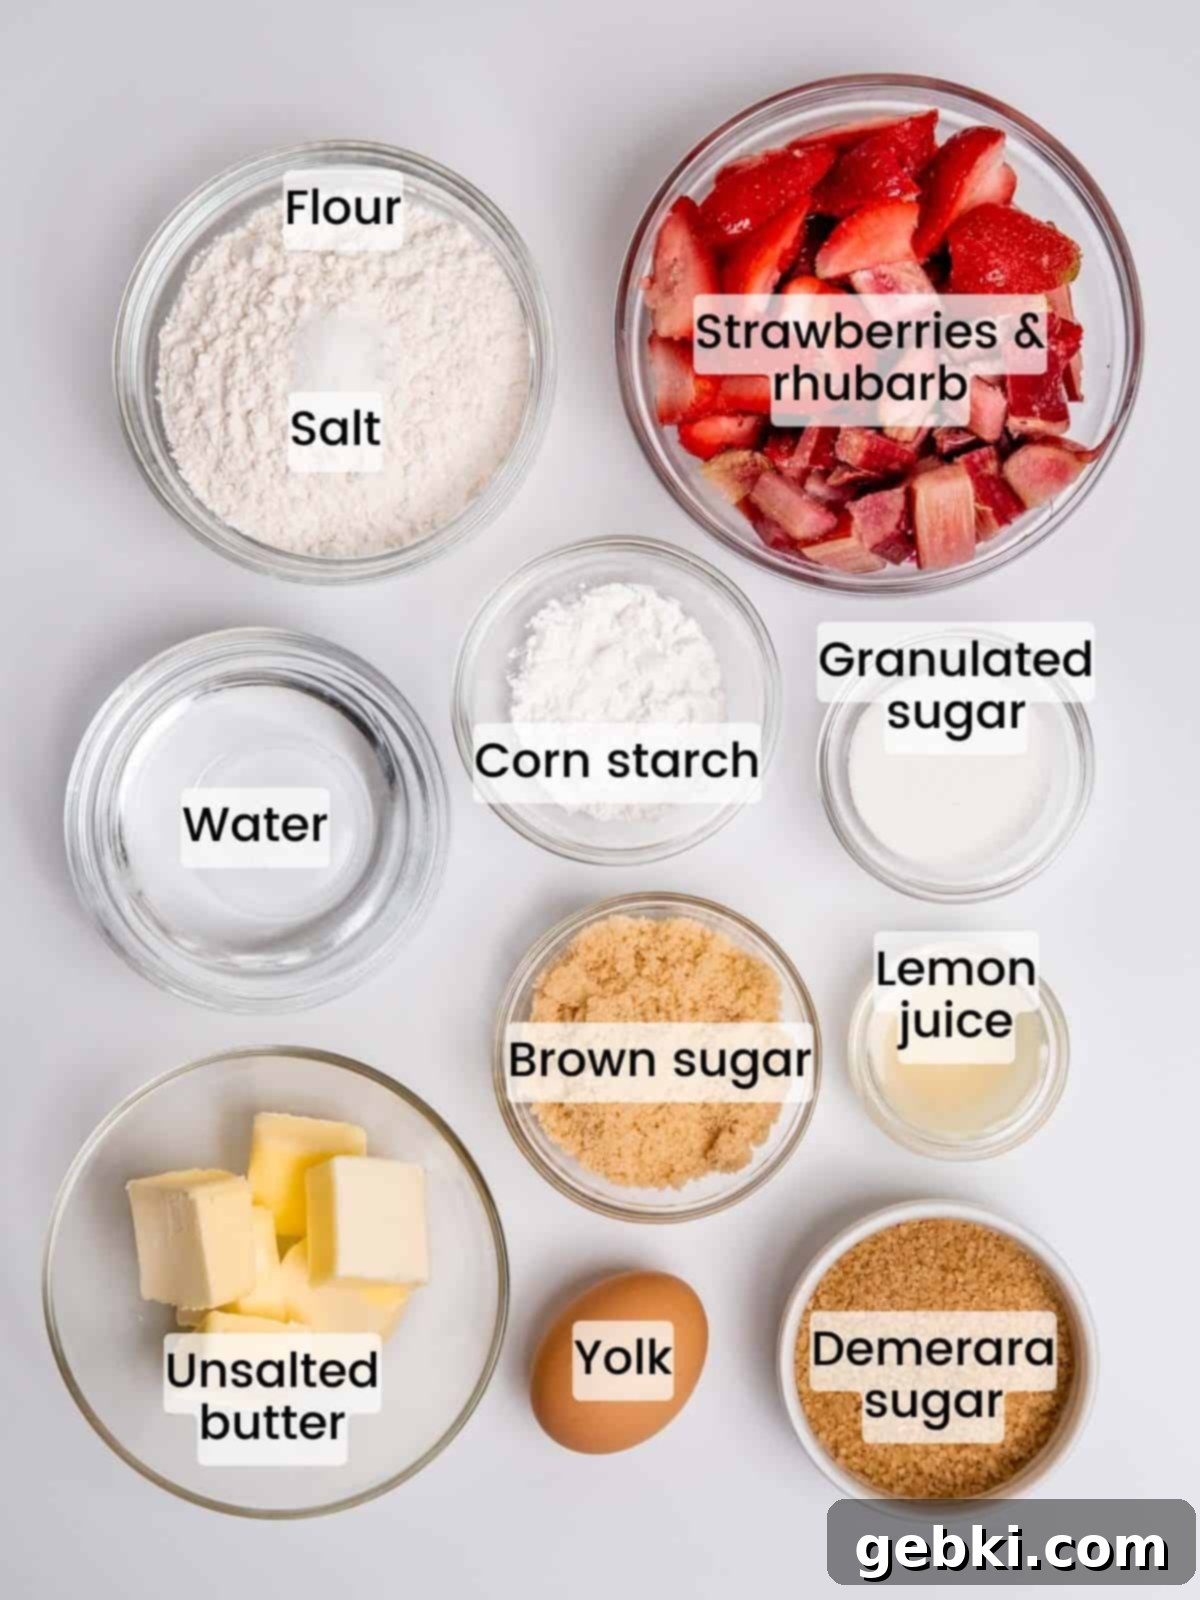
Ingredient Notes:
- Strawberries & Rhubarb: These are the stars of the show! You have the flexibility to use either fresh or frozen fruit. If using fresh rhubarb, look for firm, brightly colored stalks. For strawberries, opt for plump, sweet-smelling berries. I highly recommend stocking up on rhubarb when it’s in season during spring; wash, dry, and chop it before freezing to enjoy year-round. Similarly, frozen strawberries are readily available. If you use frozen fruit, do not thaw it beforehand; use it directly from the freezer to prevent a watery filling.
- Sugar & Lemon Juice: These ingredients are crucial for striking the perfect balance in your filling. The granulated and light brown sugars provide sweetness, while the lemon juice adds a necessary zing, cutting through the richness and enhancing the fruit’s natural brightness. It’s the secret to achieving that irresistible sweet-tart harmony that defines a great strawberry rhubarb dessert.
- Corn Starch: A vital thickening agent for the fruit filling. Corn starch ensures that your galettes don’t turn into a soupy mess during baking. It helps the filling hold its shape, creating a beautifully spoonable texture that’s neither too runny nor too firm, keeping all that delicious fruit neatly contained within the crust.
- Flour, Salt, Sugar, Ice Water, Cold Butter (for the crust): These are the fundamental components of your homemade, flaky pie crust. Using high-quality all-purpose flour provides the structure. A pinch of salt enhances the flavor, and a touch of sugar adds a subtle sweetness and helps with browning. The secret to a truly flaky crust, however, lies in using *very cold* butter and *ice water*. The cold butter creates steam pockets during baking, resulting in those desirable layers. Work quickly to prevent the butter from melting, as warmth can lead to a tough crust. Freezing pre-cut butter pieces for at least 20 minutes before incorporating them is an excellent trick to maintain that crucial coldness.
- Egg Yolk & Demerara Sugar (Optional but Highly Recommended): This simple egg wash, made from an egg yolk mixed with a little water, is brushed over the crust edges just before baking. It gives the galettes a beautiful golden sheen and helps the coarse demerara (or turbinado) sugar adhere. The coarse sugar adds a delightful crunch and an extra touch of sweetness, elevating the rustic charm and texture of your finished galettes. Don’t skip this step if you want that professional-looking, delicious finish!
For precise measurements and a full list of ingredients, please refer to the recipe card below.
Creative Substitutions & Delicious Variations
While the classic strawberry rhubarb combination is hard to beat, these mini galettes are wonderfully versatile, allowing for endless creative twists. Feel free to experiment with these suggestions to make the recipe truly your own:
- Fruit Medley Magic: Don’t limit yourself to just strawberries and rhubarb! You can easily mix and match different fruits to create unique flavor profiles. Consider adding blueberries, raspberries, or sliced peaches for a mixed berry galette. Apples and pears, perhaps with a touch of cinnamon, would also be fantastic in the cooler months. Just be mindful of the moisture content of different fruits and adjust cornstarch if needed.
- Shortcut Crust: If you’re short on time or prefer a less hands-on approach, store-bought pie crusts are a perfectly acceptable substitute for the homemade dough. Opt for a good quality all-butter crust for the best flavor. Simply roll it out, fill, and bake as directed. This option makes these galettes an even quicker and easier dessert.
- Flavorful Additions: Elevate the fruit filling with subtle spice or aromatic notes. A pinch of ground ginger, a hint of cardamom, or a splash of vanilla extract can add depth and warmth to the strawberry rhubarb blend. A tablespoon of orange zest could also brighten the flavors beautifully.
- Delightful Toppings: Once baked and still warm, these galettes are utterly divine with a scoop of creamy vanilla bean ice cream melting over the bubbling fruit. A dollop of freshly whipped cream, a sprinkle of toasted almonds, or a drizzle of balsamic glaze (which pairs surprisingly well with strawberries!) are also fantastic ways to enhance your dessert experience.
Please note: This recipe has been thoroughly tested with the original ingredients. If you choose to replace or add any ingredients, we encourage you to share your results in the comments below! Your insights help our community grow.
Recommended Equipment for Baking Galettes
Having the right tools can make your baking experience much smoother and more enjoyable. Here’s the essential equipment for making these mini galettes:
- Food Processor (Highly Recommended): While you can absolutely make pie dough by hand, a food processor is a game-changer. It rapidly combines the ingredients, ensuring the butter stays cold and is evenly distributed, which is crucial for a flaky crust. It also saves your hands from getting sticky and prevents the dough from warming up too much from your body heat. It simplifies the dough-making process significantly.
- Rolling Pin & Parchment Paper: These are indispensable for rolling out your dough. Parchment paper serves multiple purposes: it prevents the dough from sticking to your work surface or the rolling pin, it makes it incredibly easy to transfer the delicate galettes to the baking sheet without tearing, and it ensures a non-stick baking surface for easy cleanup. Rolling between two sheets of parchment is a fantastic trick for even thickness and no sticking.
- Large Mixing Bowls: You’ll need at least one medium-large bowl for preparing the fruit filling and another for combining dry ingredients if making the dough by hand.
- Baking Sheet: A sturdy baking sheet is essential for baking the galettes. A half-sheet pan is usually perfect for fitting all four mini galettes.
- Measuring Cups & Spoons / Digital Scale: Accurate measurements are key in baking. While measuring cups and spoons are fine, a digital kitchen scale (like this one) is recommended for precise weighing of dry ingredients like flour, which can greatly impact the texture of your crust.
- Pastry Cutter or Fork (if making dough by hand): If you don’t have a food processor, a pastry cutter or two forks will be necessary to cut the cold butter into the flour mixture, creating the pea-sized pieces needed for a flaky crust.
Step-by-Step Guide: How to Make Mini Strawberry Rhubarb Galettes
Baking these mini galettes is a surprisingly straightforward process, especially with these detailed steps. Follow along to create a truly impressive, yet simple, rustic dessert.
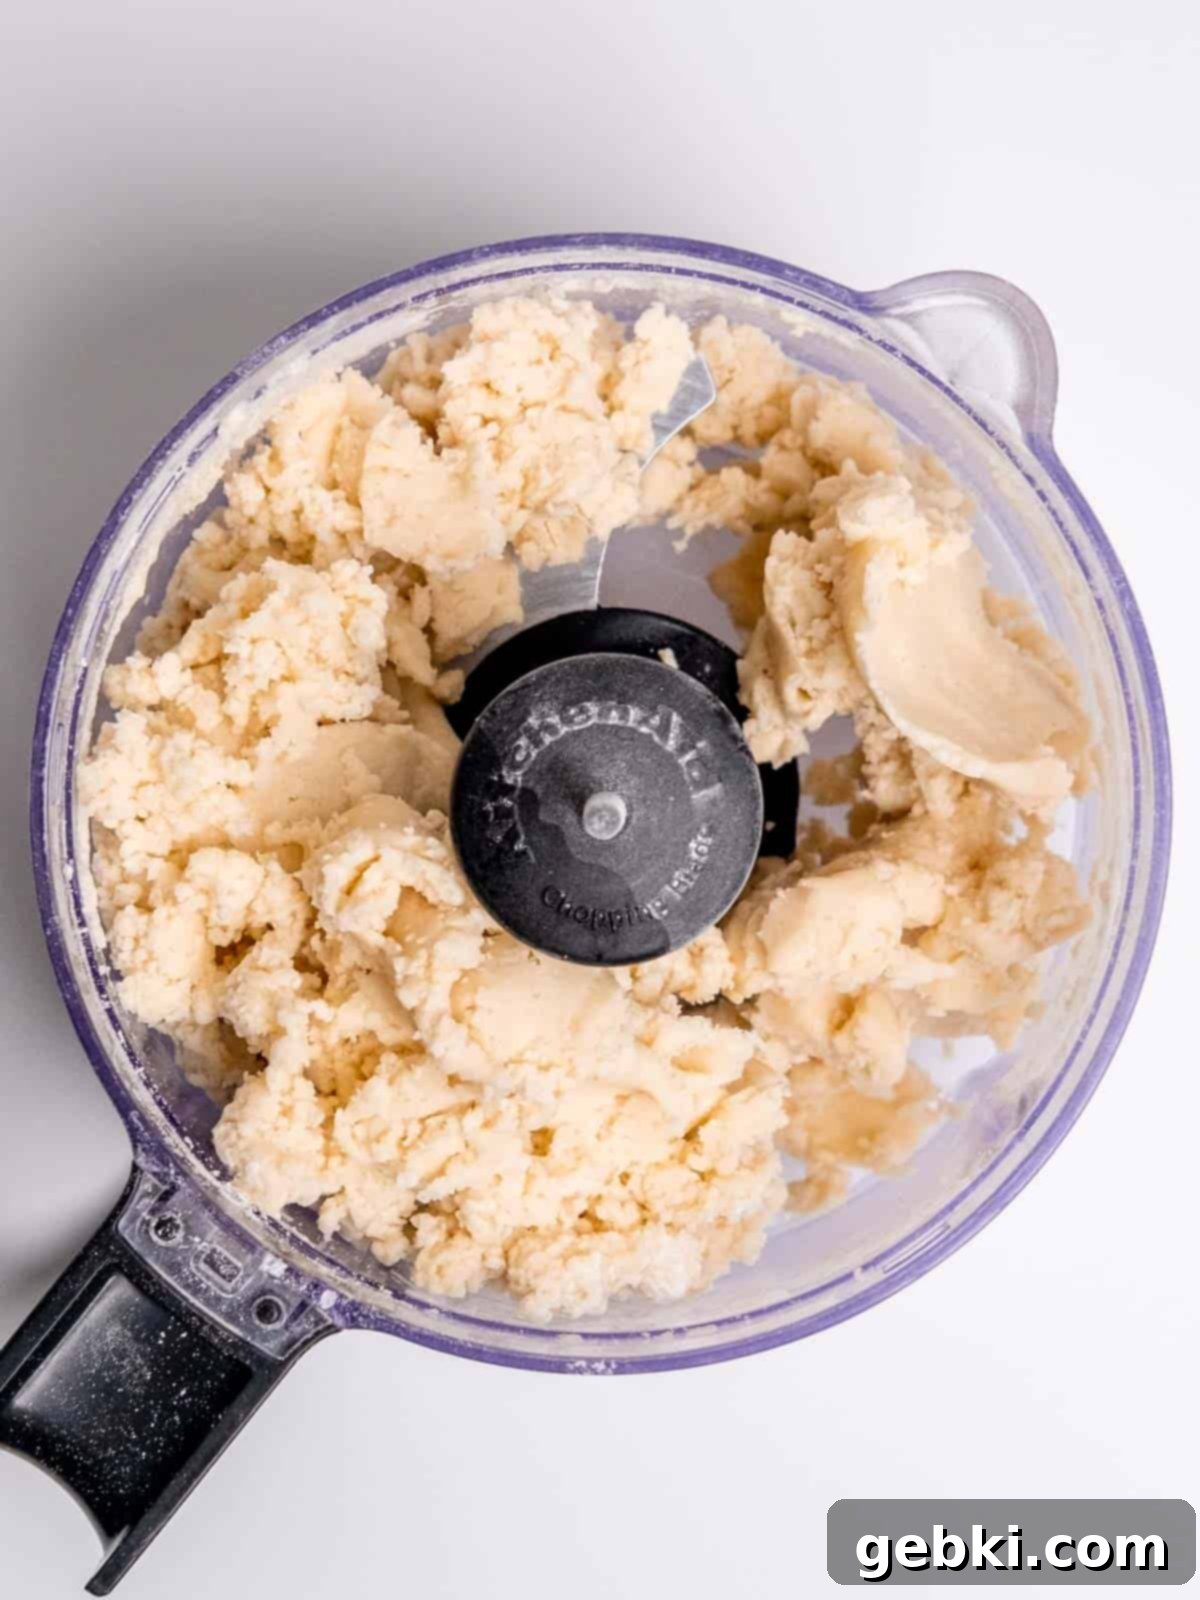
Step 1: Prepare the Dough (Food Processor Method). In a food processor, pulse together the flour, salt, and granulated sugar for a few seconds to combine. Add the very cold, cubed butter and pulse several times until the butter is incorporated into pea-sized crumbs. Gradually add the ice water, one tablespoon at a time, pulsing after each addition, until the dough just begins to come together and forms a ball. Be careful not to overmix.
(If you prefer to make the dough by hand, refer to the “Making Dough Without a Food Processor” section below for detailed instructions.)
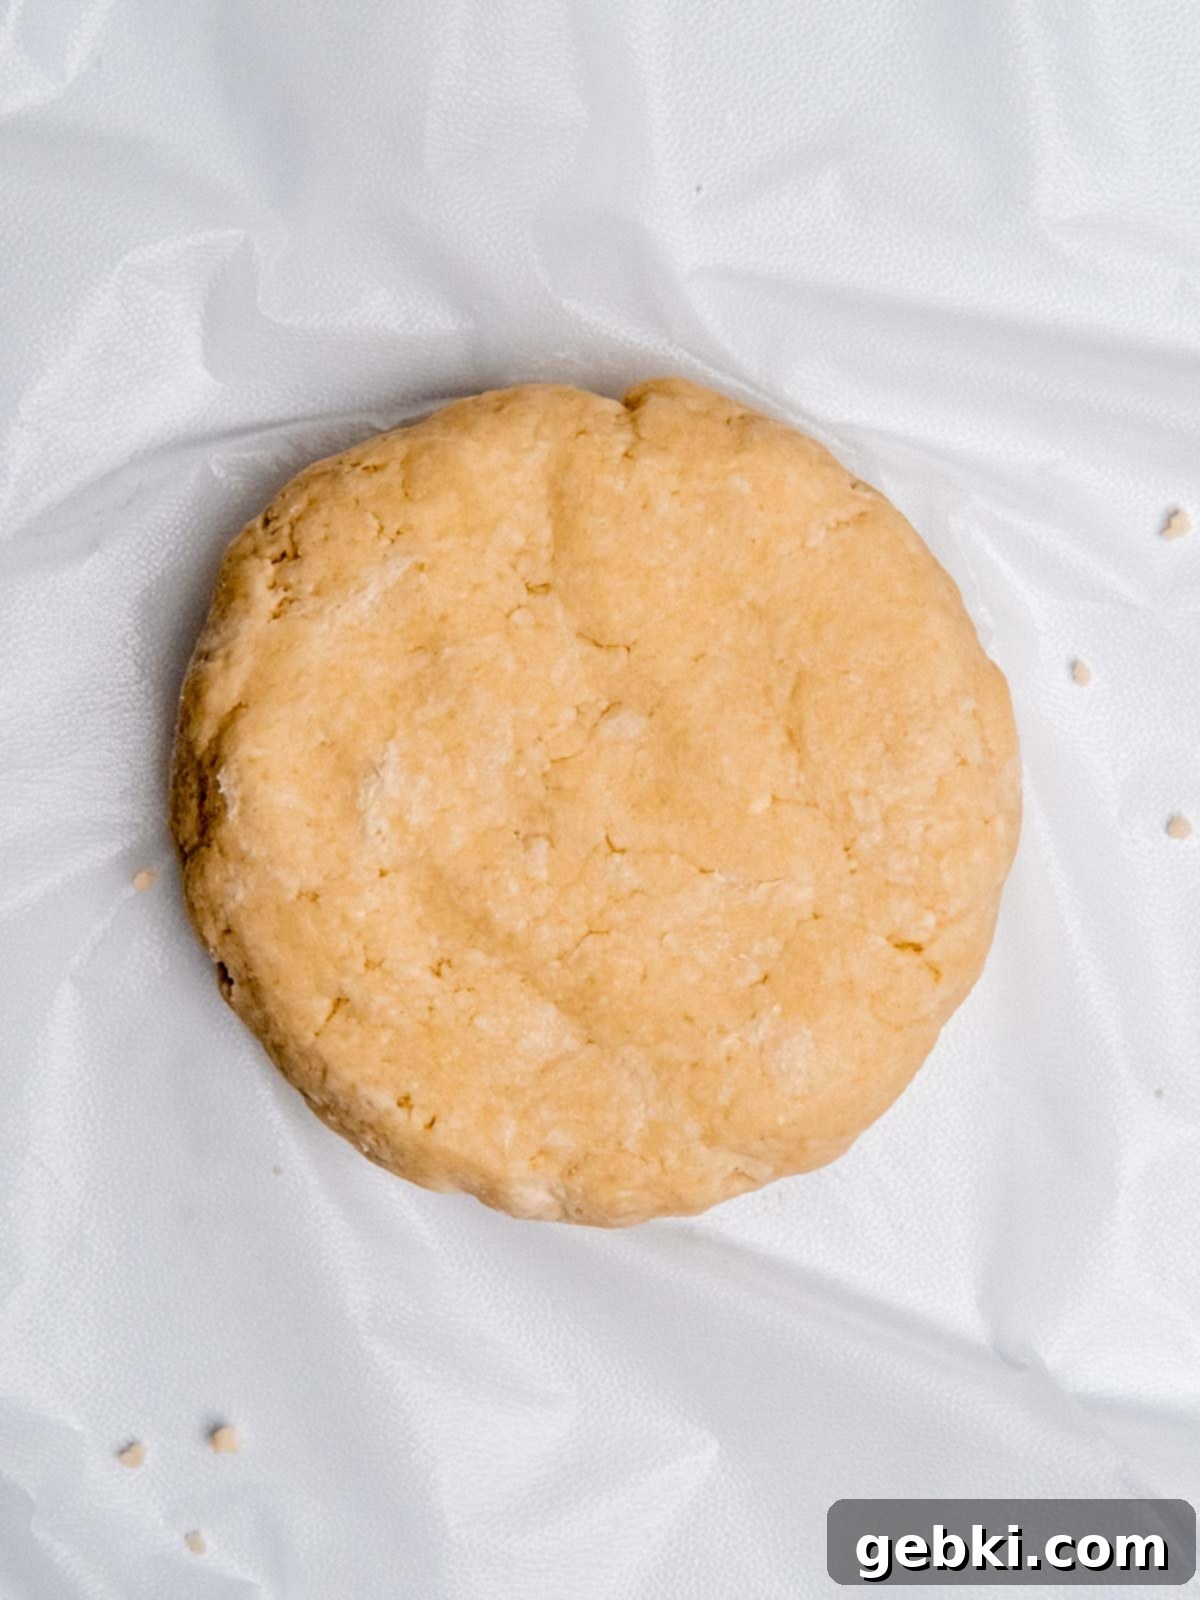
Step 2: Chill the Dough. Gather the dough from the food processor, form it into a cohesive ball, and then gently flatten it into a disc shape on a sheet of plastic wrap. Wrap it tightly and place it in the freezer for at least one hour (or in the refrigerator for at least two hours). Chilling the dough is essential to allow the gluten to relax and the butter to firm up, preventing shrinking and ensuring a flaky texture.
Once your dough is thoroughly chilled and firm, remove it from the freezer and divide it into four equal pieces. It’s important to work with one piece at a time to keep the remaining dough cold, so place the unused portions back in the refrigerator while you work.
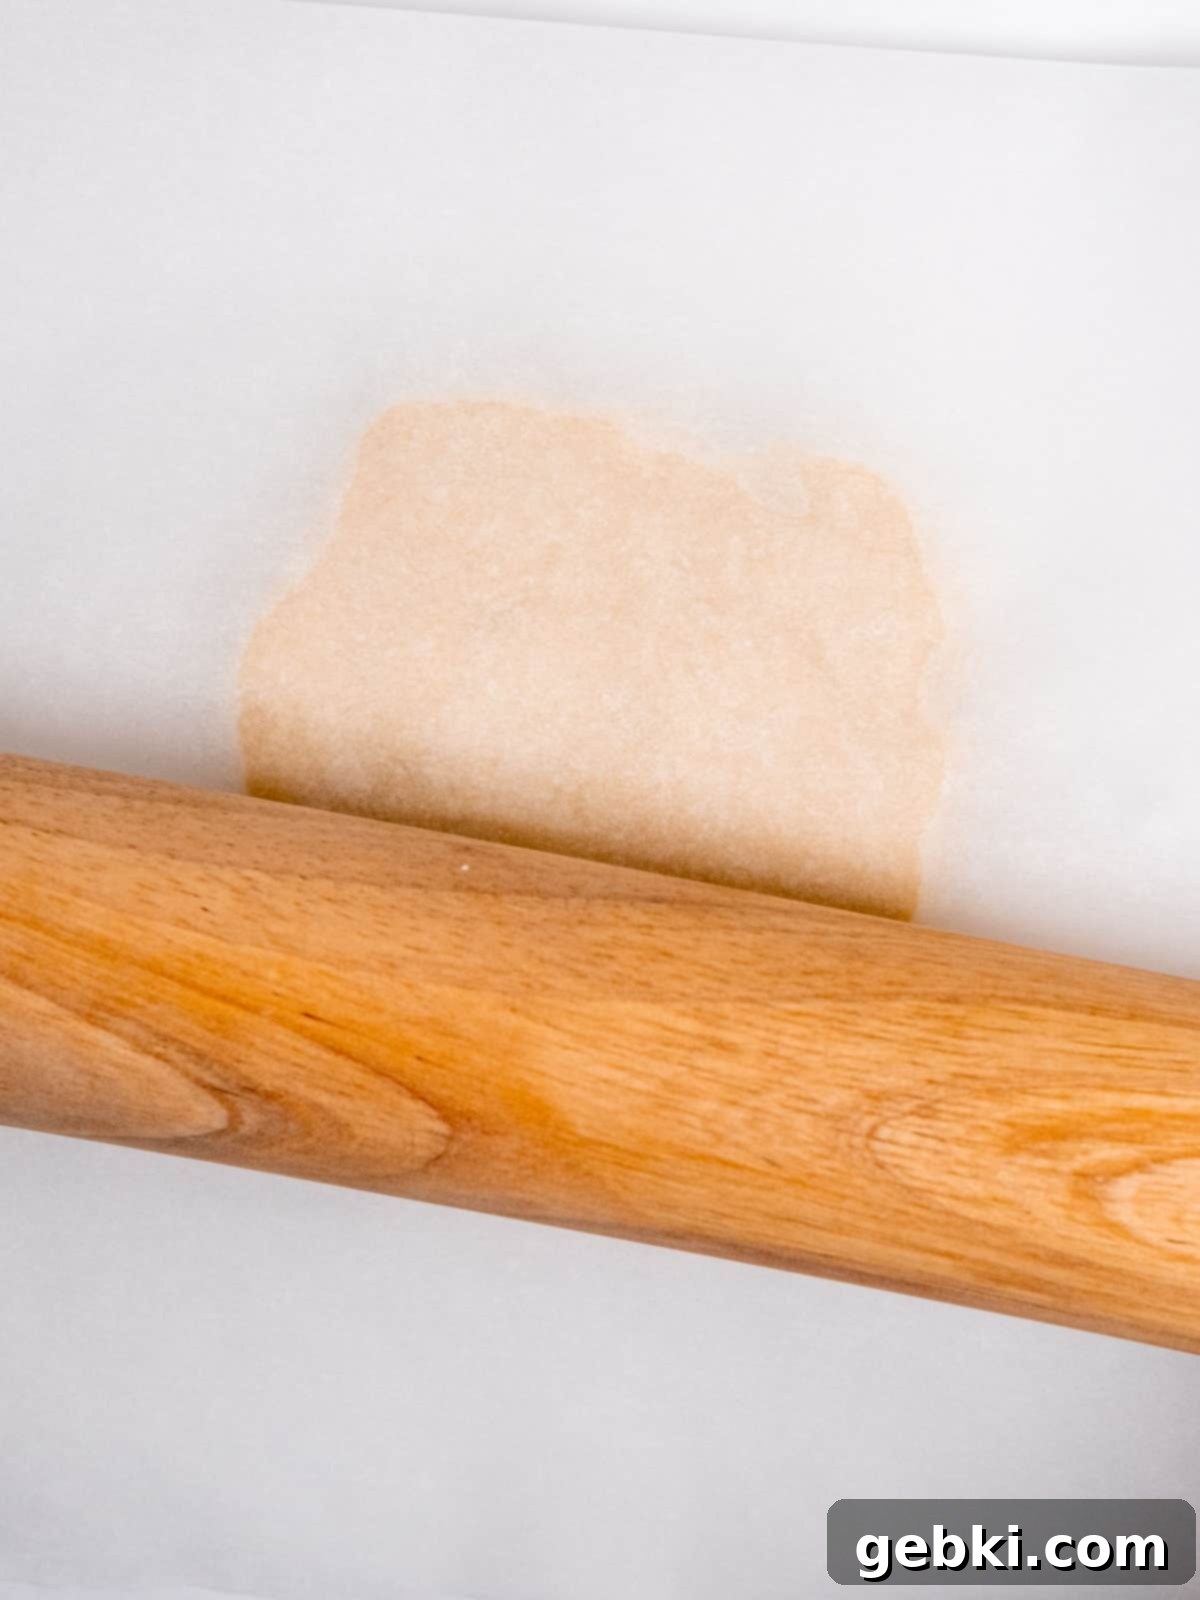
Step 3: Roll Out the Dough. Take one piece of the chilled dough and form it into a ball. Flatten it slightly on a sheet of parchment paper. Place another sheet of parchment paper on top and, using a rolling pin, roll the dough into a thin circle, approximately 8 inches in diameter. The parchment paper prevents sticking and helps you achieve an even thickness. Don’t worry about perfection; the rustic look is part of the galette’s charm!
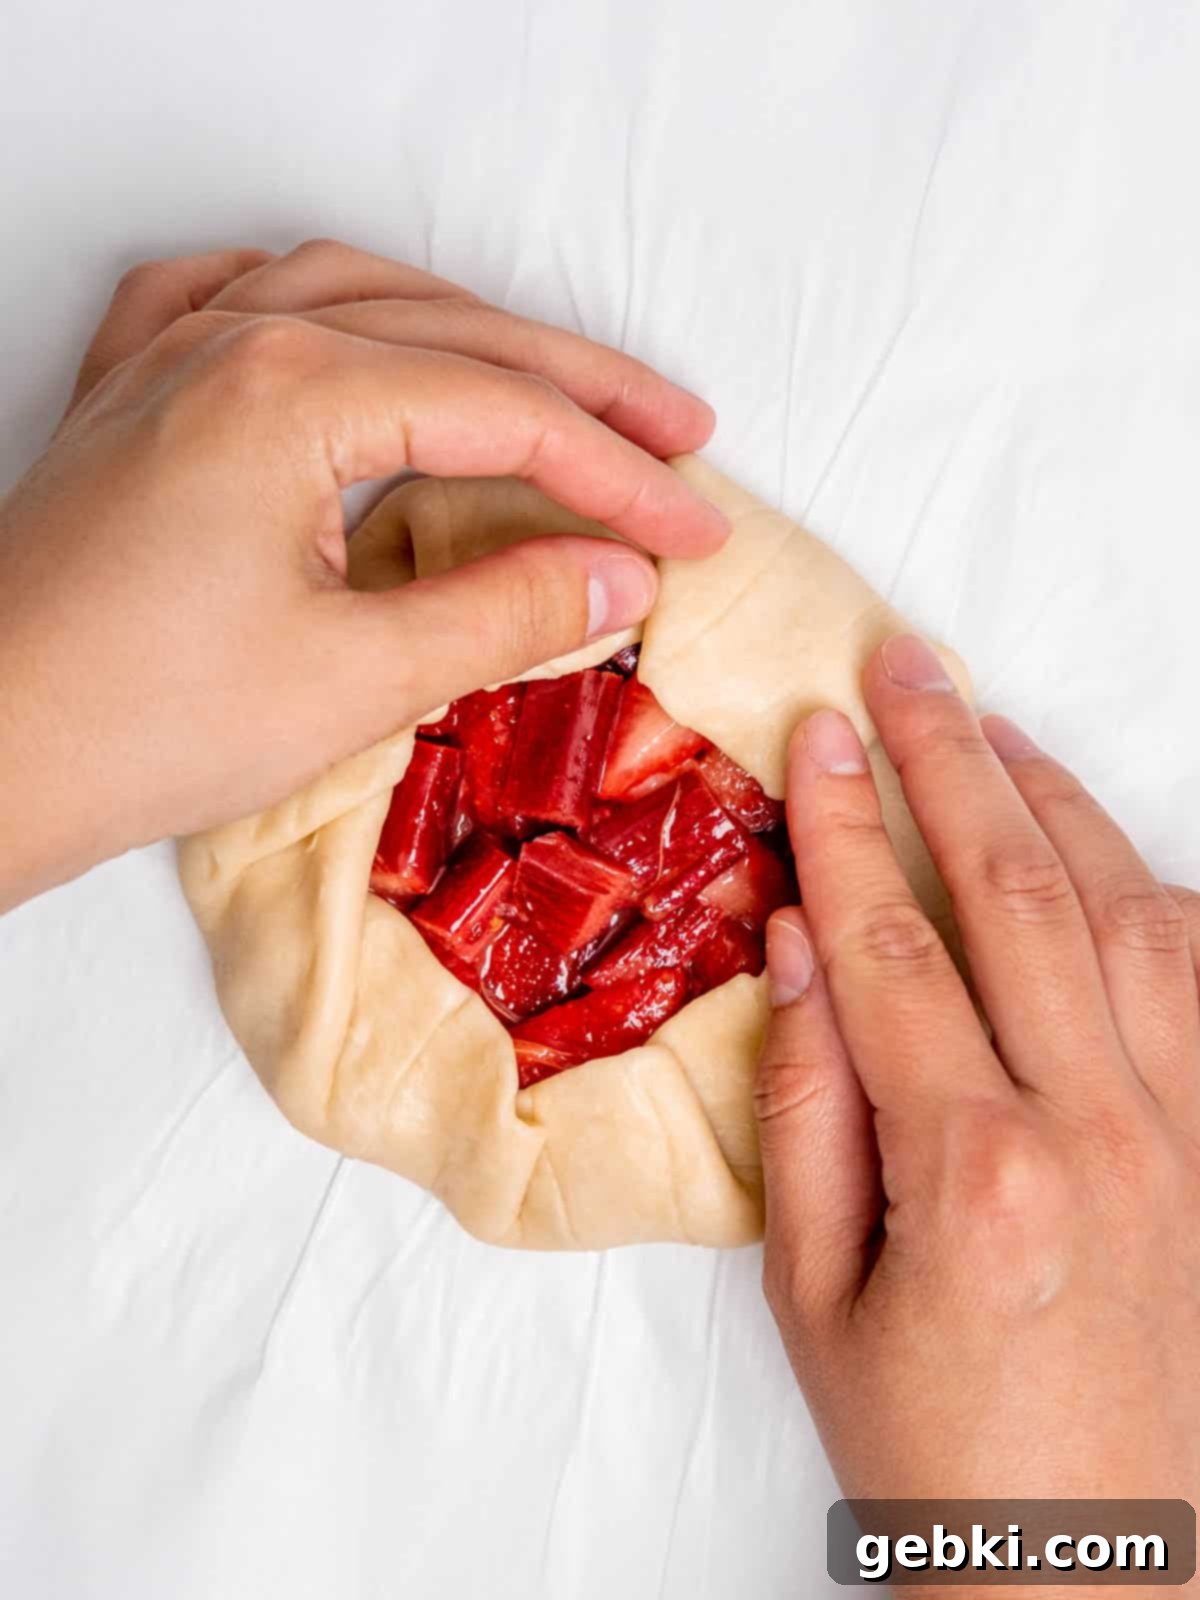
Step 4: Fill and Fold. Spoon a generous amount of your prepared strawberry rhubarb filling onto the center of the rolled-out dough, leaving a clear 1-inch border around the edge. Be sure to leave any excess juice in the bowl to prevent a soggy crust. Carefully fold the edges of the dough over the filling, crimping gently if desired. The goal is to create a rustic, free-form pastry. Once folded, transfer the galette (still on its parchment paper) to a large baking sheet.
Repeat steps 3 and 4 for the remaining three dough pieces, assembling each mini galette and placing it on the baking sheet alongside the others. Once all four galettes are assembled on the baking sheet, place the entire sheet in the freezer while your oven preheats to 375°F (190°C). This brief freeze helps the crust maintain its shape and flakiness during baking.
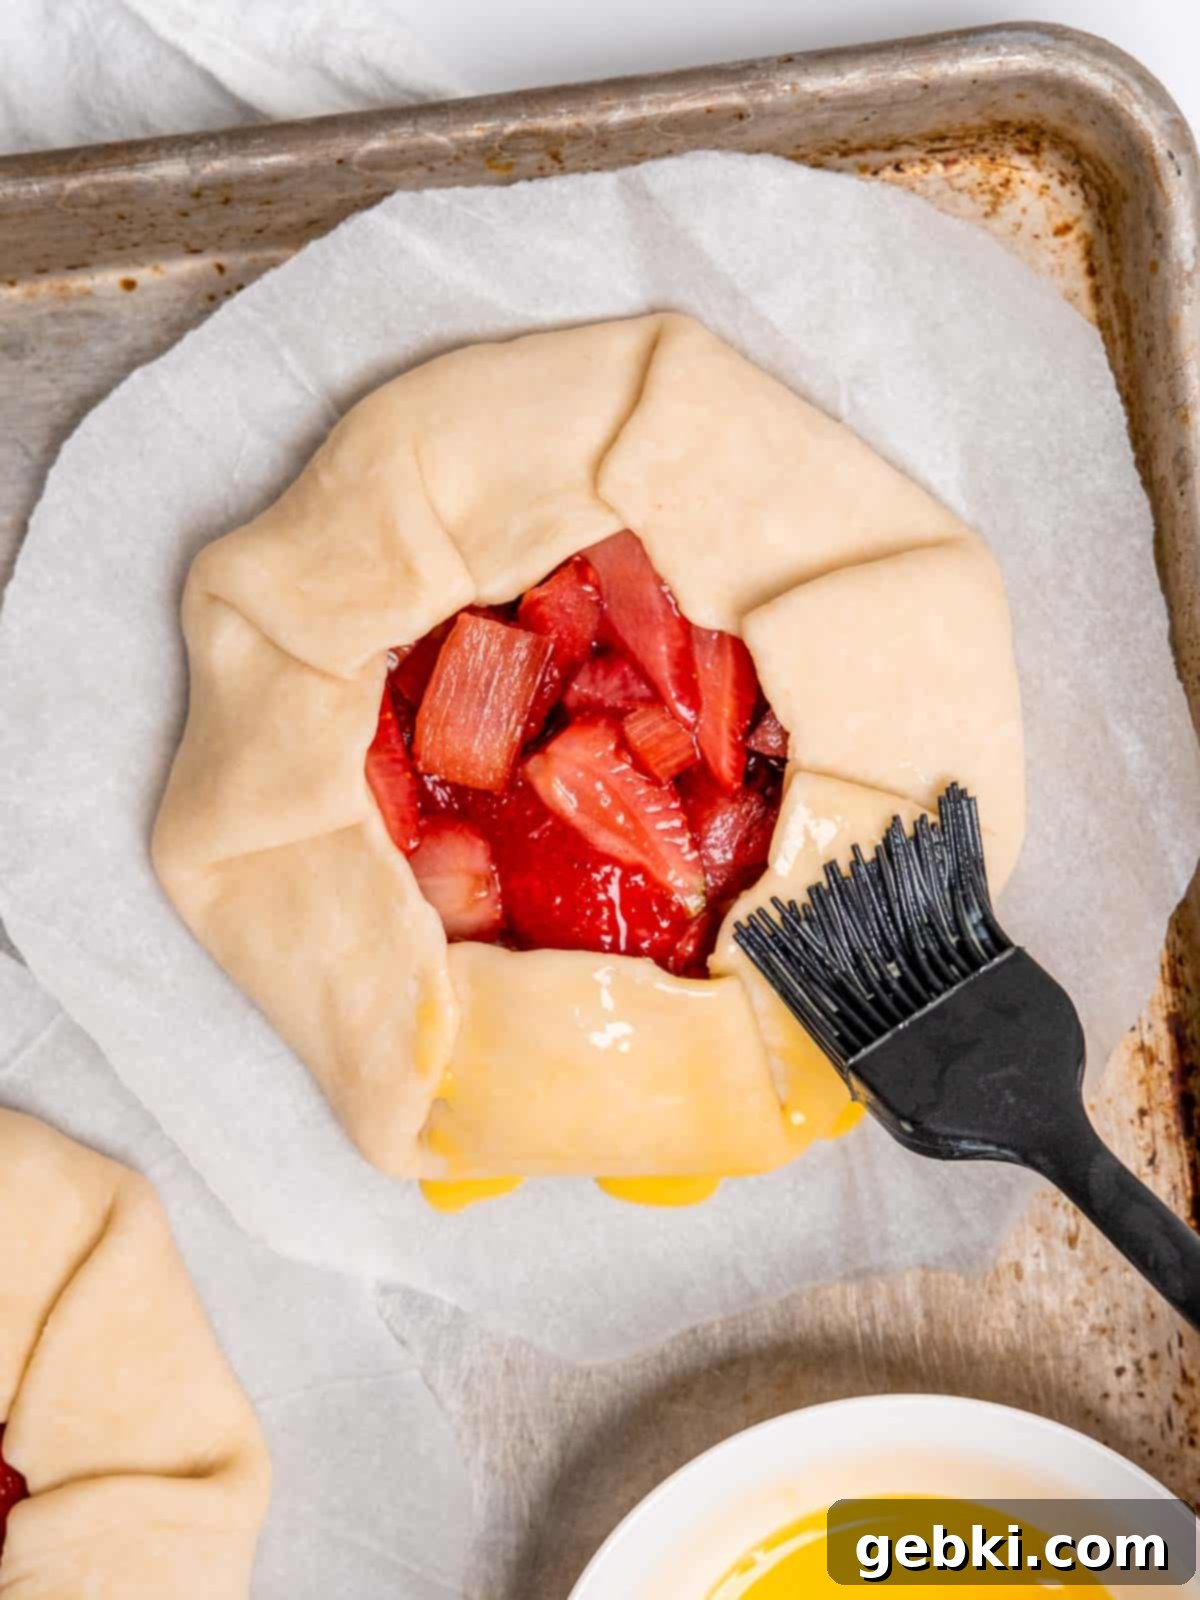
Step 5: Apply Egg Wash. Once your oven is preheated and the galettes have had at least 20 minutes to chill in the freezer, retrieve them from the freezer. In a small bowl, whisk together the egg yolk with one teaspoon of water to create an egg wash. Gently brush this mixture over the exposed edges of each galette crust. This wash will help achieve that beautiful golden-brown color during baking.
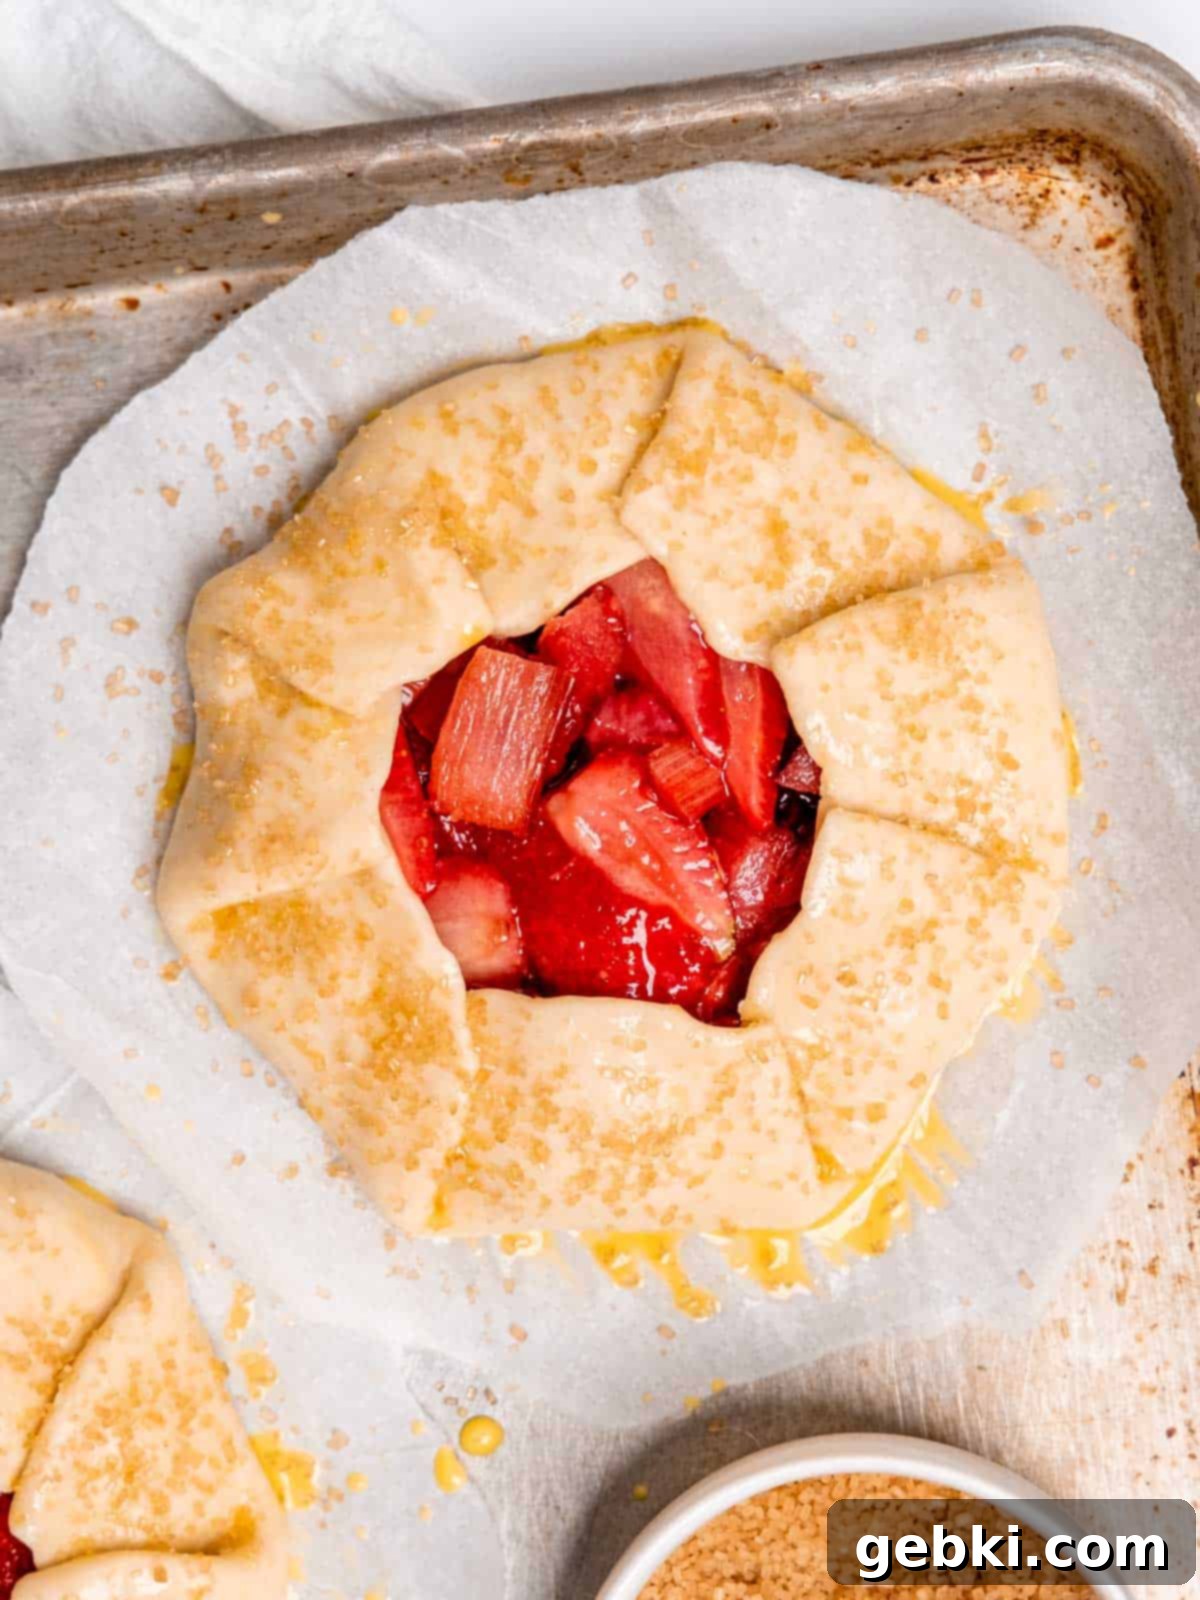
Step 6: Sugar Sprinkle and Bake. Generously sprinkle turbinado or demerara sugar over the egg-washed crust edges. This adds a lovely sparkle, extra sweetness, and a delightful crunchy texture. Carefully place the baking sheet with the galettes on the middle rack of your preheated oven. Bake for approximately 30-40 minutes, or until the crust is beautifully golden brown and the strawberry rhubarb filling is bubbling invitingly. Baking times can vary, so start checking around 15-20 minutes and adjust as needed. Allow them to cool slightly before serving for the best texture.
Making Pie Dough by Hand: A Classic Method
Don’t have a food processor or blender? No problem! Making pie dough by hand is a traditional and satisfying method. It might take a little more elbow grease, but the results are just as delicious. Here’s how to create that perfect flaky crust without any special equipment:
- Combine Dry Ingredients: In a large mixing bowl, thoroughly whisk together the all-purpose flour, granulated sugar, and salt. This ensures all the dry components are evenly distributed before adding the fat.
- Cut in Cold Butter: Add the cold butter pieces (preferably pre-frozen for 20 minutes and cut into small cubes) to the flour mixture. Using a pastry cutter, a fork, or even your fingertips (working quickly!), cut the butter into the flour until the mixture resembles coarse meal with some pea-sized butter chunks remaining. It’s crucial that the butter stays cold and doesn’t fully incorporate; these small pockets of butter are what create the flaky layers. Ensure each piece of butter is coated in flour.
- Gradually Add Ice Water: Make a well in the center of the flour-butter mixture. Add 1 tablespoon of ice water at a time, using a spatula or your hands to gently mix the dough after each addition. The goal is to bring the dough together just enough so that it holds when squeezed, but without overworking it. Stop adding water as soon as the dough starts to stick together; too much water can make the crust tough.
- Chill the Dough: Once the dough has formed a shaggy ball, transfer it to a sheet of plastic wrap. Gently flatten it into a disc shape, wrap it tightly, and place it in the freezer for at least 1 hour (or refrigerate for 2 hours) to firm up and allow the gluten to relax.
- Proceed with Assembly: Once chilled, follow steps 2-6 of the “How to Make Mini Strawberry Rhubarb Galettes” section above for rolling, filling, and baking your delicious galettes.
Expert Baking Tips for Perfect Galettes
Achieving perfectly flaky crusts and deliciously bubbly fillings for your galettes is easier with a few insider tricks. Here are my top expert baking tips to ensure your mini strawberry rhubarb galettes turn out beautifully every time:
- Keep Ingredients Cold: This is arguably the most important rule for a flaky pie or galette crust. Ensure your butter is cut into small pieces and frozen for at least 20 minutes before you start. Use ice-cold water, and even chill your flour for 15 minutes if your kitchen is warm. Cold ingredients prevent the butter from melting prematurely, creating those desired pockets of steam that result in a light, flaky texture.
- Don’t Overwork the Dough: Overmixing the dough develops the gluten too much, leading to a tough rather than tender crust. Mix just enough until the ingredients are combined and the dough barely holds together. A shaggy dough is a happy dough!
- Chill, Chill, Chill: Don’t rush the chilling process for the dough. A minimum of one hour in the freezer (or two in the fridge) allows the gluten to relax, preventing the crust from shrinking during baking, and ensures the butter is firm, contributing to maximum flakiness. If at any point your dough becomes too warm or sticky during rolling, pop it back into the freezer for 10-15 minutes until it’s firm again.
- Manage Fruit Moisture: Rhubarb and strawberries release a lot of liquid when cooked. Ensure you use corn starch to thicken the filling adequately. When spooning the filling into the crust, try to leave behind any excess juice that has accumulated in the bottom of the mixing bowl. Too much liquid can make the bottom crust soggy.
- Use Parchment Paper: Rolling your dough between two sheets of parchment paper makes cleanup a breeze and prevents sticking. It also allows you to easily transfer the delicate, unbaked galettes to your baking sheet without them tearing.
- The Egg Wash & Coarse Sugar are Key: While optional, brushing the crust with an egg wash provides a beautiful golden-brown color and a lovely sheen. The sprinkle of coarse sugar (demerara or turbinado) adds a delightful sparkle and a textural crunch that truly elevates the rustic appeal of the galette.
- Bake Until Golden and Bubbly: Don’t pull your galettes out of the oven too soon. The crust should be deeply golden, and the fruit filling should be visibly bubbling in the center. This ensures the fruit is fully cooked and the crust is crisp.
Common Questions About Mini Strawberry Rhubarb Galettes
Rhubarb is a seasonal delight, typically available in the spring months, from April to June in many regions. You can often find fresh rhubarb stalks in the produce section of well-stocked grocery stores. Your local farmers market is another excellent place to look, as they often carry freshly harvested seasonal produce. Don’t be shy to ask your grocer or local farmer when it’s expected to be in season!
These galettes are truly spectacular fresh out of the oven, when the crust is crisp and the filling is warm and bubbling. My absolute favorite way to enjoy them is by letting them cool for just a few minutes, then adding a generous scoop of creamy vanilla ice cream on top. The contrast of the warm, sweet-tart fruit with the cold, melting ice cream is heavenly! They are also delicious topped with a dollop of freshly whipped cream. Some of my friends even prefer them chilled, which is a great option for a make-ahead dessert. Experiment to find your favorite!
Absolutely! While this particular recipe features an all-butter pie crust for its rich flavor and superior flakiness, you can certainly substitute some of the butter with cold shortening. For best results, replace about 4 tablespoons of the butter with an equal amount of cold, cubed shortening. Shortening can sometimes create an even flakier crust, though it lacks the distinct buttery flavor. A combination of butter and shortening often yields a fantastic balance of flavor and texture.
Yes, you can! This recipe yields four mini galettes, but you could easily divide the dough into two larger portions to create two larger galettes. Just remember to adjust the baking time accordingly. Larger galettes will likely require a longer baking time (closer to 40-50 minutes) to ensure the crust is golden and the filling is thoroughly cooked and bubbling. The rustic nature of galettes means they look great no matter the size!
If you notice the edges of your galette crust browning faster than the filling is cooking, you can easily prevent over-browning. Simply create a loose “shield” or “tent” out of aluminum foil and place it over the galettes. This will protect the edges from direct heat, allowing the rest of the galette to cook through without burning the crust. You can remove the foil for the last 5-10 minutes of baking if you want to crisp up the edges a bit more.
Storage and Reheating Instructions for Galettes
Once baked, these delightful mini galettes can be enjoyed immediately or stored for later. Proper storage ensures they remain fresh and delicious.
Refrigerator Storage
Allow any leftover strawberry rhubarb galettes to cool completely to room temperature. Then, transfer them to an airtight container. They can be stored in the refrigerator for up to 5 days. Keeping them in an airtight container prevents them from drying out and absorbing odors from other foods.
Freezing Instructions
For longer storage, these galettes freeze beautifully. Once completely cooled, wrap each galette individually in plastic wrap, then place them in a freezer-safe bag or container. They can be stored in the freezer for up to 1 month. This is a great option for meal prepping desserts or saving them for a future craving!
Reheating Instructions
Mini galettes are delicious served cold, directly from the refrigerator, especially on a warm day. However, if you prefer them warm and with a slightly crisper crust, reheating is simple:
- Microwave: For a quick reheat, place an individual galette in the microwave for 30-60 seconds, or until warmed through. Be aware that the crust may lose some of its crispness in the microwave.
- Oven: To restore a crisp crust and warm filling, preheat your oven to 350°F (175°C). Place the galettes directly on a baking sheet and heat for 10-15 minutes, or until warmed through and the crust is slightly re-crisped. If reheating from frozen, this might take 20-30 minutes.
More Seasonal & Fruit Dessert Recipes You’ll Love
If you enjoyed these Mini Strawberry Rhubarb Galettes, you’re in for a treat! Here are a few more delicious recipes that celebrate fresh fruit and offer similar rustic charm or comforting flavors:
- Easy Mixed Berry Galette Recipe
- Easy Strawberry Rhubarb Crisp Recipe
- Fresh Blueberry Peach Crisp Recipe
- Spiced Blueberry Pie
Did you try this recipe? Leave a ⭐️ rating below and share it on Instagram, Facebook, and Pinterest!
📖 Recipe

Mini Strawberry Rhubarb Galettes
Kayla Burton
Pin Recipe
Equipment
- Plastic wrap
- Parchment paper
- Baking sheet
- Food chopper (or pastry cutter/fork for by hand)
- Rolling Pin
- Mixing bowls
- Scale/measuring cups
- Measuring spoons
Weigh dry ingredients in grams (g) with a food scale for best results!
Ingredients
Crust
- 2 cups (250 g) all-purpose flour weighed in grams or spooned and leveled
- 1 tablespoon (12 g) granulated sugar
- 1 teaspoon (6 g) salt
- 12 tablespoons (1½ sticks) (175 g) unsalted butter cut into tablespoons and freeze for 20 minutes
- 5-7 tablespoons (74-103 ml) ice water
Strawberry Rhubarb Filling
- 2 cups (2 cups) strawberries diced, fresh or frozen* (not thawed)
- 2 cups (2 cups) rhubarb diced, fresh or frozen (not thawed)
- ½ cup (100 g) light brown sugar packed
- 2 tablespoons (24 g) granulated sugar
- 1 tablespoon (1 tablespoon) lemon juice
- 2 tablespoons (16 g) corn starch
Optional egg wash + sugar
- 1 large (1 large) egg yolk
- 1 teaspoon (1 teaspoon) water
- ¼ cup (¼ cup) turbinado or demerara sugar
Instructions
Dough (Food Processor Method)
- Add the flour, sugar, and salt to a food chopper. Pulse for 5 seconds. Add the cold butter and pulse until it’s blended really well (no large butter chunks are left).
- Add up to 4 tablespoons of ice water, pulsing after each tablespoon. Then, add ½ tablespoon of water at a time until the dough starts to stick together.
- Place the dough onto a sheet of plastic wrap. Form it into a ball and flatten it. Then, wrap it in the plastic wrap and place in the freezer for 1 hour.
Dough (By Hand Method)
- Whisk the flour, sugar, and salt together in a large bowl. Cut the cold butter into the flour mixture using a pastry cutter or fork. Make sure the butter pieces are coated in flour and are pea-sized.
- Add up to 4 tablespoons of ice water, mixing with a spatula after each tablespoon. Then, add ½ tablespoon of water at a time, stirring until the dough begins to stick together.
- Form a ball with the dough and flatten it on a sheet of plastic wrap. Then, wrap it up and place in the freezer for 1 hour.
Strawberry Rhubarb Filling
- Mix the strawberries, rhubarb, brown sugar, granulated sugar, lemon juice, and corn starch in a medium-large bowl until well combined. Refrigerate until your crust is rolled out.
Assembling the Galettes
- Cut the chilled dough into 4 equal pieces. Work with 1 piece at a time while the others chill in the refrigerator.
- Form a ball with a section of the dough, then flatten it on a piece of parchment paper. Place another parchment sheet on top of the flattened ball and roll it into a thin circle (about 8 inches in diameter) using a rolling pin. (It helps to tape the bottom parchment sheet to the counter. The sheet on top is to prevent the pin from sticking to the dough.)
- Spoon strawberry rhubarb filling onto the center of the dough (try to leave the juice behind in the bowl). Leave 1 inch of the dough unfilled around the edge.
- Tightly fold the unfilled dough edges onto the filling. The galette should be about 6 inches in diameter.
- Trim any excess parchment paper around the galette and then transfer it onto a sheet pan. (Keep the parchment under it.) Place it in the freezer.
- Repeat with the remaining 3 dough balls, placing each galette onto the pan in the freezer when you’re done. All 4 should fit on a half sheet baking pan.
- After all galettes have been assembled and placed in the freezer for at least 20 minutes, preheat the oven to 375°F (190°C).
- When your oven is pre-heated, brush the galettes with an egg wash (the yolk mixed with water) and sprinkle turbinado or demerara sugar around the edges.
- Bake on the middle shelf until the crust is golden and the filling is bubbling. The time will vary depending on how long they were frozen for. Start checking them around 15-20 minutes. They may take up to 40 minutes to bake.
Save This Recipe! 💌
We’ll email this post to you, so you can come back to it later!
Notes
Calories: 750kcal
Carbohydrates: 96g
Protein: 9g
Fat: 38g
Saturated Fat: 23g
Polyunsaturated Fat: 2g
Monounsaturated Fat: 10g
Trans Fat: 1g
Cholesterol: 141mg
Sodium: 602mg
Potassium: 409mg
Fiber: 4g
Sugar: 40g
Vitamin A: 1241IU
Vitamin C: 49mg
Calcium: 114mg
Iron: 4mg
The provided nutritional information is an estimate per serving. Accuracy is not guaranteed.
Leave a comment below & tag @brokenovenbaking on social!
Sign up for our newsletter to get more delicious recipes delivered straight to your inbox!