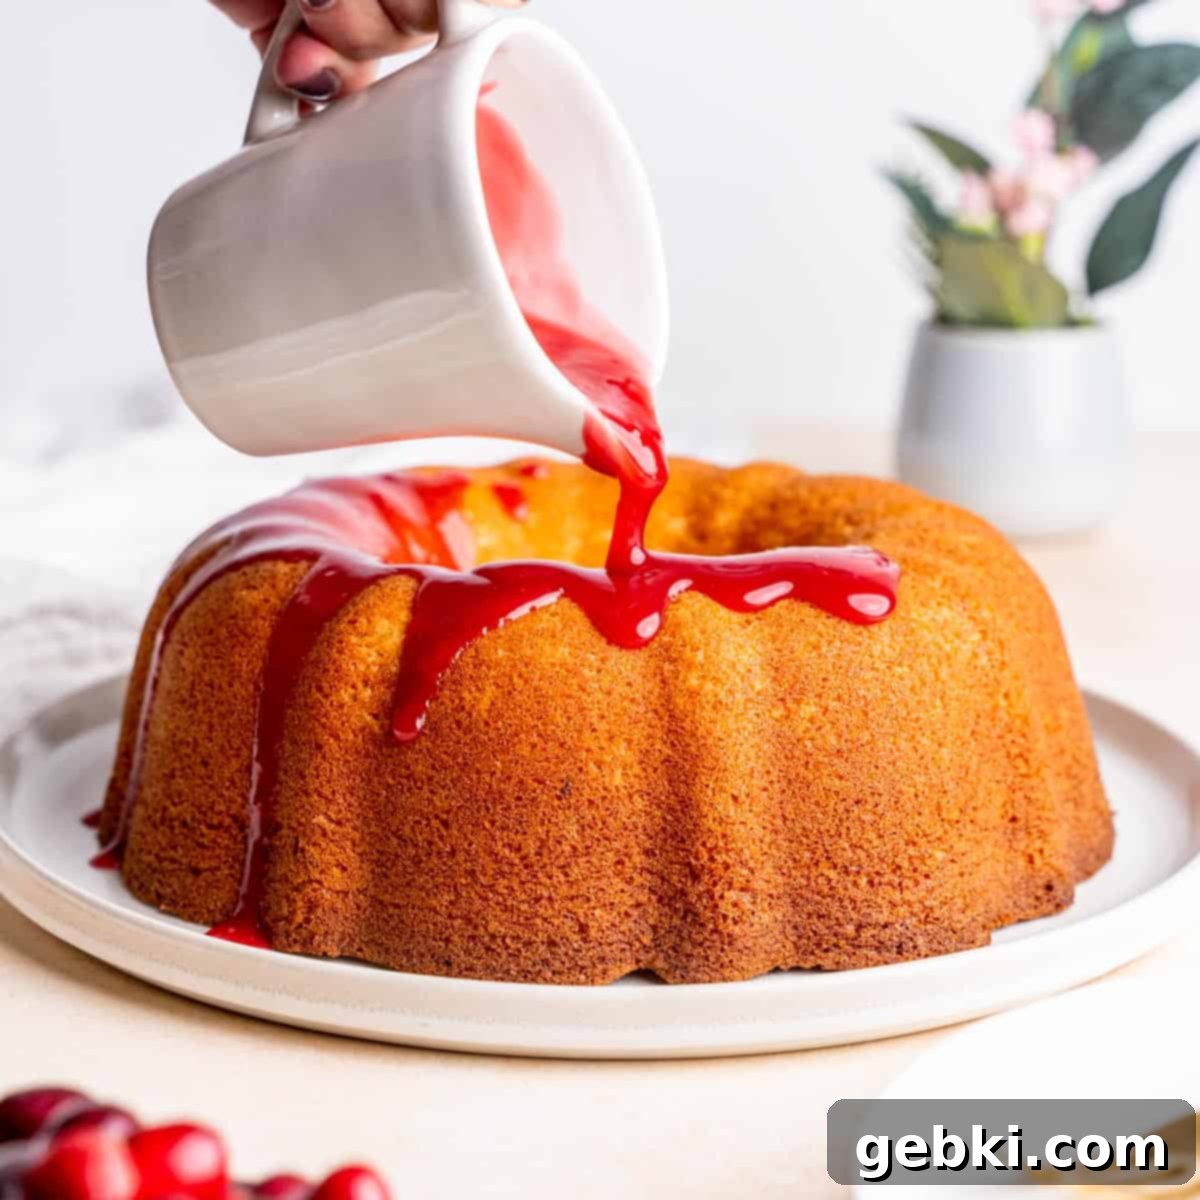
Delicious Orange Bundt Cake with Tangy Cranberry Glaze: Your Festive Dessert Centerpiece
The delightful combination of cranberry and orange is truly a match made in heaven, especially when it comes to baking. There’s something undeniably special about the vibrant citrus notes mingling with the tart burst of cranberries. While cranberry orange muffins have long been a beloved bakery staple, we wanted to elevate these incredible flavors into a show-stopping dessert perfect for sharing: a grand, elegant bundt cake. This Orange Bundt Cake with Cranberry Glaze isn’t just any cake; it’s a testament to balanced flavors and a wonderfully moist texture. Crafted with fresh orange juice and plenty of orange zest, the cake itself is light, fluffy, and infused with bright citrus. But the magic doesn’t stop there. It’s crowned with a glistening, tangy cranberry glaze that beautifully complements the cake’s sweetness, creating a symphony of flavors that will impress everyone at your table.
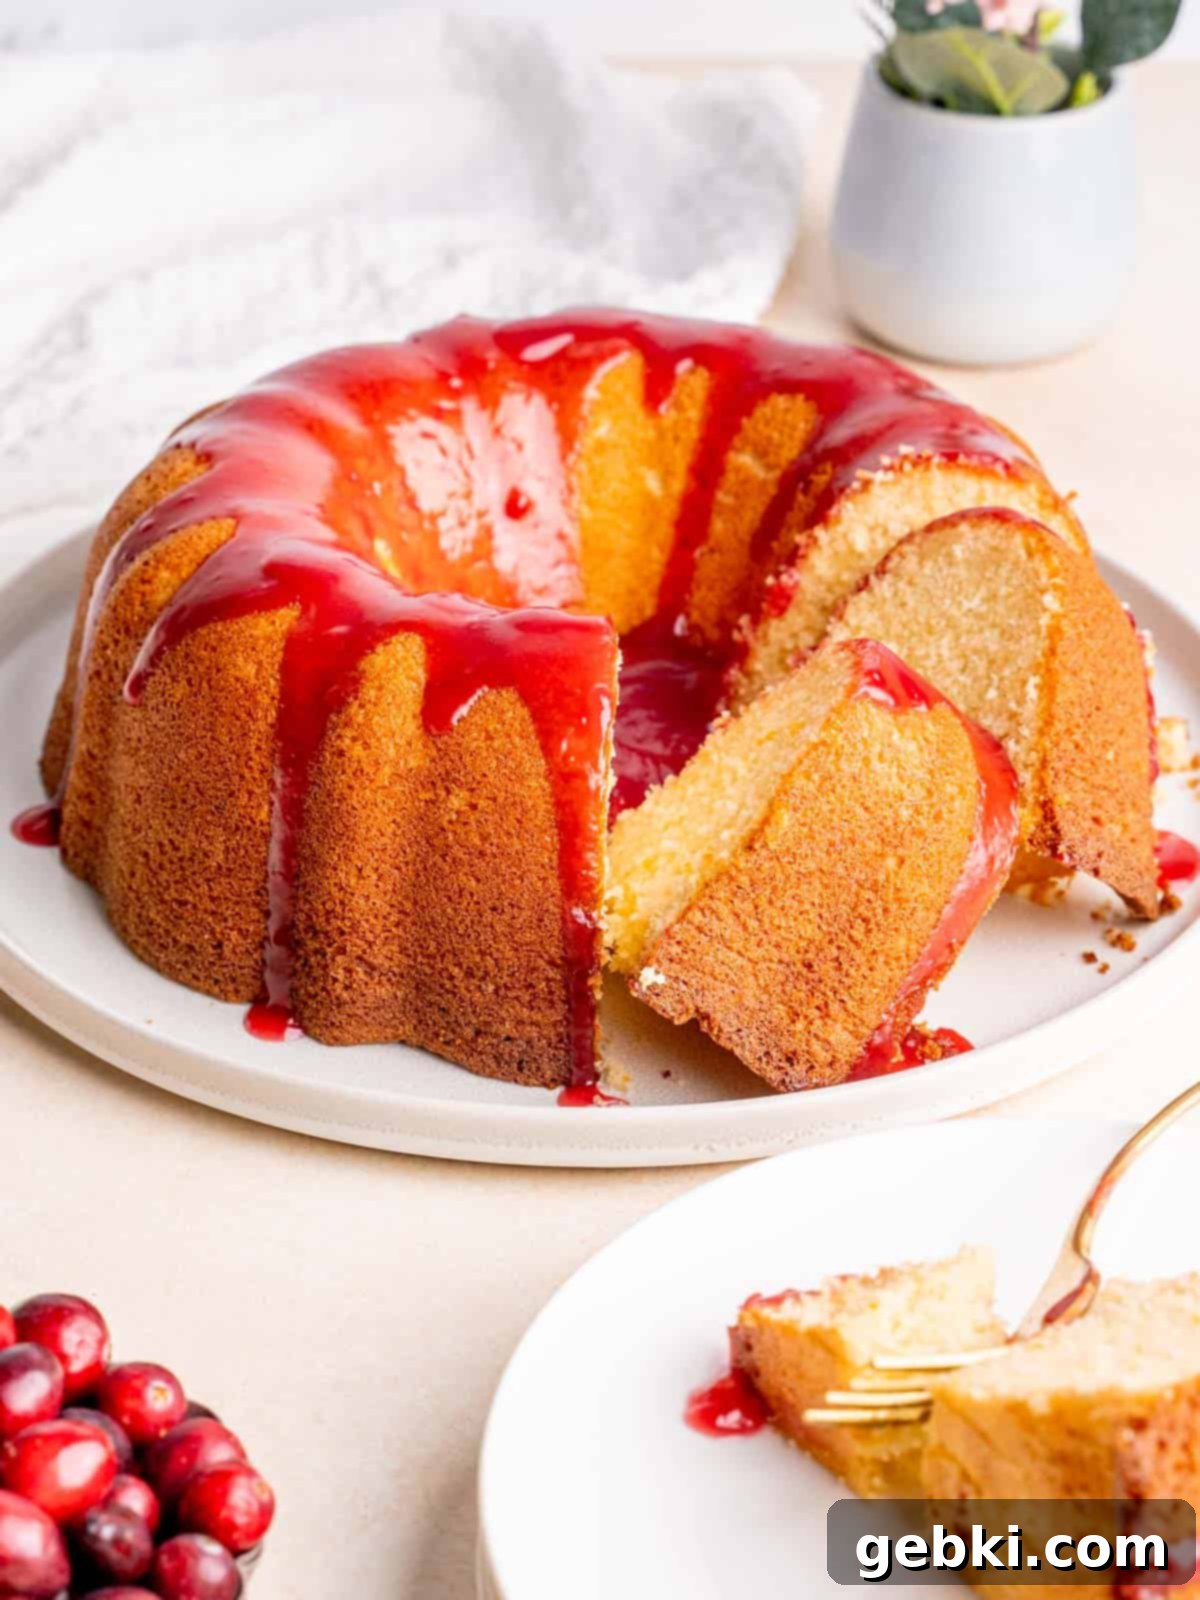
As autumn leaves fall and the holiday season approaches, cranberries become a cherished ingredient, a true Thanksgiving staple in the US. This year, why not present them in a dazzling, unexpected way by incorporating them into a luscious glaze for this elegant bundt cake? The timing couldn’t be more perfect, as oranges are also beautifully in season during the holidays, offering their peak flavor and aroma. This Orange Bundt Cake with Cranberry Glaze is not only ideal for your holiday baking repertoire but also perfect for any special gathering. Its generous size, yielding at least 12 slices, ensures there’s more than enough to go around, making it the ultimate crowd-pleaser for family meals, festive parties, or a cozy evening dessert.
For those looking to add another creative twist to classic holiday fare, consider these Sweet Potato Cupcakes with Toasted Meringue Frosting – a delightful dessert that transforms a traditional side dish into a charming individual treat!
Why You’ll Adore This Cranberry Orange Bundt Cake
There are countless reasons why this particular orange bundt cake recipe will quickly become a favorite in your kitchen. First and foremost is the incredible flavor profile. The cake itself is bursting with natural orange essence, thanks to both fresh juice and aromatic zest. This isn’t an artificially flavored cake; it’s a true celebration of bright, zesty citrus that awakens the palate. The texture is another highlight – it’s exceptionally light and fluffy, almost cloud-like, a direct result of carefully whipped egg whites folded into the batter. This technique gives the cake a delicate crumb that practically melts in your mouth, providing a delightful contrast to richer, denser cakes.
Then there’s the show-stopping cranberry glaze. Its vivid, jewel-toned color and perfectly balanced tart sweetness provide a striking contrast and a harmonious flavor profile to the rich, citrusy cake. This isn’t just a simple drizzle; it’s a flavorful, glossy topping that truly elevates the entire dessert experience, making each bite an adventure of sweet and tart. It’s a sophisticated yet approachable cake, perfect for both seasoned bakers looking for a rewarding project and those new to bundt cakes seeking a reliable, impressive recipe. Moreover, the inherent elegance of the bundt cake shape means that a simple pour of this glossy glaze is all you need for a stunning, centerpiece-worthy dessert ready to impress your guests without requiring elaborate decorating skills.
[feast_advanced_jump_to]
Essential Ingredients for Your Orange Bundt Cake & Cranberry Glaze
Crafting this exquisite orange bundt cake and its accompanying vibrant cranberry glaze relies on a thoughtful selection of fresh, high-quality ingredients. Each component plays a crucial role in achieving the perfect balance of flavor, moisture, and texture. Here’s a detailed breakdown of what you’ll need and why each element is important for a truly sensational bake:
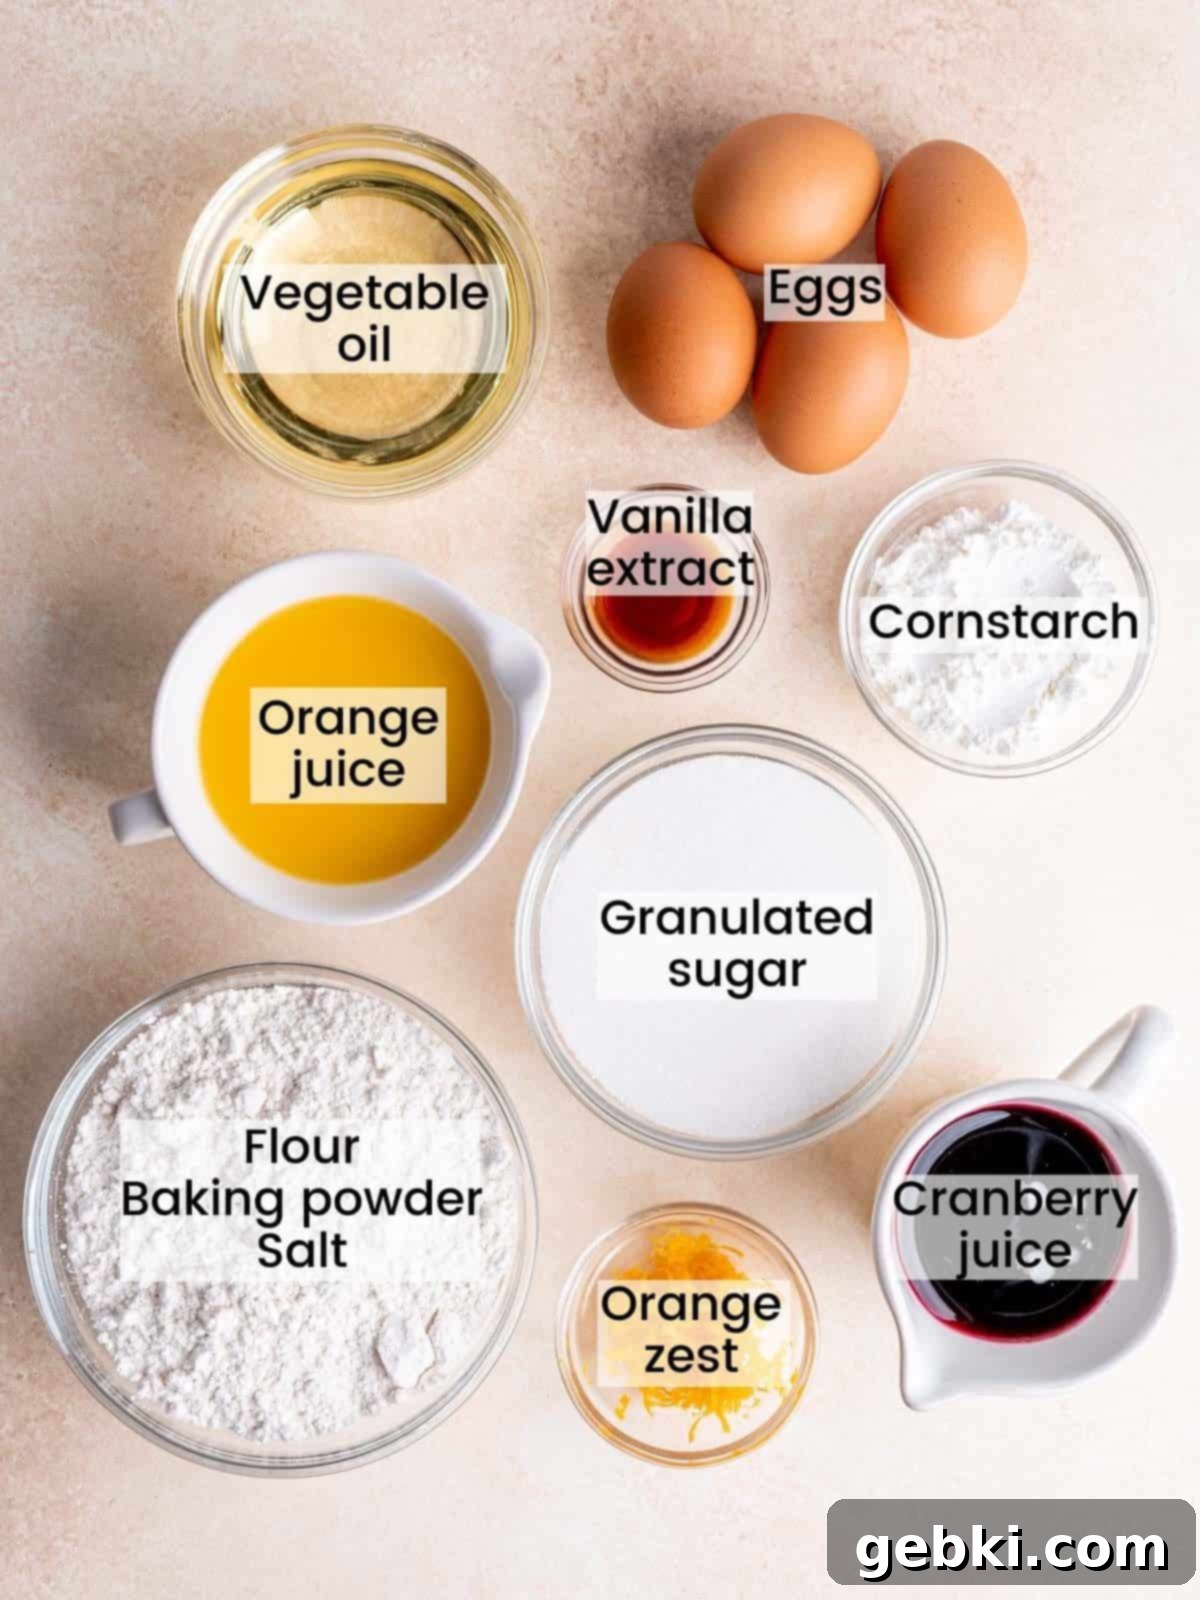
- Eggs: Using large, room temperature eggs is crucial. Separating the yolks and whites allows us to whip the whites to stiff peaks, incorporating a significant amount of air that gives this bundt cake its incredibly light, airy, and tender texture. Room temperature eggs also emulsify better with other ingredients, leading to a smoother, more cohesive batter.
- Granulated Sugar: Beyond providing essential sweetness, sugar contributes to the cake’s tender crumb and moistness. It also plays a vital role in stabilizing the whipped egg whites, ensuring they hold their structure.
- Vanilla Extract: A classic and indispensable flavor enhancer, vanilla extract deepens and rounds out the overall taste profile of the cake, complementing the bright citrus notes.
- Vegetable Oil (or other neutral oil): Unlike butter, oil creates a beautifully moist cake that stays fresh and tender for a longer period. Opt for a neutral oil like canola, grapeseed, or sunflower oil to ensure the pure, vibrant orange flavor shines through without interference.
- Orange Juice (100%): For the purest, most authentic orange flavor, it’s paramount to use 100% orange juice with no added sugars or artificial ingredients. Freshly squeezed juice offers the best aroma and taste, but a high-quality store-bought brand with a single ingredient (“orange juice”) works perfectly well.
- Orange Zest (from about 2 oranges): This is where a significant portion of the cake’s vibrant orange aroma and intense flavor comes from. The essential oils in the zest are potent and fragrant, imparting a brighter, more complex citrus note than juice alone. Do not skip this important ingredient!
- All-Purpose Flour: This forms the structural base of our cake. Sifting it along with other dry ingredients helps to aerate it, prevent lumps, and ensures a uniformly light, tender crumb.
- Cornstarch: A secret ingredient for ultimate tenderness! Adding cornstarch to the flour mixture helps to slightly reduce the gluten development, making the cake crumb incredibly delicate and melt-in-your-mouth soft.
- Baking Powder: Our primary leavening agent, baking powder reacts when wet and heated to create carbon dioxide bubbles. These bubbles expand during baking, contributing significantly to the cake’s impressive lift and airy, open structure.
- Salt: A small amount of salt is essential in baking to balance the sweetness of the sugar and enhance all the other flavors in the cake, making them pop.
- Cranberry Juice (100%): For the striking, tart, and beautifully colored cranberry glaze. As with the orange juice, opt for 100% pure cranberry juice for the most authentic flavor and vivid hue in your glaze.
For precise measurements and detailed quantities for both the cake and the tangy cranberry glaze, please refer to the comprehensive recipe card provided below. Weighing your dry ingredients in grams (g) with a food scale is highly recommended for the most consistent and best baking results!
Creative Substitutions & Delicious Variations
While this Orange Bundt Cake with Cranberry Glaze recipe has been meticulously developed for optimal flavor and texture, we understand that sometimes you might want to experiment, adapt to dietary needs, or simply use what you have on hand. Please note that extensive testing with all possible substitutions hasn’t been conducted for every ingredient. If you do make changes, we’d absolutely love to hear how they turned out in the comments below, as your feedback helps our entire baking community!
Thoughtful Substitutions to Consider:
- Neutral Oil: If vegetable oil isn’t your preference, other neutral-flavored oils such as canola oil, grapeseed oil, or even a light olive oil (not extra virgin, which has a strong flavor) can be used interchangeably. The goal is an oil that won’t overpower the delicate orange flavor.
- Citrus Juices & Zest: While orange is the star here, you could explore other citrus combinations. A lemon bundt cake with a vibrant raspberry glaze or a lime bundt with a rich blackberry glaze could be interesting variations, though be aware they will create a completely different flavor profile. Adjust sugar levels as needed for different tartnesses.
- Flour: For a slightly different crumb, you could technically use a cake flour blend. However, this recipe already incorporates cornstarch to tenderize the all-purpose flour, achieving a similar delicate texture. Replacing entirely with gluten-free flour would require specific gluten-free baking blends and might alter the cake’s structure and hydration needs significantly, so proceed with caution and research appropriate GF substitutes.
- Baking Powder: While difficult to substitute directly without affecting the rise, if you only have baking soda, you’d need to add an acidic ingredient (like buttermilk or additional citrus juice) to activate it, which would significantly alter the recipe.
Exciting Variations to Elevate Your Bundt Cake:
- Glaze Alternatives:
- All-Orange Glaze: For an intensely citrusy experience that doubles down on the orange notes, simply replace the cranberry juice in the glaze with additional 100% orange juice. This creates a bright, sunny finish.
- No Glaze: If you prefer a less sweet option or want the pure orange flavor to shine, this orange bundt cake is absolutely delightful on its own. A simple dusting of powdered sugar just before serving can add a touch of elegance.
- Cream Cheese Glaze: A classic cream cheese frosting or glaze would add a rich, tangy creaminess that pairs wonderfully with citrus cakes. You could add a touch of orange zest to the cream cheese glaze for continuity.
- White Chocolate Drizzle: For a decadent twist, a melted white chocolate drizzle or ganache could provide an interesting textural and flavor contrast to the bright orange and tart cranberry.
- Flavorful Add-ins for the Cake Batter:
- Chopped Cranberries: For an extra burst of tartness and beautiful ruby-red specks throughout the cake, gently fold in about ½ to ¾ cup of fresh or frozen (not thawed) chopped cranberries into the batter just before pouring it into the bundt pan.
- Nuts: Toasted and finely chopped pecans, walnuts, or almonds (about ½ cup) can add a lovely crunch, nutty depth, and visual appeal that complements the orange flavors beautifully.
- Spices: A pinch of warm spices like ground cinnamon, cardamom, or even a hint of nutmeg (¼ to ½ teaspoon) could add a warm, subtle complexity, especially if you’re serving this during the colder holiday months.
- Candied Ginger: Finely diced candied ginger (about ¼ cup) can add a delightful warmth and chewiness, pairing exquisitely with orange.
- Elegant Garnish Options: Elevate your presentation even further with fresh orange slices, candied cranberries, a sprinkle of extra orange zest, or delicate fresh mint leaves over the glazed cake.
Essential Equipment for Baking a Perfect Bundt Cake
Baking a beautiful bundt cake, especially one with such intricate designs, relies on having a few key pieces of equipment. Most of these are standard kitchen items, but a couple of specialized tools will make a significant difference in ensuring your cake turns out perfectly every time. Here’s a detailed look at what you’ll need:
- Bundt Pan: This is, of course, the star of the show! You’ll need a standard 9-inch or 10-12 cup bundt pan. The batter for this recipe is specifically formulated to fit perfectly within this size, allowing for proper rise and structure. The intricate designs of a bundt pan are what give these cakes their distinctive, elegant appearance, so choosing a good quality, heavy-duty pan is a worthwhile investment.
- Hand Mixer (or Stand Mixer): A reliable hand mixer will be incredibly useful for this recipe, particularly for whipping the egg whites to stiff peaks – a critical step that contributes to the cake’s light and airy texture. It also makes quick work of mixing the egg yolk batter smoothly and thoroughly. If you are lucky enough to own a stand mixer with a whisk attachment, this process becomes even more effortless.
- Baking Spray with Flour: This is arguably the most important “special” item for bundt cakes. I highly recommend using a non-stick baking spray that contains flour (such as Baker’s Joy or Pam Baking). It’s an absolute game-changer for ensuring your cake releases cleanly from the pan. Bundt pans, with their many nooks and crannies, can be notorious for sticking. A thorough, comprehensive coating with this spray – making sure you hit every single groove and crevice – will virtually eliminate this common baking frustration, guaranteeing a beautifully intact cake every time. If you don’t have this specialized spray, you can achieve a similar effect by thoroughly greasing the pan with softened butter and then dusting it evenly with all-purpose flour, carefully tapping out any excess.
- Mixing Bowls: You’ll need at least two medium to large mixing bowls: one for separating ingredients (yolks and whites) and another for preparing the main batter components. A third smaller bowl is handy for the dry ingredients.
- Whisk & Spatula: A good wire whisk is essential for combining dry ingredients evenly and initially mixing the glaze. A flexible rubber spatula is indispensable for scraping down the sides of bowls and, most importantly, for gently folding in the whipped egg whites without deflating them.
- Measuring Cups & Spoons / Digital Kitchen Scale: Accurate measurements are a fundamental key to successful baking. While standard measuring cups and spoons will work, for the most consistent and best results, especially with dry ingredients like flour and sugar, a digital kitchen scale (like this one) is highly recommended. Measuring by weight (grams) is far more precise than by volume (cups).
- Small Saucepan: A small to medium saucepan will be needed for preparing the delightful cranberry glaze, allowing you to simmer the juices and sugar.
- Cooling Rack: An absolute necessity for allowing your bundt cake to cool properly after baking. Placing the cake on a wire rack ensures air circulates all around it, preventing the bottom from becoming soggy and promoting even cooling.
Step-by-Step Guide to Baking Your Orange Bundt Cake
Baking this Orange Bundt Cake might seem intricate at first glance, but by following these detailed steps, you’ll achieve a light, flavorful, and show-stopping cake with remarkable ease. Remember, precision and gentle handling are key, especially when incorporating the delicate egg whites. Let’s begin your baking journey!
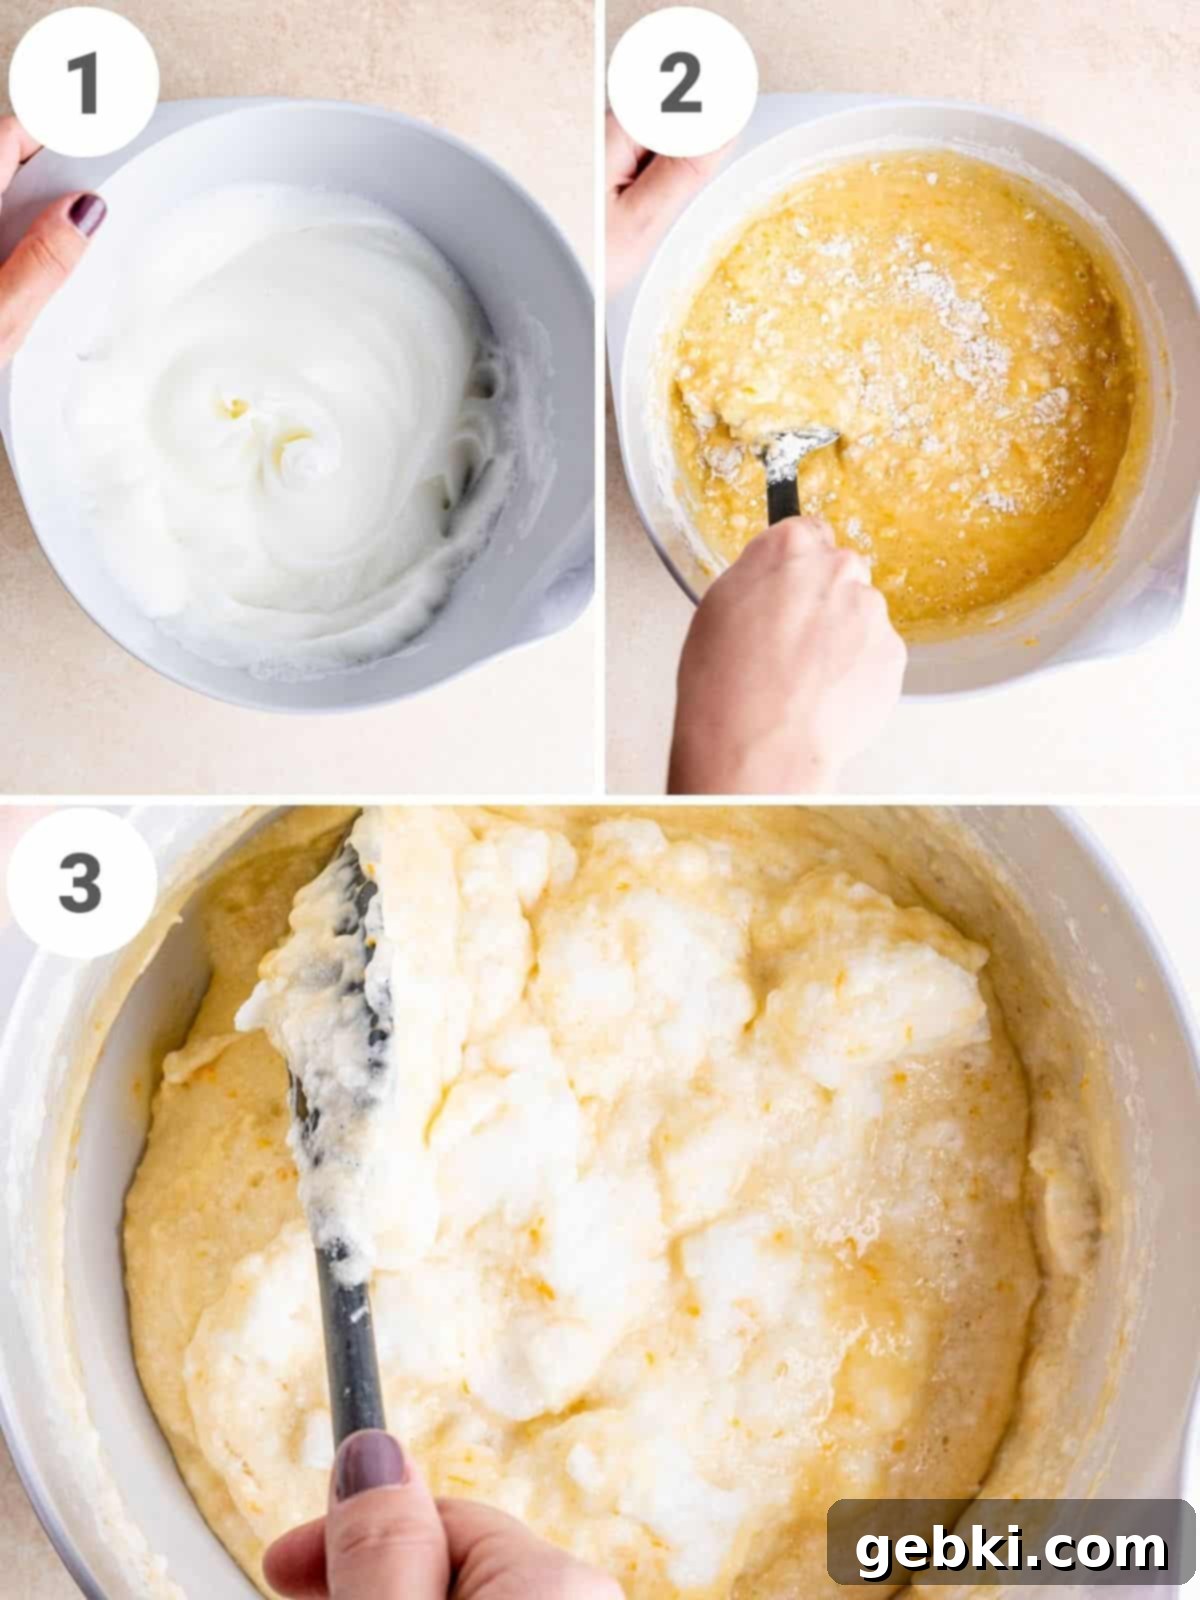
Step One: Prepare the Egg Whites for Lift (Picture 1 above) – Begin by carefully separating your room temperature eggs. Place the egg yolks into a large mixing bowl and the egg whites into a separate, impeccably clean medium bowl. Using a hand mixer (or the whisk attachment of a stand mixer), whip the egg whites on medium-high speed until they form stiff, glossy peaks. This means that when you lift the whisks from the whites, the peaks should hold their shape firmly, pointing upwards without flopping over. This step is absolutely crucial for incorporating air, which gives the cake its incredibly light and airy texture. Set the bowl of whipped whites aside gently.
Step Two: Combine the Fragrant Wet Ingredients (Picture 2 above) – In the large bowl containing the egg yolks, add the granulated sugar and vanilla extract. Beat these ingredients together with your hand mixer until the mixture becomes pale yellow in color and is smooth and creamy, typically taking about 1 to 2 minutes. Next, pour in the vegetable oil, fresh 100% orange juice, and the wonderfully fragrant orange zest. Mix on low speed until all components are just incorporated, being sure to scrape down the sides of the bowl with a spatula to ensure everything is evenly combined. The room temperature ingredients will emulsify beautifully.
Step Three: Gently Fold for the Perfect Crumb (Picture 3 above) – In a separate small or medium bowl, whisk together the all-purpose flour, cornstarch, baking powder, and salt. This ensures all leavening agents and flavor enhancers are evenly distributed throughout the dry mix. Sift this combined dry mixture directly over the wet egg yolk mixture. Using a rubber spatula, gently fold the dry ingredients into the wet until the flour streaks have just disappeared. Be careful not to overmix at this stage, as excessive mixing can develop the gluten in the flour too much, leading to a tough, dense cake. Finally, and most importantly, gently fold the stiff egg whites into the cake batter. Do this in two or three additions, using a light, upward lifting motion with your spatula. The goal is to incorporate the whites without deflating them, preserving as much of that vital trapped air as possible. Stop folding as soon as the mixture is uniformly combined and no white streaks remain.
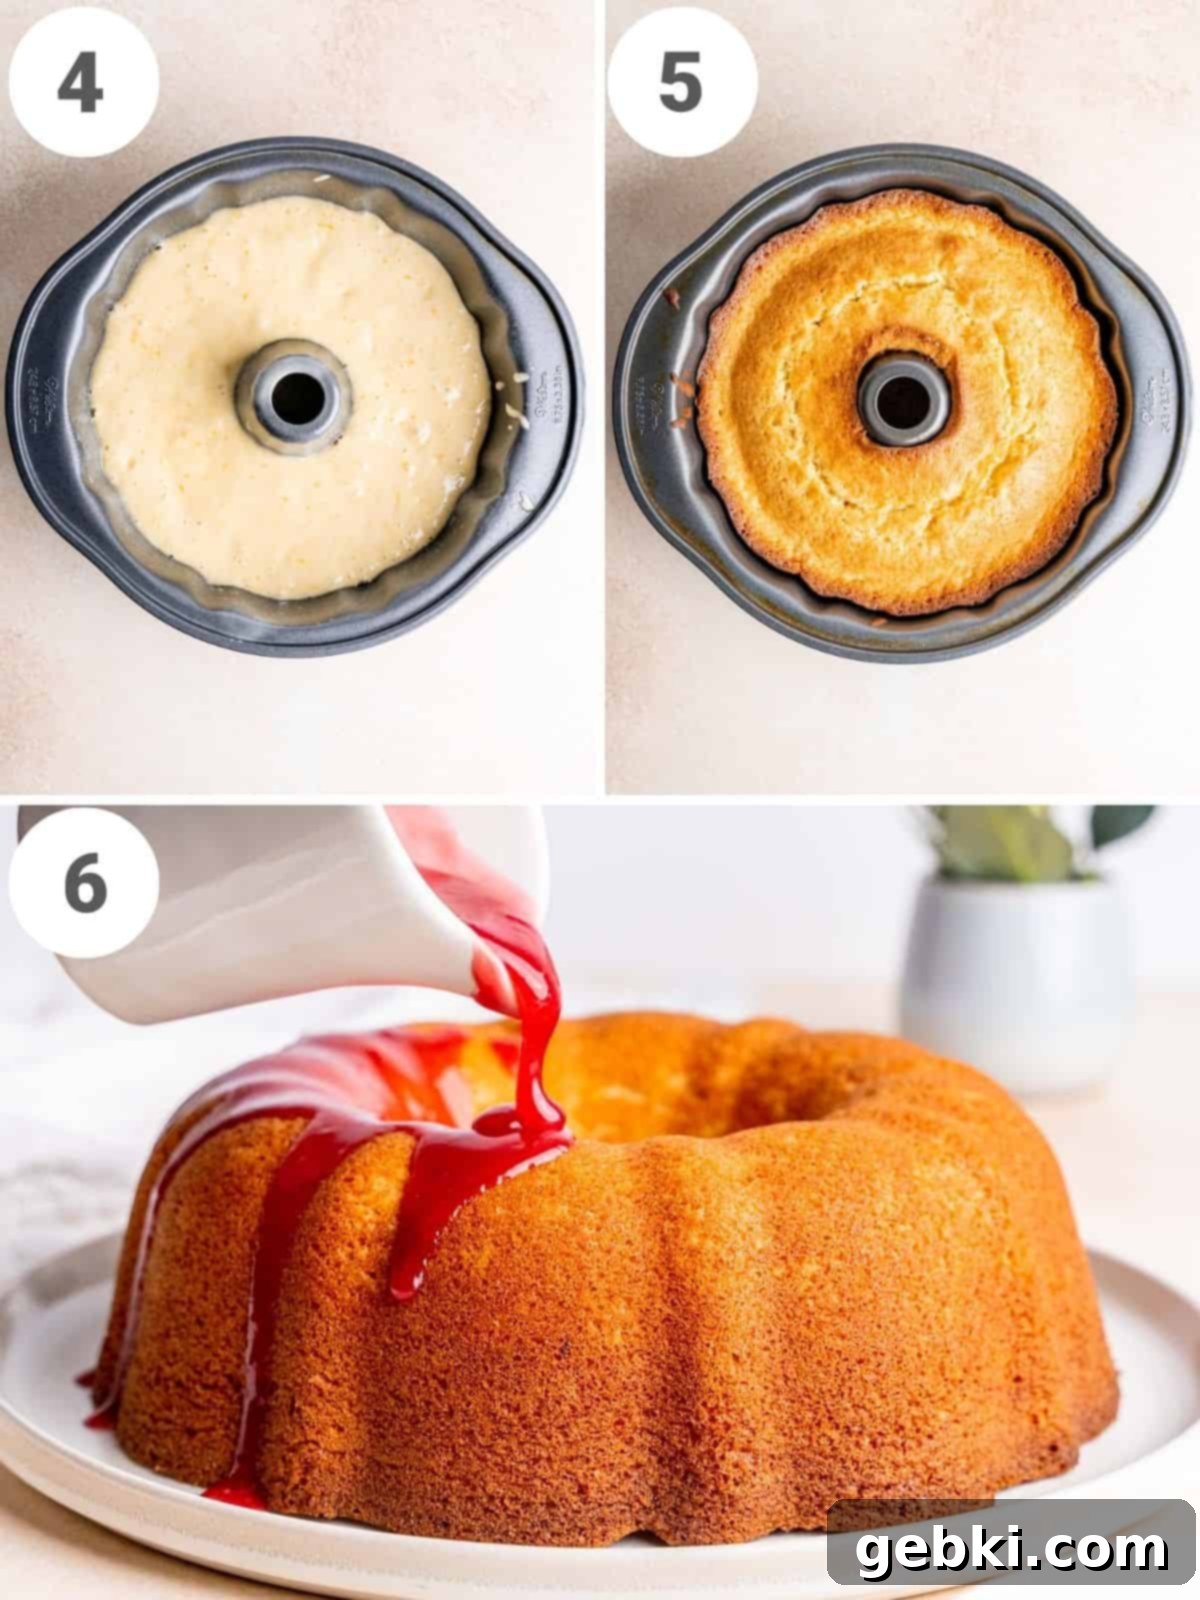
Step Four: Bake to Golden Perfection (Pictures 4-5 above) – Pour the carefully prepared cake batter evenly into your meticulously greased bundt pan. Gently tap the pan a couple of times on the counter to release any large air bubbles. Place it in your preheated 350°F (175°C) oven and bake for approximately 35-45 minutes. The cake is ready when a wooden skewer or toothpick inserted into the thickest part of the cake comes out clean, with no wet batter clinging to it. The top will also be beautifully golden brown and spring back lightly when gently touched. Once baked, remove the cake from the oven and let it cool in the pan for a crucial 10-20 minutes (or until the pan is cool enough to comfortably handle). This vital cooling time allows the cake to firm up slightly and contract from the sides, making it much easier to release cleanly. After this resting period, carefully invert the cake onto a wire cooling rack to cool completely to room temperature.
Step Five: Craft the Tangy Cranberry Glaze (Picture 6 above) – While the cake bakes and cools, prepare your vibrant cranberry glaze. In a medium saucepan, combine the 100% cranberry juice, 100% orange juice, and granulated sugar. Whisk these ingredients together over medium-low heat until the sugar is fully dissolved. Bring the mixture to a gentle simmer and let it cook for about 10 minutes, stirring occasionally. This simmering period allows the flavors to meld and the liquids to slightly reduce. Remove the saucepan from the heat and stir in the cornstarch that has been dissolved in warm water. The glaze should visibly thicken slightly as it cools. Allow the glaze to cool completely to room temperature before drizzling it generously over your completely cooled bundt cake. This ensures the glaze sets beautifully on the surface and doesn’t simply soak into the cake, providing that perfect glossy finish.
Pro Tip for Fluffy Cakes: Always use room temperature eggs, and when separating them, be incredibly careful! Even a tiny speck of yolk that accidentally gets into the egg whites can prevent them from whipping up to stiff peaks, which will compromise the cake’s desired airy and light texture. Clean, dry bowls and beaters are also essential for successful egg white whipping.
Expert Tips for a Perfectly Moist and Fluffy Bundt Cake Every Time
Achieving bundt cake perfection requires a bit of attention to detail, but with these expert tips, you’ll consistently bake a moist, tender, and beautifully released cake that earns rave reviews:
- Embrace Room Temperature Ingredients: This isn’t just a suggestion; it’s a golden rule in baking! Ensure your eggs (and any other dairy if applicable, though this recipe uses oil) are at room temperature. Room temperature ingredients emulsify better, creating a smoother, more uniform batter that traps air more efficiently, resulting in a more tender and higher-rising cake.
- Mastering Whipped Egg Whites: Don’t rush or skimp on this crucial step. Stiff, glossy peaks are key to the cake’s signature light and airy texture. Use an impeccably clean, dry bowl and clean beaters. Any trace of grease, moisture, or egg yolk can prevent the whites from whipping correctly. Stop just when they hold their shape; over-whipping can make them dry and difficult to fold.
- The Art of Gentle Folding: When incorporating the dry ingredients into the wet mixture, and especially when folding in the delicate whipped egg whites, use a light hand. Overmixing at either stage develops gluten, which can lead to a dense, tough, and chewy cake rather than a tender, fluffy one. Fold just until no streaks of flour or egg white are visible, then stop.
- Flawless Bundt Pan Preparation is Paramount: A sticky bundt cake is a baker’s nightmare! This cannot be stressed enough. Invest in and use a good quality non-stick baking spray with flour (like Baker’s Joy or Pam Baking) and coat *every single crevice, groove, and curve* of the pan thoroughly. Alternatively, generously grease the entire pan with softened butter using a pastry brush, then dust it evenly with all-purpose flour, tapping out any excess. This meticulous preparation will virtually eliminate sticking frustration and guarantee a beautifully intact cake.
- Avoid the Calamity of Overbaking: Overbaking is the quickest way to dry out any cake, and bundt cakes are no exception. Begin checking for doneness at the lower end of the suggested baking time. A wooden skewer or toothpick inserted into the center should come out clean or with a few moist crumbs clinging to it, but absolutely no wet batter.
- Patience During Cooling in the Pan: Resist the urge to flip the cake out of the pan immediately after removing it from the oven. Allowing it to cool in the bundt pan for 10-20 minutes is a crucial step. This time allows the cake to set its structure, firm up slightly, and naturally pull away from the sides of the pan, making for a much cleaner and easier release onto your cooling rack.
- Cool Glaze for a Completely Cooled Cake: Always ensure both your cranberry glaze and your orange bundt cake have cooled completely to room temperature before drizzling. If either component is warm, the glaze will melt, thin out, and simply absorb into the cake rather than forming that beautiful, distinct, glossy layer on top.
Frequently Asked Questions About This Orange Bundt Cake
Here are answers to some common questions you might have while preparing and enjoying this delicious orange bundt cake with cranberry glaze. We aim to provide all the information you need for a successful and delightful baking experience!
Absolutely, and it’s highly recommended! Freshly squeezed orange juice will undoubtedly provide the brightest, most authentic, and most fragrant orange flavor for both your cake and the cranberry glaze. If you choose to use fresh juice, just be sure to strain out any excessive pulp to ensure a smooth, uniform texture in both the cake batter and the glaze. If you opt for store-bought orange juice, always make sure to check the label to confirm that “orange juice” is the only ingredient, avoiding those with added sugars, artificial flavors, or other unnecessary additives for the best, most natural results.
This recipe is perfectly designed and scaled for a standard 9-inch bundt pan, which typically has a capacity of 10 to 12 cups of batter. Using a pan of this size is important as it ensures the cake bakes evenly, rises beautifully, and achieves its intended fluffy texture without overflowing. If your bundt pan is significantly smaller or larger than the recommended size, you may need to adjust the baking times accordingly or scale the recipe, though this specific ingredient ratio is optimized for a 9-inch/10-12 cup pan.
This is a very common issue with bundt cakes, and it typically comes down to one or both of two critical reasons. Firstly, the pan might not have been greased thoroughly enough. With the intricate designs of bundt pans, it’s absolutely vital to coat every single nook, crevice, and detail generously with a high-quality non-stick baking spray containing flour, or with softened butter and then meticulously dusting with flour. Secondly, the cake might not have had sufficient time to cool in the pan before being inverted. Allowing the cake to cool for 10-20 minutes after baking allows its structure to firm up and, importantly, allows the cake to contract slightly from the sides of the pan, making for a much cleaner and easier release. Patience during this cooling period is truly key to a successful bundt cake flip!
Yes, absolutely! This orange bundt cake is a fantastic make-ahead option, especially for holidays or parties. The cake itself can be baked 1-2 days in advance. For best results and to maintain its optimal freshness and texture, it’s highly recommended to store the cake unglazed in an airtight container at room temperature. You can prepare the cranberry glaze closer to the serving time, or store it separately in an airtight container in the refrigerator for up to a week. When you’re ready to serve, gently rewarm the glaze if desired (or serve it chilled) and drizzle it beautifully over the cake.
Achieving the perfect consistency for your glaze is all about careful measurement and observation. The key ingredient for thickening is cornstarch. Ensure your cornstarch is fully dissolved in warm water *before* adding it to the simmering juice mixture; this prevents lumps and ensures even thickening. Cook the glaze just until it slightly thickens – remember,
